BlackWorksInc
New member
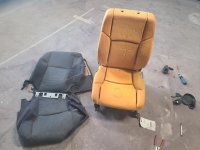
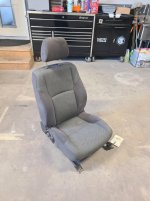
So as you know, I have been looking for a factory seat cover to replace my current one. They don't make the two tone Sport Edition dark grey covers anymore and no one in the aftermarket seems to bother with anything besides leather seat covers, so I just got a rather nice example out of a wrecked 4th gen in a Las Vegas junk yard.
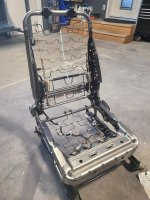
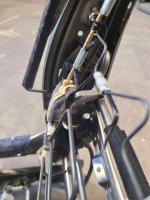
Plan is to strip off the covers, wash them, and then decide what to do with the seat foam cushions (either restore them or replace them). I'm not sure yet if I'll just transfer all the "good" bits to my current driver's seat or just rebuild this junkyard unit and swap the whole seat out, I'll have to figure that out while I'm doing this. Additionally I will also show you guys how to better "reinforce" the lumber mechanism as that seems to easily bend and become jammed up making you think that a $500 lumbar actuator is the culprit (more on that later).
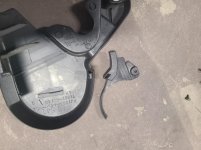
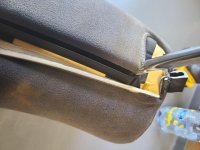
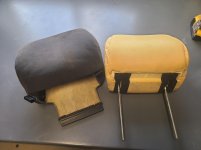
So let's start with our seat and the head rest, you'll notice that the cover is held on by interlocking two plastic clips; keep this in mind as this is how the rest of the seat is held to the steel frame. Just push the plastic ends together until you feel them come free and peel the fabric carefully off the headrest foam.
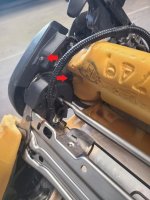
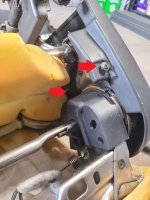
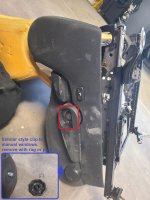
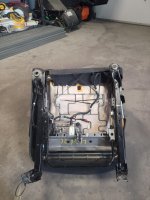
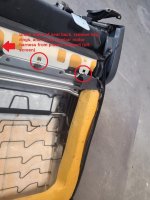
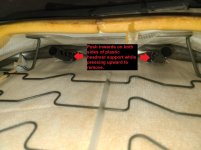
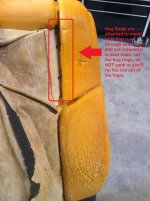
Next step is to flip the seat over and you'll see two, probably stretched out elastic bands that loop over some plastic clips to hold the seat back flap on. Just get those out of the way and you'll see the 5 hog rings that hold the seat back plastic plate and fabric to the seat frame. Cut those off and while you're at it, disconnect the clip for the lumbar motor harness from the plastic plate. Then carefully unzip the two zippers for the seat back fabric, reach in the seat frame and unclip the headrest post guides (squeeze the clip tabs inwards and push the plastic upwards). Now you'll pull the fabric over the seat foam and start cutting off hog rings as you go (there's 13 total that secure the seat back to the seat foam, I highly recommend you cut them and do not yank hard, if you do you might accidentally rip the support rod out of the foam!). Once the seat back cover is removed you can set it aside and start on the seat bottom.
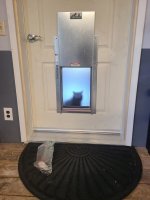
The feline refusing to use the very nice and fancy fire rated pet door I installed for him (he knows that I know that he knows how to use it, but he refuses to do so when I am watching, little bastard!), but clearly letting me know he is not happy with me being in the garage without him.
Plan is to strip off the covers, wash them, and then decide what to do with the seat foam cushions (either restore them or replace them). I'm not sure yet if I'll just transfer all the "good" bits to my current driver's seat or just rebuild this junkyard unit and swap the whole seat out, I'll have to figure that out while I'm doing this. Additionally I will also show you guys how to better "reinforce" the lumber mechanism as that seems to easily bend and become jammed up making you think that a $500 lumbar actuator is the culprit (more on that later).
So let's start with our seat and the head rest, you'll notice that the cover is held on by interlocking two plastic clips; keep this in mind as this is how the rest of the seat is held to the steel frame. Just push the plastic ends together until you feel them come free and peel the fabric carefully off the headrest foam.
Next step is to flip the seat over and you'll see two, probably stretched out elastic bands that loop over some plastic clips to hold the seat back flap on. Just get those out of the way and you'll see the 5 hog rings that hold the seat back plastic plate and fabric to the seat frame. Cut those off and while you're at it, disconnect the clip for the lumbar motor harness from the plastic plate. Then carefully unzip the two zippers for the seat back fabric, reach in the seat frame and unclip the headrest post guides (squeeze the clip tabs inwards and push the plastic upwards). Now you'll pull the fabric over the seat foam and start cutting off hog rings as you go (there's 13 total that secure the seat back to the seat foam, I highly recommend you cut them and do not yank hard, if you do you might accidentally rip the support rod out of the foam!). Once the seat back cover is removed you can set it aside and start on the seat bottom.
The feline refusing to use the very nice and fancy fire rated pet door I installed for him (he knows that I know that he knows how to use it, but he refuses to do so when I am watching, little bastard!), but clearly letting me know he is not happy with me being in the garage without him.
Attachments
-
 Seat.jpg133.3 KB · Views: 3,084
 -
 Headrest_Seam.jpg138.3 KB · Views: 2,900
 -
 Headrest.jpg132 KB · Views: 2,906
 -
 Seat_Bottom.jpg131.6 KB · Views: 2,937
 -
 Seatback_Zipper.jpg133.2 KB · Views: 3,082
 -
 Headrest_Clips.jpg125.4 KB · Views: 2,894
 -
 SeatBack.jpg135.6 KB · Views: 2,903
 -
 Cat.jpg131.2 KB · Views: 2,863