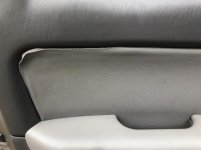
Anyone want to comment on how to get to the point you can re-glue this piece. Just wondering what to take off before I start.
This was added when new in 2000 by an installer who switched the SR5 cloth seats for leather. Does the darker grey surround part just pull off like the armrest or how do I remove enough stuff to glue it back
hey sorry I missed this one... I have been doing some trial and error on this because I want to re-do all the door cards in one of my trucks... the fabric and door pulls are kind of nasty and beyond cleaning.
the old fabric probably foam backed vinyl? the foam/glue breaks down and separates like this?
<a href="https://imgur.com/KsnYEOh"><img src="https://i.imgur.com/KsnYEOhl.jpg" title="source: imgur.com" /></a>
this is just a test one I did so I could learn how not to do it, success on that part for sure... it has bubbles or lumps in it. I know what not to do next time but this was just a test so no big deal.
<a href="https://imgur.com/8SALEW3"><img src="https://i.imgur.com/8SALEW3l.jpg" title="source: imgur.com" /></a>
the edge is not glued and the slot/channel along the edge really does not hold the fabric, it's just kind of wedged into it. I know that sounds strange but I have studied a couple of these now and it's really effective and if done correctly is just fine. toyota assembly people know their jobs. yes they do. so you can just peal the edge out and it's not glued in. guessing this is for expansion and contraction otherwise you would have failures like the one you are seeing.
<a href="https://imgur.com/R7QoCm4"><img src="https://i.imgur.com/R7QoCm4l.jpg" title="source: imgur.com" /></a>
you will want to clean off any of the crumbled foam and make sure it's clean then apply this stuff to both the fabric and door card. once it sets up for like 15-20 min you can then make contact with the 2 sides and it will be permanently joined. unless you replace the entire surface I'm pretty sure your gong to have lumps and bumps... but I guess you have to decide how much that bothers you but pretty sure it will look bad?
<a href="https://imgur.com/GT75ApD"><img src="https://i.imgur.com/GT75ApDl.jpg" title="source: imgur.com" /></a>