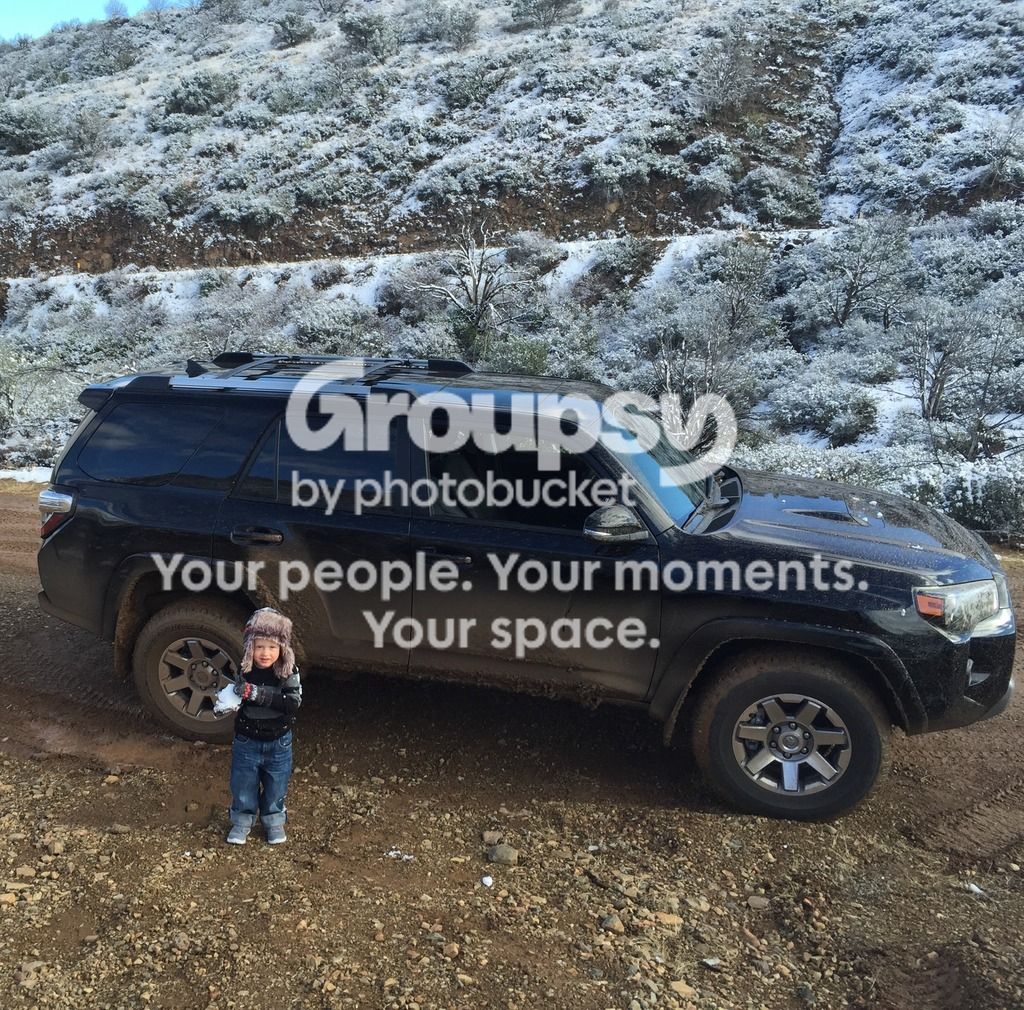
Gormo Builds a 2015 TEP

Gormo

New member
Finally getting around to a build thread!

2015 Trail Edition Premium Attitude Black



Purchased as my Christmas gift to myself in December 2014. We have already traveled as a family (Wife and I and our 4 year old boy) all over the South West. In February we traveled from AZ up the Pacific Coast Highway to San Francisco, on to Tahoe for skiing (if you call it that), Park City UT, and Vail Co, and back through Moab UT. Already have 15,000+ miles on the 4Runner. Also went to our first Overland West Expo, but only for the day. Next year I will do the classes. Next year I am planning a trip down the Baja for a few weeks.

Build:
Front Runner Full Length Slime Line II Rack! (Possibly the first one with all Front Runner Parts) Yes I will post more and I have lots of build pics!
Front Runner 40" LED Bar with cover
Front Runner Accessories -
Hi-Lift Jack Bracket
Universal Corner Brackets
Stratchits​
N•Fab Nerf Bars (need something to knock ski boots on)
AVS Hood Deflector (It kinda helps)
Husky Mats (These things are a necessity with black interior)

Awaiting Install:
ICON Stage 5 with Billet UCA and Overland Rear Springs (Thanks Total Automotive Performance!)

Must Figure Out Soon:
Wheels (Factory or New)
Tires (Not going too big)



Last edited:
Register to hide this ad
Installing Front Runner Slimline II


Getting a Front Runner Full Length Rack on a 5th Gen.!

After much harassing for a factory kit from Front Runner I made it happen. This is slightly different than previously done by Oleg as I used the Front Runner track system, instead of custom front mounts.

Yes this does take two rivnuts and a drill in the roof gutter channel, but it is not hard to do. The rivnuts can be hidden with the factory rubber if you ever take the rack off. With lots of silicone sealant and the track is over the opening this should not leak.

What you need:
A Slimline II Rack Kit! Call Steve Hayes at Front Runner Outfitters and ask for the Gorman!
1255mm x 2368 mm
60mm Foot (Packs of 2) X 2 for the rear
70mm Foot (Packs of 2) x 1 for the front
2200mm Universal Track
All the awesome Front Runner Accessories you desire!

Extra Stuff You Need:
M8-1.25 x 40mm Flat head Socket Cap Screws x 10 (Part 20FHCP-0800400)
Round Spacer, Nylon, Black, 12mm Screw Size, 12mm OD, 8.3mm ID, 10mm Length
3M Marine Grade Silicone Sealant Clear, 08029, 1/10 gal (Pack of 1)
20pcs Flat Head Metric Steel M8 Blind Insert Rivet Nut
Thread Lock (you probably already have if you are doing this)

Tools:
13mm Flat Wrench
13mm Socket wrenches x 2
Socket extenders to reach tough spots.
5mm & 4mm Hex Keys
Good Tape Measurer
Rivnut tool- you can use a homemade one, or get one from Front Runner. The one from Front Runner needs to be grinder down on the sides to fit in the roof gutter track.
11.0mm Diameter Drill Bit - A good fresh one!
11/32 Drill Bit
1/4 Drill Bit
And A Good Drill


Ok thats enough for part 1. Order this stuff and I will keep working on Part 2.
 
Nice rack! lol.. I was wondering about this when I bought mine as the mounting set up you have is similar to the K9. Also can you still fit a table under it?
 
Last edited:
Nice rack! lol.. I was wondering about this when I bought mine as the mounting set up you have is similar to the K9. Also can you still fit a table under it?

You would need to remove the shark fin antenna to have the table fit.
 
I have these tracks sitting in my garage, waiting for me to stop hesitating over the rivnut install. Anxiously awaiting your experience drilling into the front of the roof pinch weld :popcorn:
 
I have these tracks sitting in my garage, waiting for me to stop hesitating over the rivnut install. Anxiously awaiting your experience drilling into the front of the roof pinch weld :popcorn:

You will be just fine with the drill. Just needs one rivnut about 3" from the front of the track to pull the tracks down. Practice the rivnut to know how many turns you should expect from your tool. I will post details tonight. I love how it turned out. So much of a better looking design for the 5th Gen.
 
[MENTION=118255]Gormo[/MENTION]. Any updates on this. Almost pulled the trigger on the 3/4 rack until I was researching and found your modification. Thanks for all the info


Getting a Front Runner Full Length Rack on a 5th Gen. Part 2!

After a few weeks and a thousand miles, the rack is still perfect! No issues!

Step 1: Remove the Old Stuff
Follow this post to help if you need it - http://www.toyota-4runner.org/5th-gen-t4rs/79563-diy-roof-rack-delete-w-pics.html#post680881 Now decide if you will keep this thing, try to sell it, or recycle it.

You can remove the rubber stripping in the rain gutter. You will need the front sections later to finish of the front edge.

Step 2:Build the Rack
Build the rack! Nothing special, just follow the instruction that came with the rack. Use a blanket or two to cover the floor so you don't get scratches.

Step 3: Measure the drill holes
Ok this is the part that I did the hard work on. To be just like me, starting at the the end you will put nearest to the rear measure and mark 5", 7 1/4", 56" and 58 1/4. From the front measure and mark 3". You can follow my measurements above, but I would propose a change. Let me caution you, I have not tried these new measurements so no guarantees. You can stick with what I just told you and you will be fine. I honestly believe this change will make life easier, but i could be wrong. Now I will tell you what I wish I had done. Move every measurements 2" forward so 2", 5 1/4", 54" and 56 1/4 and 1" from the front. This would decrease the extra track in the rear and give a bit more length in the front. This may possibly solve the fact that my rack feet straddled the factory holes. Making it hard to insert the stud plates. My original measurements did this-


It's possible that moving the 2" will fix this issue above and allow for the front foot to actually tie directly into the 2nd cross bar and not between the 2nd and 3rd. I used the Front Runner Between Slat Foot Adapter RRAC021 to place the front foot between the 2nd and 3rd cross bars.


Step 4: Drill the tracks

Using a pilot bit first drill from the inside of the track, using the center line to help stay centered. A total of 5 holes on each track. I used a 11/32 bit as my final bit size. This was enough diameter for the M8 bolts.


Step 5: Customize your M8 Bolts

The heads on the M8 bolts will not fit in the track width. I used my grinder and squared of the heads so the fit. Just hold with a pair of liars and grind a few seconds on opposite sides, this will give you just enough space for the heads to drop into the track. You can see the heads edges in the 2nd picture in step 3. You will need 10 M8 bolts like this.

Step 6: Test fit and mark for front drill hole

You can place the tracks over the factory holes and install one of the bolts to hold it in place. Now push down on the front track and mark the location of your front drill hole in the rain gutter. I centered the mark in the gutter. Now take the tracks back off.

Step 7: Drill the front hole

This will probably be the most nervous you get, don't worry. I used a fresh 11.0mm Diameter Drill Bit and drilled the front hole. This is the exact size for the rivnuts I used. Made for a good tight fit when inserting the rivnuts. Only needed a minute on each side. Nothing appeared under the metal and the bit easily drilled. (I don't imagine any different result with the new measurements, but I have not drilled that exact location.)

Step 8: Insert Rivnut
OK I used the rivet tool that Front Runner provided. I had to grind off a half inch on each side of the M8 side to fit in the rain gutter. You could do this, or try a homemade rivet setup that you can find on the web. Just need something that will fit in the narrow gutter.


I strongly recommend that you practice a few rivnuts before you try for real! You don't want to not have a good seated rivnut and have to cut out a failed one. Learning the proper direction of force and the number or times you need to turn the rivnut to properly compact it is important. The type of rivnut can vary.

Before I inserted the rivnut I applied some marine grade silicone to the opening and around the edge of the opening.


OK Now Take a brake and have beer! Part 3 is next!
 
Last edited:
Getting a Front Runner Full Length Rack on a 5th Gen. Part 3 of 3!

Step 9: Install feet on rack

Install the upper half of the feet onto the rack, save the lower part for the tracks. leave the feet loose so they can slide during install on the roof. Back foot on the last rear slat bar , the one that hold the back edge. Another foot every 3rd slat. the front foot between the 2nd and 3rd slat using the Between Slat Foot Adapter.


Step 9: Install the tracks

The M8 Stud Plates for the feet (the things that slide into the tracks) are too thick to slide over the M8 bolt heads. I don't think an M8 bolt head is made that would allow it to slide. So you need to plan ahead! If you followed my original measurements you will need to slide 4 stud plates between the location of the front and rear factory rack mounts, and one stud plate between the rear and 2nd from rear bolts in the 2 1/4" space. The other two stud plate you can insert after you have the bolts screwed in as they can slide from he rear and the front. (If you go with the new measurements I believe you need 6 stud plates between the two factory rack holes.

I used spacer between the track and the screw holes like this:

Not sure they are really needed or make a difference, but it reduces the area between the holes and the tracks due to the rain gutter depth.

I applied marine grade silicone on each opening that was getting a bolt.

Cut the weather stripping that was originally in the rain gutters so that the front edge still fits and enough material goes back to just in front of the rivnut. You don't need the stripping in the rest of the area.


Bolt the tracks in, (Remember the Stud Plates need to be on the correct side of each bolt, if not you will need to remove the bolt to move the stud plates later) starting with the rear and finishing with the front rivnut. The front will get pulled down with the bolt installed.


Step 10: Install the lower part of the feet in the track

Install the lower part of the feet into the track into the stud plates. Keep the bolts loose so you can slide the feet to match the rack. Don't tighten any of the feet until you are happy with how the rack sits. You can now follow the rest of the front runner instruction to finish the install.

You will need at least one other person to get the rack on the roof, and if you can afford the beer more people wold be great! It's big and if you truck is lifted it is very tall!


Now go enjoy your new Front Runner Slimline II Rack!
 
Last edited:
Icon Stage 5!

I got my Icon Stage 5 Installed with over-landing springs and 285/70/17 KO2s! I will update with pics soon!
 
Camping Pics

We rentend a Tepui / MOAB Fort XL trailer form Bivouac Camping Trailers for a long weekend. First we checked out Ashurst Lake and Kinnikinnick Lake near Mormon Lake. Than we went over to Dogtown Lake near Williams, with a day trip to White Horse Lake. Came home via the Perkinsville road through Jerome. Used our new Sunseeker awning with extension. The trailer was great!

<a href="http://s737.photobucket.com/user/gormo1/media/B24B39AA-87C8-48E7-B9A9-A4D478D693B9.jpg.html" target="_blank"><img src="http://i737.photobucket.com/albums/xx15/gormo1/B24B39AA-87C8-48E7-B9A9-A4D478D693B9.jpg" border="0" alt=" photo B24B39AA-87C8-48E7-B9A9-A4D478D693B9.jpg"/></a>

<a href="http://s737.photobucket.com/user/gormo1/media/8D611482-D228-4FF7-A010-7B8C0572E2CD.jpg.html" target="_blank"><img src="http://i737.photobucket.com/albums/xx15/gormo1/8D611482-D228-4FF7-A010-7B8C0572E2CD.jpg" border="0" alt=" photo 8D611482-D228-4FF7-A010-7B8C0572E2CD.jpg"/></a>

<a href="http://s737.photobucket.com/user/gormo1/media/2A4C5384-7EA7-4CA2-86C8-A44411CA389F.jpg.html" target="_blank"><img src="http://i737.photobucket.com/albums/xx15/gormo1/2A4C5384-7EA7-4CA2-86C8-A44411CA389F.jpg" border="0" alt=" photo 2A4C5384-7EA7-4CA2-86C8-A44411CA389F.jpg"/></a>
 

Members online

Forum statistics

Threads
278,310
Messages
3,554,080
Members
248,016
Latest member
Advally Service

Trending content

Back
Top