Help on Roof Light Wiring...?

MeBe4running

New member
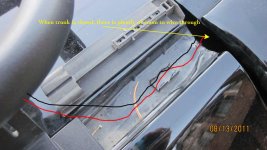
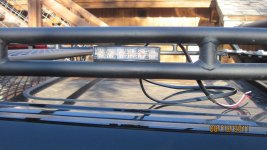
I am soon to have Light fixtures on my roof rack of which I wish to mount as cleanly as possible through to the interior of the truck. I have searched and been through several threads with nothing coming close to a solution for me.

Bearing in mind the amount of wires to the wire's thickness, mounting through a narrow location won't work.

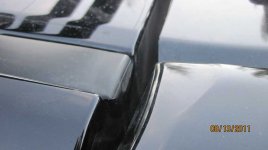
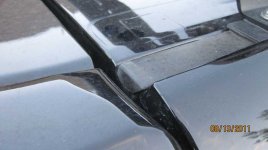
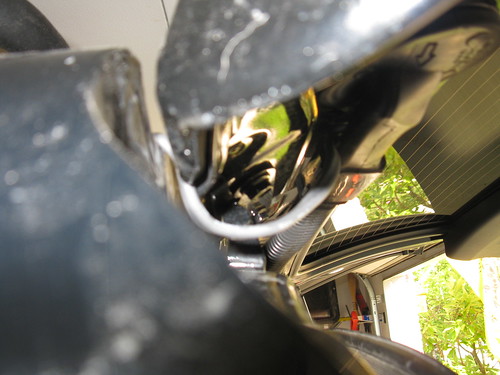
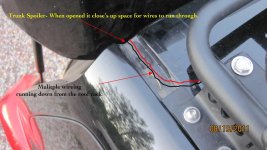
This is the best I can think of; however when you open the trunk of the vehicle there is no room. Another words it would constrict the maximum opening of the trunk. Being 6"4 that is an issue. So, can someone save me from some headaches here?

Any suggestions or ideas would be most appreciated, thanks!

Here are some images of what I thought of doing originally.
 

Attachments

  • truck_rear_wireing.jpg
    truck_rear_wireing.jpg
    132.6 KB · Views: 16,807
  • 4runner_rear_wireing options.jpg
    4runner_rear_wireing options.jpg
    137.4 KB · Views: 10,284
  • IMG_0025.jpg
    IMG_0025.jpg
    45.6 KB · Views: 6,432
  • IMG_0026.jpg
    IMG_0026.jpg
    56.1 KB · Views: 6,753
Register to hide this ad
I have seen another truck run the wires that way with luck but I believe it was a 4th gen. Some people have even drilled through the roof for a cleaner look. It all comes down to what your comfortable doing and how much spece the wires allow for.
 
What is the distance between the hatch and the roof when it's fully open? Is it enough to run your wires side by side instead of one thick bundle? What gauge wire are you planning to use and how many are you running to the roof?

Have you tested the clearance by temporarily taping the wires in place and see how much contact actually occurs and if it does interfere with the hatch opening fully?

Keep in mind that my truck is a 4th Gen, however, i'm running four 10 gauge wires from the roof to the interior the exact same way you described. It's a tight fit for sure, but the wires do not impede the hatch.

Here are some pics of my setup:
IMG_1991.jpg~original


Driver's side:
IMG_1993.jpg~original


IMG_1999.jpg~original


IMG_2000.jpg~original


Passenger side:
IMG_1990.jpg~original


IMG_1997.jpg~original


Sorry for all the questions, but others might be able to come up with some ideas for you if they have that information.

Good luck with your search,

Kevin
 
I have been meaning to post a writeup on this- but haven't yet. I have some pics in my photo album that may help.

Toyota 4Runner Forum - Antman's Album: Antman's Crappy Pics

You are on the right track! There are obviously many ways to do this, but I ran my wires into the truck where you are planning to run yours. You only need to run one wire into the truck- the positive wire for the lights...

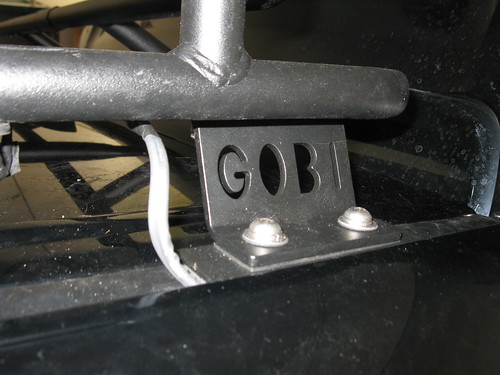
Couple of pointers. The Gobi wires run front to back on each side. I twisted white/ black together on each side to create a single wire for positive(drivers side) and ground(pass side). I layed out all the wires from the mounted lights and ran the positives to one side, grounds to the other and connected them all to the rack wires with some heatshrink butt connectors( waterproof), and liquid electrical tape over that- and then shrink-wrap. Overkill, but one time job!. Then I wire loomed the exposed wire for a clean look.

I ran a CB wire through that opening as well, so wiring for the lights will fit no problem. Now, where the wires exit on the back of the rack, connect the wires the same way to a thicker single wire. Cover the positive wire with some quality shrink, to give some extra abrasion resistance, and run the power into the truck (see pics). Good news is you only need to run the hot lead into the truck. The ground can be terminated at the rack; Where the ground wires exit at the back of the rack, terminate those with a ring terminal, and place the ring terminal under the bolt head for the rear "GOBI" bracket where it bolts to the roof. I put a stainless star washer between the bolt head and the stainless washer from GOBI to get a solid ground. Tighten the bolt and cover it all with liquid electrical tape, and you are good! Hope this makes sense- I really need to do that writeup... :)
 
Last edited:
I posted a detailed write up on my build thread: http://www.toyota-4runner.org/5th-gen-t4rs/94578-okkis-build-thread.html#post831769

I ran 2 12 gauge wires via the rain gutter and under the Gobi mount. One wire powers the front lights and the second will power the rear lights.

You will need to notch the rain gutter cover and you cannot run the wire through the middle, because the rain gutter is held in place by that clamp.

It's kind of hard to take a clear picture of it, but you can see that the wires fit just fine between the body and the lift gate; there is no binding. I protected my wires with some shrink wrap.

5968236511_b5beced607.jpg

5968235927_1d4164167a.jpg


Hopefully this helps.

Okki
 
I posted a detailed write up on my build thread: http://www.toyota-4runner.org/5th-gen-t4rs/94578-okkis-build-thread.html#post831769

I ran 2 12 gauge wires via the rain gutter and under the Gobi mount. One wire powers the front lights and the second will power the rear lights.

You will need to notch the rain gutter cover and you cannot run the wire through the middle, because the rain gutter is held in place by that clamp.

It's kind of hard to take a clear picture of it, but you can see that the wires fit just fine between the body and the lift gate; there is no binding. I protected my wires with some shrink wrap.

5968236511_b5beced607.jpg

5968235927_1d4164167a.jpg


Hopefully this helps.

Okki

Hmmmmmm. Kinda looks like what I did...
 
Sorry I forgot about your writeup, or I would have linked it and saved myself all that typing! Btw- good luck with that job...
 
I have been meaning to post a writeup on this- but haven't yet. I have some pics in my photo album that may help.

Toyota 4Runner Forum - Antman's Album: Antman's Crappy Pics

You are on the right track! There are obviously many ways to do this, but I ran my wires into the truck where you are planning to run yours. You only need to run one wire into the truck- the positive wire for the lights...

Couple of pointers. The Gobi wires run front to back on each side. I twisted white/ black together on each side to create a single wire for positive(drivers side) and ground(pass side). I layed out all the wires from the mounted lights and ran the positives to one side, grounds to the other and connected them all to the rack wires with some heatshrink butt connectors( waterproof), and liquid electrical tape over that- and then shrink-wrap. Overkill, but one time job!. Then I wire loomed the exposed wire for a clean look.

I ran a CB wire through that opening as well, so wiring for the lights will fit no problem. Now, where the wires exit on the back of the rack, connect the wires the same way to a thicker single wire. Cover the positive wire with some quality shrink, to give some extra abrasion resistance, and run the power into the truck (see pics). Good news is you only need to run the hot lead into the truck. The ground can be terminated at the rack; Where the ground wires exit at the back of the rack, terminate those with a ring terminal, and place the ring terminal under the bolt head for the rear "GOBI" bracket where it bolts to the roof. I put a stainless star washer between the bolt head and the stainless washer from GOBI to get a solid ground. Tighten the bolt and cover it all with liquid electrical tape, and you are good! Hope this makes sense- I really need to do that writeup... :)

Antman you legend! It is simply re-assurance to see someone having done what you're thinking about doing. I went a little overboard on the lights.... I have 5 rigid Industries units and two small 88'' LED Bars for the sides. With that being said its a lot of wiring! However if I do what you have done but on both sides I should have enough room. Your response has nailed it! Thanks again man, I will post images of the installation once complete. :thumb3::thanks:
 
Antman you legend! It is simply re-assurance to see someone having done what you're thinking about doing. I went a little overboard on the lights.... I have 5 rigid Industries units and two small 88'' LED Bars for the sides. With that being said its a lot of wiring! However if I do what you have done but on both sides I should have enough room. Your response has nailed it! Thanks again man, I will post images of the installation once complete. :thumb3::thanks:

... Awesome! Surely you didn't mean 88"(?) LED bars. Please post some pics, sounds like it's gonna be pretty cool.
 
What is the distance between the hatch and the roof when it's fully open? Is it enough to run your wires side by side instead of one thick bundle? What gauge wire are you planning to use and how many are you running to the roof?

Have you tested the clearance by temporarily taping the wires in place and see how much contact actually occurs and if it does interfere with the hatch opening fully?

Keep in mind that my truck is a 4th Gen, however, i'm running four 10 gauge wires from the roof to the interior the exact same way you described. It's a tight fit for sure, but the wires do not impede the hatch.

Here are some pics of my setup:
IMG_1991.jpg~original


Driver's side:
IMG_1993.jpg~original


IMG_1999.jpg~original


IMG_2000.jpg~original


Passenger side:
IMG_1990.jpg~original


IMG_1997.jpg~original


Sorry for all the questions, but others might be able to come up with some ideas for you if they have that information.

Good luck with your search,

Kevin

Kevin, thanks for your detailed response. Nice clean install you've got there! This is almost exactly of what I am bearing in mind to do for my install.

Is it enough to run your wires side by side instead of one thick bundle? What gauge wire are you planning to use and how many are you running to the roof?

Good questions, I have 5 rigid industries units and two 88" led bars for the sides. Yep, I know a lot of wiring, just to make things more complicated. I don't know the answer to that yet. I will when then arrive, good question.

Have you tested the clearance by temporarily taping the wires in place and see how much contact actually occurs and if it does interfere with the hatch opening fully?

Good idea, I will try that now. :zoom:

Thanks Kevin I sure appreciate your time and will let you know the final outcome!
 
... Awesome! Surely you didn't mean 88"(?) LED bars. Please post some pics, sounds like it's gonna be pretty cool.

Yeah, they really are 0.88'' here some pic's. Hah, 88" that would be bright! (pun not intended) Really pricey but worth it in the long run.
 

Attachments

  • IMG_0009.jpg
    IMG_0009.jpg
    139.2 KB · Views: 9,015
I was thinking- if you are mounting those side lights there, you could drill a hole in the bottom rail to access the wires inside. Just run the wires through a rubber grommet. Otherwise, you are going to have a pretty long length of exposed wiring...

Honestly, I would take the rack off and wire everything on the garage floor. You have a lot of wiring to do! That way you only need to hookup the ground and power wires once the rack is reinstalled. If you take the rack off with the bolt/nuts on top of the GOBI brackets you won't need to reattach the brackets to the roof itself. Easy. Sure beats 6 hours on a ladder up and down! :)
 
I was thinking- if you are mounting those side lights there, you could drill a hole in the bottom rail to access the wires inside. Just run the wires through a rubber grommet. Otherwise, you are going to have a pretty long length of exposed wiring...

Honestly, I would take the rack off and wire everything on the garage floor. You have a lot of wiring to do! That way you only need to hookup the ground and power wires once the rack is reinstalled. If you take the rack off with the bolt/nuts on top of the GOBI brackets you won't need to reattach the brackets to the roof itself. Easy. Sure beats 6 hours on a ladder up and down! :)

Antman, you must be telepathic! I'm wireing all the units through the roof rack by drilling holes and sealing with rubber grommets. I'm also taking the rack off to do so. Paul from gobi racks is going to help me with the install, thankfully! I'm brainstorming to be cost efficient. Though Paul is not like that at all.

I should have this install all done within the next 2-3 weeks. I will post the end result. Thanks again for words of wisdom. You the Antman!
 

Members online

No members online now.

Forum statistics

Threads
278,312
Messages
3,554,083
Members
248,016
Latest member
Advally Service

Trending content

Back
Top