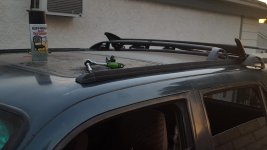
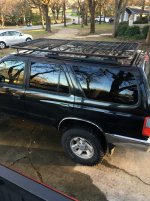
Homemade flat full length roof rack

Rio Bravo

New member
Hey guys, new to the forum but a long time lurker. I thought it was time I contribute something. I've taken advantage of all the info on here for long enough.

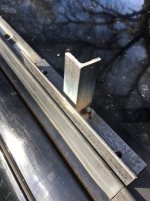
Without further ado. I began with factory rails that I bought on ebay. My 4Runner didn't have a factory roof rack, it just had the little plastic runner things. The factory rails bolted right in and haven't been a problem at all.
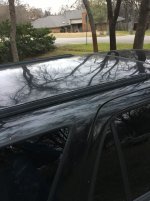
IMG_0477.jpg

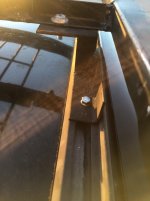
The factory rails come with 3 channel nuts. I want to say that they are M6, but I'm not 100%. I can check on that later. I ended up using another channel nut that I took off the factory cross rail and inserted. I used 2 bolts on each L bracket to secure it to the factory rail. (Hence the need for 4 channel nuts).
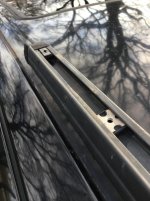

IMG_0487.jpg
 

Attachments

  • IMG_0477.jpg
    IMG_0477.jpg
    101.7 KB · Views: 4,570
  • IMG_0487.jpg
    IMG_0487.jpg
    101.5 KB · Views: 5,205
Register to hide this ad
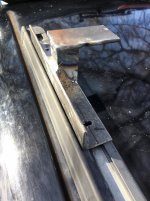
Here is a look at the brackets. I used 1.25 inch angle iron. The roof is not flat, so we had to angle the upright part of the bracket in slightly. It is an inexact science, and I used a grinder, a level, and soap stone to get the bottom angled somewhat correctly. Basically, I would put the upright on the angle iron on the factory rail and use the level to see how much to grind off the upright. I went little by little, and eventually got close.
IMG_0490.jpg
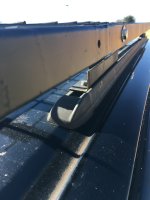
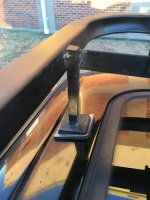
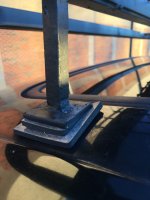
Here is a look at the pedestal I put on top of the upright. This bracket is on the back of the roof rack. I would have done all 4 brackets like this, but my flooring dictated that I do something different on the front bracket. That being said I think the pedestal mount is the way to go.
IMG_0489.jpg
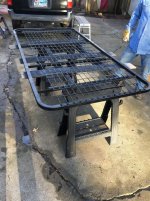
This is what the rack itself looks like. It is a flat rack, and the bottom is some industrial shelving. The edge of the rack is 1.25 inch square tubing that I found in a dumpster. It was already bent at 90 in a square, so all I did was lengthen it and make it a little narrower. It is 86 inches x 41 inches.
IMG_0491.jpg
 

Attachments

  • IMG_0490.jpg
    IMG_0490.jpg
    96.7 KB · Views: 4,418
  • IMG_0489.jpg
    IMG_0489.jpg
    133.8 KB · Views: 4,391
  • IMG_0491.jpg
    IMG_0491.jpg
    140.5 KB · Views: 6,889
Thanks for the compliments guys. That's really interesting with the extended rails.

How did you attach it to the roof? Did the downward angle towards the front mess anything up?
 
Wedgy just followed your link and answered my own questions lol. Still a noob.

Any leaks or problems drilling into the roof?
 
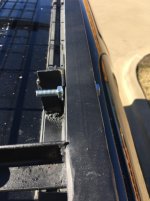
Here's a look at how I mounted the rack to the brackets and the roof. This is the rear bracket. It's basically a pedestal bolted to the angle iron supporting the floor of the rack.
IMG_0503.JPG
The middle bracket was different from the rear bracket because of how my flooring ended up. I used an industrial shelf and there were metal runners welded to the mesh that I used to weld to the frame of the rack. The way that it spaced out meant that for the middle bracket I had to secure it directly to the frame and not to the floor. I ended up drilling through the frame to the upright on the L bracket which I extended to flush with the top of the frame. I am going to fill the hole in with some spray foam later to keep out water.
IMG_0500.JPG
IMG_0501.jpg
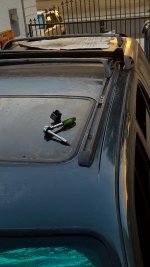
Finally, here is what I did up front. I used solid square tubing and strapping to make a base. Same story as before: inexact science, used grinder, and soap stone to figure out the angle. Underneath it is some 3M grip tape/cushioning I found at the hardware store.
IMG_0504.JPG
IMG_0506.JPG
 

Attachments

  • IMG_0503.JPG
    IMG_0503.JPG
    132.2 KB · Views: 4,249
  • IMG_0500.JPG
    IMG_0500.JPG
    121.6 KB · Views: 4,496
  • IMG_0501.jpg
    IMG_0501.jpg
    86.5 KB · Views: 4,118
  • IMG_0504.JPG
    IMG_0504.JPG
    47.3 KB · Views: 4,124
  • IMG_0506.JPG
    IMG_0506.JPG
    122 KB · Views: 4,167
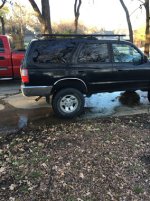
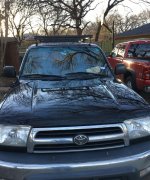
It turned out pretty well and I like the design of the flat rack. It's very functional, and is strong enough to walk on. I can put lumber on top of it and haul around my wooden pirogue. There is a little wind noise at high speed but it isn't bad. It's sort of the same sound as driving an aggressive tire at highway speed, but it isn't as loud.

It is a little higher in the front than I would prefer, but it doesn't bother me that much. I made the rear brackets to be 2 inches above the factory rails which might be a little high. In hindsight, I think an inch and a half would be just about right.

IMG_0492.JPG
IMG_0494.jpg
IMG_0493.jpg
 

Attachments

  • IMG_0492.JPG
    IMG_0492.JPG
    57.9 KB · Views: 4,277
  • IMG_0493.jpg
    IMG_0493.jpg
    134.2 KB · Views: 7,827
  • IMG_0494.jpg
    IMG_0494.jpg
    138.4 KB · Views: 4,146
Nice to see someone else build their own roof rack. I built my first rack and it served me very well. There is a good bit of price in having something built, not bought.
 

Members online

Forum statistics

Threads
278,316
Messages
3,554,111
Members
248,016
Latest member
Advally Service

Trending content

Back
Top