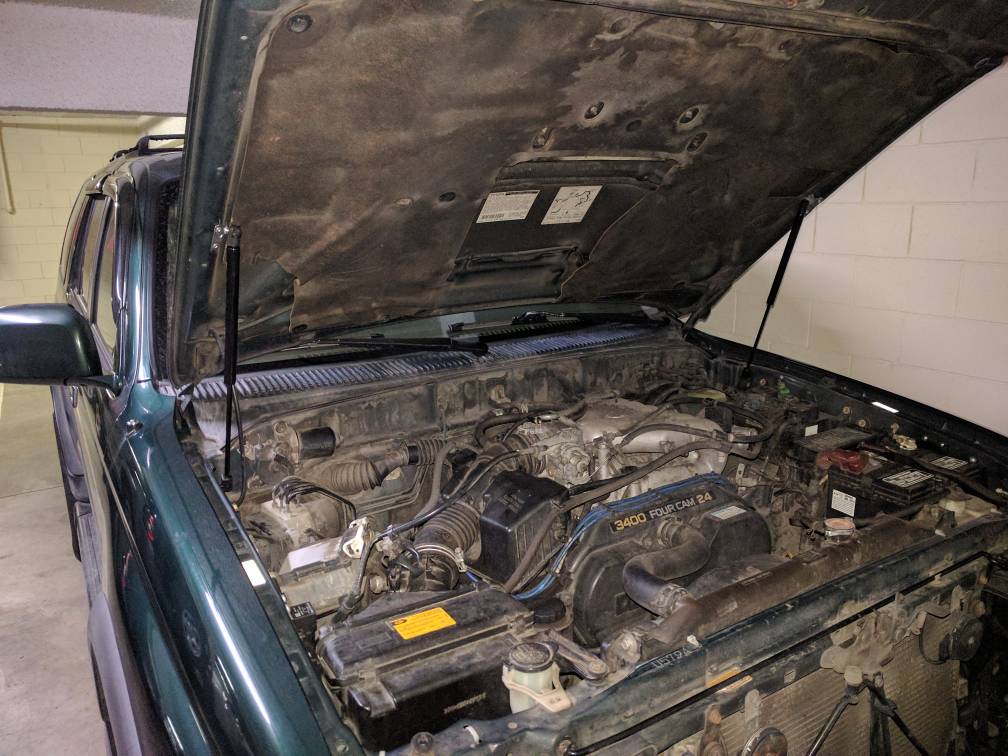
Hood Strut Mod for 3rd Gen

octanejunkie

Elite Member
Found a thread on Yotatech and ordered a set of 90-97 Landcruiser struts from Amazon to do this myself

The struts I got are so strong it took my entire body weight to compress one! I'm afraid these struts will bend my hood.

I'd rather not spend $80+ on a Redline kit after I already dropped $30 on struts I don't trust to use... ugh


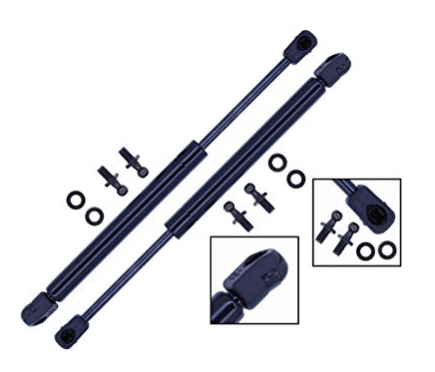
EDIT: found this on Amazon http://a.co/8lwPOun - any reason why I couldn't make this work?
 
Last edited:
Register to hide this ad
Found a thread on Yotatech and ordered a set of 90-97 Landcruiser struts from Amazon to do this myself

The struts I got are so strong it took my entire body weight to compress one! I'm afraid these struts will bend my hood.

I'd rather not spend $80 on a kit after I already dropped $30 on struts I can't use... ugh

I followed Ritzy4runners thread and did this mod. Once you install it the weight of the hood will help. It will not bend your hood. This is one of my most favorite mods.
 
If it's the same type of struts from Ritzy's Yotatech thread then yes you can use it. I just ordered Strong Arm struts from ebay since OEM are crazy expensive.

I ordered TLC Tail Gate Struts, same referenced by Ritzy

From Amazon: "Pack of 2 Rear Trunk Tailgate Hatch Lift Support Gas Spring Strut for Toyota Land Cruiser 1990-1997"
 
Imma gonna haz to look at this mod wenz I get somuh time. You follow me?

I'll look close but I don't want to take up valuable underhood space if I can help it. My 89 FJ62 has something called balancers that take some of the hood weight, but I could only keep one since the Chevy ECU is mounted in the way. It make one use some effort, but still easier than the entire weight of the hood. I could always do my wife's first, she won't care if you can't fit a compressor under her hood!

:bravo:
 
Good Job!

I was going to use the LS400 ones from my donor car, but in the end decided to go for the Redline kit.

It's also a great option, but does cost more, and probably doesn't give the satisfaction that you have.

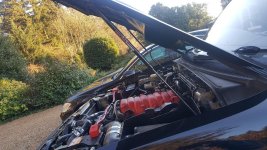
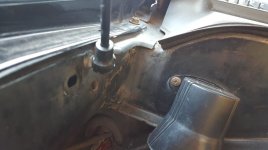
One thing I did differently, I ignored their instructions and the lower bracket and just used a threaded ball joint on a spacer. I thought it gave a slightly cleaner overall finish.
 

Attachments

  • 20170120_154012.jpg
    20170120_154012.jpg
    136.8 KB · Views: 4,197
  • 20170120_154107.jpg
    20170120_154107.jpg
    52.6 KB · Views: 4,027
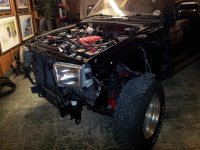
It did mean pulling the front wings (Fenders) off to fit the captive nut at the other side, but that gave me an excuse for more rust proofing.

There are existing holes "almost" in the right place, but I didn't want them to be uneven, so drilled new.
 

Attachments

  • 20130813_002054.jpg
    20130813_002054.jpg
    134 KB · Views: 4,049
Hoody

I bought the Redline hood struts on a group buy here soon after I bought my 2000 Runner. Could not be happier with this mod, I hate lifting the full weight of the hood.
 
I bought the Redline hood struts on a group buy here soon after I bought my 2000 Runner. Could not be happier with this mod, I hate lifting the full weight of the hood.
It it weren't for lifting the hood I'd get no exercise at all...

JK

Sent from my Nexus 5X using Tapatalk
 
How I did it - BUT DON'T DO IT LIKE THIS

THE BRACKETS AND BALL STUD LOCATIONS IN THIS POST DO NOT WORK WITH THE STRUTS I PURCHASED, MY HOOD WAS PUSHED UPWARDS AT THE MIDDLE AND HINGE WHEN CLOSED SO I REMOVED THE STRUTS FOR NOW AND WENT BACK TO USING THE PROP

SORRY FOR THE FALSE VICTORY, NEW BRACKETS AND NEW POST PENDING

Thanks to pics from [MENTION=138011]TorqueOfTheDevil[/MENTION] I decided to keep looking and found a nice set of Tuff Support hood lift struts on Amazon that mount on ball studs for $35 delivered. Ordered.
4a4c9cfe10d87354e3aec657cbaec4b9.jpg


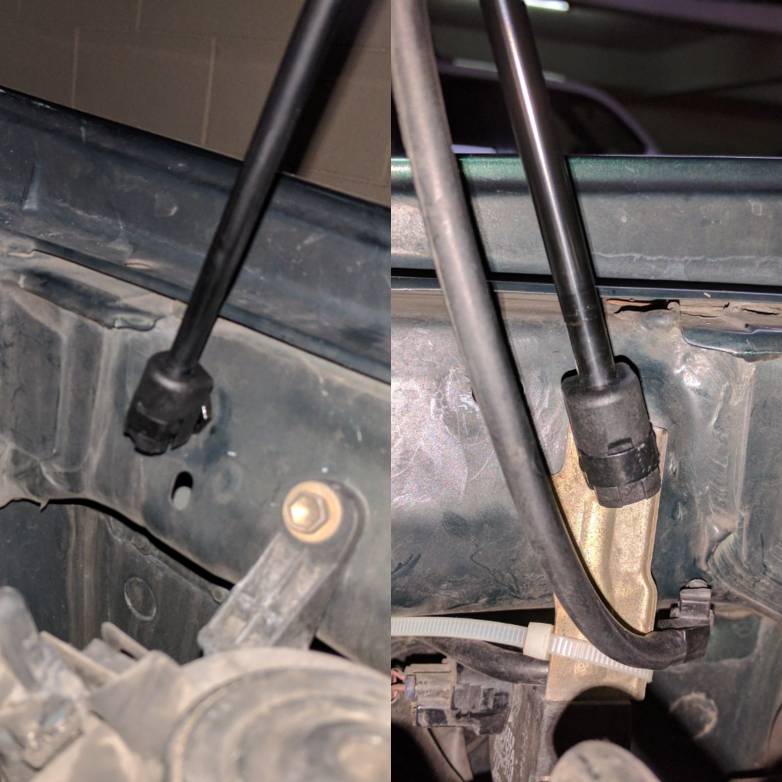
I found that the ball studs that came with the struts threaded into the threaded factory holes on the inner fenders referenced in the yotatech thread that originally inspired me, so naturally I installed them there.
218a5ee15fd24de53b476cdad0b68cad.jpg

NOTE: You can see how I routed the windshield washer hose in the pic on the right.

EDIT: THIS LOCATIONS IS TOO LOW ON THE FENDER AND SETS THE STRUT ON AN ANGLE, PUSHING UPWARDS AGAINST THE HOOD
STRUT SHOULD BE LEVEL TO NOT DO THIS


[ IGNORE EVERYTHING STARTING HERE ]
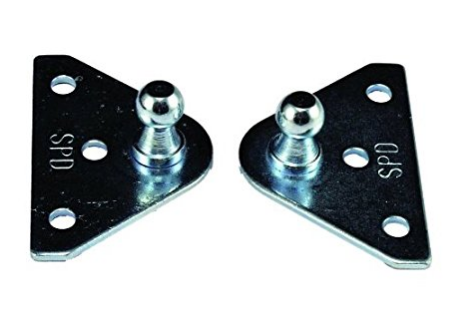
After some playing and poking around with my hood, I decided I needed ball stud brackets. I measured the studs that came with the Tuff Support kit, obviously, so I knew I needed 10mm ball stud brackets, and found 10mm ball stud brackets on Amazon for $6 (LINK REMOVED) and I ordered them right up.
d6201fb4a10479054cc224ed0ac5ac8b.jpg


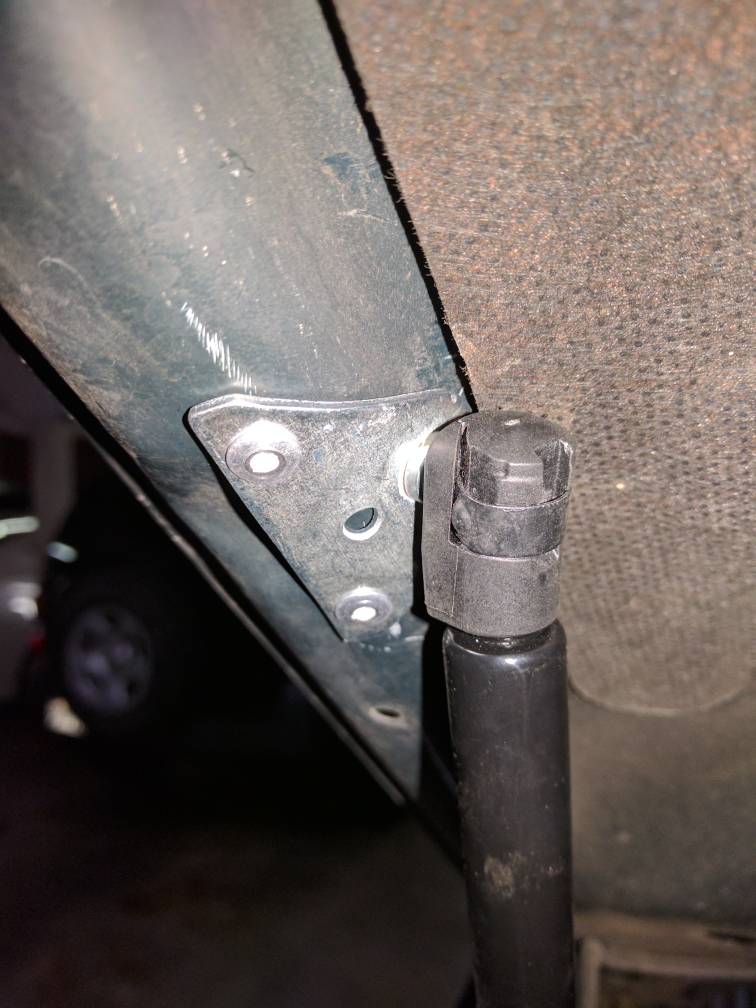
Again following the yotatech thread as my guide, I chose a location on the inside of the hood support rib for my ball studs, right at the crease/depression, but my brackets were flat and needed to be curved to fit. Out came 2 pairs of channel locks, a 2" diameter heavy pipe and a hammer and in no time I bent, beat and curved the brackets to profile with the hood support rib.

Centering my now-curved brackets over the depression in the rib, I marked the center-punched the holes and drilled them out in two steps to make sure I had them aligned with the brackets.


Using rivets like in the yotatech thread, I installed the brackets to the holes I drilled in the hood rib and attached the struts to the both sets of ballstuds. BOOM done.
968cbe8101986ee9f20c312eb18499e8.jpg

[ IGNORE EVERYTHING ABOVE HERE ]

I relocated the windshield washer 90° elbow by removing it from the inside fender with a small flat blade screwdriver and routed the hose behind the relay bracket and secured it with a zip tie. The hose from the elbow to the hood is parallel and inside of the hood strut and routes itself nicely next to the strut when the hood is closed.
fdaa950ca5ea95c3cfef178749b5749e.jpg


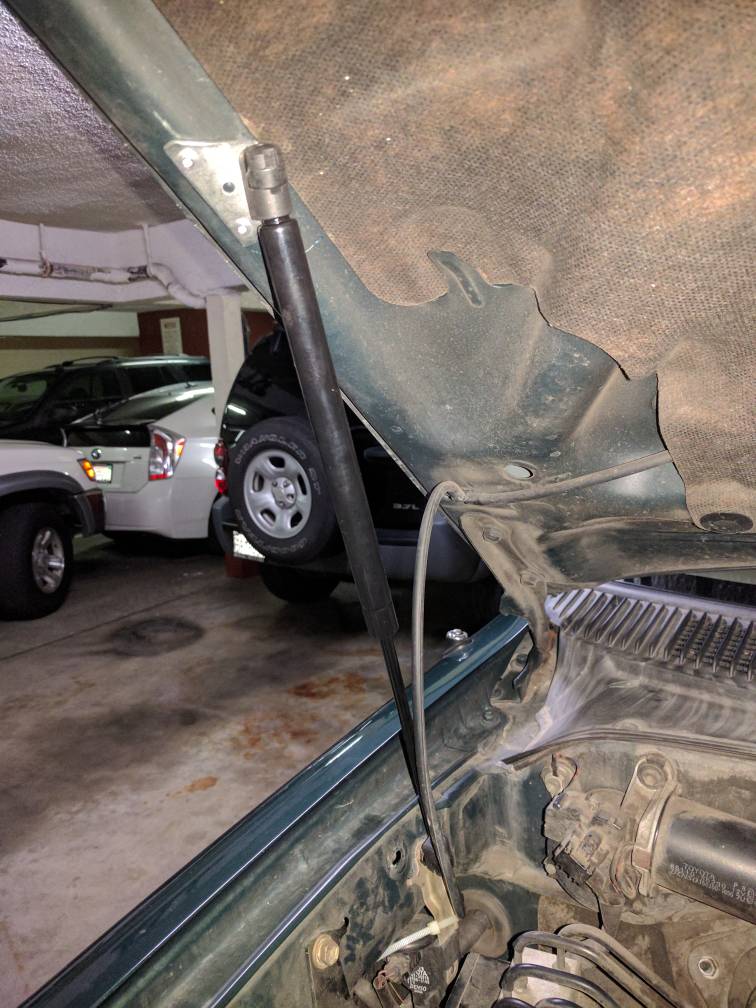
In reality, I probably could get away with one strut, two are quite stout, but it looks good and functions well. The only thing I would do different if I had more time (or were less ansty to do get er done) would be to make longer ball stud brackets that attach over several inches in each direction against the inside of the hood support rib to distribute the load better. Maybe that's v2.0 of this project for me, but for now I will enjoy no prop rod :dancin:

EDIT: IN MY HASTE TO GET ER DONE MY WAY, I OVERLOOKED A CRITICAL FACT THAT THE AFTERMARKET ALREADY KNEW, IF THE STUDS AREN'T LEVEL WHEN THE HOOD IS CLOSED THEY KEEP APPLYING PRESSURE UPWARDS AGAINST THE HOOD CAUSING THE HOOD TO RISE

REDLINE SOLVES THIS WITH OFFSET BRACKETS ON THE HOOD AND FENDERS THAT ALLOW THEIR STRUT TO SIT LEVEL (or closer to level) WHEN THE HOOD IS CLOSED PLUS THEY USE PROGRESSIVE STRUTS THAT DON'T PUSH FULL FORCE WHEN CLOSED. WELL WORTH $90 ALL IN


Here is how my first, attempt looked when completed
81e4a557c32d1a094872ab9a280ecd20.jpg


QUESTION: Do those blue plug wires make it look like a cheap import or what?
ANSWER: No, your dirty engine bay does (@zoombyu86) :lol:

 
Last edited:

My first car had a spring mechanism that allows the hood to open with nothing more than a fingertip. It was quite convienient since I was have to check the engine often for this and that. Every vehicle after that I have wondered why more car manufacturers dont use the springs mechanism or gas piston assisted opening of the hood. Its just a nice touch in my opinion and looks awesome! I will definitely add this mod to my longterm goals for my future runner. :reddance:
 

Members online

No members online now.

Forum statistics

Threads
278,309
Messages
3,554,071
Members
248,016
Latest member
Advally Service

Trending content

Back
Top