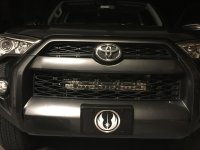
"If I can do It You Can" Behind Grill Light Bar Install

Cymon

New member
So I finally got around to doing this install and write-up as I was away taking my kids for a surprise trip to Disney World for my daughters 4th birthday and the light bar arrived while we were away. Hope this helps some folks out.

This write-up is designed to encourage or assist those 4runner owners/forum members who may not feel comfortable with vehicle modifications (especially the electrical) but like what they see on some of the other awesome vehicles on here, and show that anyone can do it if they want to. Now the way that I did this mod may not be the least expensive, although I attempted to use the best “bang for the buck” light bar and mounting brackets.

Like most mods on this forum, there are dozens of threads out there on this exact install. They range from the super complex (fabbing your own brackets and creating your own relay) to more basic, as you will see here. This version is taking that information and simplifying it to the most basic “push a switch in the dash and the light bar lights up” install. Below are some of the many helpful threads on light bar installs including the wiring and installing a factory style switch. You can read through at your leisure and decide what method works best for you (i.e.: tying your relay in to your high beams so they will turn on at the same time). You can also find even more by doing the forum famous [MENTION=66316]1engineer[/MENTION] search...lol!

[MENTION=81322]barryhiram[/MENTION] (http://www.toyota-4runner.org/5th-gen-t4rs/159174-factory-style-fog-light-switch-fits-knock-out.html

[MENTION=83083]rigtec[/MENTION] (A must read if you are doing any electrical work on the car)http://www.toyota-4runner.org/5th-gen-t4rs/192198-switch-not-switch.html

[MENTION=103267]Saker[/MENTION] (The Most Complete LED Light Bar Install Write-Up) http://www.toyota-4runner.org/5th-gen-t4rs/164966-led-light-bar-install-2014-toyota-4runner.html

[MENTION=133346]BradBrad619[/MENTION] (The Reason Why I’m Doing This Install) http://www.toyota-4runner.org/5th-gen-t4rs/211930-2014-2016-behind-grill-light-bar-mounts.html

Getting Through Firewall : http://www.toyota-4runner.org/5th-gen-t4rs/120835-cable-routing-through-firewall.html

[MENTION=129593]MTN4RNR[/MENTION] (High Quality Light Bar Install and Description) http://www.toyota-4runner.org/5th-gen-t4rs/209558-building-driving-adventuring-mtn4rnr-14.html#post2327305

[MENTION=65614]Antman[/MENTION] (Subwoofer install…How to get through the firewall) ) http://www.toyota-4runner.org/5th-gen-t4rs/92013-antmans-thread-24.html#post989173

[MENTION=83083]rigtec[/MENTION] (Why I chose these LED’s) http://www.toyota-4runner.org/5th-gen-t4rs/178040-opt7-leds-6.html

AOB Wiring http://www.toyota-4runner.org/5th-gen-t4rs/211802-wiring-lightbar-independent-harness-aob-switch.html

http://www.toyota-4runner.org/5th-gen-t4rs/222180-those-looking-led-light-bar.html

Background:
I’m doing this install because lets face it…its cool (or at least I think so)! Is this a “need” modification for me? No! Is it a want modification that could help me see the trail better while driving to campsites at night or on dark back roads? Yes. I do not live in a remote location, and based off of use I don’t need to spend $ on a high-end light bar. I also don’t feel the need to wake every diurnal animal within a 5-mile radius of where I’m driving. The light bar that I chose to use does come with very good reviews and is highly recommended. I also wanted to minimally tie in to the OEM electrical and like my DRL so that is one of the reasons I will be installing this from the light bar relay directly to the factory replacement switch (AOB) and not tying in to the high beams or an unused fuse (although this is a really good option if you are not using a provided by manufacturer grounded relay; see [MENTION=129593]MTN4RNR[/MENTION] install in the link above if you want to add a fuse).

My plan originally was to install the same way [MENTION=137810]KingTaco[/MENTION] installed his as described in post #273 in this thread…http://www.toyota-4runner.org/5th-gen-t4rs/211930-2014-2016-behind-grill-light-bar-mounts-19.html

That was the plan, although as you will see, plans change. My install didn’t go exactly as smoothly as was described in his install, and I should not have been surprised as I am probably not as experienced with this type of thing. The funny thing is, I thought the mounting would be the easy part and the electrical would give me fits, but it was really the other way around. Anyway I will be going into detail and the things I learned with lots of pictures. My wife even commented, as I was taking longer than expected, “At least you’re learning a whole lot about your truck”, and that’s exactly what happened!

Supplies:
- Mounting Brackets :I got mine from [MENTION=133346]BradBrad619[/MENTION] (see the post above). There are also several other fabricators if you do not feel confident in making your own. One that makes some that look good and is a new member here is [MENTION=139789]RagoFabrication[/MENTION] .
- Screws, depending on what type of mount you are using (I used 4 – 14 x 1 ½” Stainless Steel Hex Screws.
- 4 Neoprene washers
- Metal Wire Fish ($6 Harbor Freight), or you can use a clothes hanger as described in the routing through firewall posts above.
- Factory Style Switch (I used AOB) TOYOTA 4RUNNER Replacement Switches -Air On Board
- Petroleum Jelly (To help get through the firewall…and because mods are “exciting”)
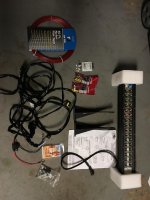
- LED Light Bar and Relay: I used the OPT 7 22” LED and its corresponding relay as described in this post with link. http://www.toyota-4runner.org/5th-gen-t4rs/222180-those-looking-led-light-bar.html (Plug and Play!)
- Drill
- Screwdrivers
- Wrench
- Wire Crimpers/Stripper
- 14-16 gage Butt Connectors


If you have seen any of my other write-ups, you know that this will take multiple posts and will contain lots of pictures…remember, if I can do it you can! (I know its corny, I’m a middle school teacher…give me a break).
 

Attachments
  • IMG_5611.jpg
    IMG_5611.jpg
    131.3 KB · Views: 17,588
Last edited:
Register to hide this ad
Mounting

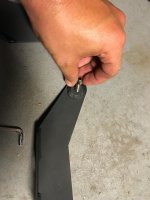
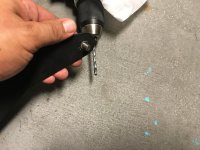
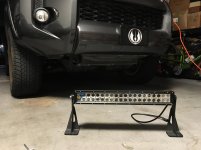
Ok, so the mounting was slightly more difficult, mainly because my light bar came with brackets and mounting screws that were 5/16” and the brackets I had were made for ¼” screws. So right off the bat it wasn’t as plug and play as I thought. So I had a ¼” tap bit in my tool chest and bored out a larger hole in my brackets. This took some time, and was likely the main reason why this install took me more then one evening. Once I got the mounting screws to fit through, it sat nicely on the brackets, ready for mounting.
 

Attachments

  • IMG_5612.jpg
    IMG_5612.jpg
    133.3 KB · Views: 17,357
  • IMG_5613.jpg
    IMG_5613.jpg
    135.4 KB · Views: 17,340
  • IMG_5614.jpg
    IMG_5614.jpg
    126.9 KB · Views: 17,857
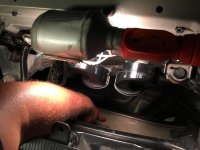
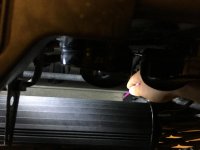
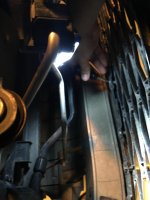
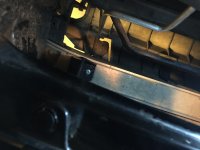
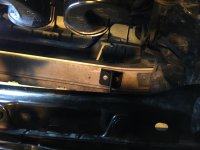
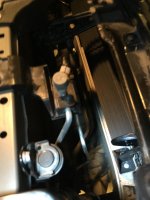
Ok, now for getting behind the grill. First you have to remove the front engine cover. If you have not done this before it is way easier than it seems. The instructions are in your owners manual, but what you do is push down on the center of the pins and then pull up on the tabs, which allows you to pull the pins right out. After removing the cover you can see down into the engine area behind the grill and in front of the radiator. I am attaching my brackets to the aluminum bumper cross-member, but there are endless ways to mount in the area…many of which are in the threads at the top of this write-up. I know [MENTION=126085]mcarey86[/MENTION] just mounted his 32” light bar recently using concrete angle brackets (very creative).

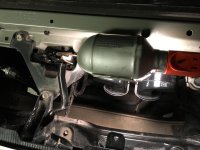
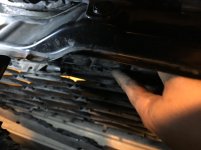
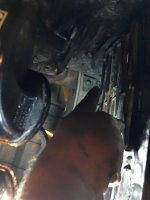
So as you can see in the picture below, I am pointing to the aluminum cross-member I will be attaching them to. I was hoping to do this install without removing any part of the front grill. That didn’t happen, but I was able to line up the brackets, test fit, and mark up the bumper for where I wanted to attach the mounts. Now the light bar attached to the brackets would not fit in, so I took the brackets off, placed them on the cross-member, then slid the light bar in. It actually rested nicely on the radiator support bracket (3rd Pic) to help in reassembly.
 

Attachments

  • IMG_5617.jpg
    IMG_5617.jpg
    124.6 KB · Views: 17,356
  • IMG_5618.jpg
    IMG_5618.jpg
    128.6 KB · Views: 17,460
  • IMG_5619.jpg
    IMG_5619.jpg
    124 KB · Views: 17,346
  • IMG_5620.jpg
    IMG_5620.jpg
    124.2 KB · Views: 17,284
  • IMG_5622.jpg
    IMG_5622.jpg
    126.4 KB · Views: 17,291
  • IMG_5636.jpg
    IMG_5636.jpg
    127.9 KB · Views: 18,122
Last edited:
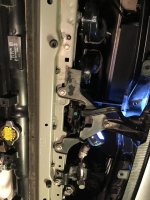
Here came my second little snag. I was unable to get my hand and drill into a reasonable position to attach the mounts using the self-tapping screws and washers. So this means that I had to take off the lower portion of the grill.
 

Attachments

  • IMG_5624.jpg
    IMG_5624.jpg
    124.3 KB · Views: 17,243
  • IMG_5631.jpg
    IMG_5631.jpg
    119.4 KB · Views: 17,100
[MENTION=120701]Cymon[/MENTION]
Love the looks of the light bar behind the grill. Good job! Thanks for showing us how you installed it. :)
 
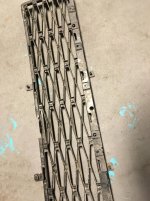
Lower portion of grill removal:

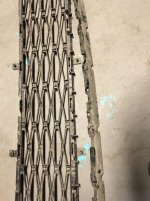
The lower portion of the grill is attached to a metal support bracket at the bottom and is snapped in at the top with plastic fasteners. First unscrew the screws across the bottom. There is a plastic pin (similar to the one that is used to keep the front engine cover on) at the center top of the grill piece that also needs to come out. After that unsnap the grill across the top where the plastic fasteners are. There are a few of them and it takes a good tug, but this is plastic and after the first one snaps off you’ll feel better about pulling hard on the other ones. The final snap is on the bottom right and left corner of the grill piece, once these snap out, the metal support piece and grill will detach. Once detached you can bend the grill (its very malleable) and remove it from the front center.
 

Attachments

  • IMG_5625.jpg
    IMG_5625.jpg
    123.1 KB · Views: 17,301
  • IMG_5626.jpg
    IMG_5626.jpg
    120.6 KB · Views: 17,243
  • IMG_5627.jpg
    IMG_5627.jpg
    134.2 KB · Views: 17,179
  • IMG_5628.jpg
    IMG_5628.jpg
    134.8 KB · Views: 17,006
  • IMG_5629.jpg
    IMG_5629.jpg
    132.3 KB · Views: 16,932
Drill Mount

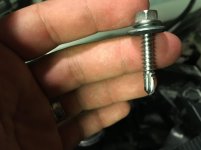
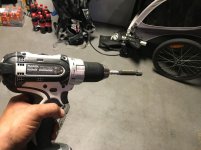
At this point I was able to access the brackets with my drill and using the self-tapping screws attach them to the aluminum cross-member. If you have never drilled into metal before, use a fast speed setting on your drill and it will take a lot of pressure at first. Once the screw catches you can feel it pull in and lock down on the washer and bracket. These brackets are not going anywhere!
 

Attachments

  • IMG_5630.jpg
    IMG_5630.jpg
    131.8 KB · Views: 17,238
  • IMG_5632.jpg
    IMG_5632.jpg
    123.8 KB · Views: 17,075
Attaching Light Bar

Before reattaching the light bar to the brackets, do yourself a favor and replace the grill piece first. It is a very tight fit and with the light bar mounted would be near impossible to get the grill back in. At this point I was able to reattach the light bar to the brackets.
 

Attachments

  • IMG_5633.jpg
    IMG_5633.jpg
    122 KB · Views: 16,853
  • IMG_5634.jpg
    IMG_5634.jpg
    121.2 KB · Views: 17,024
  • IMG_5635.jpg
    IMG_5635.jpg
    130.7 KB · Views: 16,901
  • IMG_5640.jpg
    IMG_5640.jpg
    116.6 KB · Views: 18,654
Running the wires:

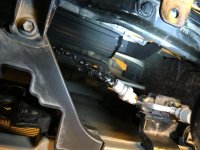
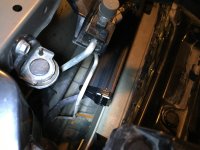
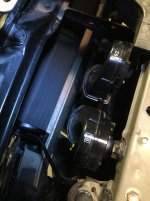
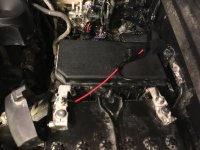
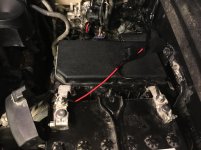
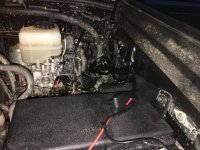
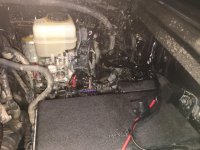
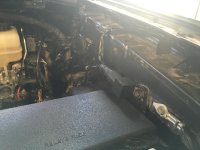
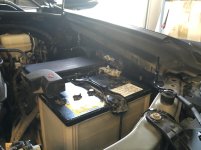
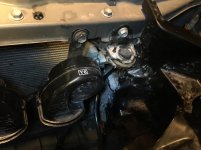
Once the light bar was attached I ran the connecting wire to the relay harness by accessing a small hole next to the horn (black part with the “Y6" on it in the picture). I attached the relay to the bolt that was already in place above the fuse panel (1st Pic). I also added stainless washers to the bolt for better grounding. The wires I tucked under the side hood trim panel and zip tied them. The trim panel can just be pulled up with a firm tug (Pic 2 and 3). The entire relay wiring at this point is very neat and clean, out of the way and protected (Pic 4).
 

Attachments

  • IMG_5648.jpg
    IMG_5648.jpg
    132.4 KB · Views: 16,796
  • IMG_5649.jpg
    IMG_5649.jpg
    133.2 KB · Views: 16,766
  • IMG_5650.jpg
    IMG_5650.jpg
    124.4 KB · Views: 16,807
  • IMG_5651.jpg
    IMG_5651.jpg
    117.4 KB · Views: 16,945
  • image.jpg
    image.jpg
    128.5 KB · Views: 16,453
Last edited:
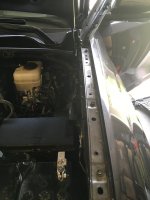
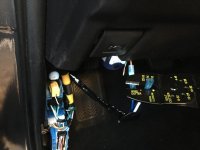
Now that I got through the firewall, I detached the switch that came with the relay harness (I’m going to attach it to an AOB factory type switch in the dash) and then cut the plug attachment off. I removed it with about 8” of wire still attached to the plug so that I could use the switch in the future if I wanted to. I then attached the relay harness wire to the coat hanger using electrical tape (see pic 1) and lubed it up with a bunch of petroleum jelly. I know [MENTION=65614]Antman[/MENTION] suggests lubing with dielectric grease (he’s hardcore with his lube) and probably better for this situation, but I’ve been married for 9 years with two kids under the age of 4 so my lube of choice is good ol Vaseline!

Once lubed, just pull through and now I have wires inside the vehicle!


Attaching to AOB Switch:
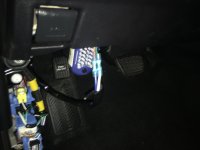
At this point I attached the wires to my AOB switch that I pre-installed. You can read the install here on my MFD Thread…
http://www.toyota-4runner.org/5th-gen-t4rs/222282-cymons-weekend-warrior-mfd-thread-3.html

Now here is the AOB -> Opt7 Relay Wiring Connections

AOB Black -> Grey Factory wire on Wiper Warmer Switch (to ground AOB switch and allow for dimming). If you are not attaching to Factory wires then you would attach it to the Black wire from the relay.

AOB Blue -> Connect to Green Factory wire on Wiper Warmer Switch. (This is power for dimming, but if not connecting to factory wires tape off this wire as it is not necessary)

AOB Red -> Opt 7 Blue (Power out of switch to relay when the switch is pressed)

AOB Green -> Opt 7 White (This is the hot lead that connects power from battery to switch)

I used 14-16 Butt Connectors to attach the relay wires to the AOB wires behind the dash. To use butt connectors, strip the wires about ¼ inch, twist the wires, and then insert into the butt connectors and crimp in the middle.
Nice little tutorial here…
How to strip and connect wires with a butt connector

The black wire from the relay was not necessary as I grounded my switch with the wiper warmer dimmer switch, so I taped it off and then attached it to the other wires.
 

Attachments

  • IMG_5652.jpg
    IMG_5652.jpg
    133.6 KB · Views: 16,785
  • IMG_5653.jpg
    IMG_5653.jpg
    110.3 KB · Views: 16,809
Test it out!

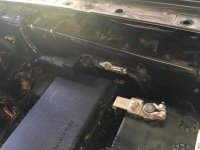
Last step is to attach the relay to the battery using the battery attachment wires. Unscrew the + battery terminal screw at the top (always positive first when adding power, when disconnecting do the – terminal first) and attach the red lead wire. Then do the same to the black wire on the negative terminal of the battery.

Test! If you press the switch and it lights up and then turns off when you press the switch again…success!!


The last thing I did was tape up the connections with electrical tape and used zip ties to clean up and attach wires to existing wiring so it wasn’t “floating” around.
 

Attachments

  • IMG_5654.jpg
    IMG_5654.jpg
    125.5 KB · Views: 16,694
  • IMG_5655.jpg
    IMG_5655.jpg
    131.7 KB · Views: 16,614
  • IMG_5656.jpg
    IMG_5656.jpg
    137.5 KB · Views: 16,557
  • IMG_5657.jpg
    IMG_5657.jpg
    134.6 KB · Views: 16,539
Last edited:
Light bar Test

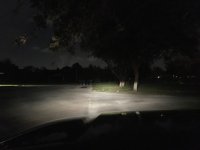
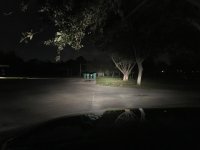
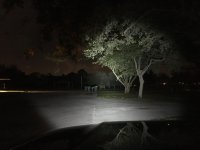
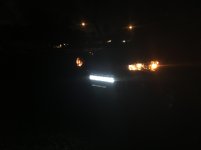
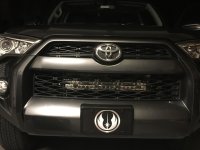
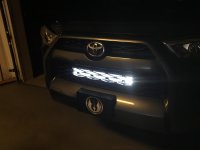
So in my garage I then adjusted the center of the light bar output to fall in between my low beams and high beams. This may be a little low, but that works for me.

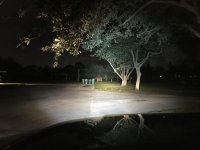
So then of course I had to go out to a dark parking lot and test it out. As a frame of reference the trashcans are about 75 yards away. I then tested in the alley behind my house. With high beams the light reached to the end of my block. With the light bar the light was getting down about 2.5-3blocks. Not bad at all!

Pic 1 Low Beams
Pic 2 Low and High Beams
Pic 3 Low Beams, High Beam and Light Bar
Pic 4 Light Bar
 

Attachments

  • IMG_5659.jpg
    IMG_5659.jpg
    170.8 KB · Views: 16,720
  • IMG_5660.jpg
    IMG_5660.jpg
    139.8 KB · Views: 16,642
  • IMG_5661.jpg
    IMG_5661.jpg
    136.7 KB · Views: 16,482
  • IMG_5663.jpg
    IMG_5663.jpg
    139.6 KB · Views: 16,714
Last edited:
So I finally got around to doing this install and write-up as I was away taking my kids for a surprise trip to Disney World for my daughters 4th birthday and the light bar arrived while we were away. Hope this helps some folks out.

This write-up is designed to encourage or assist those 4runner owners/forum members who may not feel comfortable with vehicle modifications (especially the electrical) but like what they see on some of the other awesome vehicles on here, and show that anyone can do it if they want to. Now the way that I did this mod may not be the least expensive, although I attempted to use the best “bang for the buck” light bar and mounting brackets.

Like most mods on this forum, there are dozens of threads out there on this exact install. They range from the super complex (fabbing your own brackets and creating your own relay) to more basic, as you will see here. This version is taking that information and simplifying it to the most basic “push a switch in the dash and the light bar lights up” install. Below are some of the many helpful threads on light bar installs including the wiring and installing a factory style switch. You can read through at your leisure and decide what method works best for you (i.e.: tying your relay in to your high beams so they will turn on at the same time). You can also find even more by doing the forum famous [MENTION=66316]1engineer[/MENTION] search...lol!

[MENTION=81322]barryhiram[/MENTION] (http://www.toyota-4runner.org/5th-gen-t4rs/159174-factory-style-fog-light-switch-fits-knock-out.html

[MENTION=83083]rigtec[/MENTION] (A must read if you are doing any electrical work on the car)http://www.toyota-4runner.org/5th-gen-t4rs/192198-switch-not-switch.html

[MENTION=103267]Saker[/MENTION] (The Most Complete LED Light Bar Install Write-Up) http://www.toyota-4runner.org/5th-gen-t4rs/164966-led-light-bar-install-2014-toyota-4runner.html

[MENTION=133346]BradBrad619[/MENTION] (The Reason Why I’m Doing This Install) http://www.toyota-4runner.org/5th-gen-t4rs/211930-2014-2016-behind-grill-light-bar-mounts.html

Getting Through Firewall : http://www.toyota-4runner.org/5th-gen-t4rs/120835-cable-routing-through-firewall.html

[MENTION=129593]MTN4RNR[/MENTION] (High Quality Light Bar Install and Description) http://www.toyota-4runner.org/5th-gen-t4rs/209558-building-driving-adventuring-mtn4rnr-14.html#post2327305

[MENTION=65614]Antman[/MENTION] (Subwoofer install…How to get through the firewall) ) http://www.toyota-4runner.org/5th-gen-t4rs/92013-antmans-thread-24.html#post989173

[MENTION=83083]rigtec[/MENTION] (Why I chose these LED’s) ) http://www.toyota-4runner.org/5th-gen-t4rs/178040-opt7-leds.html

AOB Wiring http://www.toyota-4runner.org/5th-gen-t4rs/211802-wiring-lightbar-independent-harness-aob-switch.html

http://www.toyota-4runner.org/5th-gen-t4rs/222180-those-looking-led-light-bar.html

Background:
I’m doing this install because lets face it…its cool (or at least I think so)! Is this a “need” modification for me? No! Is it a want modification that could help me see the trail better while driving to campsites at night or on dark back roads? Yes. I do not live in a remote location, and based off of use I don’t need to spend $ on a high-end light bar. I also don’t feel the need to wake every diurnal animal within a 5-mile radius of where I’m driving. The light bar that I chose to use does come with very good reviews and is highly recommended. I also wanted to minimally tie in to the OEM electrical and like my DRL so that is one of the reasons I will be installing this from the light bar relay directly to the factory replacement switch (AOB) and not tying in to the high beams or an unused fuse (although this is a really good option if you are not using a provided by manufacturer grounded relay; see [MENTION=129593]MTN4RNR[/MENTION] install in the link above if you want to add a fuse).

My plan originally was to install the same way [MENTION=137810]KingTaco[/MENTION] installed his as described in post #273 in this thread…http://www.toyota-4runner.org/5th-gen-t4rs/211930-2014-2016-behind-grill-light-bar-mounts-19.html

That was the plan, although as you will see, plans change. My install didn’t go exactly as smoothly as was described in his install, and I should not have been surprised as I am probably not as experienced with this type of thing. The funny thing is, I thought the mounting would be the easy part and the electrical would give me fits, but it was really the other way around. Anyway I will be going into detail and the things I learned with lots of pictures. My wife even commented, as I was taking longer than expected, “At least you’re learning a whole lot about your truck”, and that’s exactly what happened!

Supplies:
- Mounting Brackets :I got mine from [MENTION=133346]BradBrad619[/MENTION] (see the post above). There are also several other fabricators if you do not feel confident in making your own. One that makes some that look good and is a new member here is [MENTION=139789]RagoFabrication[/MENTION] .
- Screws, depending on what type of mount you are using (I used 4 – 14 x 1 ½” Stainless Steel Hex Screws.
- 4 Neoprene washers
- Metal Wire Fish ($6 Harbor Freight), or you can use a clothes hanger as described in the routing through firewall posts above.
- Factory Style Switch (I used AOB) TOYOTA 4RUNNER Replacement Switches -Air On Board
- Petroleum Jelly (To help get through the firewall…and because mods are “exciting”)
- LED Light Bar and Relay: I used the OPT 7 22” LED and its corresponding relay as described in this post with link. http://www.toyota-4runner.org/5th-gen-t4rs/222180-those-looking-led-light-bar.html (Plug and Play!)
- Drill
- Screwdrivers
- Wrench
- Wire Crimpers/Stripper
- 14-16 gage Butt Connectors


If you have seen any of my other write-ups, you know that this will take multiple posts and will contain lots of pictures…remember, if I can do it you can! (I know its corny, I’m a middle school teacher…give me a break).


Thanks for the recommendation! If any of the members here are needing the 30" brackets or a good deal on lights from one of our dealers, DM me and we will get you a discount.

Thanks for supporting us!
 
Summary:
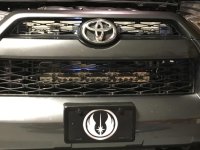
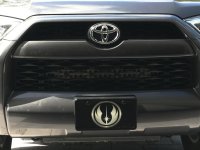
This install did not go as smoothly as my last couple of mods (Rear differential Breather & AOB Switch), but I learned a lot with this one. Hopefully I have shown that anyone can do this mod if they really want to. The total net $ of this project including the light bar was under $200, which even impressed my wife. This will likely be the last mod for a while (don’t you love when everyone on here says that LOL!), unless there are some awesome group buys on armor in the near future and I can get my accountant to release the funds. I can’t wait to try this one out on some canal roads in the Everglades!

Oh, and beer of choice for this install…Lagunitas Litte Sumpin’ Sumpin’ Ale…my personal go-to!
 

Attachments

  • IMG_5664.jpg
    IMG_5664.jpg
    229.4 KB · Views: 11,559
  • IMG_5665.jpg
    IMG_5665.jpg
    125.9 KB · Views: 11,375
  • IMG_5666.jpg
    IMG_5666.jpg
    118.8 KB · Views: 11,919
  • IMG_5671.jpg
    IMG_5671.jpg
    97.6 KB · Views: 11,417
  • IMG_5672.jpg
    IMG_5672.jpg
    126.4 KB · Views: 11,262
Great install and write up!

I used the same method, and lube to get through the firewall. Tried it dry the first two times, and lost the coat hanger to wire connection. Third try, with the vaseline, and I was in like flint.
 
Last edited:
[MENTION=120701]Cymon[/MENTION],

Great write-up! :thumb3:
Your description of how to remove the lower grill portion was great.

This will facilitate people removing it if they want to install a trim piece if they cut the grill to achieve maximum light output on their light bar install.!
 
[MENTION=120701]Cymon[/MENTION],

Great write-up! :thumb3:

Your description of how to remove the lower grill portion was great.

This will facilitate people removing it if they want to install a trim piece if they cut the grill to achieve maximum light output on their light bar install.!

Thanks! Yes, that part was actually much easier than anticipated, I would have planned on it the whole time if I knew it was that simple. I agree, the lower grill trim piece is an excellent addition to this mod!
 
Thanks for sharing the writeup!

I decided to go with the 32" OPT7 afterall and will be using the [MENTION=139789]RagoFabrication[/MENTION] brackets - looking forward to it!
 

Members online

Forum statistics

Threads
278,316
Messages
3,554,111
Members
248,016
Latest member
Advally Service

Trending content

Back
Top