JediWebDude build thread

jediwebdude

New member
* * S O L D * *
Aug 18, 2019 Update: sadly, I have departed with my dependable adventure rig. Sooo many memories. It was a fun project. It went anywhere. I hope the new owner enjoys it as much as me and my family did.

My new rig is a TRD Pro Tacoma, so I will not be as active here on T4R.org.


===========================================


Now that I'm 90% done with the truck, thought maybe I'd start a build thread and go back in time. Obviously I won't be posting in exact sequence. I will, however, post photos and descriptions of everything I've done. This will take several weeks as I have lots and lots of photos, and have spent way too much money on mods and mistakes.
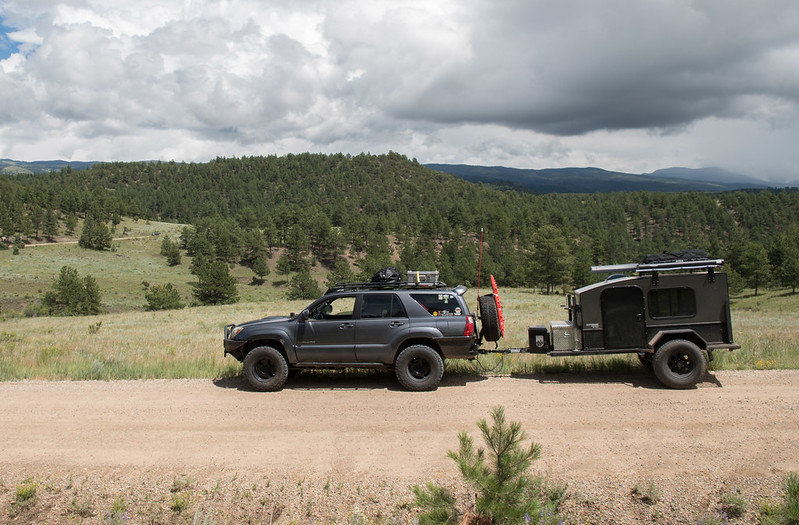


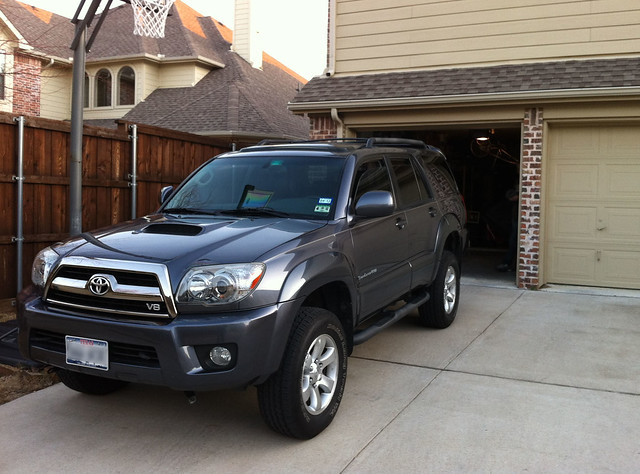
How it looked before I decided to get into off-roading. This is a photo of the first mod: Cornfed 3/2 spacers installed (later replaced w/ Radflo suspension).

What I've got on it thus far

Outfitted and Protection
RCI MetalWorks aluminum skid plates for front, transmission, transfer case, and LCAs
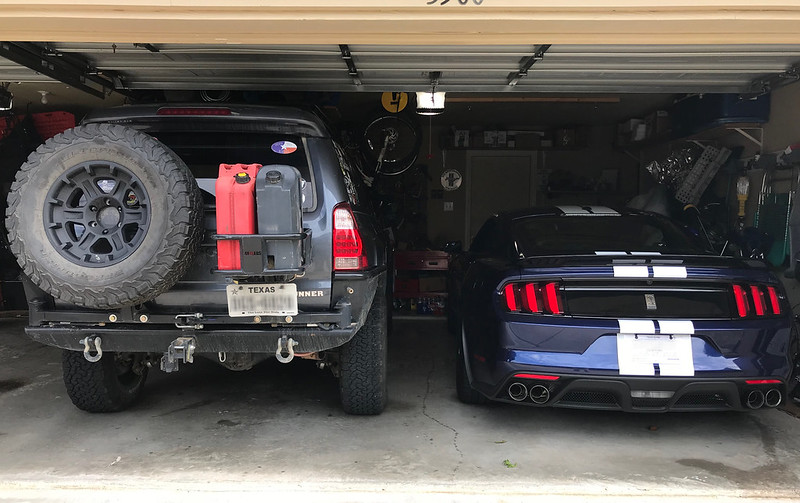
4x4 Labs rear bumper with dual swingouts, spare tire carrier, and dual can carrier
Demello front bumper
ComeUp 9500 winch with synthetic line
GOBI roof rack
ARB 50 qt fridge
ARB air locker (rear)

Tires/Rims
BFG KO2 A/T 285/70 17
rims: (5) American Outlaw - Lonestar (17x8.5 6-139.70 -10 offset) purchased June 2018

Electronics
Kenwood DMX7704s head-unit (connected w/ JBL audio/amp, Sirius XM antenna)
sPOD SE Touchpad
Baja Designs LED Lightbar - single row
Baja Designs quad lights mounted in front bumper - amber
ZeroDark 7-inch LED bumper lights
ZeroDark PodRocket LED ditch lights
CBI Off-road ditch light brackets
Blue Sea Systems socket mount dual USB and 12v sockets
Cobra 29LX CB radio with NOAA | FireStik II CB antenna
Singer Alternator (high output) <-- this thing is awesome
NorthStar 27F battery

Suspension
Toytec rear LCAs
Radflo 2.5 front coilovers raised to 3" lift
Radflo 2.5 rear shocks
All-Pro 3.5" rear springs
SkyJacker rear swaybar endlinks
Toytec extended brake lines
ICON upper control arms
 
Last edited:
Register to hide this ad
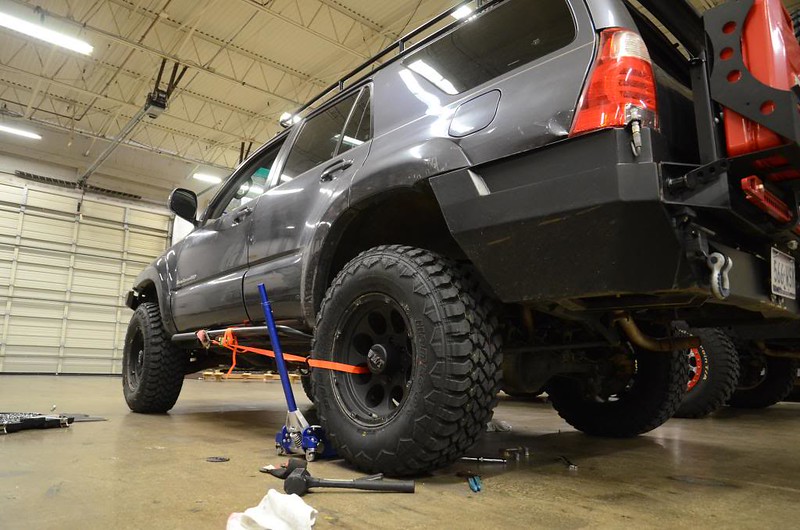
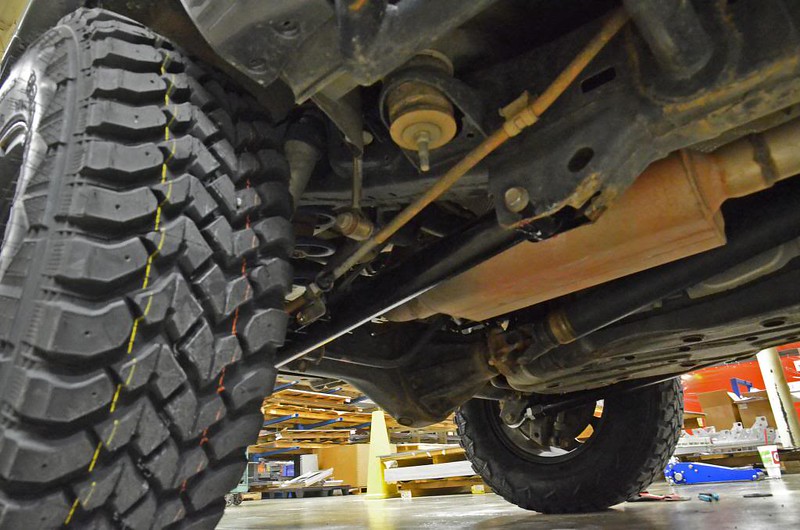
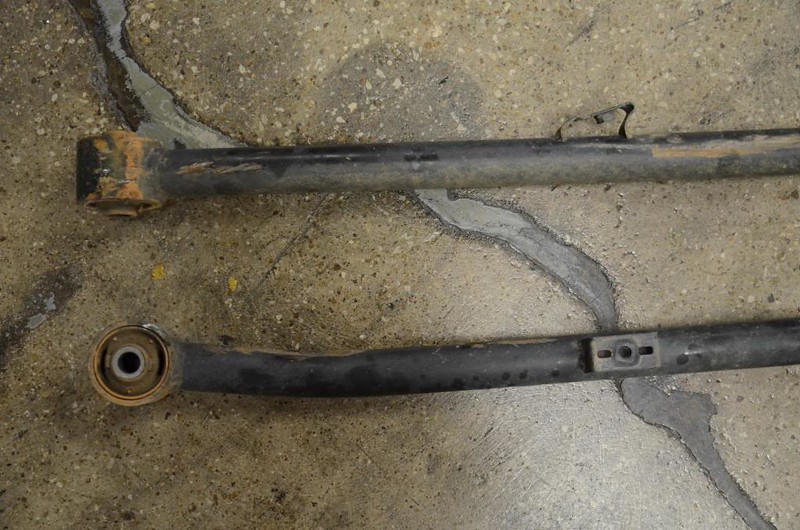
June 1, 2013: Installed Toytec rear trailing LCA pair, mainly 'cuz I damaged one of the OEM ones at Lone Star Toyota Jamboree doing night off-roading. Fortunately, just an hour prior to the night run, I had won a $100 Toytec gift card at the event raffle. =)


Comparison of OEM to Toytec LCA...


Using a ratchet strap to hold axle in place. Was also beneficial when end holes weren't lining up with bracket holes...just pull on the ratchet strap a little to get the axle to come forward...
 
Last edited:
Installed:


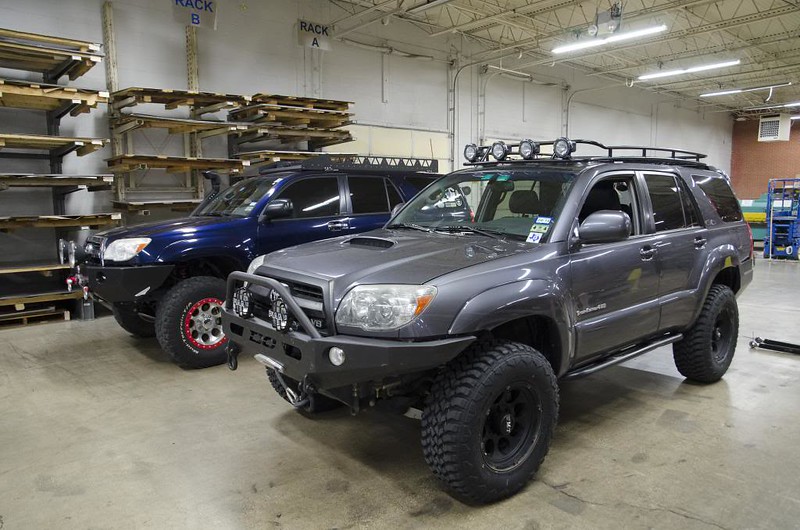
Thanks to [MENTION=62256]Photogdog[/MENTION] (a.k.a. Deryck) for inviting me to his family's shop to do this work. He had ordered the same LCAs, so we installed ours together.

 
Last edited:
About the Toytec LCA Install

Thanks to [MENTION=1907]DawgRunner[/MENTION] for sending me some tips after he installed his. I also watched a video posted on FJCruiser.com.

Deryck ([MENTION=62256]Photogdog[/MENTION]) and I ran into some issues on each of our rigs during the installs, so I'll point those out and how we got around them.

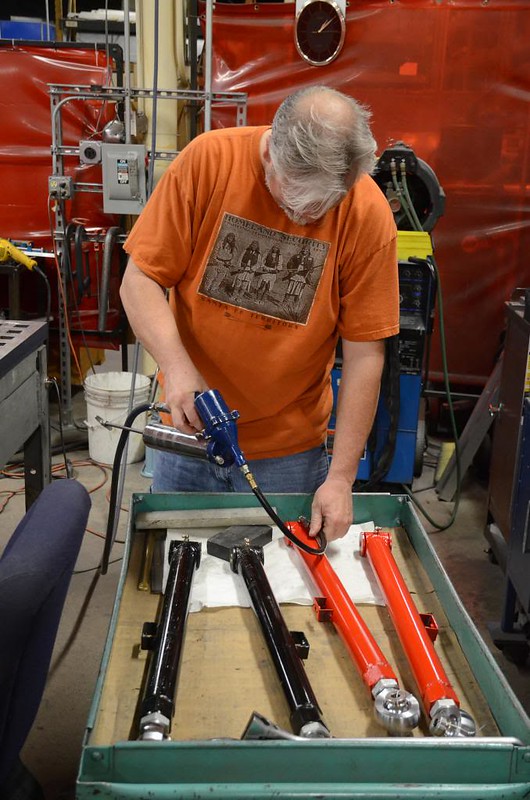
1) These do not appear to have come greased. Thus, you will need a grease gun. Pump in the grease through the valve until grease seeps out the bushing sides.
2) While the OEM bolts fit in my Toytec LCA bushing holes just fine, this was not the case for Deryck. He removed the metal bushings and drilled them out to make the bolts fit. This was doable because we were at a machine shop! My advice is pull out the upper and lower bolts, one at a time while truck is strapped, and make sure they fit.
3) Damaged frame brackets made it difficult to shove in the new LCAs. That's because those dang brackets are weak. So weak, you can pry them wider to get the new LCAs to squeeze in.
4) When inserting the new LCAs into the brackets, you will need the following:
- ratchet strap (don't use tow strap to hold the axle in place since the tow strap will be difficult to adjust...a ratchet strap is easier to adjust)
- heavy rubber mallet for hammering LCAs into place, and hammering stubborn bolts through the holes
- big crescent wrench for prying the brackets wider
- a buddy to help...this turned out to be a 2 man job

Deryck injecting the grease. He painted his LCAs red to complement his red bling:
 
Last edited:
May 31, 2013: new Hankook 33" M/T tires installed (285/70 17)

These replaced my 1 year-old 32" BFG A/T 275/70 17 tires. While the BFG A/T tires are great trail tires, I found they were not suitable for more rigorous off-roading. Anytime I scrambled up rocks, I lost chunks of tread. The tires were also wearing unevenly...the centers were wearing faster than edges, which is a common complaint about the BFG A/T tires.

Despite Hankook claiming these are 285s, I found it interesting that the tread is exactly 9" wide, which is what the BFG 275s were. So I'm not gaining in tread width, but am gaining in additional clearance and a tougher tire. Based on reviews, these Hankooks are ideal for airing down due to tread corner design.


Yes, I know...my skid plate has seen better days.
 
Last edited:
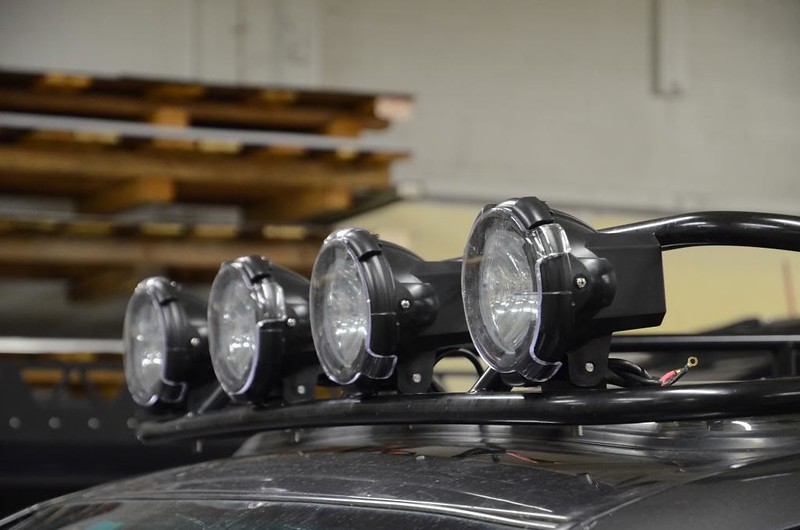
May 28, 2013: Mounted Hella 4" Optilux HID lights on the roof rack. The main screws on each light were too long, so had to cut them down. I have not yet ran the wiring. I am trying to get brave enough to do a grommet through the sunroof rubber seal. The alternative is to run heavier gauge wire all the way to the rear and come through the tailgate.

<a href="http://www.amazon.com/gp/product/B00A9XKTAY/ref=as_li_ss_tl?ie=UTF8&camp=1789&creative=390957&creativeASIN=B00A9XKTAY&linkCode=as2&tag=vumerch-20">Hella H71020181 Hella Optilux 4 Inch HID Driving Light Kit</a><img src="http://ir-na.amazon-adsystem.com/e/ir?t=vumerch-20&l=as2&o=1&a=B00A9XKTAY" width="1" height="1" border="0" alt="" style="border:none !important; margin:0px !important;" />

 
Last edited:
Very nice man. One of my favorite rigs. :cheers:The pics from when you first had your cbi helped push me to get mine.
 
Rig looks great as always Phil!

It's about time you started a thread... although- what's actually left now? Lockers? SAS?

edit- just realized you pulled the rock rings off, you already ruin em or just get tired of the bling?
 
Last edited:
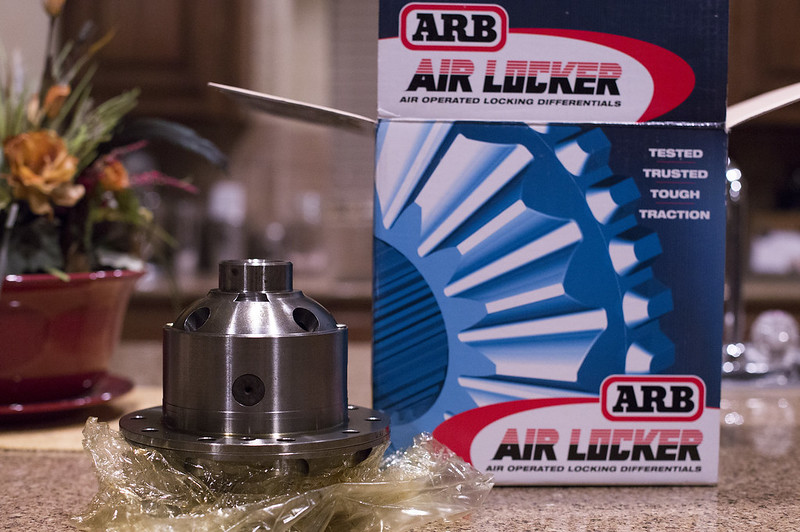
March 28, 2013: ARB Air Locker install

During March, ARB offered a sale on their air lockers. Buy an air locker, get the mini compressor for free ($160 savings). Buy 2 lockers, get the bigger air compressor free ($400 savings)...and the bigger compressor can be onboard air. After discussing with a number of folks, including several mechanics, I decided a front locker wasn't a good idea.

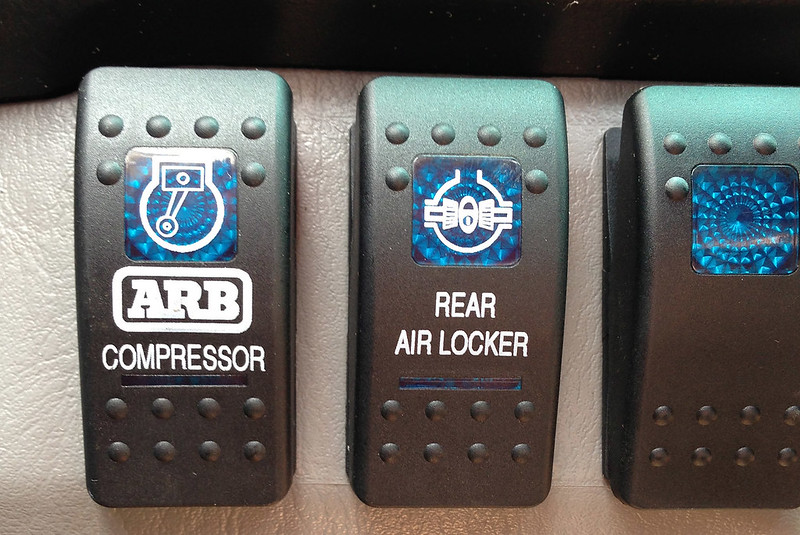
BaerTrax of Dallas is a well-known fab and off-road component install shop. The owner, Josh, has an overland-equipped Taco, newly outfitted Lexus SUV, and several old Land Cruisers and other Toyota trucks. He's the go-to guy for DFW area Toyota off-roaders. His shop installed my rear locker, the mini compressor, and the switches.


ARB Air Locker by VisualUniverse, on Flickr


ARB-switches by VisualUniverse, on Flickr
 
March 2013: Diehard Platinum Marine mega battery

This thing weighs in at 75 lbs. I opted to get this instead of a dual battery kit. Photo shows my old AutoZone battery next to the new Diehard. The new battery barely fit. My teenage son had to help by holding cables back as I dropped it in.


Last edited:
It's about time you started a thread... although- what's actually left now? Lockers? SAS?

edit- just realized you pulled the rock rings off, you already ruin em or just get tired of the bling?

Ha! I took them off so Discount Tire could mount the new tires. Last time DT re-installed the rings, they stripped threads on a mounting screw. So now I remove/re-install the rings myself.

Mickey T has discontinued those rims, so I will probably order some rings as spares while they are still avail.

What is SAS?
 
Ha! I took them off so Discount Tire could mount the new tires. Last time DT re-installed the rings, they stripped threads on a mounting screw. So now I remove/re-install the rings myself.

Mickey T has discontinued those rims, so I will probably order some rings as spares while they are still avail.

What is SAS?

Are you kidding me? those are one of their best selling wheels, I can't believe they're discontinued. I wonder if the pro comp and other brand rings will work as well.

SAS is a solid axle swap, like Medic83, Roams001, or CrozHawk on t120. Google it and you'll see. I was only joking though.
 
January 2012: Installed Cornfed 3/2 lift spacers and SpiderTrax, and new brake pads.


365/16 - mods and maint by VisualUniverse, on Flickr

With my new lift and wider stance, I headed out to this off-road park in nearby Bridgeport, TX. Had my two older sons with me. I thought I was really pushing it on the 2-diamond trails. Considering I didn't have off-road tires, an off-road suspension, and or any other off-roading mods, it was probably a good thing I stuck to the tamer stuff.

Photos of my first time out off-roading:


Car Wash by VisualUniverse, on Flickr


Flex Zone by VisualUniverse, on Flickr


365/22 - Time for a wash by VisualUniverse, on Flickr

We met these guys that day (Marc and Brian). Turns out, they are next-door neighbors who met when they moved into their newly built homes and discovered they each had a 1st gen. They live only a few miles from me and I've been off-roading with them multiple times since that first day. Just as I have transformed my truck, both Marc and Brian have done the same to theirs. Marc recently did an engine swap by installing a newly built EFI 22RE.

Classic 4Runners by VisualUniverse, on Flickr
 
Last edited:
June 2012: CBI rear bumper install

Seems most 4th gen folk prefer to get an off-road front bumper before they do the rear. I did the opposite mainly because I kept bottoming out in the rear. This was probably because the 2007 V8 tow harness was done in such a way that it was positioned lower. I previously owned a 2005 V6 SR5 and my tow harness sat much higher.


Last edited:
I later ordered the gas can carrier and gas can from CBI. Also installed the CB antenna on the tab that I had requested from CBI. If ordering a rear bumper from CBI, this is something to think about: where do you want the CB antenna to mount.

 
Last edited:
February 2, 2013: This marks the day that I decided, in a most over-confident fashion, to conquer a 4-diamond rock-crawler trail, and thus severely damaged my CBI rocksliders. I damaged the driver side slider on the way up, and the passenger side slider on the way down...on the exact same rock. Now the driver's door hits the top of the slider when opening/shutting it. The important thing here is that I conquered the route...both ways. :dance:

Taking 4Runner on 4 diamond trail by VisualUniverse, on Flickr
 

Members online

Forum statistics

Threads
278,307
Messages
3,554,050
Members
248,016
Latest member
Advally Service

Trending content

Back
Top