KodiakJones 2014 4Runner Build Thread

KodiakJones

New member
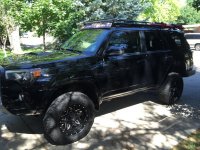
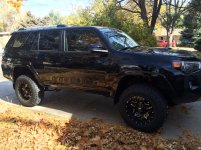
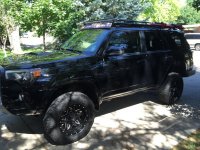
Just picked up a 2014 4Runner about a month ago. Started with the basic trail edition in black with cloth seats. Will be adding a bunch over the next few months.

Making the switch from Jeep Wrangler to Toyota for many reasons. My old rig has a lot of stories and hopefully the next owner will treat her right. Anywho...

My goal is to create a perfect blend of form and function by building a rig that provides comfort and utility as a daily driver, wheeler, and ticket to the backcountry.

First stage [COMPLETE]:
Window Tint
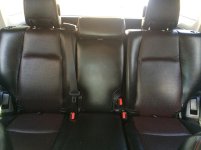
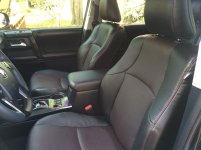
Leather Heated/Cooled Seats
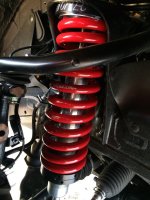
3'' BOSS TOYTEC Suspension
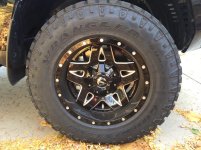
Fuel wheels
Wrangler Off Road Tires

Second State [COMPLETE]:
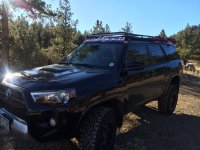
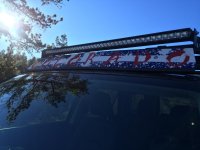
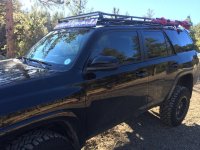
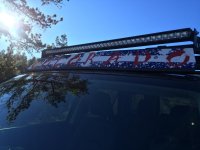
Gobi Stealth Rack with Custom "ColoradoRunner" Decal
40'' rigid light bar
aFe Stage 2 Si intake system
Hefty Fabworks Rear Bumper and Tire swing

Third Stage:
4x4 labs front bumper with winch and lights
Hefty Fabworks Rock Sliders
Rear LEDs and Rock lights
Interior Mood lights

State Four:
Sliding Cargo Drawer
ARB Air Compressor
 

Attachments
  • IMG_0081.jpg
    IMG_0081.jpg
    138.9 KB · Views: 1,373
  • IMG_0083.jpg
    IMG_0083.jpg
    140.1 KB · Views: 1,307
  • IMG_0874.jpg
    IMG_0874.jpg
    136.7 KB · Views: 1,326
  • IMG_0877.jpg
    IMG_0877.jpg
    128.8 KB · Views: 1,274
Last edited:
Register to hide this ad
Katzkin Leather Heated/Cooled Seats

Katzkin Leather Heated/Cooled seats now in place!

Black leather with red thread and center piece perforated leather with red leather backing.

Really changed the whole feel of the interior!

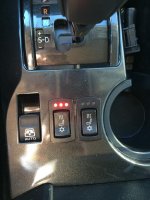
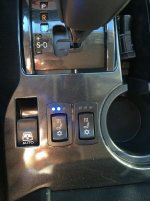
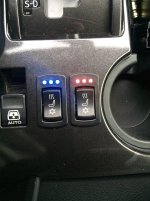
The control for the seats used the two pop outs on the center console.
 

Attachments

  • IMG_0787.jpg
    IMG_0787.jpg
    138.1 KB · Views: 2,821
  • IMG_0788.jpg
    IMG_0788.jpg
    134.3 KB · Views: 2,731
  • IMG_0789.jpg
    IMG_0789.jpg
    146.8 KB · Views: 2,653
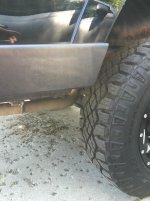
Toytec BOSS Lift and Fuel Wheels/Wrangler Tires + Front Window Tint

Love the aggressive, yet elegant, look that these wheels added. The silver accent really pops in contrast to the black on black. Have the 5th wheel/tire ready for when I get my rear bumper/tire swing installed next month. Hefty Fab currently working on it!

3'' Toytec BOSS Suspension lift added. Was one of the only lift kits that allowed for KDSS to remain without a lot of extra mods.

FUEL Deep Lip Full Blown D554 with Goodyear Wranglers
 

Attachments

  • IMG_0790.jpg
    IMG_0790.jpg
    139.6 KB · Views: 2,889
  • IMG_0791.jpg
    IMG_0791.jpg
    136.1 KB · Views: 2,757
  • IMG_0793.jpg
    IMG_0793.jpg
    129.7 KB · Views: 2,716
Those seats are really nice! What type of shop do you go to get that done, or did you do it yourself from katzkin? Could you share the price?
 
Katzkin Leather Heated/Cooled seats now in place!

Black leather with red thread and center piece perforated leather with red leather backing.

Really changed the whole feel of the interior!

The control for the seats used the two pop outs on the center console.

Really like these. May copy you on mine. Is the leather back dyed red?
 
Really like these. May copy you on mine. Is the leather back dyed red?

Ya the back leather was dyed red so the holes punched through show the red from behind. Very subtle. The pictures actually show off more of the red than you pick up in person.
 
Those seats are really nice! What type of shop do you go to get that done, or did you do it yourself from katzkin? Could you share the price?

Katzkin had an authorized installer in town. To replace the front and rear seats with the leather and have the front two seats heated and cooled was $3,000 even.
 
Looks great, love the contrast. Do you mind posting a photo of the seat heater/cooler control buttons? I have dealer-installed Katzkin's currently but want to take it in to have heater elements installed. I'm curious to see how/where/what the buttons look like and where they mounted them up. Thanks a bunch.
 
Looks great, love the contrast. Do you mind posting a photo of the seat heater/cooler control buttons? I have dealer-installed Katzkin's currently but want to take it in to have heater elements installed. I'm curious to see how/where/what the buttons look like and where they mounted them up. Thanks a bunch.

There were two punch outs right in the center console next to the rear window switch. Each one goes both directions.

One tap for High, another tap in same direction for medium, another tap for low, another tap for off. Showing off "His-N-Hers" in the last pic.
 

Attachments

  • IMG_0804.jpg
    IMG_0804.jpg
    137 KB · Views: 2,392
  • IMG_0805.jpg
    IMG_0805.jpg
    136.8 KB · Views: 3,257
  • IMG_0811.jpg
    IMG_0811.jpg
    136.8 KB · Views: 2,326
Last edited:
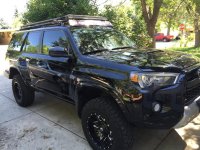
Gobi Stealth Rack and 40'' Rigid Light Bar Installed

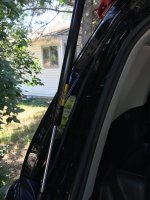
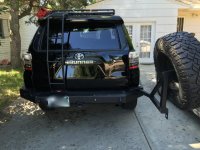
Had this done a while back...just getting around to posting pictures. The Gobi Stealth rack with rear door ladder. Had to replace to the lift gate springs with heavier duty gas springs to make sure the door would be able to stay lifted with the added weight of the ladder on the door. If you are thinking about getting the rack, I would highly recommend the ladder. I've had racks before without a ladder and made due. The ladder makes a world of difference.

Locking high jack mount is secure and the only issue I had was that the base would rattle and make quite the racket. I bought some cheap velcro straps to secure the base of the high jack to the shaft and problem solved.

With the 3'' Toytec lift and bigger tires, the stealth rack allows the 4Runner to fit into a standard garage with about 2'' to spare and haven't been to a parking garage that was below 7'.

I went with the single row LED bar because I thought I would like the lower profile compared to the double row. Big mistake. The double looks beefier and has a higher output without adding to the total height of the vehicle. So I will be selling the single row and exchanging for a double at some point.

The wiring for the lights was ran along the lower bar of the rack to the back of the vehicle and then down the rear door hatch and then behind the rear tail light.
 

Attachments

  • IMG_0083.jpg
    IMG_0083.jpg
    140.1 KB · Views: 1,214
  • IMG_0876.jpg
    IMG_0876.jpg
    137 KB · Views: 1,329
  • IMG_0877.jpg
    IMG_0877.jpg
    128.8 KB · Views: 1,218
  • IMG_0097.jpg
    IMG_0097.jpg
    132.4 KB · Views: 1,215
Last edited:
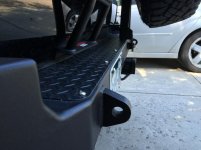
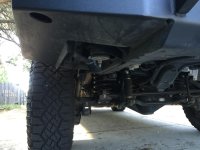
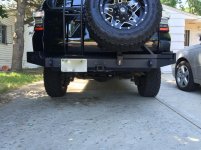
Hefty Fabworks Rear Bumper and Tire Swing Installed

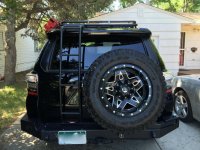
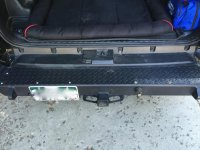
Had Chris at Hefty Fabworks install his bumper on my 4Runner. It took him about a day. He has made some modifications from his earlier designs and the 5th Gen design is awesome! It added about 3 inches to my departure angle and some nice clean lines on the back.

Only issue I had with the install is that now I have to move my back up camera since the tire blocks about 4/5 of the view. Thinking about installing it on the top of the hitch mount but haven't decided yet.

Swing arm is secured with a lynch pin instead of a lever/latch because shit breaks down and an easy and reliable method is usually the best...no need to get fancy here folks.

Small LED to the left of the license plate for illuminating the plate at night. A few cuts to the body of the vehicle were made but the lines are so clean you can't tell.

Let me know if you have any questions.
 

Attachments

  • IMG_0086.jpg
    IMG_0086.jpg
    138.1 KB · Views: 1,222
  • IMG_0088.jpg
    IMG_0088.jpg
    120.3 KB · Views: 1,464
  • IMG_0089.jpg
    IMG_0089.jpg
    125.4 KB · Views: 1,235
  • IMG_0091.jpg
    IMG_0091.jpg
    135.5 KB · Views: 1,232
  • IMG_0092.jpg
    IMG_0092.jpg
    134.9 KB · Views: 1,221
  • IMG_0094.jpg
    IMG_0094.jpg
    136.7 KB · Views: 1,208
  • IMG_0095.jpg
    IMG_0095.jpg
    136.6 KB · Views: 1,266
Last edited:
KodiakJones, Were you in Lakewood around Mississippi and Kipling yesterday? Saw a Runner that looked like yours drive by my house, I waved and had the silver 2015 SR5 with a roof basket on top in the driveway.
 
Rear bumper

Are you happy with your Hefty Fabworks bumper? Any challenges securing or releasing your latch when you want to open up the back? Thanks.
 
Are you happy with your Hefty Fabworks bumper? Any challenges securing or releasing your latch when you want to open up the back? Thanks.

No issues. Smooth and secure. You just have to push slightly on the tire when putting the pin back in. If it wasn't tight then you would get a bunch of rattling so no complaints. Only issue would be that the tire-swing blocks the back-up camera (wouldn't be to hard to move just haven't gotten around to it)


Dudes at the car wash always act like they are dealing with a rubix cube when trying to open it though...so that's always entertaining.
 

Members online

Forum statistics

Threads
278,309
Messages
3,554,070
Members
248,016
Latest member
Advally Service

Trending content

Back
Top