Leaking Transfer Case Seal?

4boer2

New member
/* If this should be in the maintenance section, sorry. */

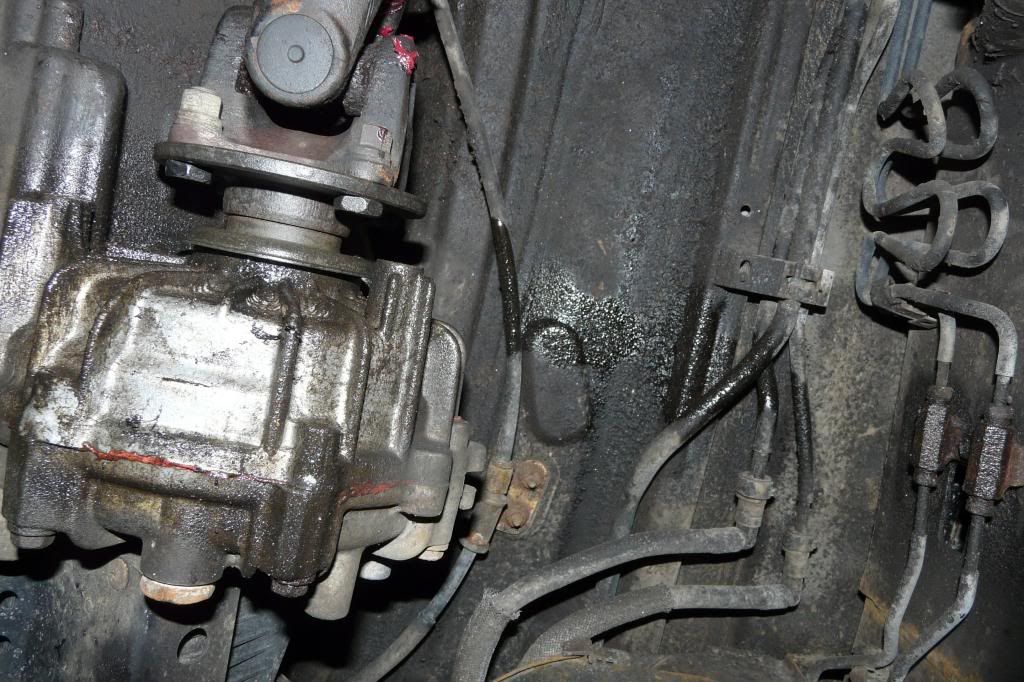
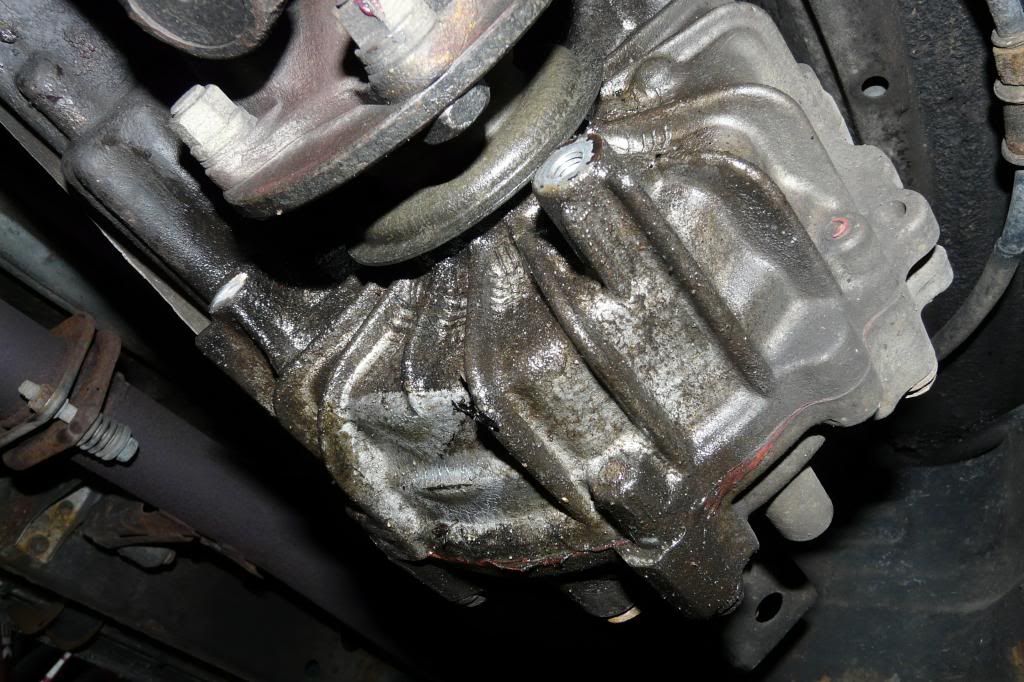
I was changing the oil today and discovered that the transfer case skid had a coating of fluid on it. There was also fluid slung onto the floor, not driveline grease. To me, that means it is the seal to the front driveshaft instead of the main gasket. It definitely is not the drain or fill plugs. On a scale of 1-10, how important is this? Can I fix whatever this is myself?

Thanks

P1110334.jpg~original


P1110328.jpg~original
 
Register to hide this ad
Reference Post

I found the procedure in my Haynes book. It's pretty straightforward. I wish bigfish's pictures were available as the staked nut part is worrisome. I found the required part numbers using this, this, and this catalogue. The seal is 90312-23001 and the nut is 90179-22016. If anyone wants pictures speak up. I will most likely get this done next week.

Part numbers confirmed here: http://www.landcruiserclub.net/forums/showthread.php/39995-90-Series-Transfer-Case-Oil-Leak

EDIT: WRONG SEAL, KEEP READING!
 
Last edited:
I found the procedure in my Haynes book. It's pretty straightforward. I wish bigfish's pictures were available as the staked nut part is worrisome. I found the required part numbers using this, this, and this catalogue. The seal is 90312-23001 and the nut is 90179-22016. If anyone wants pictures speak up. I will most likely get this done next week.

Wanting pictures with procedures is a given and should be a requirement. :) I am sure some will greatly appreciate it. Me too, but i don't need to do it.
 
Now that the DIY writeup (here) has pictures again, I can see that I have bought the seal that goes into the companion flange instead of the right one. The correct seal number is 90311-41010. It also means that I won't be taking as many pictures.
 
Last edited:
Replaced my seal this weekend. Had to use an air impact to get the 30mm nut off. Wow was it on tight. Reassembly was the easy part.
 
Part 1

Disclaimer: These are not official instructions, rather just how I went about completing the job. I reference and used some pictures from BigFishAllDay's write-up mentioned above. (http://www.toyota-4runner.org/3rd-g...r-case-output-shaft-oil-seals-how-diyers.html)

1. Apply PB blaster to the driveshaft nuts, driveshaft grease zerk, and the transfer case skid plate bolts the day before. Also, sometime before you disconnect the driveshaft, you should noticeably paint the connection between the driveshaft and companion flange so you can align it the way it was (for balancing purposes). You will need new gear oil because you should drain your fluid before you take the flange off, unless you like oily surprises (both 24mm, always undo the fill before the drain plug. Torque them to 27 ft lbs).

P1110352.jpg~original


2. Take off the four skid plate bolts (12 mm).
/*I do not have a transmission skid plate, so I don’t know if that will be in the way or not.*/

3. Next are the drive shaft nuts. They are on tight and there is no room for an impact. If all four tires are off the ground the driveshaft will spin (V8. That will only happen when the front wheels are up for the V6). Therefore you must have a way of stopping the rotation. If your car is on the ground, that will work, however I prefer the driveshaft to be able to spin so I could easily access each nut. BigFish shoved an extension through the u-joint. I used a wrench on the hex head of the bolt (17 mm) and another on the nut (14 mm). There is one washer with each nut. If the nut is really stuck on, don’t be afraid to apply some heat.

P1110351.jpg~original


4. If you maintain your vehicle well, the slip yoke should be filled with grease and will be hard to compress in order to separate the flange from the driveshaft. Therefore, you must remove the zerk fitting. (Not the one in the u-joint!) It is 7mm and should be super easy.

25_zps2fe307e1copy.jpg~original

Photo Courtesy of BigFishAllDay

5. Collapse the driveshaft any way you like. I pried in-between the shaft and companion flange and forced it in. Just remember that all of the grease will ooze out. You may set the driveshaft aside on the crossmember.

P1110350.jpg~original


23_zpsdb113bec.jpg~original

Photo Courtesy of BigFishAllDay

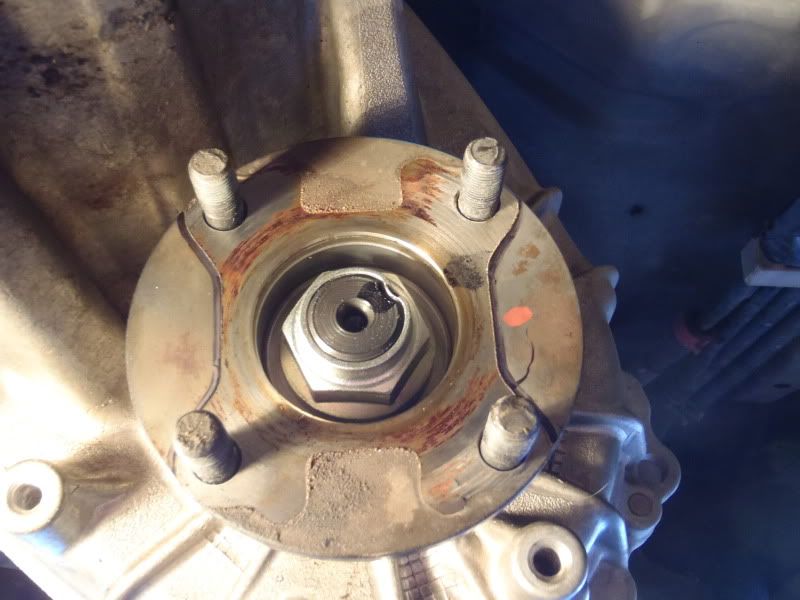
6. Next you have to unstake the nut. The output shaft has a notch cut into the threads and part of the nut is pushed into the notch. The purpose of this is to keep the nut from spinning, and Toyota did a very good job at it. What you must do is un-dent the nut from the shaft. This is the hardest part, but it is not impossible. First you will need something flat and pointy, like a screwdriver. How you want to do it is up to you. I recommend turning the flange so that the staked part is facing up toward the cabin floor. Then take a hammer and your chosen pointy tool and chisel it away. That's what worked for me.

/*One thing to take note of is the transmission crossmember is in different places for the V8 and V6. It was really in the way of my hammer swinging, so how long your pointy tool is will also be a factor.*/

24_zps62116bba.jpg~original

Photo Courtesy of BigFishAllDay

P1110337.jpg~original


P1110341.jpg~original


Here is the tool that worked best for me.

P1110344.jpg~original
 
Last edited:
Part 2

7. Now you have to take the nut off. It is 30mm and very tight. I was advised not to use and impact as it may damage the gears. I don’t even know if you have room for one. Proceed at your own risk. Put the companion flange nuts back onto the studs. This protects the threads. I did exactly what BigFish did. I wouldn’t put pb blaster on it, but a little propane did help.
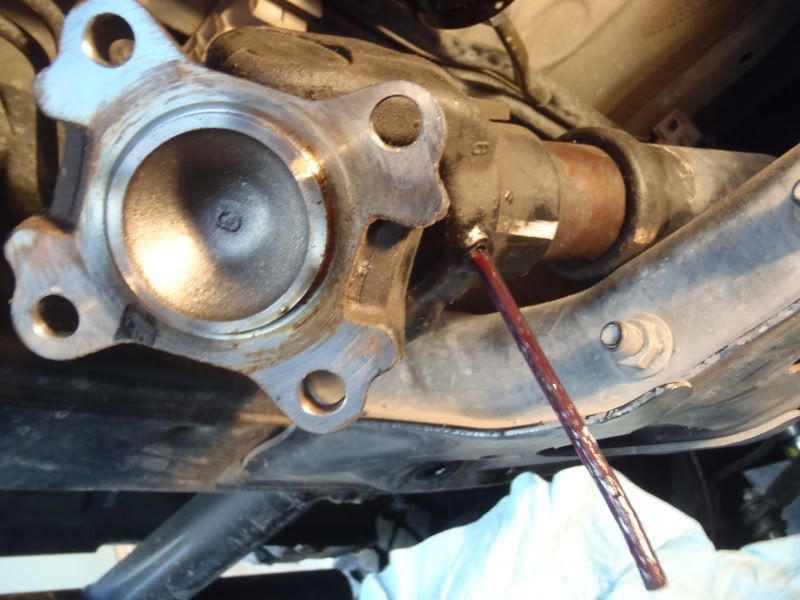
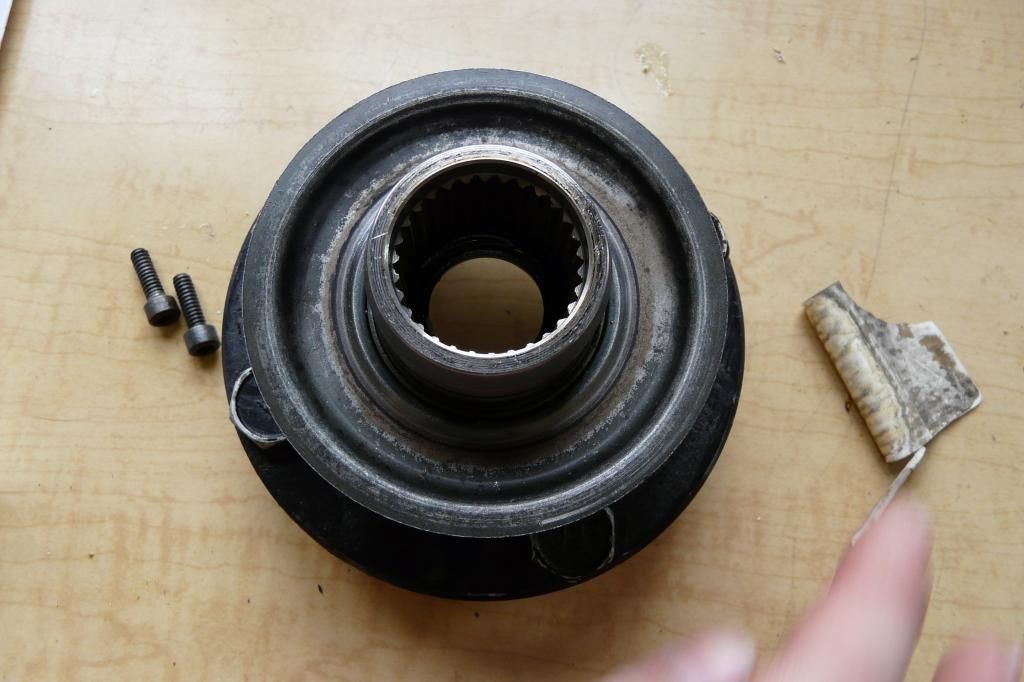
8. Now, pull the companion flange off. It should not be too hard. If you need help, just lightly tap all around the flange with a hammer. If you haven’t already drained your fluid it will come out now. I wiped mine down with a rag just to be clean. You can look at the seal in there too.

P1110343.jpg~original


P1110345.jpg~original


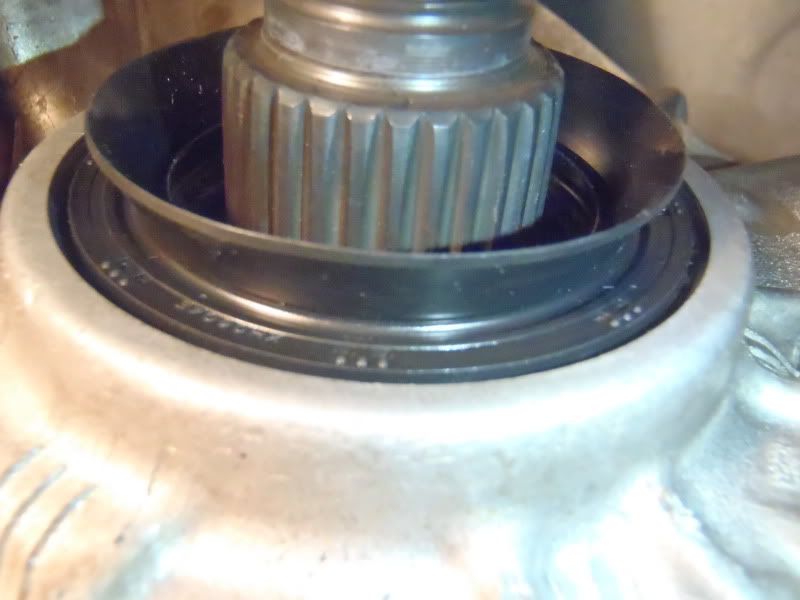
9. Now you have to take the seal out. I used a very small screwdriver to gently pry it out. Avoid damaging the surface of the transfer case. There is a retention spring on these seals. Make sure that the old one is out!

10. We're finally putting things back together! Coat the new seal surface in gear oil and push the seal evenly in the right amount. It can go in too far. I placed a massive socket on top of the new seal a gently taped it with a hammer.

P1110348.jpg~original


This is good depth wise:
7_zps1aa59110.jpg~original

Photo Courtesy of BigFishAllDay
 
Last edited:
11. Time to put the nut back on. Torque it to 87 ft lbs the same way you took it off.
12. Stake the new nut. I just hit a chisel and center punch with a hammer and that did it.
13. Time to put the driveshaft back on. Find your paint and just pull it back over the threads. Don't forget the washers. Torque to 54 ft lbs. I had to use a swivel head to use a torque wrench. I'm pretty sure as long as they're decently tight they'll be fine.
14. Fill the transfer case. 75w-90 for me. Screw the zerk in hand tight and pump with grease. It will take a while. I heard of one technique where you take the zerk out again once you see the driveshaft move to have the perfect amount. I didn't see that necessary because I've never had a problem.
15. Put the skid plate back on ( I don't have a torque for that, not too tight).

Fin. :bravo:
 
That's better. This one cost $18.something

IMG_9635.jpg~original

Gentlemen, I would like to add this picture with a part number that includes ALL the seals, gaskets, washers and stuff for the center diff for my 03 v8. simplifies looking for this and that seal. it was $30 from my local dealer with free delivery and i had it the next work day morning! cant beat that!

20140514_103848_zpslurulxgf.jpg~original
[/URL]

Also some food for thought.

When i bought my truck, i notice a weeping line of dirt/oil like in the first picture, though no way was it leaking that bad. i changed the fluid in all 3 cases, front and rear diff and transfer case. cleaned off all the oil from weeping line.

watched the oil to check if it still leaked. it did and it was getting worse, still never as bad as first picture

i changed it from the oil fluid to synthetic gear oil from redline 75w90. similar viscosity but since it was synthetic i feel the seal might have be compromised since it was worn out so the thinner synthetic could have weeped past it.

i ended up paying my trusted mechanic to do this job, $85. he changed what ever seals he could get to. i hate trans and gear fluid smell. its like liquid death that will not come off. $85 was priceless. its been 3000 miles since the repair and it hasnt leaked since.
 

Members online

Forum statistics

Threads
278,306
Messages
3,554,045
Members
248,016
Latest member
Advally Service

Trending content

Back
Top