Lift and UCA install

Jester4kicks

New member
Hey all, the UPS guy brought my OME lift today, and my light racing UCA's yesterday. I've been reading up on the install procedure, and I think I've mostly got it, but there are a few parts I'm still nervous about.

Here's the guide I'm basing the spring install off of:
OME Lift

In that thread though, the front springs/struts were assembled from the seller. Mine are not. As I understand it, this shouldn't be too hard. I plan on renting a spring compressor from advance auto, and it looks like you just get the two pieces on either side of the spring and start tightening them down until you can wiggle the spring freely. Is it harder than that?

I am also a little confused about the struts/shocks I received. There is a long metal clip that appears to be holding them in a compressed state. I'm not entirely sure how I'm supposed to get that clip off without having the thing burst to full length.

The only other thing that I'm concerned about is the UCA install.

I was looking at this guide:
Upper Control Arms replacement

As I understand it, the two toughest parts of the UCA install are disconnecting the ball joint, and removing the long bolt that holds the entire UCA on. Since I'm already going to be borrowing a spring compressor from advance, I figured I'd also borrow a ball join separator. As for the long bolt, I've heard I may have to pull that out through the engine compartment. Thoughts?

So far, here's my shopping/borrow list. Let me know if I'm missing anything.
-PB Blaster
-Spring compressor
-Ball Joint separator
-Strap wrench

Sorry for the length, all thoughts or pointers are welcome! Thanks!
 
Register to hide this ad
I followed this write-up when I did my front OME install a few weeks ago. Short and to the point, but made it very easy. I had about a 5 foot metal pry bar that made the install much easier, didn't have to touch the alignment bolts.
 
First off, congrats on the new suspension and the fact you're doing it yourself.

OME Lift
It's not too hard to use a spring compressor but if it was me, i would take the front strut assembly and have a shop put it together so you don't have to mess with it. Should only cost about $20.

Or you can use this as a guide and bypass the spring compressor all together: OME Install - no spring compressor

If you do use the spring compressor, just compress the spring enough to get the top plate on securely before releasing the spring. Take it slow.

Light Racing Upper Control arms
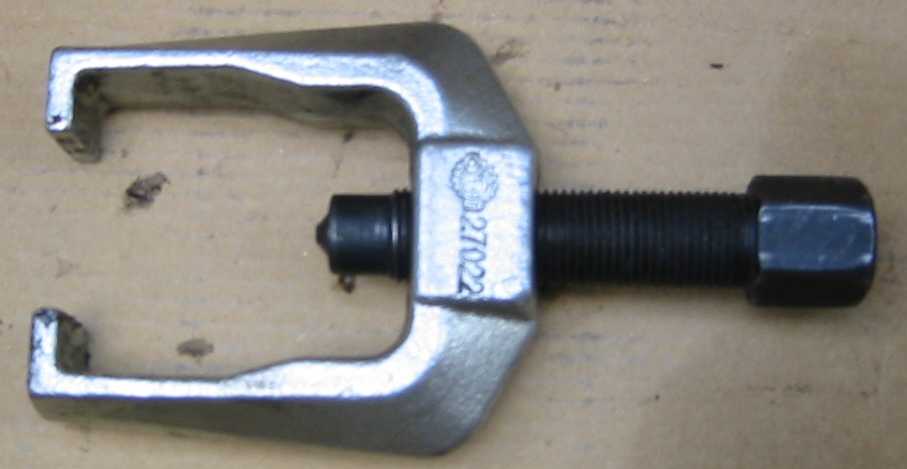
Upper Control arms are easy. make sure you don't use the pickle fork style ball joint separator since this will tear up the boot (not too much of a concern but good to have spare parts just in case).

Here is the one i use:
ball-joint-tool.jpg


This is where having an extra set of hands is a good idea. once the spindle separates from the UCA, it is abrupt and the spindle will want to swing away. If you don't have a extra set of hands use a bungee cord or zip ties to hold the spindle in place.

the bolt for the upper control arm does come out from the engine compartment. The drivers side comes out easier if you remove the battery. the bolt itself doesn't rotate when turning the nut so no need to hold it in place.

On top of that list I'm sure you have metric sockets, metric open end wrenches, torque wrench, jack stands and a good floor jack.

Good luck and look forward to seeing some after pics.
 
I've messed with the spring compressor from Advance Auto and it isn't too bad. As darkie mentioned, go slow and make sure that the pins on the compressor are "locked" onto the coil before you begin compressing it. When you place that much pressure on the spring, the smallest movement or accidental pressure can release the spring and hurt you or your new parts!
Just take it slow and make sure you double check before compressing/releasing! It isn't too bad to be honest.
 
Well, it took all day, but the front suspension is finally done.

Big delays came up when the spring compressor I had couldn't quite get the OME spring crunched down enough to assemble. We got one stock spring off, then took the new springs and struts, along with one of the stock springs still on the strut, into Sears and had them take care of it. Only cost $30 total. Not bad.

Also had an issue with the ball joint separator we started with. Ended up going back to Advanced while Sears was working the coils. While there, we found exactly the kit we needed (which the clerks seemed completely oblivious of). Ended up using the one darkie pictured above, and it worked perfectly.

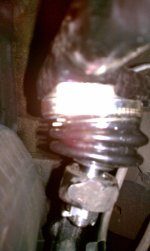
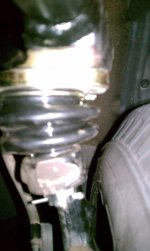
The only issue that I'm particularly concerned about is with the boot on one of the UCA's. The guy helping me install them was playing with the rubber boot that covers the ball joint. While doing that, he kinda squished it down, and it never sprang back to it's previously position.

One the driver's side, the rubber boot on the ball joint covers the spindle right down to where it meets the connector tie (whatever that piece is called, held in place by the bolt beneath it). On the passenger side, there's about 1/4 - 1/2" of exposed metal between when the boot stop and where the connector sits (even after I tightened down the bolt that holds it there).

Thoughts on that?
 
Here's a couple pictures so you can see what I'm talking about. One of the boots is kinda squished, and you can see the uncovered part of the spindle. The other looks... well, "right".
 

Attachments

  • IMAG0317.jpg
    IMAG0317.jpg
    140.3 KB · Views: 2,457
  • IMAG0320.jpg
    IMAG0320.jpg
    136.5 KB · Views: 2,450
Finished the install earlier this morning! Looks great, and rides well too! It's definitely stiffer than stock, but there's still plenty of cushion.

I'm still a little nervous about the height. Measuring from the lower-outer edge of the circle on the hubcap that goes around the toyota logo (not the oval of the logo itself), here are the distances to the edge of the fender directly above.

Front Left: 24 3/4"
Front Right: 25 1/8"
Back Left: 25 3/8"
Back Right: 25 5/8"

I'm hoping that the front left is sitting lower because of the extra weight on that corner... and also hoping that things will all settle in a little more level. Thoughts?

I'll get good pics when the weather clears. I'll post a few teasers in a minute.
 
Looks great! Are those stock size tires you have on there? I was wanting to do this lift, however, was worried that having stock size tires may look a bit strange with the OME lift (BTW - which springs did you go with?). I think your rig looks just fine with the stock size tires (if they are) with that lift.
 
Looks great! Are those stock size tires you have on there? I was wanting to do this lift, however, was worried that having stock size tires may look a bit strange with the OME lift (BTW - which springs did you go with?). I think your rig looks just fine with the stock size tires (if they are) with that lift.

Yup, stock rims and tires. Springs are the 885 and 895.
 
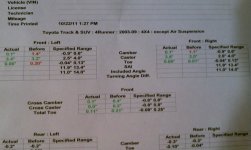
Final update. Went in for an alignment yesterday. Here's the results.
When setting the Light Racing UCA's, I went with the recommendation to set them to 0* (Logo facing directly out) and all the way out.
 

Attachments

  • IMAG0333.jpg
    IMAG0333.jpg
    138 KB · Views: 2,274
Finished the install earlier this morning! Looks great, and rides well too! It's definitely stiffer than stock, but there's still plenty of cushion.

I'm still a little nervous about the height. Measuring from the lower-outer edge of the circle on the hubcap that goes around the toyota logo (not the oval of the logo itself), here are the distances to the edge of the fender directly above.

Front Left: 24 3/4"
Front Right: 25 1/8"
Back Left: 25 3/8"
Back Right: 25 5/8"

I'm hoping that the front left is sitting lower because of the extra weight on that corner... and also hoping that things will all settle in a little more level. Thoughts?

I'll get good pics when the weather clears. I'll post a few teasers in a minute.

My left front and rear ended up sitting about 3/4 of an inch lower. I pulled my daystar spacers out to do my ome lift so I just took one of my rear leftover spacers and put it in the drivers side rear, now it sits almost perfect even with a full tank of gas.
 
My left front and rear ended up sitting about 3/4 of an inch lower. I pulled my daystar spacers out to do my ome lift so I just took one of my rear leftover spacers and put it in the drivers side rear, now it sits almost perfect even with a full tank of gas.

Yeah, if it settles in that far, I might have to do something like that. For a 3/8" difference though.... meh, might just ignore it.
 

Members online

Forum statistics

Threads
278,309
Messages
3,554,066
Members
248,016
Latest member
Advally Service

Trending content

Back
Top