810moto
New member
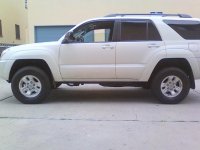
Well after a long Monday in the garage, I have completed my front lift.
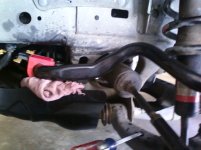
Took me better part of the day, mostly spent on the drivers side becuase I had no clue what I was doing but thanks to ARK_SWAMP_RIDER's pm and helpful links, I had plenty of reading to make sure I was doing thing right. I started around 10:45am and got done around 3:00pm. The swaybar was the biggest pain in the rump becuase I had used the Red Lok Tite on the bolts when I replaced the bushings. Not much room between the skid and the bolts so it was a knuckle buster. I greased everything the night before with some BigLot brand of WD40 and it worked pretty good.
Keep in mind, I only had one side of the truck on stands at a time. Can trust those cheap 2 ton stands from pepboys so i doubled up on each side.
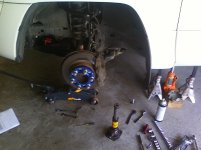
After removing the wheel, I unbolted the lower control arm with no cheater bar, my little rachet killed my hand untorquing that 100 ft lbs.
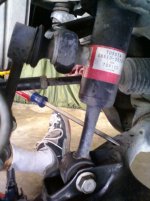
Next I undid the end link and lower shock mount. Pretty easy on those items. Here is where I got stumped for a bit. I was trying to get a 14mm socket or wrench on that 3rd bolt behind the top of the shock and it was killin me till my neighbor came down and said he had a snap on offset closed end wrench. Holy Crap did that save the day!
I kept the entire shock/spring assembly in tack and removed the unit.
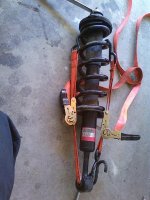
Hickup #2. No spring compressor....well not a real one anyways. I ended up using to rachet straps that I had for my dirtbike and cranked them down one notch at a time equally. WORKED LIKE A CHAMP!
After much thought into what of my basic tools I could use on that stupid top head of the shock, I ended up using some vice grips as tight as I could get them and unthreaded the top nut. Ratchet straps now removable with no recoil at all.
FJ coil/shock and 1/2" spacer mounted and bolted down.
Reverse of above.
Using the handle from the floor jack, I pried the lower arm down and lined up the upper bolts first and just ran a few threads on them to hold it in place.
Now the PITA part. Getting the lower shock mount in it's home was more than a task. That stiffer spring and shock was killing my hands. It seemed about 1-2mm offset or something and was not allowing it to seat properly. with the help of a 2x4, hammer and a big screw driver, it finally took its seat.
Bolted everything back up, torqued it down reinstall wheel and on to the next side.
Time elapsed on when #1.....3 hours!
Wheel #2 took just over an hour becuase I learned my lesson on the drivers side of what to do and not to do.
All in all, it was man world all day in the garage and I had a blast.
Now for the before and after measurements.
1/2 tank of gas
B4
Dr Side 32-3/8"
PS Side 32-3/4"
AFTER
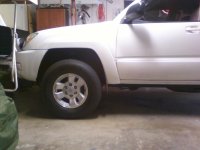
DR Side 35"
Ps Side 35-1/8"
This is after I drove around for about an hour. Checked it again this morning after my front end alignment done by Herbs Automotive
and it is the same. $49.95 for the front end alignment by the way with the coupon from the web site.
I have used them for years and learned real quick that it won't leave the shop till it's right.
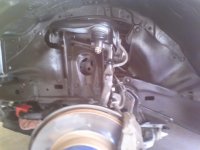
Oh, by the way, while everything was apart, I sprayed everything in the wheel well with rubber undercoating and I mean everything. Looks sweet when it dried.
sorry for the phone photos. it's all i have right now.
Took me better part of the day, mostly spent on the drivers side becuase I had no clue what I was doing but thanks to ARK_SWAMP_RIDER's pm and helpful links, I had plenty of reading to make sure I was doing thing right. I started around 10:45am and got done around 3:00pm. The swaybar was the biggest pain in the rump becuase I had used the Red Lok Tite on the bolts when I replaced the bushings. Not much room between the skid and the bolts so it was a knuckle buster. I greased everything the night before with some BigLot brand of WD40 and it worked pretty good.
Keep in mind, I only had one side of the truck on stands at a time. Can trust those cheap 2 ton stands from pepboys so i doubled up on each side.
After removing the wheel, I unbolted the lower control arm with no cheater bar, my little rachet killed my hand untorquing that 100 ft lbs.
Next I undid the end link and lower shock mount. Pretty easy on those items. Here is where I got stumped for a bit. I was trying to get a 14mm socket or wrench on that 3rd bolt behind the top of the shock and it was killin me till my neighbor came down and said he had a snap on offset closed end wrench. Holy Crap did that save the day!
I kept the entire shock/spring assembly in tack and removed the unit.
Hickup #2. No spring compressor....well not a real one anyways. I ended up using to rachet straps that I had for my dirtbike and cranked them down one notch at a time equally. WORKED LIKE A CHAMP!
After much thought into what of my basic tools I could use on that stupid top head of the shock, I ended up using some vice grips as tight as I could get them and unthreaded the top nut. Ratchet straps now removable with no recoil at all.
FJ coil/shock and 1/2" spacer mounted and bolted down.
Reverse of above.
Using the handle from the floor jack, I pried the lower arm down and lined up the upper bolts first and just ran a few threads on them to hold it in place.
Now the PITA part. Getting the lower shock mount in it's home was more than a task. That stiffer spring and shock was killing my hands. It seemed about 1-2mm offset or something and was not allowing it to seat properly. with the help of a 2x4, hammer and a big screw driver, it finally took its seat.
Bolted everything back up, torqued it down reinstall wheel and on to the next side.
Time elapsed on when #1.....3 hours!
Wheel #2 took just over an hour becuase I learned my lesson on the drivers side of what to do and not to do.
All in all, it was man world all day in the garage and I had a blast.
Now for the before and after measurements.
1/2 tank of gas
B4
Dr Side 32-3/8"
PS Side 32-3/4"
AFTER
DR Side 35"
Ps Side 35-1/8"
This is after I drove around for about an hour. Checked it again this morning after my front end alignment done by Herbs Automotive
and it is the same. $49.95 for the front end alignment by the way with the coupon from the web site.
I have used them for years and learned real quick that it won't leave the shop till it's right.
Oh, by the way, while everything was apart, I sprayed everything in the wheel well with rubber undercoating and I mean everything. Looks sweet when it dried.
sorry for the phone photos. it's all i have right now.


 ) but Kudos for thinking outside of the box! I will remember that trick