Replace Headlight Bulbs
One of the easiest (and most noticable) modifcations you can perform on your truck is replacing the factory headlights. A set of high-quality aftermarket headlights can not only improve the appearance of your truck, but can also improve your nighttime vision.
When shopping for aftermarket bulbs, it's important to make sure you purchase the correct bulbs. For all Tacoma models, you'll need to purchase size H4 bulbs.
Installing aftermarket bulbs (or replacing a blown factory bulb) is easy. Click the arrow below then follow the directions on the following pages. If you have questions or comments about this procedure, email CustomTacos.
IMPORTANT NOTE: When performing this procedure, it is VERY important NOT to touch any part of the glass lens on either the old or new bulbs. Oils from your fingers can rub off on the bulb and cause them to spontaneously blow when powered on.
It is helpful to go ahead and unpackage the new bulbs before you start. Since it is so important not to touch the glass lenses, I found it helpful to open the packaging of the new bulbs first.
Pop the hood and locate the back of the headlight assembly on either side. Since the battery is on the driver's side of the truck (thus making it harder to work with the rear of the headlight), I found it easiest to do the passenger side headlight first.
Remove the rubber cup weather seal from the wiring harness.
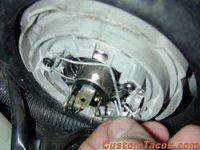
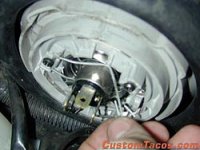
There is a small metal spring-loaded clip that holds the actual bulb in place. Unhook the clip the release the bulb. Be careful not to let the bulb fall out.
There is a small metal spring-loaded clip that holds the actual bulb in place. Unhook the clip the release the bulb. Be careful not to let the bulb fall out.
Install the replacement bulb. It has three tabs on it that will slide into the slots on the headlight assembly.
Replace the rubber cap on the headlight assembly. This is the trickiest part of the installation. Make sure that the wiring harness is securly on the bulb and that the rubber cap is completely on.
That's it. Turn on your headlights and make sure that both bulbs power on.