MALPASSEDlokol
New member
Hey guys, so doing some random forum searching last week and came across [MENTION=51260]Reina[/MENTION] 's Low-Pro roof rack design. I loved the design and wanted more heavy-duty roof mounting anyway so I figured I'd ditch the stock cross bars and go for it.. Thank you [MENTION=51260]Reina[/MENTION]!
I did run into a few hassles along the way so, anyone trying to attack [MENTION=51260]Reina[/MENTION]'s design. Here are a little more item specifics that you'll need.
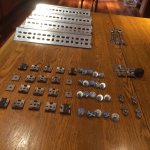
**Mount Bracket-to-Mount Bracket** (4 hardware p/mount)
-1 L-Shape 2 1/4" x 1 1/2" x 48" Metal Bracket $16.00
-1 L-Shape 1 1/2" x 1 1/2" x 48" Metal Bracket $11.00
-16 3/8" x .75" Stainless Bolts $12.00
-16 3/8" Stainless Washers $4.32
-16 3/8" Stainless Nuts $5.60
-Grinder/Metal Saw Blades, ect
-Each full length 48" bracket cut into (4) 1 ft sections
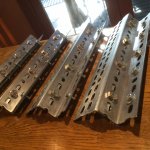
**Adjusting Mounts Profile if Wanted**
-I adjusted the back side bracket holes about 7mm higher so the top of the front bracket, to the top of the rear bracket sat flush. Still with room to maneuver a wrench in order to torque together.
- 3/8" Drill Bit
- Drill Press (recomended)
- Sharpie (adjusted hole marking)
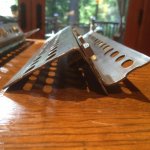
I would recommend using a couple coats of etching primer and giving a good 200+400 grit sand as part of the bare metal painting process. I used an industrial equipment satin BLK spray that turned out great. I had to continuously run inside back and forth for drying due to it being about 50*F outside while shooting it.
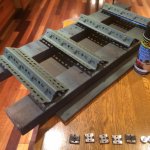
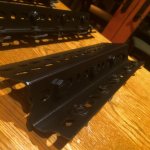
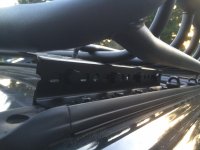
**Mount Bracket-to-Stock Roof Mounted Rails** (5 hardware p/ mount)
-20 6mmx100 Stainless Bolts $6.40
-20 6mm Stainless Washers $2.78
-20 Stock Roof Rail/Crossbar Metal Sliders (*Junk yard/ 2nd+3rd gen fit same rails) $FREE
**Roof Rack-to-Mounting Brackets**
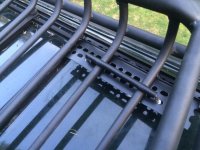
-4 Rola Roof Rack U-Bolts that came with mounting hardware.
-8 8mmx125 Stainless Nylock Nuts $3.44
**Other/Misc**
-1 Spray Can Satin BLK Industrial Paint $5.00
-1 Etching Primer On Hand
-200 and 400 Grit Sand Paper On Hand
-Philips Driver
-Sharpie
COMPLETE TOTAL $66.54
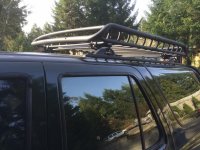
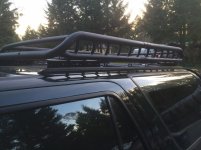
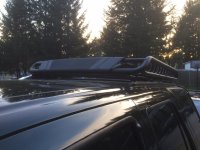
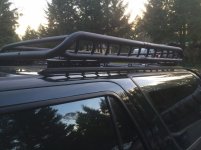
After ditching the factory cross bars and putting together these upgrade mounting brackets, in Total I lost 2.5" of my previous Rola Roof Rack's ride height while still maintaining a clean factory looking style, and gaining significantly stout load capacity for right under $70.00 and a little effort. Maybe gained a pinch of MPG if I'm lucky! :music:
The most important factor for me is the stability and load capacity of which I believe is thoroughly more stout than the factory bars. I got up and stood on the rack and tested each corner, front and back and put excess pressure on the mounts and in my opinion the rack and mounts are hell for stout. *(I'm 200lbs). As far as maxing out the load up there, I would put my money on the stock mounted rails that the brackets are mounted into failing before any component of the new brackets or roof rack have an issue. As of now, I wouldn't hesitate to put 400 lbs up there if need be. Ill have to put that to the test on some upcoming travels. Regardless, I wouldn't have even dared to stand up top the factory cross bars so I'm definitely content. Credit to [MENTION=51260]Reina[/MENTION]!
I did run into a few hassles along the way so, anyone trying to attack [MENTION=51260]Reina[/MENTION]'s design. Here are a little more item specifics that you'll need.
**Mount Bracket-to-Mount Bracket** (4 hardware p/mount)
-1 L-Shape 2 1/4" x 1 1/2" x 48" Metal Bracket $16.00
-1 L-Shape 1 1/2" x 1 1/2" x 48" Metal Bracket $11.00
-16 3/8" x .75" Stainless Bolts $12.00
-16 3/8" Stainless Washers $4.32
-16 3/8" Stainless Nuts $5.60
-Grinder/Metal Saw Blades, ect
-Each full length 48" bracket cut into (4) 1 ft sections
**Adjusting Mounts Profile if Wanted**
-I adjusted the back side bracket holes about 7mm higher so the top of the front bracket, to the top of the rear bracket sat flush. Still with room to maneuver a wrench in order to torque together.
- 3/8" Drill Bit
- Drill Press (recomended)
- Sharpie (adjusted hole marking)
I would recommend using a couple coats of etching primer and giving a good 200+400 grit sand as part of the bare metal painting process. I used an industrial equipment satin BLK spray that turned out great. I had to continuously run inside back and forth for drying due to it being about 50*F outside while shooting it.
**Mount Bracket-to-Stock Roof Mounted Rails** (5 hardware p/ mount)
-20 6mmx100 Stainless Bolts $6.40
-20 6mm Stainless Washers $2.78
-20 Stock Roof Rail/Crossbar Metal Sliders (*Junk yard/ 2nd+3rd gen fit same rails) $FREE
**Roof Rack-to-Mounting Brackets**
-4 Rola Roof Rack U-Bolts that came with mounting hardware.
-8 8mmx125 Stainless Nylock Nuts $3.44
**Other/Misc**
-1 Spray Can Satin BLK Industrial Paint $5.00
-1 Etching Primer On Hand
-200 and 400 Grit Sand Paper On Hand
-Philips Driver
-Sharpie
COMPLETE TOTAL $66.54
After ditching the factory cross bars and putting together these upgrade mounting brackets, in Total I lost 2.5" of my previous Rola Roof Rack's ride height while still maintaining a clean factory looking style, and gaining significantly stout load capacity for right under $70.00 and a little effort. Maybe gained a pinch of MPG if I'm lucky! :music:
The most important factor for me is the stability and load capacity of which I believe is thoroughly more stout than the factory bars. I got up and stood on the rack and tested each corner, front and back and put excess pressure on the mounts and in my opinion the rack and mounts are hell for stout. *(I'm 200lbs). As far as maxing out the load up there, I would put my money on the stock mounted rails that the brackets are mounted into failing before any component of the new brackets or roof rack have an issue. As of now, I wouldn't hesitate to put 400 lbs up there if need be. Ill have to put that to the test on some upcoming travels. Regardless, I wouldn't have even dared to stand up top the factory cross bars so I'm definitely content. Credit to [MENTION=51260]Reina[/MENTION]!
Attachments








Last edited: