Minimalist 265/75/16 Tire Clearance Solution

reelamin

New member
Crud...265 not 255...MODs can you change the title please?

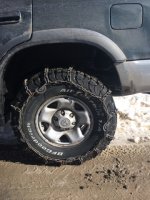
I have a need to fit snow chains on my rig (96 SR5 256K) for a few months of the year only. This is a must have situation for me. I also want to run this tire size because I have multiple vehicles using it and have all the chains for it. I have a totally worn out original suspension. I used this Forum and gained a huge amount of information. So here is what I am doing to solve my issue with the parameters I want. I hope it's not too picture heavy, but I like visual aids.

I NEED TO FIT a 305/75/16 EASILY to avoid chain contact.

Any measurements/weights will be exact none of this "its about, looks like, probably, etc." as information like that does not give answers so people can make a decision if it will work to help solve their problem.

This is what I call a hunting rig. No question 90% of the driving is on roads and I do no rock crawl or climb ravines. I just park and walk when it gets crazy. One day I will be driving it on old logging roads, and the next will be a 5hr one way day trip to go fishing. Planning on a 1k highway one way hunting trip this fall if drawn. So I want a comfortable vehicle, and don't want to have to "herd" it down the road for hours on end. Currently it gets 20mpg and 15mpg at 80mph.

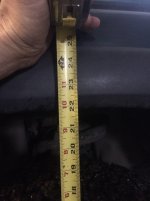
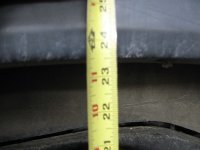
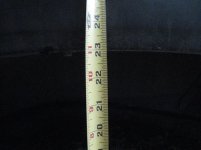
As the front sits now. These tires right at 1k on them. 21" from center of hub to bottom edge of fender.
<a href="http://s1070.photobucket.com/user/reelamin/media/START_zpscly8fulb.jpg.html" target="_blank"><img src="http://i1070.photobucket.com/albums/u494/reelamin/START_zpscly8fulb.jpg" border="0" alt=" photo START_zpscly8fulb.jpg"/></a>

Worn out suspension just for reference. That is strut/shock oil and they all look like this. She wallows down the road like humping a fat chick on a water bed.
<a href="http://s1070.photobucket.com/user/reelamin/media/IMG_3683_zpsygaiy5dq.jpg.html" target="_blank"><img src="http://i1070.photobucket.com/albums/u494/reelamin/IMG_3683_zpsygaiy5dq.jpg" border="0" alt=" photo IMG_3683_zpsygaiy5dq.jpg"/></a>

Suspension Clearance.
<a href="http://s1070.photobucket.com/user/reelamin/media/STOCK%20UCA_zpszpr9veyt.jpg.html" target="_blank"><img src="http://i1070.photobucket.com/albums/u494/reelamin/STOCK%20UCA_zpszpr9veyt.jpg" border="0" alt=" photo STOCK UCA_zpszpr9veyt.jpg"/></a>

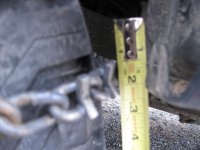
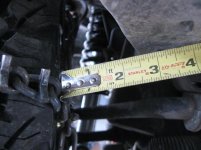
The problem and no matter what either the main or cross link hits.
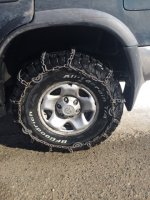
<a href="http://s1070.photobucket.com/user/reelamin/media/STOCK%20UCA%20CHAINS_zpsnel85kie.jpg.html" target="_blank"><img src="http://i1070.photobucket.com/albums/u494/reelamin/STOCK%20UCA%20CHAINS_zpsnel85kie.jpg" border="0" alt=" photo STOCK UCA CHAINS_zpsnel85kie.jpg"/></a>

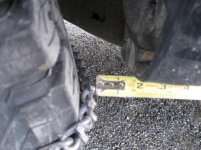
So I then added some 1.25" Spidertrax and measured the differences in clearance. These will come off after March and go back on in October. No adjustment or re-alignment needed. Just ran them down the road at 80mph for about 20 miles. Drove exactly like it did before putting them on. I got them delivered to my door for $96 from http://www.morris4x4center.com/ Crazy fast shipping!
<a href="http://s1070.photobucket.com/user/reelamin/media/IMG_3685_zps2ykcyhf0.jpg.html" target="_blank"><img src="http://i1070.photobucket.com/albums/u494/reelamin/IMG_3685_zps2ykcyhf0.jpg" border="0" alt=" photo IMG_3685_zps2ykcyhf0.jpg"/></a>

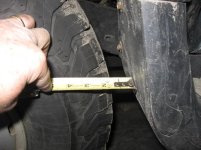
Front Splash Apron stock and trax is same distance.
<a href="http://s1070.photobucket.com/user/reelamin/media/SPLASH%20STOCK_zpswofz2nqm.jpg.html" target="_blank"><img src="http://i1070.photobucket.com/albums/u494/reelamin/SPLASH%20STOCK_zpswofz2nqm.jpg" border="0" alt=" photo SPLASH STOCK_zpswofz2nqm.jpg"/></a>

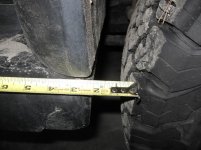
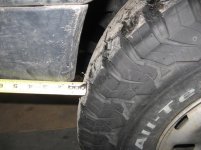
To rear/running board tock and trax is same distance. Yes this is warped out and I can do things to give it more space. I do not want to remove my boards, but I will if I have to. Those additional mods will happen as we go if needed.
<a href="http://s1070.photobucket.com/user/reelamin/media/BOARD%20STOCK_zpscfkchufy.jpg.html" target="_blank"><img src="http://i1070.photobucket.com/albums/u494/reelamin/BOARD%20STOCK_zpscfkchufy.jpg" border="0" alt=" photo BOARD STOCK_zpscfkchufy.jpg"/></a>

More to come later no more time now.
 
Last edited:
Register to hide this ad
I have some time to add in a few more measurements and results from yesterday. My body lift kit did not arrive as expected and it snowed last night. Putting off the snow removal.

I forgot to mention all the measurements I obtained were the minimum distances I could create with the wheels turning in or out.

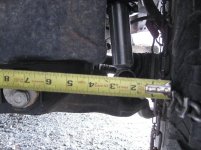
Suspension with spacer. Forgot to take without chains on, but you can see how it the spacer solved that issue.
<a href="http://s1070.photobucket.com/user/reelamin/media/SPACE%20CHAIN%20II_zps3cx7nix5.jpg.html" target="_blank"><img src="http://i1070.photobucket.com/albums/u494/reelamin/SPACE%20CHAIN%20II_zps3cx7nix5.jpg" border="0" alt=" photo SPACE CHAIN II_zps3cx7nix5.jpg"/></a>
<a href="http://s1070.photobucket.com/user/reelamin/media/SPACE%20CHAIN_zpsbt0j90xm.jpg.html" target="_blank"><img src="http://i1070.photobucket.com/albums/u494/reelamin/SPACE%20CHAIN_zpsbt0j90xm.jpg" border="0" alt=" photo SPACE CHAIN_zpsbt0j90xm.jpg"/></a>

Stock at splash apron/bumper looking back.
<a href="http://s1070.photobucket.com/user/reelamin/media/REAR%20SPACE%20FENDER_zpsnvakcjb8.jpg.html" target="_blank"><img src="http://i1070.photobucket.com/albums/u494/reelamin/REAR%20SPACE%20FENDER_zpsnvakcjb8.jpg" border="0" alt=" photo REAR SPACE FENDER_zpsnvakcjb8.jpg"/></a>
Spacer
<a href="http://s1070.photobucket.com/user/reelamin/media/SPACED%20BUMPER%20FRONT_zpsxchbo89m.jpg.html" target="_blank"><img src="http://i1070.photobucket.com/albums/u494/reelamin/SPACED%20BUMPER%20FRONT_zpsxchbo89m.jpg" border="0" alt=" photo SPACED BUMPER FRONT_zpsxchbo89m.jpg"/></a>

Stock looking forward.
<a href="http://s1070.photobucket.com/user/reelamin/media/STOCK%20FENDER%20REAR_zpsjz41sthe.jpg.html" target="_blank"><img src="http://i1070.photobucket.com/albums/u494/reelamin/STOCK%20FENDER%20REAR_zpsjz41sthe.jpg" border="0" alt=" photo STOCK FENDER REAR_zpsjz41sthe.jpg"/></a>
Spacer
<a href="http://s1070.photobucket.com/user/reelamin/media/REAR%20FENDER%20SPACED_zpse3feqla0.jpg.html" target="_blank"><img src="http://i1070.photobucket.com/albums/u494/reelamin/REAR%20FENDER%20SPACED_zpse3feqla0.jpg" border="0" alt=" photo REAR FENDER SPACED_zpse3feqla0.jpg"/></a>
Stock looking vertically down.
<a href="http://s1070.photobucket.com/user/reelamin/media/STOCK%20FENDER%20DOWN_zpsiearkmvt.jpg.html" target="_blank"><img src="http://i1070.photobucket.com/albums/u494/reelamin/STOCK%20FENDER%20DOWN_zpsiearkmvt.jpg" border="0" alt=" photo STOCK FENDER DOWN_zpsiearkmvt.jpg"/></a>
Spacer
<a href="http://s1070.photobucket.com/user/reelamin/media/SPACED%20FENDER%20DOWN_zpscihktrse.jpg.html" target="_blank"><img src="http://i1070.photobucket.com/albums/u494/reelamin/SPACED%20FENDER%20DOWN_zpscihktrse.jpg" border="0" alt=" photo SPACED FENDER DOWN_zpscihktrse.jpg"/></a>
Front Frame Stock
<a href="http://s1070.photobucket.com/user/reelamin/media/SPACED%20FENDER%20DOWN_zpscihktrse.jpg.html" target="_blank"><img src="http://i1070.photobucket.com/albums/u494/reelamin/SPACED%20FENDER%20DOWN_zpscihktrse.jpg" border="0" alt=" photo SPACED FENDER DOWN_zpscihktrse.jpg"/></a>
Spacer
<a href="http://s1070.photobucket.com/user/reelamin/media/FRONT%20INSIDE%20SPACE_zpskxj8xbv0.jpg.html" target="_blank"><img src="http://i1070.photobucket.com/albums/u494/reelamin/FRONT%20INSIDE%20SPACE_zpskxj8xbv0.jpg" border="0" alt=" photo FRONT INSIDE SPACE_zpskxj8xbv0.jpg"/></a>
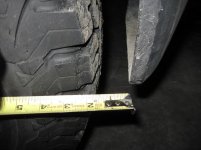
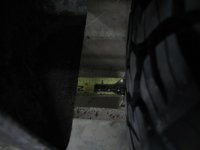
Rear Frame Stock. It was making a tiny amount of contact. I never felt or heard this. It barely rubbed through the factory frame coating.
<a href="http://s1070.photobucket.com/user/reelamin/media/REAR%20INSIDE%20STOCK_zpsa3lmmiwa.jpg.html" target="_blank"><img src="http://i1070.photobucket.com/albums/u494/reelamin/REAR%20INSIDE%20STOCK_zpsa3lmmiwa.jpg" border="0" alt=" photo REAR INSIDE STOCK_zpsa3lmmiwa.jpg"/></a>
<a href="http://s1070.photobucket.com/user/reelamin/media/IMG_3682_zpsu5wduhhc.jpg.html" target="_blank"><img src="http://i1070.photobucket.com/albums/u494/reelamin/IMG_3682_zpsu5wduhhc.jpg" border="0" alt=" photo IMG_3682_zpsu5wduhhc.jpg"/></a>
Spacer and it also moved the tread edge back over 2".
<a href="http://s1070.photobucket.com/user/reelamin/media/REAR%20SPACE_zpsiyd71rfw.jpg.html" target="_blank"><img src="http://i1070.photobucket.com/albums/u494/reelamin/REAR%20SPACE_zpsiyd71rfw.jpg" border="0" alt=" photo REAR SPACE_zpsiyd71rfw.jpg"/></a>
<a href="http://s1070.photobucket.com/user/reelamin/media/REAR%20SET%20BACK%20SPACE_zpshekzt11g.jpg.html" target="_blank"><img src="http://i1070.photobucket.com/albums/u494/reelamin/REAR%20SET%20BACK%20SPACE_zpshekzt11g.jpg" border="0" alt=" photo REAR SET BACK SPACE_zpshekzt11g.jpg"/></a>

I still do not have enough clearance for the chains from the front splash apron and the rear/running board area. All I have for now as my body lift has not arrived. I got my spacers from Morris 4x4. Best price to my door when I ordered. They arrived literally from across the nation faster than my body lift from 1 state away standard shipping.
Jeep Parts, Jeep Accessories & Soft Tops for Jeep Wrangler ? CJ & Jeep Cherokee Parts by Morris 4x4
 
Last edited:
Do you run the chains F+R then? Rear by itself isn't enough?

Based on the size of those chains (not just cheesy cables), you'll need to clearance as if you have 2" larger tires than you do. Look up what it takes to clearance for 33"+ tires and you'll have an idea... This is especially more important since any small incidental contact (frame, plastic) will cause damage rather than just a bit of rubbing.

For frame contact - just don't turn to full lock. Steering stops seem like overkill for this issue.

For body contact - body lift and clearancing the inner fenders. You can cut out the inner half of the transition piece to gain a bit of room, then deal with the pinch weld to get around an extra inch before needing to tub or anything serious. You may need to cut some of the front bumper plastic.

-Charlie
 
Do you run the chains F+R then? Rear by itself isn't enough?

Based on the size of those chains (not just cheesy cables), you'll need to clearance as if you have 2" larger tires than you do. Look up what it takes to clearance for 33"+ tires and you'll have an idea... This is especially more important since any small incidental contact (frame, plastic) will cause damage rather than just a bit of rubbing.

For frame contact - just don't turn to full lock. Steering stops seem like overkill for this issue.

For body contact - body lift and clearancing the inner fenders. You can cut out the inner half of the transition piece to gain a bit of room, then deal with the pinch weld to get around an extra inch before needing to tub or anything serious. You may need to cut some of the front bumper plastic.

-Charlie

Sorry for the delay...dont know how to set up notice someone posted. We run chains because we need them not because the sign says so. I have but do not like walking miles out of the hills because I got stuck. I normall run chains on the front first and if I need more then both only on the rear. Just depends on the situation and what the weather does. We even run drag chains (nothing more than chains on one or more of the rear most tires) on our trailers so they don't come around on top of us.

I need full clearance regardless for the just listed reason...can't have limitations...just need to be able to turn, brake, gas, how the situation requires. If I tear something up...well I'm walking and I only like to walk if there is something to kill or possibly kill.

I have spent months on here checking out different options and lifts. Exactly why I am going the way I am. Hope this just compiles it for others like me.

See my next post. I do not want to cut, hammer, and otherwise half bake some solution. Will I? Absofreakinglutely....but that is my last resort.

Thanks for the input.
 
Last edited:
My latest parts came in to create some clearance. I got them from a member here for $100, and he shipped exactly when he said he would. The bolts did not fit my rig but the owner made it right very quickly and as well as I could expect. http://www.fatpatsbodylifts.com/
<a href="http://s1070.photobucket.com/user/reelamin/media/IMG_3718_zps5h93fie2.jpg.html" target="_blank"><img src="http://i1070.photobucket.com/albums/u494/reelamin/IMG_3718_zps5h93fie2.jpg" border="0" alt=" photo IMG_3718_zps5h93fie2.jpg"/></a>


The lift showed up later today, so I started boiling a few heads. Might be a day or so before I can start the lift. Should be any day.
<a href="http://s1070.photobucket.com/user/reelamin/media/IMG_3719_zpsprek77hj.jpg.html" target="_blank"><img src="http://i1070.photobucket.com/albums/u494/reelamin/IMG_3719_zpsprek77hj.jpg" border="0" alt=" photo IMG_3719_zpsprek77hj.jpg"/></a>
 
Last edited:
1.25" spacers will make the clearance worse on the fender wells. Also check upper control arm clearance at full droop through steering angle. Let's hope the body lift is enough.

I think you will still have to trim some hidden plastic (running board transition piece), flattening the pinch weld and re-mold the inner liner to get the rest of the clearance you will need.

This is the kind of thread with more info you might need:
http://www.toyota-4runner.org/3rd-gen-t4rs/97131-33s-16s.html

-Charlie
 
1.25" spacers will make the clearance worse on the fender wells. Also check upper control arm clearance at full droop through steering angle. Let's hope the body lift is enough.

I think you will still have to trim some hidden plastic (running board transition piece), flattening the pinch weld and re-mold the inner liner to get the rest of the clearance you will need.

This is the kind of thread with more info you might need:
http://www.toyota-4runner.org/3rd-gen-t4rs/97131-33s-16s.html

-Charlie
I cant get to the right computer to update the thread with more pics. I have the body lift installed but no time for uploading today.

Thanks for the input. I have looked at all kinds of threads and do appreciate the link. I measured mine and posted up the exact distances with the tape present. I had no difference at minimum available clearance (turned tire until it was at closest distance) on the splash apron and the back of the well (Front running board plastic) I realize others say it does and expected it , but my tape measure didn't reflect it.
 
One more thing that might help (and is less 'hacky'). Alignment. If you have your alignment tech go for max caster instead of mid-range, it can get more clearance at the rear of the wheel well (maybe another 1/2"? Not exactly sure). But it is 'free' and doesn't require any hacking of the body.

I run pretty much the same size tire (265/70-17), but never plan on using chains in the front, which makes clearance for me much easier.

-Charlie
 
Well I got my body lift on. This is a super easy and fast mod for some clearance gain. I had to go to town and buy some bolts (provided did not fit), but I'm working with the maker to get a little refund. Yep, it increased my lift by exactly 1"...lol. This is not a lift you have to guess or hope...it is what it advertises.

I have been slammed trying to edit a video to make $50. No time to get the measurements done. I can tell it created lift, but it does not look like it gained me enough in the areas I need. (Front and rear of tire) I will get those measurements ASAP and see how and if they actually changed.
<a href="http://s1070.photobucket.com/user/reelamin/media/IMG_3739_zpsejmjqr33.jpg.html" target="_blank"><img src="http://i1070.photobucket.com/albums/u494/reelamin/IMG_3739_zpsejmjqr33.jpg" border="0" alt=" photo IMG_3739_zpsejmjqr33.jpg"/></a>
 
Photo bucket sucks dirty butt holes!!! So I am doing my best to get photos attached. I am NOT a computer guy.

I had some time today to work on the rig. I did gain some clearance where I need it now. Mainly right in front and directly behind the tires both front and rear. I used a jack to simulate what I would gain with suspension lift.

Front Splash Apron: I did not gain anything with just the body lift. I did gain about .5" with an additional 1" suspension lift. I will just cut it if there is contact after the suspension update.

Front of Running Board: I gained about .5" with the body lift, and another .5" with a 1" suspension lift. Same with this I will just remove it if I am getting chain contact after suspension update.

I did not have the needed clearance in the back because it is sagging so bad. I figured I would be good with new springs and a 2" lift. I may not clear both front and rear after I "lifted" it. Both are a easy fix by removing the back of the running board and replacing the stock splash guard with a flat aftermarket one. I could cut the stocker but that would be a waste.
 

Attachments

  • IMG_3819.jpg
    IMG_3819.jpg
    64.6 KB · Views: 898
  • IMG_3817.jpg
    IMG_3817.jpg
    64.4 KB · Views: 896
  • IMG_3828.jpg
    IMG_3828.jpg
    72.7 KB · Views: 876
  • IMG_3829.jpg
    IMG_3829.jpg
    52.3 KB · Views: 872
Last edited:
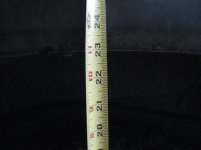
...
Front Splash Apron: I did not gain anything with just the body lift. I did gain about .5" with an additional 1" suspension lift. I will just cut it if there is contact after the suspension update.


Front of Running Board: I gained about .5" with the body lift, and another .5" with a 1" suspension lift. Same with this I will just remove it if I am getting chain contact after suspension update.
...

How do you think all these adjustments will do when the suspension flexes upwards and tire flexes backwards during normal driving, bumps and while turning in those conditions? Gotta account for that too unfortunately. Luck and enjoy. :cowboy:
 
How do you think all these adjustments will do when the suspension flexes upwards and tire flexes backwards during normal driving, bumps and while turning in those conditions? Gotta account for that too unfortunately. Luck and enjoy. :cowboy:

Thanks for the input. Absolutely must factor that in as that is basic reality. If I can maximize clearance (and maintain as stock as possible) as it sits that will carry over into real world use. I have heard one fractional tire hit so far with just the spacers on. I stopped and checked immediately and could not tell where it was hitting as there was nothing visible. I tried several times to replicate it by going over the same area several times with no luck. I will keep updating this as I go so other can hopefully save some money and know what worked or did not work in one situation.
 
I drove it today with no chains on. I hit a few ditches, snow berms, steep angles while turning both up and down with no contact. I found out while putting the body lift on the OEM bumber is about equal to paper.

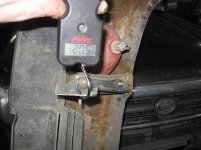
OEM bumper with, splash apron, turn signals, brackets, license plate and frame. Yes it is kick butt 20.5lbs of junk! So I had hoped to get by without one, but it looks like an aftermarket bumper has to happen. I know a Shrockworks with hoops is right at 120lb....so I threw on an additional 120 with the bumper for 140lbs. It squatted the 256k OEM suspension a whole entire 3/8".
 

Attachments

  • IMG_3770.jpg
    IMG_3770.jpg
    62.4 KB · Views: 859
  • 120lb.jpg
    120lb.jpg
    132.4 KB · Views: 862
  • Before 120lb.jpg
    Before 120lb.jpg
    89.9 KB · Views: 863
  • After 120lb.jpg
    After 120lb.jpg
    86.4 KB · Views: 867
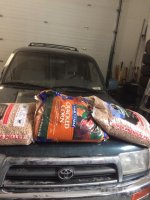
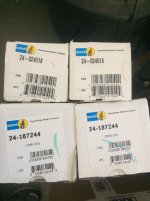
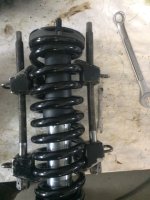
So, after spending a stupid amount of time on this site and the internet as a whole I ordered up some Bilstein 4600's. They arrive and then I find out Bilstein says only on a stock height vehicle. WTF??? Yep right on their descriptions it says it. So, I have to lose some money and send them back to get some 5100's. I want what will work and will not lie to them when they fail, so it has to be 5100's. My 906 springs showed up and I was ready, but thanks to a post by phattyduck I believe he saved me issues down the road.

BILSTEIN 4600'S ARE FOR STOCK SUSPENSION....IF YOU LIFT IT AT ALL PER BILSTEIN YOU NEED 5100'S. That is if you want them to warranty their product.
 

Attachments

  • thumbnail_IMG_3524.jpg
    thumbnail_IMG_3524.jpg
    129.8 KB · Views: 806
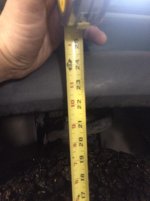
I put my 906/5100's on the rear yesterday. I gained lift to exactly what everyone else has experienced 22" center of hub to fender. Also axle is perfectly in the same location as before the lift so no panhard bar issues. It was .5" higher until I drove it a little and measured again dead on at 22". Remember I have a 1" body lift so the tape will read more. I did not gain anything but did gain .5" at the rear. I pretty much knew this for the rear as I had jacked it up to find out. I needed suspension anyway so not a big deal.

EDIT: After 2k miles it has settled by .5", so now sitting at 21.5" center of hub to fender. No heavy weight hauled...just normal driving on some dirt roads. Some wash boardy dirt and pretty rough frost heaved pavement.
 

Attachments

  • IMG_3930.JPG
    IMG_3930.JPG
    117.2 KB · Views: 751
  • IMG_3955.jpg
    IMG_3955.jpg
    51.8 KB · Views: 737
  • IMG_3932.JPG
    IMG_3932.JPG
    89.3 KB · Views: 734
Last edited:
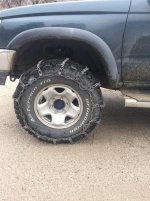
Here is what I did so far for 'street clearance' on my 4Runner with the same diameter tires as you (265/70-17). No body lift, stock 2WD suspension sagging with a bit of extra 4WD weight:

51C08064-FCB7-4365-A0FD-05FABF0B2466_zps2k3nvb88.jpg~original


CF7518E9-0BD9-480D-850F-5C9C07C1533F_zpscnlzy0u9.jpg~original


You can see where I cut the inner section off the running board end cap and removed one bolt. This is good enough to keep the rubbing to an absolute minimum on the street. It does touch the liner a bit under compression.

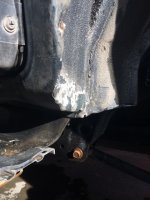
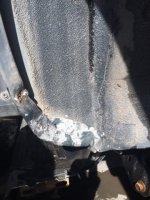
Behind the bulge in the plastic fender liner is the body pinch weld that can be pounded flat, then plastic remolded close to the body for full clearance without chains. Externally, you won't be able to see any modifications. That's my plan, as I will never have chains on the front and won't be going up in tire size from here.

For chain clearance, you will need to do more even with the body lift due to the spacers (make sure it clears when flexed!).

-Charlie
 
Here is what I did

Thanks I really appreciate the input. I went with the 5100's because of your input. I think they will help me on the front because of their adjustability.

I pretty much knew where I was going to end up with the lift portion, but as i said the 256K suspension needed replaced. I simply jacked it up on each end and measured before I ever started this. It has been close but not exactly so as I do each change. Main reason I did this was hopefully get some info out there to help others decide what they want to try.

I really did not see a huge difference in clearance because of the spacers on the outside stuff. For my application I gained what I needed for the UCA and frame distances. It moved the possible contact point but created more space in that process.

I just ordered my 880 springs today and KYB strut mounts. My 1" Diff drop should be here this week. After I get them put together, I will need to coordinate my install time with the alignment shop. After that I'm slapping some chains on it and I will know what needs to come off or get modified.
Thanks again and don't hesitate to throw ideas at me!!
 
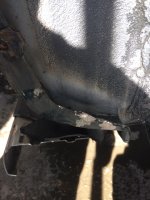
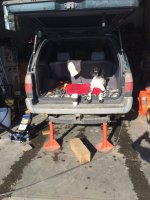
I knew this was going to happen, but I went through this process anyway. So took it up to run with some chains actually on it after installing the rear suspension. Obviously it doesn't take a genius to see it probably will hit. Took off the stock mud flaps, and gained all I possibly could need at the rear. Will just add some flat plastic flaps and gain spray/debris reduction and still clear. The front...hit the plastic at end of running boards at 10mph...bolts stripped in plastic so just ripped them off. Then they started hitting the inside plastic of the splash apron at just under 20mph...so cut it for clearance. Then it barely touched Pinch Weld at 40mph on whoops compression and started to hit noticeably at 50mph. So I took the hammer to it and it will clear no matter what. Just waiting for shop to heat up, dry everything, caulk the hell out of it, install new flaps, and the rear is done! What a great day to be able to work in a T-shirt with the shop door open on Feb 11th!!.
 

Attachments

  • thumbnail_IMG_3622.jpg
    thumbnail_IMG_3622.jpg
    71.9 KB · Views: 295
  • thumbnail_IMG_3623.jpg
    thumbnail_IMG_3623.jpg
    67.8 KB · Views: 273
  • thumbnail_IMG_3634.jpg
    thumbnail_IMG_3634.jpg
    96.6 KB · Views: 277
  • thumbnail_IMG_3636.jpg
    thumbnail_IMG_3636.jpg
    87.2 KB · Views: 275
  • thumbnail_IMG_3637.jpg
    thumbnail_IMG_3637.jpg
    72 KB · Views: 280
  • thumbnail_IMG_3644.jpg
    thumbnail_IMG_3644.jpg
    99.8 KB · Views: 280
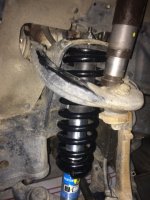
So, I finally am ready for an alignment tomorrow...(postponed now but thats another story) so I put my front 880/5100's on the front. Initially I gained exactly 1" of lift but only drove it around a little. I'm sitting 22" center of hub to fender. No measurements as I have some old tires on it for the 30 mile drive to the alignment shop. Will update with measurements hopefully next week if I can actually make it in.

I am going to have to bash the pinch weld, and probably cut the fender for clearance. I know, I know, I could have done this easier and cheaper......but not what I was hoping for. Lots of lessons learned.
 

Attachments

  • thumbnail_IMG_3733.jpg
    thumbnail_IMG_3733.jpg
    56.3 KB · Views: 265
  • thumbnail_IMG_3731 (1).jpg
    thumbnail_IMG_3731 (1).jpg
    59.3 KB · Views: 256
Last edited:
Finally got it in for alignment last week, and tested out the tire chains and BAM A LAM...boom shaaaka bowwww wowwww...they fit with no issues now. I still need to install some plain flat mudflaps, and melt/bend them at a sharp angle back under the front of the running boards. The factory end cap had to come off because I could not melt/bend it to clear. The arch area of the end cap was the problem area. Ran it to 50MPH with no issues and full turn into some bumps and drops....no contact at all any place.

Must Do IMO:
I got my new suspension with a 1" lift, and a 1" body lift. Hub to fender on front is 23" and rear is 22.5" with 2K on rear and only 150 miles on front. Even if front settles .5" I will still clear. I had to have wheel spacers of at least 1", remove front/back running board end caps, remove OEM rear mud flaps, smash rear pinch weld, cut out inside area rear fender flare front lower. Hope it helps someone.
 

Attachments

  • IMG_3958.jpg
    IMG_3958.jpg
    74.6 KB · Views: 231
  • IMG_3964.JPG
    IMG_3964.JPG
    125.7 KB · Views: 243
  • IMG_3961.jpg
    IMG_3961.jpg
    76.3 KB · Views: 239
  • IMG_3963.jpg
    IMG_3963.jpg
    59.9 KB · Views: 229
  • IMG_3955.jpg
    IMG_3955.jpg
    51.8 KB · Views: 231
  • thumbnail_IMG_3753.jpg
    thumbnail_IMG_3753.jpg
    136.9 KB · Views: 270

Members online

Forum statistics

Threads
278,312
Messages
3,554,083
Members
248,016
Latest member
Advally Service

Trending content

Back
Top