Hello my peeps! My '98 (bought new) which was totaled last yr is back. I wanted to give back to the community.
I bought a Napa compressor and modified it. After watching numerous videos, this was the design i went with:
-removed the napa hose and installed a pressure switch (1/8" npt) in it's place. this shuts down the compressor as soon as i stop inflating. Amazon.com
-drilled a 1/4" outlet in the air duct rod and tapped it using this. this doubles the air outlet's diameter. https://www.amazon.com/gp/aw/d/B01MDV3A30?psc=1&ref=ppx_pop_mob_b_asin_title
- added various 1/4" npt fittings (nipple, 90° elbow, coupler.
Amazon.com
Amazon.com
Amazon.com
-i believe you need a 5mm allen to remove the 8 bolts on the compressor caps. i removed everything from the air duct before drilling. i didnt want metal shavings in my compressor heads or air lines.
-i removed all circuitry. if it fails, i cant fix it easily. so i replaced it w a relay. the compressor draws about 90a. So a 200a relay is fine. i got a 300a. Doesnt make any difference.
https://www.amazon.com/gp/aw/d/B0859BZJNW?psc=1&ref=ppx_pop_mob_b_asin_title
-i decided on 2awg wire (cuz i had extra) for the power cable but i wouldnt go smaller than 4awg. It reduces resistance (and it's byproduct, heat). To connect the compressor's wire (approx 7awg) to the 2awg, i bought this, added ferruls to ea wire, added some solder and screwd the compression nuts down. i then used (red) sealing shrink wrap over it. There are other solutions to butt splice, but this was the most convenient and nearly the smallest option.
https://www.amazon.com/gp/aw/d/B09NJTY12W?psc=1&ref=ppx_pop_mob_b_asin_title
-90° terminal connectors on pressure switch. since i rotated the 1/8" outlet so it faces down, i used 90° connectors. something like these:
https://www.amazon.com/smseace-Insu...2lkZ2V0TmFtZT1zcF9waG9uZV9zZWFyY2hfYXRm&psc=1
-had to make 3 jumper wires (fr power switch to pressure switch, pressure switch to relay, and fr relay's big negative terminal to the smaller terminal above it (diagram below).
-i used 2 cable ties for power/ground wire support. one was 3/8" iirc and the other was 1/2". sourced at Ace Hardware. the size you choose will depend on how large of wire you use to plug your compressor into your truck's power.
-the 2 cable ties, power switch & the relay were screwed into the compressor using self tapping screws. my advice, drill the holes very small/carefully. after drilling, use a probe to see how much space you have to screw something down. You dont want to puncture anything beneath the outter shell. try to avoid getting shavings in the pump.
- all connections either used double lined heat shrink or heat shrink connectors.
-nothing extends past the compressor's base plate, nor above the two pump heads so that it packs as small as it can.
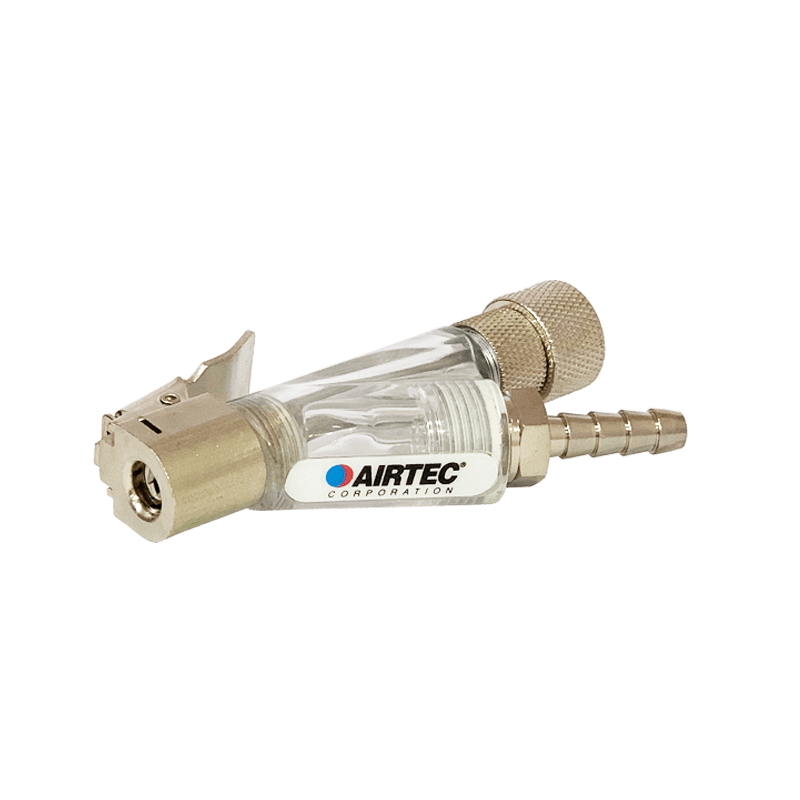
-the slightly angled (up) coupler is simply to help prevent my air hose from touching a hot pump head.
-power switch. i used the switch that came w the compressor. To mount it, i cut the mount out of the original plastic cover so i could reuse it. This worked great. I put it in a vice and used a heat gun to bend the bottom. With the foot now at 90°, i drilled a hole through it and the outter compressor housing and secured it w another self tapping screw. The screw had a washer on the top and bottom. the bottom one is just to add a little space betw the hot compressor's outter shell and the plastic switch holder.
-anderson plug. i had this on hand already. if you order one, youll need proper lugs, crimper, heat shrink, etc. the anderson is the 150a model.
-why didnt i hard wire in my engine bay?
1. heat is a compressor's worst enemy.
2. i would have either needed twice as long of an air hose (to reach my overland trailer tires) or a more complicated install running air hose to the rear bumper and mounting a coupler there.
3. i have a gx460 too. i want to be able to use the compressor w both vehicles.
4. i already had 2awg wire/150a anderson plug running fr the engine bay to the rear of the truck (so i could use my winch at the rear bumper as well as the compressor)
i think that's it! from what ive seen this easily competes w the arb twin at a fraction of the cost.
Hope this helps someone!
update. dang, i forgot this site only allows the smallest of pics. all of mine are too large. i posted the pics in an overlanding fb group, here:
https://m.facebook.com/story.php?story_fbid=9592632297514894&id=4889671181144386
I bought a Napa compressor and modified it. After watching numerous videos, this was the design i went with:
-removed the napa hose and installed a pressure switch (1/8" npt) in it's place. this shuts down the compressor as soon as i stop inflating. Amazon.com
-drilled a 1/4" outlet in the air duct rod and tapped it using this. this doubles the air outlet's diameter. https://www.amazon.com/gp/aw/d/B01MDV3A30?psc=1&ref=ppx_pop_mob_b_asin_title
- added various 1/4" npt fittings (nipple, 90° elbow, coupler.
Amazon.com
Amazon.com
Amazon.com
-i believe you need a 5mm allen to remove the 8 bolts on the compressor caps. i removed everything from the air duct before drilling. i didnt want metal shavings in my compressor heads or air lines.
-i removed all circuitry. if it fails, i cant fix it easily. so i replaced it w a relay. the compressor draws about 90a. So a 200a relay is fine. i got a 300a. Doesnt make any difference.
https://www.amazon.com/gp/aw/d/B0859BZJNW?psc=1&ref=ppx_pop_mob_b_asin_title
-i decided on 2awg wire (cuz i had extra) for the power cable but i wouldnt go smaller than 4awg. It reduces resistance (and it's byproduct, heat). To connect the compressor's wire (approx 7awg) to the 2awg, i bought this, added ferruls to ea wire, added some solder and screwd the compression nuts down. i then used (red) sealing shrink wrap over it. There are other solutions to butt splice, but this was the most convenient and nearly the smallest option.
https://www.amazon.com/gp/aw/d/B09NJTY12W?psc=1&ref=ppx_pop_mob_b_asin_title
-90° terminal connectors on pressure switch. since i rotated the 1/8" outlet so it faces down, i used 90° connectors. something like these:
https://www.amazon.com/smseace-Insu...2lkZ2V0TmFtZT1zcF9waG9uZV9zZWFyY2hfYXRm&psc=1
-had to make 3 jumper wires (fr power switch to pressure switch, pressure switch to relay, and fr relay's big negative terminal to the smaller terminal above it (diagram below).
-i used 2 cable ties for power/ground wire support. one was 3/8" iirc and the other was 1/2". sourced at Ace Hardware. the size you choose will depend on how large of wire you use to plug your compressor into your truck's power.
-the 2 cable ties, power switch & the relay were screwed into the compressor using self tapping screws. my advice, drill the holes very small/carefully. after drilling, use a probe to see how much space you have to screw something down. You dont want to puncture anything beneath the outter shell. try to avoid getting shavings in the pump.
- all connections either used double lined heat shrink or heat shrink connectors.
-nothing extends past the compressor's base plate, nor above the two pump heads so that it packs as small as it can.
-the slightly angled (up) coupler is simply to help prevent my air hose from touching a hot pump head.
-power switch. i used the switch that came w the compressor. To mount it, i cut the mount out of the original plastic cover so i could reuse it. This worked great. I put it in a vice and used a heat gun to bend the bottom. With the foot now at 90°, i drilled a hole through it and the outter compressor housing and secured it w another self tapping screw. The screw had a washer on the top and bottom. the bottom one is just to add a little space betw the hot compressor's outter shell and the plastic switch holder.
-anderson plug. i had this on hand already. if you order one, youll need proper lugs, crimper, heat shrink, etc. the anderson is the 150a model.
-why didnt i hard wire in my engine bay?
1. heat is a compressor's worst enemy.
2. i would have either needed twice as long of an air hose (to reach my overland trailer tires) or a more complicated install running air hose to the rear bumper and mounting a coupler there.
3. i have a gx460 too. i want to be able to use the compressor w both vehicles.
4. i already had 2awg wire/150a anderson plug running fr the engine bay to the rear of the truck (so i could use my winch at the rear bumper as well as the compressor)
i think that's it! from what ive seen this easily competes w the arb twin at a fraction of the cost.
Hope this helps someone!
update. dang, i forgot this site only allows the smallest of pics. all of mine are too large. i posted the pics in an overlanding fb group, here:
https://m.facebook.com/story.php?story_fbid=9592632297514894&id=4889671181144386