MRoss Build Thread

mross217

New member
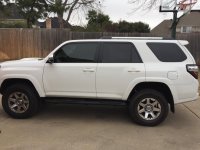
Picked up my 2016 TEP on Dec 31st. Figured that was as good as any day to go shopping. Ended up with a pretty good deal on a Super White. Traded in a 2011 Tundra.
First mod was Plasti-Dipping the front and rear bumpers. First time using it, but I have to say it was easier than expected. (lots of good advice provided on this forum).
Second mod was building a sliding cargo rack, which is why I am starting this thread. I will try to detail the parts and how I built it with "after" pictures (my mistake not taking pictures along the way).

I have since added Bilstein 5100's in the front (set at 1.75") and Bilsteins in the rest with 1" CornFed spacers. Wheels and tires are next!!

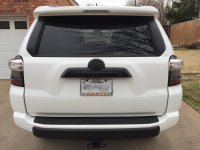
OK, first things first. Here she is today. Feb 21st
IMG_1576 (1).jpg
 

Attachments

  • IMG_1576 (1).jpg
    IMG_1576 (1).jpg
    135 KB · Views: 363
  • IMG_1578 (2).jpg
    IMG_1578 (2).jpg
    132.5 KB · Views: 331
Last edited:
Register to hide this ad
Here are the parts l used for sliding cargo deck

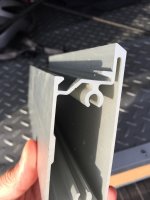
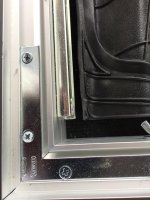
The foundation rails are extruded aluminum rails from a Wayne Dalton 8350 glass aluminum doors. (I'm in the garage door business) here is the profile. They are 1-3/8" wide and about 3" tall.

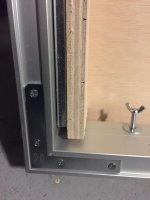
3 extruded aluminum rails: The back rail piece was cut at 39". The side rail pieces were cut at 34". Where these connected I mitered the edges and used 3/4" angles from Lowes to secure the pieces together top and bottom. What worked out perfectly is the top of the extruded rail has a channel that the angle fit snuggly into and the bottom had a channel that the angle fit into to make the connection points very firm and secure.
 

Attachments

  • IMG_1597.jpg
    IMG_1597.jpg
    117 KB · Views: 304
  • IMG_1599.jpg
    IMG_1599.jpg
    132.3 KB · Views: 284
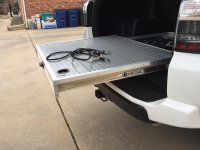
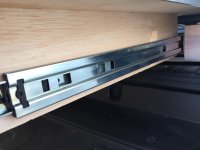
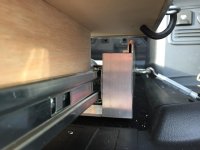
Next I used 32" heavy duty draw slides purchased from Amazon. There are the Firgelli Automations 32" Inch Guide Rail - 400lbs Capacity (there is no way these will handle 400 lbs). I wish I went for the 3" heavier slides, may have to upgrade soon.
 

Attachments

  • IMG_1603.jpg
    IMG_1603.jpg
    123.2 KB · Views: 293
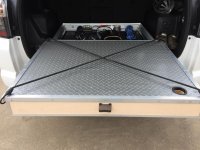
The deck is 3/4" Birch plywood.. I could have gone with a lesser grades, but the cost difference was not that much. The deck is 41" x 35". I capped all the edges in aluminum (Lowes).
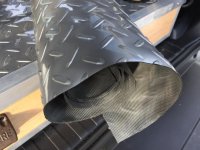
The diamond plate look is vinyl. I used double sided tape and secured it under the aluminum edges. I may be upgrading this to a an aluminum sheet soon. want to see how it hold up. I added the bottle opener for functional reasons!
 

Attachments

  • IMG_1611.jpg
    IMG_1611.jpg
    133.5 KB · Views: 272
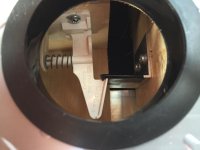
To keep the deck from sliding back and forth I repurposed a child safety cabinet door latch. Had a bag of these laying around so it was an easy choice..

I cut a 2-1/2" hole to reach in to unlatch deck and it slides out.
 

Attachments

  • IMG_1607.jpg
    IMG_1607.jpg
    134.8 KB · Views: 278
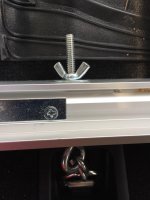
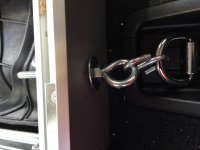
To secure the base to the cargo area i drilled holes in the back rail and ran a eyelet bolt with an S hook. These attach to the D hooks and then the wing nut tightens it snuggly.
 

Attachments

  • IMG_1600.jpg
    IMG_1600.jpg
    129.7 KB · Views: 256
  • IMG_1598.jpg
    IMG_1598.jpg
    124.2 KB · Views: 272
Used toggles bolts to secure the sides tight.. it removes and installs in less that 2 minutes.
 

Attachments

  • IMG_1604.jpg
    IMG_1604.jpg
    122 KB · Views: 263

Members online

Forum statistics

Threads
278,304
Messages
3,554,041
Members
248,016
Latest member
Advally Service

Trending content

Back
Top