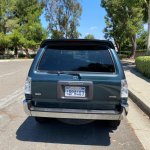
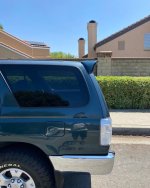
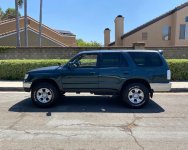
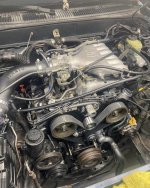
My 1998 4Runner thread

Time for valve covers! .... and fix a coolant leak.

Around that time I decided it was time to address the valve covers. They were obviously leaking and my truck would drop some oil on the ground over night usually. This was my first more serious job on my truck. At this time I also sprang a pretty severe coolant leak. I got home from work one time and then ate dinner went back outside to the garage to work on my bike and I noticed a massive puddle of coolant on the floor. I panicked a little. It took me a while to figure it out but the leak was due to a faulty gasket seal on the passenger and driver side front water jackets that go from the block to the intake manifold. So I had to rip everything off to get down to that so I could replace the gasket. I first tackled the valve cover job as that was easiest and also I could get it buttoned up and I would be good for that job since the water leak job was in the middle of the block. Before I decided to rip my engine apart I of course ordered all the parts associated with the job according to timmy the toolmans video on the valve cover gaskets I also ordeed the block to intake manifold gasket. I would soon be ordering more parts... LOL
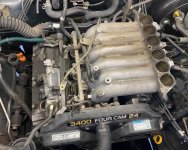
 
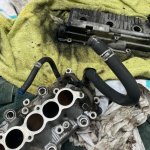
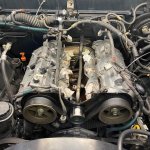
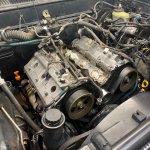
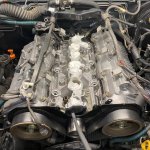
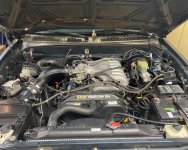
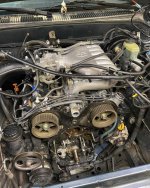
So as I did the valve cover gasket job and had everything apart I also took the time to really clean everything. Pretty much the whole top of the engine was covered in black gunk and it was nasty. The end result was so worth it though. After, you could eat off my engine! It took what felt like forever but I got acetone and cleaned my throttle body, IAC intake plenums and manifold valve covers, etc. There was a lot of oil build up from what I understand is just the normal function of the PCV system.
 
Dirty

Her is some pictures of what I am talking about. Definitley dirty haha
 

Attachments

  • IMG_2438.jpg
    IMG_2438.jpg
    138.5 KB · Views: 806
  • IMG_2477.jpg
    IMG_2477.jpg
    138.2 KB · Views: 788
More parts!

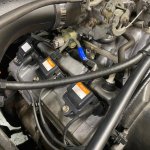
I didn't really watch any videos on taking off the intake manifold but it looked self explanatory so I just took it off and decided to go from there. What I didn't realize is that now I can see my knock sensors. They weren't something I was planning on replacing but I really didn't want to have to take it all off next week because for some reason my knock sensors went bad all the sudden haha. I mean while I was down there... might as well. So about 300 bucks later for some OEM denso sensors and a knock harness I put new ones in. After I got it all buttoned up using a very nice amount of FIPG along with new gaskets I was done fixing the coolant leak. Then I fell in the rabbit hole again. With the whole intake plenums taken off it gives really easy access to the fuel injectors so there we go I dropped 330 bucks for a remanufactured Denso set of 6 injectors from motorwest performance. I figured the old ones were probably tired. So why not! After that it was just a matter of putting the rest of it back together. and I was done! no more leaking from the valve covers.
 
Last edited:
Done!

After:
 

Attachments

  • IMG_2481.jpg
    IMG_2481.jpg
    135.3 KB · Views: 775
  • IMG_2482.jpg
    IMG_2482.jpg
    135.1 KB · Views: 822
  • IMG_2533.jpg
    IMG_2533.jpg
    134.3 KB · Views: 815
  • IMG_2564.jpg
    IMG_2564.jpg
    138.2 KB · Views: 813
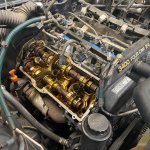
Not sure if you guys can really tell from the pictures the difference but it is so clean now! Also here's a picture of what it looked like under the valve covers. It looked the same on both sides. Pretty good! No sludge build up or anything haha.
 

Attachments

  • IMG_2446.jpg
    IMG_2446.jpg
    137.5 KB · Views: 829
accomplishment

After doing that job I felt quite accomplished with myself that I completed that all on my own. It definitley gave me more confidence to tackle the timing belt job which I would need to be doing soon in the future haha. She was running great with the new injectors and Denso spark plugs. No more coolant leaking either!
 
Last edited:
Engine problem... I thought haha

One day while driving home from Yoshimura with a friend something strange happened with my truck and it definitley worried me. Thankfully it was an easy fix. It would happen completely randomly. I would be driving and the check engine light would come on and then It felt like I had lost so much power with the engine! It was like it only had like 20% of its power. Even full throttle it couldn't even shift to third because I wasn't going fast enough. After a little fourm searching and getting the code from a code scanner it ended up being my throttle position sensor, it was going bad. I thought it was much worse, but thankfully it was an easy fix! Only 70 bucks for a new Denso one. So what I think happens is when the TPS starts going bad it'll send some kind of incorrect or different signal to the ECU and then the ecu recognizes it and puts the truck into a full limp mode, hence the severe loss of power. I think it does the limp mode as a safeguard just in case the TPS somehow goes really bad and doesn't send signals that its doing WOT or something like that when your not, basically haywire.
 
Last edited:
New grill

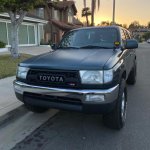
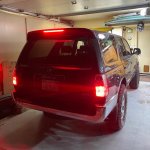
Later in July I decided I wanted a new grill. I liked the OEM one but it was cracked and broken all over and one of the tabs where it sits in the headlight housing was broken off so it would sit hanging down on the passenger side more and I noticed it. So I bought a TRD style grill to replace it. I wanted something with a little flare and I liked the style of it and the gunmetal colored TOYOTA. I also ordered a little red white and blue tricolor dude for my grille too, cuz merika!
 

Attachments

  • IMG_2936.jpg
    IMG_2936.jpg
    129.1 KB · Views: 575
More cosmetics...

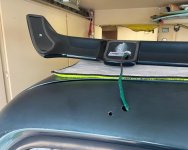
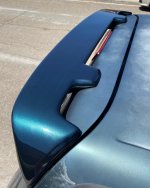
After doing the grille I didn't do really anything to it for about a month but of course I am always planning something. My 4Runner is one of the few that didn't come with the factory wind deflector thing on the rear. I always thought that it looked kinda bare and naked in the back and goofy to be honest with nothing there. Not sure if it was an option to get it or not but mine didn't have it. So I looked up stuff on the internet and came across the Jason Burtman JDM style spoiler for our trucks. I saw a few pictures of customers that got them and had them and that was it, I was getting one! Lucky for me since I didn't have the OEM deflector the install would be easier since I wouldn't have to cover any holes, I would only be making them... haha. This is one of those PONR projects, once you do the damage you hope it comes out good!
 

Attachments

  • IMG_3123.jpg
    IMG_3123.jpg
    127.3 KB · Views: 780
  • IMG_3122 (1).jpg
    IMG_3122 (1).jpg
    131.8 KB · Views: 765
  • IMG_3138 (1).jpg
    IMG_3138 (1).jpg
    127.7 KB · Views: 769
  • IMG_3129 (1).jpg
    IMG_3129 (1).jpg
    129.5 KB · Views: 716
result?

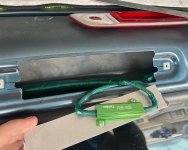
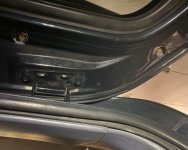
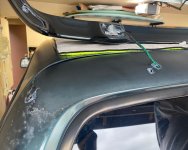
It was a lot of drilling and a lot of scary feelings while me and my dad were doing it. Definitley some custom work going on. I could have had a body shop complete the installation for the spoiler but I didn't want to have to pay money for that and I wouldn't be sure if they got it right. We have a ton of tools at home to our disposal which allowed us to do this job thankfully. Also, since the Spoiler now uses an led strip for the third brake light, if you have full LED's in your tail lights like I do then the LED third brake light will make the ABS light on your dash come one because the resistance of an LED doesn't match the halogen it wants so it's trying to tell you the light is out. The way to get around that is to add a resistor. I just bought some resistors on amazon they were 50W 8ohm and it worked great. Just wired one of the wires on the positive on the light and one to the negative, no more ABS light! My dad made a custom mount for the resistor since I wanted it far away from the wires as possible and also wanted it secure so he made a custom bracket for me to sandwhich outside tabs between the old 3rd brake lens and the hatch and it goes to a part that spins around so we could get it far away from important stuff as possible. Thanks dad!
 

Attachments

  • IMG_3154.jpg
    IMG_3154.jpg
    139.4 KB · Views: 578
  • IMG_3151 (1).jpg
    IMG_3151 (1).jpg
    135.5 KB · Views: 622
  • IMG_3150 (1).jpg
    IMG_3150 (1).jpg
    132.2 KB · Views: 614
  • IMG_3153 (1).jpg
    IMG_3153 (1).jpg
    137.9 KB · Views: 596
  • IMG_3159 (1).jpg
    IMG_3159 (1).jpg
    130.3 KB · Views: 600
  • IMG_3292.jpg
    IMG_3292.jpg
    121.3 KB · Views: 595
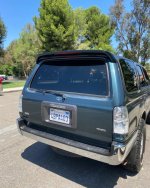
This is another one of those transformation points of my truck for me, at least cosmetically. It looks so much better with the spoiler on. There's just something about it, what it adds to the look of the rear end. I honestly don't know why 3rd gen 4runners never came as an option for you to have that spoiler. Hilux Surfs came with it factory. Also for anyone wondering how it works since I didn't really explain but to keep it short basically the spoiler has 4 legs and you drill starting from the inside of the hatch and you drill thru all the way and then get a big drill bit so you can get a socket in there and you take the 4 supplied screws and put them in thru those holes and it screws into the spoiler and that's what holds it on. It feels pretty darn sturdy actually if I say so myself.
 
E-locker!

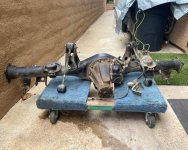
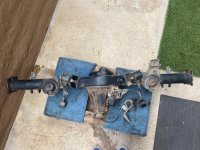
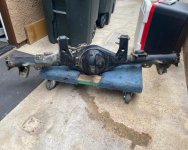
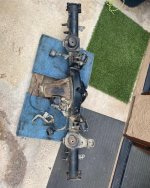
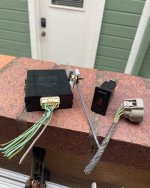
Now, this is something that I searched long and hard, high and low for. It took me a while where at first I tried to find one at a junkyard but after talking to a guy there I realized I wasted like 3 months of my time trying to find one at my local junkyards. All of my local junkyards are LKQ pick-a-part and the guy I was talking with he also has a 3rd gen 4Runner he said that it's basically rigged and you'll never get that stuff there. He said that the workers at the junkyard know that certain peices like e-lockers or the 4runner sport hoods are very valuable pieces and they take it off the truck before it even hits the junkyard. :nono:. Lame! But I guess that's how it goes. Oh well. Pretty much since march I was looking for a e-locker rear end but to no avail. the day before I finished the spoiler was when I did it. There was a guy on offerup parting out a 1998 4Runner and it was a 4x4 with an e-locker. I ended up getting everything for 800 bucks, axle housing with the elocker 3rd member the switch and all the wiring & plugs I needed and 4wd control box. So, what's the catch? I had to go take it all off myself hahaha. The guy was over close to fontana. Turns out it was his buddies truck it got in a roll over accident off roading and I assume it got totaled. So he bought it off his buddy and put it up for parts. So that day me and my buddy I enlisted went out to some guy's house and ripped off a e-locker rear end and brought it home. I haven't actually done anything with it yet but if it wasn't obvious by now I want to do the e-locker rear swap on my truck. Ever since I learned that a lot the 1st gen prerunner tacomas came with the same RR diff lock as some 4x4 4runner I wanted to find one to put in mine. Pre4Runner!
 
Last edited:
Before I transferred the money I wanted to make sure I didn't get screwed at least on the axle housing since I know people sell them for 800 alone so I checked to make sure it was straight and sure enough it is. So I went for it. Everything else ended up being fine. I asked a few times if he knew if it worked and he said it did. I took his word for it which sounds stupid but unless the mechanical e-locker part is messed up the worst that would happen is I would be replacing the gears or the e-locker motor. Both very doable things. After i brought it home I took out the third member and confirmed the locking action works and the gears looks pretty good. I didn't see anything alarming when I was draining the diff fluid out, not sparkly and no chunks on the magnet. The fluid looks like it was recently changed too, was a nice color.
 

Attachments

  • IMG_3119.jpg
    IMG_3119.jpg
    137.7 KB · Views: 879
  • IMG_3120.jpg
    IMG_3120.jpg
    137.1 KB · Views: 893
  • IMG_3118.jpg
    IMG_3118.jpg
    137 KB · Views: 888
  • IMG_3117.jpg
    IMG_3117.jpg
    136.8 KB · Views: 920
  • IMG_3133.jpg
    IMG_3133.jpg
    131.2 KB · Views: 874
I am working on getting that setup on my truck soon, but I want to get a new e-locker motor, repaint the whole thing get new hardware and the little switch on top and I need to figure out if I want to get new wheel bearings and all that while I'm doing the job since my axles will be out. Lots of things I can and probably should replace. My dad also had a good idea that I should take it to a local gear shop and have them check the third member out. Make sure the backlash is good and the gears are good. Just to make sure it just doesn't blow up on me after having it in one week! Good Idea haha! In the meantime I have been saving up my money for some of those cool blue shocks which I am getting soon.
 
Now what's next? timing belt!

After I installed the spoiler in late July fast forward now to mid October. Back in march I ordered a timing belt kit from aircabinman on ebay. A kit that timmy the toolman recommended in his 5vzfe video. Up until October I had been slacking big time on doing the timing belt job and technically I was over due with the last one being done 105k miles ago. So, after the snow summit bike park season finally ended this year and I would be back home on weekends I decided to finally knock it out. No more slacking. So far leading up to this point I have done some decent jobs on my truck now but the timing belt job I knew was more involved and more to mess up lol. But at least thankfully I already had all the parts I needed and didn't have to buy anymore. So I tore into it and started on it. It only ended up taking me 3 days and it was a lot easier than I thought it was going to be. For some context the valve cover coolant job took about 2 weeks to do lol. I was stoked I was able to get the job knock out in a weekend. Started on friday finished on sunday. I proabably could have done it in a couple days but there gets a point where mentally your spent and you need to be done for the day.
 
Last edited:
More cleaning!

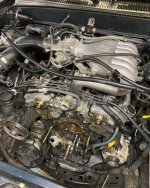
With this job it was very similar in the cleaning to the VC job. I was cleaning everything that I took off and the areas around it. It was an absolute mess. All that oil leaking over the years has created a literal tar factory on my engine. I cleaned off lots of gunk and made it look better. Did each part step by step. And had to use some garage mechanic skills since I didn't have any of the fancy tools to get like the cam gears off or the seals pressed in. I ended up cutting up the old timing belt and wrapping a section around the cam gear and then lots of gorilla tape just to be sure and then used a chain vice grip an impact to get it off. Then same trick but had someone hold the vice grip to tighten on. After getting everything cleaned and all the new parts on and back together and checking like 8 times that the timing was lined up and correct I buttoned it all up. I had to do the 2x4 trick to get the crank pulley bolt tight. Man is that sucker TIGHT. Both off an on. I used the starter bump method to get it loose with a breaker bar. getting to 217lbs is also ridiculous at the angle available in the engine bay I had my full body weight in my driver fender pulling as hard as I could with the torque wrench. Got it done nonetheless.

Last picture was right after I pulled the pin on the hyd. tensioner, with the new belt, idlers, tensioner and water pump on. Also it was really nice finally doing this job now because I don't have squeaky accessory belt anymore. My ALT, PWR. STR., and A/C belts were all old and cracked and one of them squeaked pretty loud, worst on startup and got quieter once it was warm but still audible. Now it's silent as can be.
 

Attachments

  • IMG_3413.jpg
    IMG_3413.jpg
    142.1 KB · Views: 599
  • IMG_3415.jpg
    IMG_3415.jpg
    141.7 KB · Views: 585
  • IMG_3430.jpg
    IMG_3430.jpg
    139 KB · Views: 591
Coil packs and spark plug wires

I know its kinda best practice that you should probably replace the coil packs and spark plug wires at the same time as new spark plugs but I didn't because that was before I learned about the wonders of rockauto... Before I was thinking I was going to have to shell out 111 per coil pack from toyota. Heck no! Rock auto sells Denso coil packs for 52 bucks a pop, and they are identical to the ones you'd by from toyota. They are still made in japan which is nice to see, I like that Japan quality! There wasn't really anything wrong with my coilpacks and plugs I had on but whoever replaced them last time put on some aftermarket ones with no branding and there was still what I am assuming is an original coil pack on it. It ended up being 214 out the door for 3 Denso coil packs and denso spark plug wires. Nice! Most of the stuff I see on rockauto I know is junk and I should definitley not buy it, but rockauto can be clutch in situations like this where they sell the toyota OEM manufacture brand
 

Attachments

  • IMG_3624.jpg
    IMG_3624.jpg
    129.9 KB · Views: 563
I did those coilpacks last week and that was the last thing I have done so far at this point in time to my truck. At this point I have now completed most of the important mechanical / maintenance jobs that I needed / wanted to do. There's still things I want to though like a new fuel filter and redo my drums with new shoes, etc. BUT for now I can focus more on the fun stuff hahaha. Soon my truck will be getting some sweet upgrades. I ordered some camburg UCA's last weekend and now I am waiting for my new shocks....
 
Last edited:
Awesome work so far! Sounds like you have more really cool stuff coming too.

I really like those Burtman Spoilers, definitely been thinking about getting one myself.
 

Members online

Forum statistics

Threads
278,307
Messages
3,554,054
Members
248,016
Latest member
Advally Service

Trending content

Back
Top