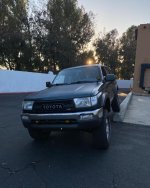
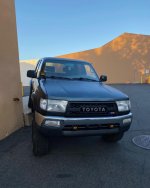
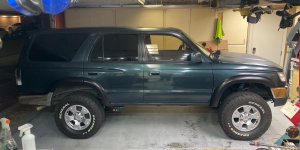
My 1998 4Runner thread

Yeah last I heard they were like a year out haha. That's awesome though, where did you order from?

Great to hear about the improved ride. I know mine was a big difference when I replaced everything up front.

Oh wow I didn't know they were like a year on the wait time that's crazy lol I can't imagine waiting that long. I'd have everything else modded out before they even came in. I have special connection within king. I'm not supposed to talk about it though haha :tape2:

Yeah before when I would hit bumps it was very jarring and off road they would get over whelmed super easy and they were super bouncy if I was hitting bumps. I think the stock spring rate is very stiff so that also didn't help. It's smooth sailing now though. Stoked!
 
Last edited:
Scan gauge 2

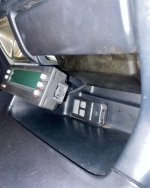
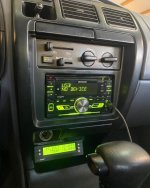
Decided to finally purchase a scangauge because I wanted to be able to see the actual number for my coolant tempurature, voltage, etc.. I also liked how I can use it for trip tracking so I can see stuff like my distance to empty, miles until empty, mpg. Not worried about tracking my mpg but if I ever do a road trip it will be really handy to have that information. It's also nice that it's a code reader. I got it more really for the engine information. If anyone has any xgauge codes they use on their 3rd gen's feel free to drop them below. I found a pretty neat place for it on my 1998 interior. I didn't like the standard mounts you can buy. I also have seen people just put in on top of their column on their steering wheel but I also don't like that either. I used some special velcro my dad got from work. It's like 5x as strong as regular velcro and better to hold it in place. I've seen some people that just put it underneath that little cubby on a single din radio but I want to keep my double din radio so I had to find somewhere else to put it.
 

Attachments

  • IMG_4159.jpg
    IMG_4159.jpg
    130.4 KB · Views: 1,145
  • 72817024751__5684A54C-C6E4-4202-A3F3-B65AABE59794.jpg
    72817024751__5684A54C-C6E4-4202-A3F3-B65AABE59794.jpg
    124.3 KB · Views: 1,012
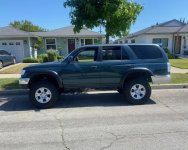
Today January 24th, 2024 marks 1 year with my 4Runner. It has been an amazing year so far with her. Since I have gotten her I have gained a new passion and learned a ton of skills working on it taking it apart and putting it back together. It's been a lot of fun. She is sitting with around 201,950 miles right now, and many more to go! Can't wait for more maintenance and mods that the future holds. Here's a picture at the gas station. 1 year apart from the first photo on this thread. :biggrin1:


Nice grille!


Sent from my iPhone using Tapatalk
 
Decided to finally purchase a scangauge because I wanted to be able to see the actual number for my coolant tempurature, voltage, etc.. I also liked how I can use it for trip tracking so I can see stuff like my distance to empty, miles until empty, mpg. Not worried about tracking my mpg but if I ever do a road trip it will be really handy to have that information. It's also nice that it's a code reader. I got it more really for the engine information. If anyone has any xgauge codes they use on their 3rd gen's feel free to drop them below. I found a pretty neat place for it on my 1998 interior. I didn't like the standard mounts you can buy. I also have seen people just put in on top of their column on their steering wheel but I also don't like that either. I used some special velcro my dad got from work. It's like 5x as strong as regular velcro and better to hold it in place. I've seen some people that just put it underneath that little cubby on a single din radio but I want to keep my double din radio so I had to find somewhere else to put it.

What's this thing?
 
What's this thing?

Hey Alex. Sorry, are you actually asking what it is? I'm not good at sarcasm over the computer hahaha. But anyways it's called a scan gauge 2. A lot of 3rd gen owners use it for the various things it can do. People typically buy it to see readouts like their coolant temperature, mpg, voltage, and on 99+ 4runners people add the tranny temp gauge thru x-gauge. They use it instead of relying on the factory dash gauges which can be unhelpful in the event that something is over heating, which at that point is a little late. When you calibrate it, it's also good for road trips you can see fuel economy stuff. It'll also tell you like your distance tank to empty, hours to empty, and miles to empty, gallons to empty, etc. It also functions as a code reader you can pull the codes that it's throwing and also clear them as well. It's a really nice tool to have to monitor a lot of stuff. Which is why I got one :D
Cheers.
 
Center console swap!

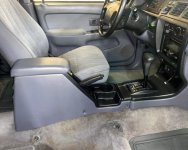
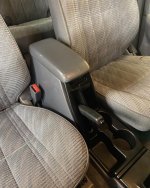
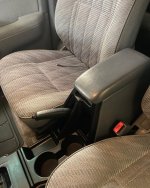
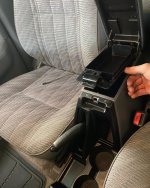
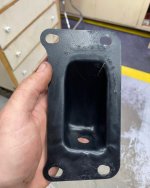
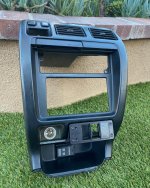
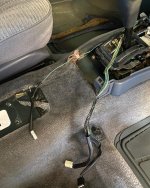
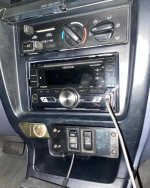
After searching for a while I finally found a moon mist 1999+ center console without a rear heater. In case you didn't know it is quite hard to find moon mist interior pieces lol. Thankfully the one I found was in good condition too. I got a good deal as well. 100 bucks for everything! center console, center console bracket, e-brake tub, and the e-brake. Since my rear window and ECT switches are on my center console I needed to relocate them. I saw SRQ had a sweet switch panel that replaces your ashtray. I never used it before or even kept anything in it so the switch panel is a perfect use of the space. Since I am remounting the switches not very far from where they were I didn't have to do any extending of the wires or anything like I've heard. All I had to do was unravel the single little ebrake light wire from the two other harnesses and re wrap the switch harnesses and the single wire do a little cable management and I was good to go! Hardest part of this swap was the e-brake tub. My 1998 was manufactured in 03/98, so unfortunately the tub wouldn't just drop in like the 05/98+ 4runners. I was not going to take a part of my body out then have to mess with re spraying paint. I just got a rat's tail file and made the holes more oblong to make it fit. It worked perfectly. I was very very excited to get this new center console in. The 98-98 ones are so lack luster compared to the 1999+ ones. Two cup holders, a secret cubby behind it, and taller primary storage AND extra lid storage. How did toyota go from the pre 1999 console to the post 1999 console. Lol not even funny how much better it is. I guess it's also cool I have 6 cup holders now! 2 in the dash 2 in the console and 2 in the rear of the console. Cup heaven!
 

Attachments

  • IMG_4321.jpg
    IMG_4321.jpg
    127.1 KB · Views: 1,064
  • IMG_4337.jpg
    IMG_4337.jpg
    138.8 KB · Views: 1,056
  • IMG_4339.jpg
    IMG_4339.jpg
    137.3 KB · Views: 1,075
  • IMG_4340.jpg
    IMG_4340.jpg
    135.5 KB · Views: 1,072
  • IMG_4320.jpg
    IMG_4320.jpg
    130.8 KB · Views: 1,070
  • IMG_4316.jpg
    IMG_4316.jpg
    141.3 KB · Views: 1,051
  • IMG_4318.jpg
    IMG_4318.jpg
    136.9 KB · Views: 1,064
  • IMG_4324.jpg
    IMG_4324.jpg
    134.2 KB · Views: 1,040
Last edited:
Steering wheel swap

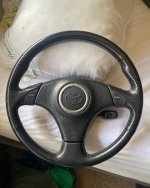
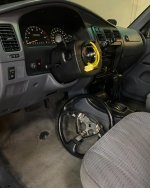
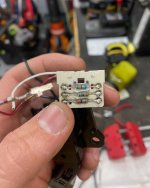
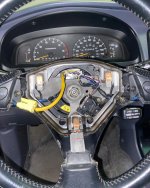
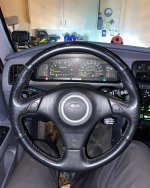
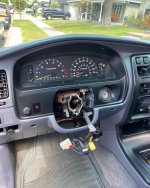
Fun little upgrade, or at least I'll call it that haha. Never really had a problem with the stock 1998 steering wheel and I actually like it but ever since seeing the 3 spoke is300 / supra / rav4 / corolla type steering wheel I've wanted to swap one into my truck. I liked the 3 spoke look and that it was a bit smaller and more sporty feeling. I liked the ergonomics too. I sourced the wheel from eBay. It ended up being one out of a MR2 actually. I also had to decide which airbag I wanted since there was a few options and I ended up with the rav4 one with the silver ring around the middle. I like how it looks. I wanted to get this new steering wheel for the different design that I liked but also because of the e-shift functions. For now the down / up buttons don't do anything but in the future when I get a new stereo that has steering wheel controls I am gonna wire the up and down buttons to have functions for the stereo. Volume up / down so I don't have to always reach for the knob to change the volume. And also the forward and previous. Big thanks to [MENTION=118207]midcoma[/MENTION] for the awesome write up on how to do this swap and and also the wiring to keep the proper cruise control functions. Very detailed and great instructions and information. I'm all for OEM+ and of course wanted to keep my cruise control. This mod came out great!

Steering Wheel Swap - Lexus IS300 with E-Shift
 

Attachments

  • IMG_4151.jpg
    IMG_4151.jpg
    131.5 KB · Views: 592
  • IMG_4516.jpg
    IMG_4516.jpg
    128.9 KB · Views: 609
  • IMG_4517.jpg
    IMG_4517.jpg
    118.9 KB · Views: 599
  • IMG_4534.jpg
    IMG_4534.jpg
    133.9 KB · Views: 604
  • IMG_4535.jpg
    IMG_4535.jpg
    132 KB · Views: 591
Last edited:
Scangauge remount

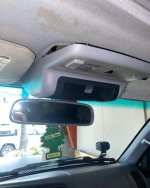
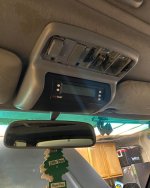
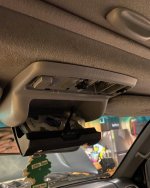
Little white since I've made a update on here. I've definitely been working on my 4Runner quite a bit lately. Since I put the SRQ fab billet ashtray switch mount I've had to take my scangauge out because where I had it before is now blocked by the swith panel. I found what I thought to be the cleanest place it could go considering the lack of space in our interiors. I've never liked the on the colomn of the steering wheel look and i didn't like the look of the spiker engineering mount either. I prefer it in a place where it's not as random or out of place to me. Thankfully this guy on etsy has a great solution. Replace your old sunglasses door with one to fit a scangauge. Perfect! Unfortunatley for me though I have a 1998 4runner with the usless card holder upper console. So I had to source a moon mist one with the sunroof controls off ebay. Since my sunroof is sealed shut and I don't plan on using it the controls are useless. I Haven't gotten the blue and white plug harness I need for the full swap so for now it's unwired. Had to cut into my headliner to fit it. Overall not bad though. And the routing of the scangauge cable ended up super clean, can't see it anywhere when routed under the headliner and down the A pillar to the OBD2 port. Glad to have my scan gauge back and actually it's in a better spot than it was before. Cool thing too is that the guy who makes these doors made it to where it's not just solid so I can still even fit a pair of glasses inside it! But I have my little trees in there instead haha.
 

Attachments

  • IMG_4553.jpg
    IMG_4553.jpg
    120.5 KB · Views: 574
  • IMG_4559.jpg
    IMG_4559.jpg
    130.2 KB · Views: 578
  • IMG_4561.jpg
    IMG_4561.jpg
    129.2 KB · Views: 581
Last edited:
LCE lightweight crank pulley

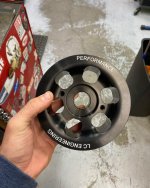
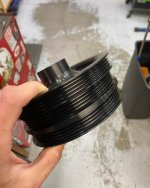
Somehow I stumbled upon the LCE website and scrolled through seeing what they sell for our 3rd gen 4runners and on the pulley section I saw their lightweight 5vz crankshaft pulley. I looked at it for a good 4 months before I decided to buy it. Not that I needed to convince myself to buy it or that it's super expensive (it's only 207 dollars) I was just waiting lol. I was also waiting because I needed to save up a little money for some other parts while I was there. I decided while I had all the belts and pulleys off I would replace the fan clutch as well as the actual plastic fan since that's one of the few things I hadn't replaced. I also wanted to replace the fan clutch bracket. That's the piece with the bearing in it that the fan clutch spins on. Nothing was wrong with it just assumed it was original and I wanted to replace it lol. I mean while I am there right? Anyways. Installing the pulley was pretty easy of course. A straight swap from the oem one. I had to use a belt trick to tighten the crank bolt it because they don't have the two holes for you to use your 5vz harmonic balancer pulley holder tool. Worked out fine. Really enjoying it so far. I can definitely feel the difference from it. She's quite peppy now and responsive to throttle. Holds the gear on hills better too. Overall she's a lil faster which for 200 bucks i'll take haha. And I can say my engine isn't stock anymore. Lol.
 

Attachments

  • IMG_4547.jpg
    IMG_4547.jpg
    124.8 KB · Views: 593
  • IMG_4548.jpg
    IMG_4548.jpg
    123.6 KB · Views: 580
New rear links! Finally put the rear bumps and sway links on

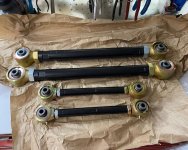
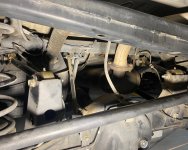
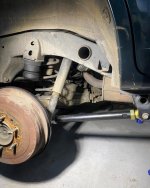
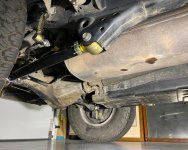
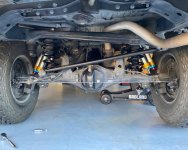
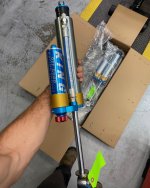
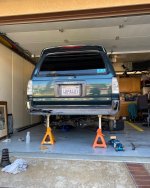
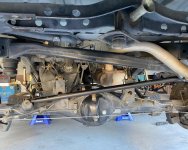
Right now I am waiting for my 2.5 rear king shocks to come in and I decided it was time to refresh some of the rear bushings since I basically replaced everything in the front suspension wise now. Rear was running on those old worn out bushings. Decided that I didn't want to mess with pressing out the old bushings in the stock control arms and splurged on a set of upper and lower OPT Offroad rear adjustable control arms with the jhonny joints :banana:. Originally I was just gonna get the uppers for the adjustability so I could correct my pinon angle after I lift the rear, and then just put some whitelines on the lowers but like I said earlier I also lowkey didn't feel like pressing the old bushings out. These arms were a definite solid upgrade. Definitley overkill for me since I am 2WD and it's not like I go 4 wheeling and need these beefy arms but when I do hit the trails or the dezert they will be nice. As of now I am still on the stock rear shocks and these links alone made the ride a lot better in the rear. Those old rubber bushings prolly about had it. These new links smoothed things out. Since I was in the area I also installed my rear durobumps and my overland customs sway bar links. I had bought both and they were laying around for now waiting until I installed my rear lift. Not sure if it's the new sway bar links or the bushings but the now my body roll is much less since I replaced them. Right now I am running no front sway bar up front since I took it out when I was installing the front shocks and never bothered putting it back on lol. Before the body roll was definitely kinda bad but now with the new sway bar bushings and links it is a lot better. Not as much nervous rolling and steering is more racey
 

Attachments

  • IMG_4566.jpg
    IMG_4566.jpg
    136.1 KB · Views: 561
  • IMG_4568.jpg
    IMG_4568.jpg
    134.1 KB · Views: 574
  • IMG_4569.jpg
    IMG_4569.jpg
    135 KB · Views: 575
  • IMG_4572.jpg
    IMG_4572.jpg
    135.3 KB · Views: 580
A few more upgrades - Finally got the rear shocks!

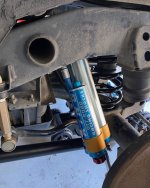
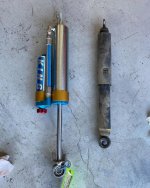
Finally got my hands on the rear 2.5 king shocks of course with the adjuster too haha. Recently my buddy splurged on a full king 2.5 set up on his 3rd gen Tacoma and his shocks had the adjusters. After seeing them I couldn't not get my shocks with the adjusters. Very worth! So stoked to be able to now have my 4Runner level again now that I have in the OME 906 coils in the rear. Gave me a perfect level now. She looks so much better. The squat in the rear was annoying lol. I can actually see out of my mirrors behind me now. Couple of other items I replaced while I was doing the rear shocks were the rear brake hose and I also put in some new whiteline poly bushings into my panhard bar. I put a 17in ext. rear Stainless brake hose in so even with the lift now the brake hose should be nice and happy. So happy to have the full king setup front and rear now. I took a picture comparing my old shocks to the new ones. The old ones I am pretty sure are the original shocks since they say toyota on them. They also don't return at all when you compress them. I compressed them last night and they are still like that :lmao: Those things are old.

I also bought a set of the bushwacker fender flares finally and put them on. They look amazing. I've always wanted to have the limited style fender flares since I think they look the best but there was no way to add them to a truck that didn't have them. These were my best option. I used 3M super strength molding tape for the door fender flares. Bushwacker wants you to self tapper into the door, and I said no way! The tape has held up great I don't think they are coming off. I also got an additional set of 2in pod lights down low for some fog lights. I've been wanting to add some fogs down low for a while so I bought some GGlighting pods since they are a local company. They are quite bright and do a good job! Now... what's next?
 

Attachments

  • IMG_4722.jpg
    IMG_4722.jpg
    130.8 KB · Views: 303
  • IMG_4734.jpg
    IMG_4734.jpg
    137 KB · Views: 287
  • IMG_4729.jpg
    IMG_4729.jpg
    133.3 KB · Views: 302
  • IMG_4733.jpg
    IMG_4733.jpg
    134 KB · Views: 288
  • IMG_4731.jpg
    IMG_4731.jpg
    132 KB · Views: 286
  • IMG_4737.jpg
    IMG_4737.jpg
    133.8 KB · Views: 306
  • IMG_4739.jpg
    IMG_4739.jpg
    133.2 KB · Views: 284
  • IMG_4744.jpg
    IMG_4744.jpg
    134.6 KB · Views: 288
Last edited:
just more pics

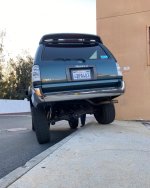
flex
 

Attachments

  • IMG_4754.jpg
    IMG_4754.jpg
    127.8 KB · Views: 285
  • IMG_4755.jpg
    IMG_4755.jpg
    132.9 KB · Views: 287
  • AB85DEE6-CC20-42A7-9AA3-31ECF651AD92.jpg
    AB85DEE6-CC20-42A7-9AA3-31ECF651AD92.jpg
    139.4 KB · Views: 215
Steering shaft tac weld mod

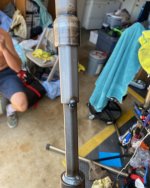
Finally got around to doing the tac welds on the steering shaft yesterday. Been wanting to do it for a long time but never got to it. I had a lot of side to side play in my steering from the hex tube being all stretched out. Also did the oil bottle shim on the tilt ball. When I would hit bumps I would hear clunking noises from what seemed like in the dash behind the steering wheel. Nice and easy job too it was just 3 bolts and a couple screws haha. No more clunking and the steering is solid as a rock now! Love it! Drives a lot better now and it doesn't wander on the freeway anymore. Got really tired of that wandering. Thanks to my buddies neighbor for hooking me up with the tack welds. Took all of maybe 1 minute haha. Time for off roading now, me and the buds are going this Wednesday :thumb3:
 

Attachments

  • IMG_4853.jpg
    IMG_4853.jpg
    131.8 KB · Views: 228
  • IMG_4854.jpg
    IMG_4854.jpg
    134.4 KB · Views: 237
  • IMG_4856.jpg
    IMG_4856.jpg
    117.8 KB · Views: 237
Rear view mirror upgrade

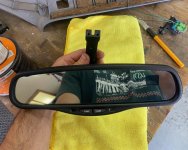
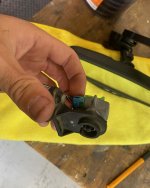
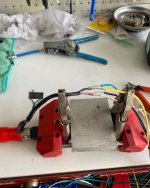
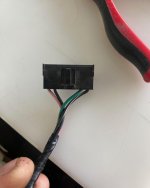
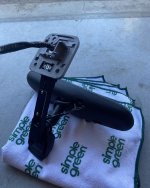
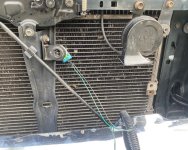
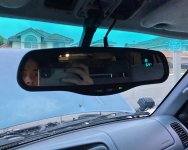
Little while back SRQ Fab came out with their billet aluminum rear mirror arm for 1st gen Tacomas and 3rd gen 4runners and I had seen it on instagram and thought hey that's sick! I gotta do that sometime! On their website the main picture they have the mirror arm shown with a Chevrolet gentex 177 mirror which came in 1999-2002 silverados, suburbans, and tahoes. I wanted that exact combo. So I looked around on ebay first and thankfully there is tons of those chevys in the junkyards so those mirrors are cheap and plentiful. I bought mine mirror w/o a harness on ebay for 40 dollars. Other than the mirror the other parts I would need is the little 7 wire connector that plugs into the back of the mirror and the temp. sensor and pigtail from it that sits in the grill. Was able to find both of those things very easily and cheap at a local junkyard. Went to walmart to get some 4 - lead trailer wire to wire it all up and some fuse taps and that's all i needed to install it. I already have the SRQ fab ashtray switch panel and i am very happy with it so I expected to have good things to say about the mirror arm, which holds true. Very quality stuff and although very expensive for such little items the quality is great and it fits awesome. cool thing is if i ever change my mind I can put any mirror I want on it now! Very happy with the mirror though. Love the auto dim feature and I also really like the compass and temp reading on it to. Not necessary things but I think they are cool. definitely a sicmod. Thanks to Zealous outdoors on youtbue for the video on installing the same mirror in his 4runner but minus the srq arm. Was very helpful getting this to work though.

https://youtu.be/0-TFMOxliJs?si=x_yvMOJqjvwd24Jd
 

Attachments

  • IMG_4952.jpg
    IMG_4952.jpg
    136.3 KB · Views: 149
  • IMG_4953.jpg
    IMG_4953.jpg
    117.7 KB · Views: 148
  • IMG_4954.jpg
    IMG_4954.jpg
    124.7 KB · Views: 156
  • IMG_4955.jpg
    IMG_4955.jpg
    117.6 KB · Views: 141
  • IMG_4958.jpg
    IMG_4958.jpg
    129.6 KB · Views: 151
  • IMG_4960.jpg
    IMG_4960.jpg
    141.4 KB · Views: 150
  • IMG_4963.jpg
    IMG_4963.jpg
    128.4 KB · Views: 163
New driveshaft.. cause why not

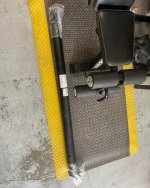
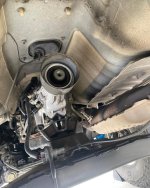
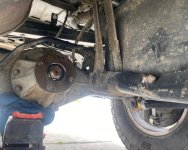
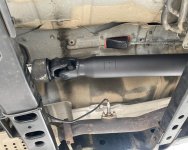
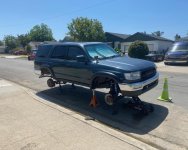
When I went off roading 2 weeks ago I think a rock got kicked up and just my luck it happened to hit one of the balancing weights on my driveshaft and bent it up. I didn't realize this had happened untill I was doing a fun line where I got really flexed out and all the sudden I hear this awful grinding scrapping slapping noise coming from the rear end. At first I had though I just blew my diff or something. Then I just blew it off and I was like eh it was prolly just my tires slipping out on the dirt. I was flexed out and diffing out. After something didn't sit right with me so I decided to take a look underneath to make sure everything was okay. Sure enough I saw it and I was like are you serious right now out of all the things that could happen THIS happens... haha. Like what are the chances a rock gets kicked up and just happens to hit the drive shaft weight. Unlucky I guess. Unfortunately for me since when my 4runner gets flexed out on that side it was banging into my gas tank and sliced and mangled a nice part out of my gas tank skid. Just my luck haha. I was honestly pretty pissed. Such a dumb thing to happen. Before this even happened I was looking at getting a whole new driveshaft anyways because I learned about the design of a 2WD and how it's a 2 piece design and the rubber insulator between the 2 pieces wears out over time and causes vibrations. I guess this was just the last straw to go ahead and replace the thing. Thankfully toyota had their 20% memorial day sale and I picked up a brand new OEM toyota unit for the sweet price of 380 bucks. Nice! I also wanted to replace the U-joints eventually on my driveshaft so I guess this was 3 in 1 fix. Put the new driveshaft on today took all of like 20 minutes lol. Super easy. 4 bolts off, 4 bolts back on. Done! Still need to bang that skid plate back and maybe weld it. Now hopefully that doesn't happen again. lol
 

Attachments

  • IMG_4949.jpg
    IMG_4949.jpg
    139.7 KB · Views: 237
  • IMG_4968.jpg
    IMG_4968.jpg
    134.3 KB · Views: 228
  • IMG_4969.jpg
    IMG_4969.jpg
    130.3 KB · Views: 212
  • IMG_4970.jpg
    IMG_4970.jpg
    133.9 KB · Views: 238
Last edited:
Eimkeith panhard bracket

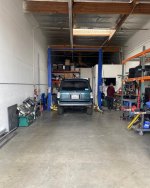
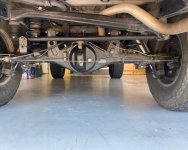
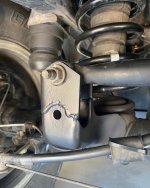
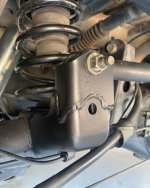
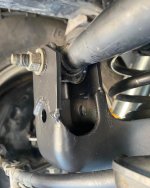
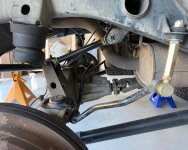
Ever since I put the OME 906 coils in the rear with the rear kings as well I could notice a lot more body roll and nervousness feeling in corners, it felt really dippy and swayey in the corners lol almost like I was decelerating more than normal. This was obviously due to the lift and now the panhard bar isn't level anymore. I remember a while back when I was trying to look for a guy in Orange County who could weld up my Eimkeith PCK bracket when I got it. I read on a fourm on here someone who had asked if there was any good welders around in OC to do the same welding I needed - the PCK haha. Everyone that responded said to go to Joe V. at Outgear solutions. That fourm was older so by now Joe V. isn't at outgear anymore and now he runs is own little shop where he does literally everything haha, installs sic mods, maintenance, welding projects, rebuilds shocks, everything. Has a legit 2 post lift and everything. Such a sweet setup. I only needed the axle side bracket welded that lifts the pan hard 2 in up which was perfect since I have a 2in lift. He did it for 100 bucks took maybe an hour I think less actually. The whole experience was pretty sick though. He only works on toyotas. He is a super cool guy and let's you know what is going on while he is doing it and even talked toyota stuff after. Seems like he did a good job on the welding too. I am definitely happy with the job. Now my panhard is back to level and cornering is much better. Also before I noticed my ride was really bouncy coming from the rear, it is now noticeably less bouncy on the little bumps. Anyways. Any of you OC folks out there need a welding job done on your Teeyota hit up Knotical Adventures aka Joe V. on Instagram.
 

Attachments

  • IMG_4991.jpg
    IMG_4991.jpg
    131.3 KB · Views: 170
  • IMG_4993.jpg
    IMG_4993.jpg
    126.4 KB · Views: 171
  • IMG_4994.jpg
    IMG_4994.jpg
    131.6 KB · Views: 166
  • IMG_4995.jpg
    IMG_4995.jpg
    129.8 KB · Views: 164
  • IMG_4996.jpg
    IMG_4996.jpg
    126.6 KB · Views: 165
  • IMG_4997.jpg
    IMG_4997.jpg
    128.3 KB · Views: 166
Everyone that responded said to go to Joe V. at Outgear solutions. That fourum was older so by now Joe V. isn't at outgear anymore and now he runs is own little shop where he does literally everything haha, installs sic mods, maintenance, welding projects, rebuilds shocks, everything. Has a legit 2 post lift and everything. Such a sweet setup. I only needed the axle side bracket welded that lifts the pan hard 2 in up which was perfect since I have a 2in lift. He did it for 100 bucks took maybe an hour I think less actually. The whole experience was pretty sick though. He only works on toyotas. He is a super cool guy and let's you know what is going on while he is doing it and even talked toyota stuff after. Seems like he did a good job on the welding too. I am definitely happy with the job. Now my panhard is back to level and cornering is much better. Also before I noticed my ride was really bouncy coming from the rear, it is now noticeably less bouncy on the little bumps. Anyways. Any of you OC folks out there need a welding job done on your Teeyota hit up Knotical Adventures aka Joe V. on Instagram.

Joe is the best. He did the PHK, limit strap tabs, sliders...etc on my 98. AND he did my clutch swap...the guy is a talented and valuable resource.
 
Joe is the best. He did the PHK, limit strap tabs, sliders...etc on my 98. AND he did my clutch swap...the guy is a talented and valuable resource.

Totally agree. Stoked with just my little pck install. I've seen his instagram and the other stuff he's done he is definitely legit. Great that he is so local too his shop is about 20 mins from me. If I need anything else I can't do I know where to go. He's a great do it all guy
 
New tires!

Hey y'all. For the few that read my fourm here haha. Been a while since my last post on here. Haven't been doing to much to my 4runner. Still doing a little maintence few items i haven't done but nothing crazy. Replaced my water temp sensor and also did the 2000+ air box / maf / wiring swap. Followed [MENTION=5345]habanero[/MENTION]s post on yota tech. Works beautifully and a great solution to us 96-99 4runner people who have the old bullet style maf that costs an arm and a leg. Also get more airflow from the new style maf too. Bonus!

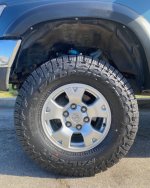
I also recently left my old job I was at for a new one. A great opportunity came up and I took it. Been real busy working now. Full time real job haha. Before I left my last job I had to buy some tires. What tires? Well some Falken AT4W's in 265/75r16 to be exact. I hadn't bought anything while I was working there but I thought my last 2 weeks there was a good idea to haha.
 

Attachments

  • IMG_5411.jpg
    IMG_5411.jpg
    135.6 KB · Views: 93
  • IMG_5404.jpg
    IMG_5404.jpg
    134.7 KB · Views: 94
  • IMG_5408.jpg
    IMG_5408.jpg
    137.1 KB · Views: 94

Members online

Forum statistics

Threads
278,308
Messages
3,554,060
Members
248,016
Latest member
Advally Service

Trending content

Back
Top