My '87 OEM Restomod

TOYOTASC

New member
I purchased a 1st gen a couple of years ago. I have a 3rd and 4th gen, but there's certain nostalgia and uniqueness about the 1st gen that I had to own one.

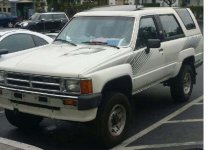
I found an '87 SR5 in CA and had it shipped to SC. It has 180k miles, very solid body, and mostly original inside and out.

Over the past year I have been restoring it to it's original condition (with a few OEM upgrades). I'm about 90% complete, but wanted to start this build thread to share by issues and ideas in order to kind of give back to all the help I have gotten from this site over the course of the past 12 months.

Anyway, here it goes...


Prior to restoration.
 

Attachments

  • 874Runner.jpg
    874Runner.jpg
    55.6 KB · Views: 1,416
Register to hide this ad
Few more pics prior to any work...

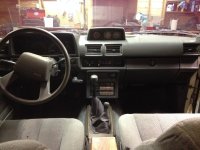
Crack in the dash pad that all 1st gens seem to have.
IMG_1334.jpg

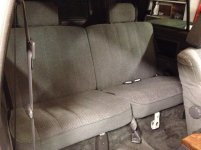
Don't think the seat covers were original, but could be wrong. The back covers had a label tag on it, which lead me to believe they were recovered many years ago.
IMG_1341.jpg

IMG_1361.jpg

At one point battery acid spewed on the hood and fender.
IMG_1782.jpg
 

Attachments

  • IMG_1334.jpg
    IMG_1334.jpg
    133.7 KB · Views: 1,319
  • IMG_1341.jpg
    IMG_1341.jpg
    137.6 KB · Views: 1,062
  • IMG_1361.jpg
    IMG_1361.jpg
    129.9 KB · Views: 1,074
  • IMG_1782.jpg
    IMG_1782.jpg
    137.2 KB · Views: 1,141
engine bay is not only looking clean, the miles you found on her is lower than the vast majority of 3rd gens (by comparison) out there on the road. I'd say you did great.
 
I've also used the following website a lot to determine part numbers and how things are assembled. There are probably others like it out there, but this is the one I use.

japancars.ru

Tips for using website:

1.) Click English flag at top
2.) Click Toyota & Lexus catalog
3.) You can search your vehicle by VIN number or Model number. If by model number, then you'll need to click the last Area Code option (CWA). Then select your model. 1st gens are 4Runner Truck 83-89. Then select your vehicle specific model. You can find this number on a plate on the firewall.
4.) Keep in mind the Period of Issue for each part number. There can be several part options for your specific model. So make sure the Period of Issue falls within the date on the plate inside your drivers side door.

I would then use toyotapartsdeal.com to find part availability, again using my model number to filter. It's categorized exactly like the japancars.ru, which makes parts easy to find. toyotapartsdeal.com seems to be one of the only parts sites that maintains availability/discontinued status.

Not endorsing these sites. Just saying it helped me during my project.
 
Subscribed.

Mine looks almost exactly like yours, except it has fewer miles and is in worse condition lol. A '87 too. Looking awesome and a great find!


Pretty solid looking HiLuxer. Those wiper switches with the integrated cruise controls are very hard to find, especially with the lettering still intact. Take care of that one.
 
Hey,was your truck a automatic to manual swap? If not, what is the switch to the right above your radio.


Subscribed.

Mine looks almost exactly like yours, except it has fewer miles and is in worse condition lol. A '87 too. Looking awesome and a great find!


Pretty solid looking HiLuxer. Those wiper switches with the integrated cruise controls are very hard to find, especially with the lettering still intact. Take care of that one.

Thanks man! The rear is sagging bad so I ordered an Old Man Emu kit to fix it. Still have yet to put it on. Wish its color still shiny as yours hahaaa. My original sunroof flew off two months after I got it. Thanks God I was able to pull one out of my part truck I have.

Hey,was your truck a automatic to manual swap? If not, what is the switch to the right above your radio.

It's the ECT button. This is also my curiosity. Haven't gotten around to check the VIN. Purchased it as you see but that ECT button would be the dead giveaway if it turned out to be a manual swap (and a very clean swap to say the least). Everything looks pretty neat and original. Plus it has the "turbo" badge on the tailgate. :decision:
 
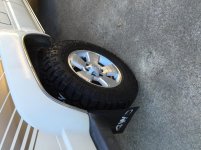
One of the first things I did was replace the stock wheels with a set of TRD Sport wheels. And with the wheel size change, I put on a set of LT265 70Goodyear Duratracs. This is about the largest tire I could fit at the stock ride height without scrubbing.

Before purchasing, I read that some folks had issues with tread separation with the Duratracs. Seeing that Goodyear also makes these tires in a passenger car rating, in addition to the LT, I'm thinking maybe some folks bought the wrong tire for their application.

IMG_1578.jpg
 

Attachments

  • IMG_1578.jpg
    IMG_1578.jpg
    135.6 KB · Views: 970
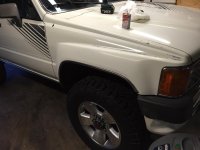
Removed the stock stripes. My first attempt was using a hair dryer and razor blade. I did have some success with this approach, but it was extremely slow going.

I then bought a 3M Stripe Off Wheel. I probably could have done 10 4Runners with the 3M wheel in the time it would take to do one with the hair dryer/blade.

As you can see in the picture, the 3M wheel did take some paint off around the outside of the stripe. But just the outside edges. So, if you're trying to remove your stripes without repainting, then be careful. I would suggest staying within the boundary of the stipe and taping around the perimeter just to be safe.

IMG_1715.jpg
 

Attachments

  • IMG_1715.jpg
    IMG_1715.jpg
    117.9 KB · Views: 1,004
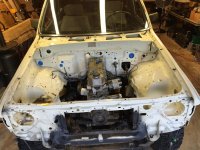
Then I decided to go in a little different direction after game planning a little more. Right or wrong, I decided to restore the mechanics side first, then come back to the body and interior.

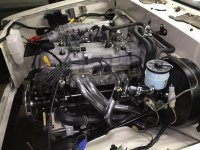
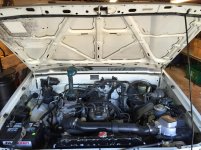
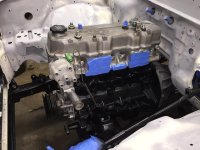
Removed everything from under the hood except the engine. Checked the timing chain, valves, etc and everything looked great.

IMG_1872.jpg

Cleaned the engine block and chassis and painted with satin black.

IMG_1880.jpg

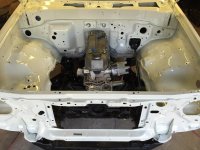
Sanded, primed, then painted back the original white.

IMG_1901.jpg
 

Attachments

  • IMG_1872.jpg
    IMG_1872.jpg
    134.7 KB · Views: 960
  • IMG_1880.jpg
    IMG_1880.jpg
    127.1 KB · Views: 959
  • IMG_1901.jpg
    IMG_1901.jpg
    124.9 KB · Views: 989
I used a DeVilbiss Plus gravity feed gun. It's not a HVLP gun. It's what the industry calls a 'compliant' gun. I found that the overspray is about the same as a HVLP and I could get a lot of paint flowing through the gun.

I researched a lot of products before I purchased this one. I wanted a quality paint job but didn't want to spend a lot on a gun just to use a few times. I mostly looked at Sata and DeVilbiss. For the price, ease of use, and quality, I definitely recommend.

PLUS® Gravity Feed Spray Gun

https://www.amazon.com/DeVilbiss-GFG670-Efficiency-Gravity-Spray/dp/B0002SQYB4
 
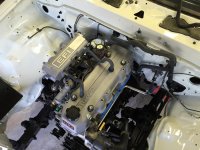
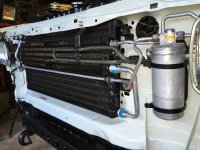
Eventually got everything back together with new oem parts: water pump, radiator, condenser, sensors, alternator, compressor, master cylinder, hoses, lines, clamps, etc, etc. (literally hundreds of parts)

Lessons Learned

Doug Thorley header... it's available with the O2 sensor either on the manifold or by the catalytic converter. Thought I would get the cheaper one, which is the one by the converter. Found out after installing that the one I bought was for an O2 sensor that has a hot. Doug Thorley doesn't mention this in their literature and they didn't seem to know the purpose of the different sensor locations when I called their technical support. Ended up swapping for the other header.

I also didn't like that you couldn't use the stock head gasket. DT gaskets weren't the best quality, plus they didn't provide all the bolts I needed to install it without the exhaust re-circ I like the looks of the header and the coating seems to be high quality, but knowing what I do now, I might have gotten a different product.

Rough idle... had a very rough idle after getting everything back together. Performed every diagnostic test the FSM recommends and still couldn't find the issue. I finally read a post about checking the injectors with a screw driver (listening for opening/closing). Found two injectors that sounded very weak. Thought it might have been bad injectors (never know how long these oem parts sit on a shelf). So, I reinstalled the original injectors b/c I knew these were good. Still had rough idle. Did numerous electrical tests and determined I wasn't getting the proper voltage at the two injectors. Unwrapped the entire wiring harness and didn't find a single cut or loose wires. (scratching my head)

Then, I came across a post about wire corrosion. Decided I try anything at this point, so I stripped the injector wires to check and sure enough they were corroded under the sheathing. I replaced the wires and she ran like a new one (minus the surging idle issue I have when engine is hot. Been putting off fixing that for awhile.)

Wiper motor... The wiper motor is discontinued by Toyota for the 1st gen (they don't even list a replacement part number). One day, I decided to try the wiper motor on my 3rd gen 4Runner b/c it looked similar. Ended up being a direct bolt-on and plugged directly in to the 1st gen wiring harness. Worked like a charm though all settings and is even smaller than the original.
IMG_1998.jpg

IMG_2123.jpg

IMG_2053.jpg
 

Attachments

  • IMG_1998.jpg
    IMG_1998.jpg
    131.9 KB · Views: 919
  • IMG_2123.jpg
    IMG_2123.jpg
    135.3 KB · Views: 884
  • IMG_2053.jpg
    IMG_2053.jpg
    135.5 KB · Views: 950

Members online

Forum statistics

Threads
278,310
Messages
3,554,080
Members
248,016
Latest member
Advally Service

Trending content

Back
Top