My Cracked Dashboard

HanginInUtah

New member
Hey everyone! Yeah, I'm new on here, and I haven't uploaded any pics or anything... the nerve! I'm planning on getting that done this weekend!

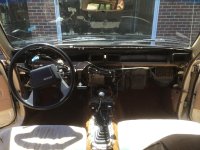
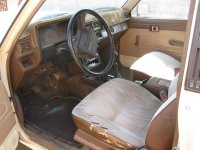
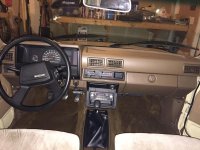
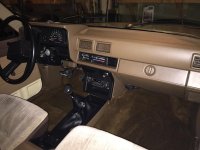
I have a 1992 in pretty good shape, but the dashboard is cracked, of course. I've thought of just ignoring it for awhile, but in my line of work I received a postcard today from Coverlay Manufacturing. Has anyone actually replaced their dashboard cover and used Coverlay? I had thought about getting a dashmat or something, but when I looked up the application, they offer one for $139.95. Doesn't sound too bad to me to have a new dash cover, if it's a good fit and quality, right?

Any experience out there with these guys? Or other options?

Love this site!! I've been lurking for a week or so, and so pumped up by quite a few of you that have similar situations to mine. I'll get up to speed this weekend... I promise!
 
Register to hide this ad
Hi neighbor!

You could DIY it too, for way cheap. Before my '86 died I was planning on filling in the crack with expandable foam, sanding it flush, and glassing the whole dash. Or you could get fancy with that fake carbon fiber stuff, or get cheap and just spray on some bedliner in a can.

My '85 dash isn't cracked, and I'm keeping it that way. :D
 
Posting for comments. Too bad website does not have an installation video, or a 'how to' file to explain what is required?? Curious if removing the dash is a major task to either replace, or repair??. It the Coverlay is a replacement dash then may be willing to put out the $??.
 
Last edited:
( IN MY OPINION )

The coverlays install best with silicone ( they may supply velcro), (put that away) wipe the existing dash down with mineral spirits or something that wont leave a sheen or soap. Use the entire tube of silicone, make S patterns so 90% of the coverlay with lay in the silicone. They fit about 90-95%...you may see some uneven-ness or impefections by the vent cutouts.

They are plastic, you can make them shine w/ armor all, but they will always feel like plastic. Small price to pay for not taking that dash off. If you're the balls type, you could just fill the cracks w/ spot putty and cover the entire dash w/ a stretchy vinyl, glue and a heat gun.

Coverlays work great for what they're designed for ......to hide the ugly.

If you buy one, get a tube of the 3hour dry 'GE' brand, or another brand name. You want to put weight on the cover so the silicone dries and holds it, wadded up towels where the windshield & coverlay meet , or folded over pcs of foam, or sandbags, a socket set holder on a washcloth....anything to hold it in place for a few hours.

The reason i like silicone, you can pull it off 'carefully' if u need to, but will generally hold for years.

Again, all opinion based ^^^^.
 
Thanks for all the ideas, guys! I may just decide to ignore it for awhile. This really wasn't the highest item on my list, so I'll let it stew for a bit. But I'm thinking that if the replacements aren't so perfect, I may just throw a dash cover on there. I'm a child of the eighties, so that ought to look about right! :)
 
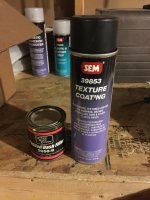
Personally, I don't have any experiences with the covers, however I recently repaired mine using a urethane filler, texture spray and SEM coating. What I lack in skills, I make up for with patience and I was very pleased with the results. In fact, I SEM coated every interior panel on my 85.

My interior was pretty rough too. The interior panels came off like Doritos from 30 years of AZ sun. I ended up replacing most in non-matching colors, then coated them with the SEM products.

The full interior took awhile, but just a dash wouldn't be all that bad once you get it off. I'll post some before and after pics.

Hope this is helpful.
 

Attachments

  • IMG_0191.jpg
    IMG_0191.jpg
    132.1 KB · Views: 1,237
  • photo-7.jpg
    photo-7.jpg
    135 KB · Views: 1,196
  • IMG_1387.jpg
    IMG_1387.jpg
    134.8 KB · Views: 1,779
  • IMG_1386.jpg
    IMG_1386.jpg
    129.7 KB · Views: 1,601
Here is the filler and texture coating. The actual color coating is "SEM Color Coat". The filler is a two-part product... pricey, but feels really strong when complete. Spray the texture coating from 3-4' away with very light coats... take my word for it ;)
 

Attachments

  • IMG_1385.jpg
    IMG_1385.jpg
    129.6 KB · Views: 1,190
What an outstanding piece of work; intend bookmarking for future references!! The one ingredient I lack is 'patience', if it can't be done in the time it takes to cook a 3 minute egg then I tend to speed up the process. After seeing results certainly gives one pause to take their time. Again, looks great, and appreciate the info.
 
One word of caution if you plan on pulling the dash, there are screws behind the vents. More than likely, the vents will crumble when trying to take them out. They're not the easiest to find replacements for so be aware. I tend to collect them in the junk yards whenever I see a 1st gen there....kinda my emergency stash! :)
 
One word of caution if you plan on pulling the dash, there are screws behind the vents. More than likely, the vents will crumble when trying to take them out. They're not the easiest to find replacements for so be aware. I tend to collect them in the junk yards whenever I see a 1st gen there....kinda my emergency stash! :)

Absolutely right. The ones I have now came out of another vehicle because of this same problem.
 

Members online

Forum statistics

Threads
278,309
Messages
3,554,071
Members
248,016
Latest member
Advally Service

Trending content

Back
Top