My solution to organizing the center console "bucket"

LakeRunr

Member
I see that this has been discussed many times here, with a few solutions here and there. I wanted to add my solution to the forum.

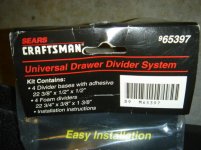
I used Craftsman tool-drawer divider supplies to divide the bucket into 4 usable parts. Two cool things about using this stuff are (1) you can change it around later without any problem, and (2) it's soft-ish (but also firm), so your stuff doesn't rattle. The "foam" really is firmer than you'd think it would be. It's perfect for this.

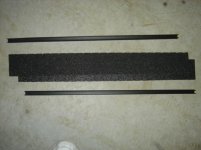
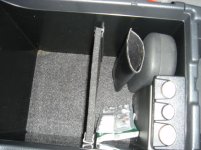
The first picture shows the package that the dividers come in.

The second pic shows what's in the package: two plastic rails with double-sided tape, and two sections of firm foam divider. There are actually 4 pieces there (each of the two pieces is perforated).

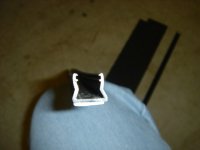
Third pic shows what the end of the plastic rails looks like. The rails can be cut with a hacksaw or dremel to whatever size you need.
 

Attachments
  • DSC00495.jpg
    DSC00495.jpg
    49.4 KB · Views: 2,664
  • DSC00497.jpg
    DSC00497.jpg
    32.4 KB · Views: 2,707
  • DSC00498.JPG
    DSC00498.JPG
    128.4 KB · Views: 2,690
Last edited:
Register to hide this ad
I cut 4 rail pieces 5 inches long each.

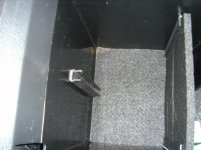
I then mounted them (they have double-sided tape on them) to divide the bucket in half horizontally. I cut 4 sections of the foam and slid them down into the rails (see first picture).

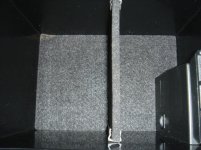
Second pic shows how the rigid foam matches the asthetics of the bucket. Also note that the foam reaches a little higher than the rails. This was so there wouldn't be any sharp rail edges sticking up.

Third pic shows how my stuff starts to fit in there.

But...not done yet...
 

Attachments

  • DSC00499.jpg
    DSC00499.jpg
    45.5 KB · Views: 3,008
  • DSC00501.jpg
    DSC00501.jpg
    45.6 KB · Views: 3,159
  • DSC00502.jpg
    DSC00502.jpg
    44.4 KB · Views: 3,017
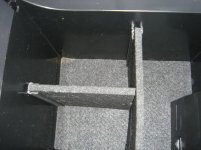
Next, I started on the longitudinal separators. I installed the other two rails, one at a time (first pic), and cut foam to reach the center piece I already installed (second pic).

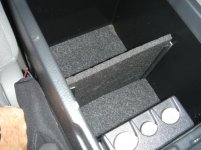
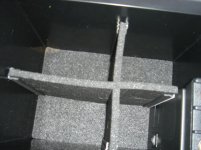
The last picture shows the finished product!

I don't remember how much the divider package cost...I've had it for a while...but I don't think it was much.

My next mod is to light up this compartment with LEDs (but only when the lid is open and the parking lights are on).
 

Attachments

  • DSC00503.jpg
    DSC00503.jpg
    42.2 KB · Views: 3,001
  • DSC00504.jpg
    DSC00504.jpg
    42.3 KB · Views: 3,194
  • DSC00505.jpg
    DSC00505.jpg
    37.8 KB · Views: 2,932
Great Idea!!!! Doing it tomorrow for sure, that "bucket" has been quite a problem for organization.
:cheers:

Also Where did you buy that from? Local Hardware store?
 
I could do that, but then I would have to look through four spots full of crap instead of one big one :D
 
Great idea, now do you have a solution for the beverage holder which is either too big or too small for whatever I am drinking? :-)
 
Yea, the cupholder thing bothers me too...especially since the cupholders in the 3rd gen were supurb. It's on my list to fiddle with.
 
you do know you can pick up the middle thing in the cup holders and move it over to the left or right and kind of wedge it in for something really small or something really big
 
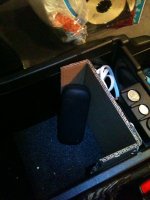
Another option is solid, folder, cardboard

Although I think the method shown is quite elegant, I decided to go a simpler, free, route and fold some sturdy cardboard into a U-shape that fits in the space.

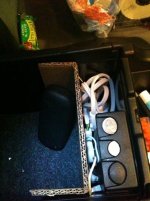
My issue was that I wanted to use the electrical plug and aux radio input (stupidly) located at the bottom of the console bucket. So, I got cables for both that had 90 degree angles on the plugs - which is key, then the folded cardboard fit right up behind it.

In the 2nd photo you can see how the 6 foot power cable (hard to find with angled plug - I got at Radio shack, wish they had a 2 ft version) folds up nicely on the left (drivers) side of the bucket without becoming a tangled mess with the rest of the console bucket. The cord has a twistee tying it neatly together except for the last 6-8 inches that can easily come out when needed, then shoved in when not. Similarly, the audio cable is just long enough to reach my iPhone when sitting on the tray on top of the console.

You can even get fancy with the cardboard and make a removable box out of it, and/or split the compartment into 2 sections. Just make sure to use the sturdy type of cardboard.
 

Attachments

  • photo1.jpg
    photo1.jpg
    131.2 KB · Views: 1,807
  • photo2.jpg
    photo2.jpg
    68 KB · Views: 1,583

Members online

Forum statistics

Threads
278,315
Messages
3,554,104
Members
248,016
Latest member
Advally Service

Trending content

Back
Top