New member: 4Runner project.

Front CV axles: the inner CV boots were torn on both sides when I bought the truck. I've replaced the front axles on our Ford previously, so this project was added to the list and was teed up for this weekend.

I read enough horror stories about chinese rebuilt axles here and on other Toyota truck boards to convince me that OEM was the best option. I located a pair of used axles via LKQ , 14K miles on the vehicle, 6-month warranty.

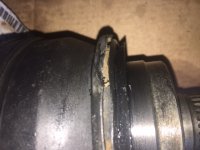
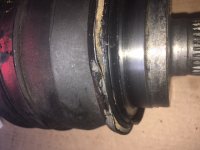
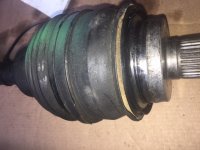
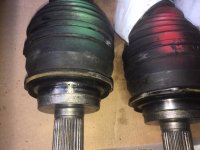
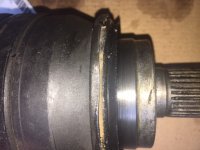
They arrived last night, and the pics show what I'm up against. The junkyard guy apparently used a prybar to remove them from the hubs, rather than pressing them from the outside. I checked the local Toyota dealer and a few online retailers, this metal endplate is not sold separately and there's no aftermarket option. No way they'll even seat properly without dragging on the knuckle, and I'm not trying to straighten them. Opened a return claim with LKQ and they're usually very reasonable. Or they can fight it out with my credit card company, up to them.

Next step is to shop local junkyards where I can examine them before buying.
 

Attachments

  • IMG_1401.JPG
    IMG_1401.JPG
    112.1 KB · Views: 241
  • IMG_1402.JPG
    IMG_1402.JPG
    92.4 KB · Views: 237
  • IMG_1403.JPG
    IMG_1403.JPG
    107.3 KB · Views: 246
  • IMG_1406.JPG
    IMG_1406.JPG
    110.2 KB · Views: 231
  • IMG_1407.JPG
    IMG_1407.JPG
    111.8 KB · Views: 238
Koyo W0133-1836168-KOY
They are a little expensive, but at least they are available.

That's terrific, thanks for posting it!! Is this the entire metal hood as well as the seal?

The axles only have 14K miles and are otherwise in great condition, got them both for $82 delivered. For the $22 each that Amazon wants, I'd rather get these ready to install than pay the $75+ each that local junkyards are asking for 100K+ mile axles.
 
Yep, I had good luck using them a a few years ago. If you haven't changed a cv axle shaft on these yet, take a look at the rest of the seal arrangement on the wheel hub side. There is another seal between the spindle and cv shaft end (not the seal that is installed between the sealed bearing and the wheel hub) that frequently goes bad and will probably need to be replaced when you swap out the cv shafts.
 
Yep, I had good luck using them a a few years ago. If you haven't changed a cv axle shaft on these yet, take a look at the rest of the seal arrangement on the wheel hub side.

Really appreciate you checking in, I just ordered a pair of Koyo seals from Amazon @ $22 each. Tapped the old seals off with a punch and I'll try to negotiate w/ LKQ to cover the cost of the new ones...but at net cost of $57 each including the new seals these axles are a still good deal vs. chinese rebuilds.

I've checked the local parts stores online and they have the inner seals you mentioned. If the current ones are trashed, I'll do the replacement. I've had good results just being careful removing the old CV axle so as not to drag the splines across the seal surfaces, and cleaning things up w/ aerosol silicon spray (non-petroleum type). But if they're already deteriorated, out they come.
 
VVT Actuator

Replacing the passenger side (Bank 1) VVT actuator reduced the P0016 error frequency from constant to intermittent, and only when the engine's not up to temp. Warming the engine up before the first drive-off prevents P0016 from setting in Permanent status and lighting the Check Engine light...it'll set in Pending state and then clear itself.

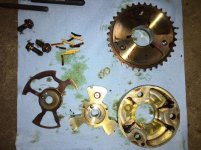
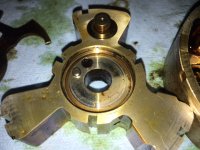
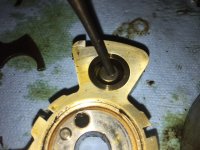
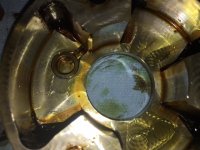
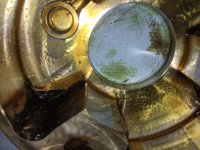
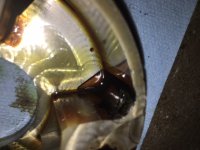
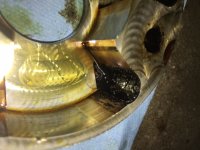
I disassembled the factory VVT actuator to determine the failure mode, pics are below. It had sludge accumulated in the crevices where the vane doesn't sweep but was otherwise serviceable. The lock-pin was set when I removed the cover. The intake cam oil passages that feed the VVT actuator were completely clogged w/ sludge at the time I replaced this part, so my theory is that no or insufficient oil was getting to the actuator.

If anybody wants this actuator or parts in current disassembled state, I'll ship it to you for USPS shipping cost. The reluctor ring is intact and undamaged, it popped free when I drove out the vane. A few dings on the aluminum housing so it is not reusable.
 

Attachments

  • IMG_1445.jpg
    IMG_1445.jpg
    56.3 KB · Views: 217
  • IMG_1446.JPG
    IMG_1446.JPG
    127.4 KB · Views: 202
  • IMG_1448.JPG
    IMG_1448.JPG
    122.3 KB · Views: 223
  • IMG_1449.JPG
    IMG_1449.JPG
    115.2 KB · Views: 215
  • IMG_1450.JPG
    IMG_1450.JPG
    125.5 KB · Views: 200
  • IMG_1451.JPG
    IMG_1451.JPG
    96.2 KB · Views: 236
  • IMG_1453.JPG
    IMG_1453.JPG
    108.9 KB · Views: 207
Hey man....I have a full engine that has 175K when it overheated due to a dipshit previous owner putting stop leak in the radiator which resulted in cooking Bank 2. It was running perfect before that tho. So if you need any parts or need me to take pics of something let me know. I've torn down the drivers side head a bit down to removing the cams, but other than transferring mounts, some brackets, etc all the internals are in tact. I'm planning to take it completely down after I get the new engine situated and get my Triumph TR4 project completed. Anyway, shoot me a PM if you need anything off this engine.
 
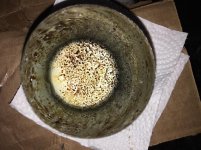
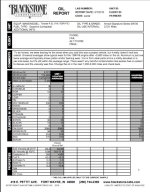
Update: 5th oil fill was Amsoil Signature Series 0W-30 with 15oz of Lubeguard moly additive. To make an informed decision on whether to replace the timing chains & guides or get a lower-mileage salvage yard engine, I drew a sample at 3700 miles and sent to Blackstone. Report is below, engine appears fine. I also changed the filter given the sludge this engine has discharged during previous oil changes, pic of the opened-up filter canister is also attached and pretty gross.

Looks like the engine is a keeper and it's time to gather timing chains, sprockets, guides, and tensioners for a project this Summer.
 

Attachments

  • 4Runner_Filter_JAN2018.jpg
    4Runner_Filter_JAN2018.jpg
    137.8 KB · Views: 196
  • 4Runner_Jan2018.jpg
    4Runner_Jan2018.jpg
    107 KB · Views: 178
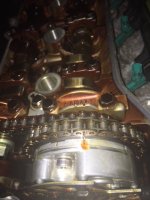
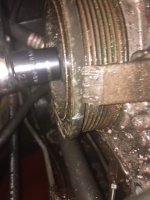
With the engine showing good oil analysis results, and the timing chain stretch becoming a nuisance with P0016 error code recurring, I've started the chain replacement project. Engine teardown is in progress and a few internal pics below showing the nearly 10degrees of timing retard between bank 1 intake cam marks and the crank balancer. Still need to unbolt the AC compressor and belt tensioner, then the timing cover and #2 valve cover come off and I'm looking at the chains. More pics to come as the project continues.
 

Attachments

  • 4Runner_bank1_cam_zero.jpg
    4Runner_bank1_cam_zero.jpg
    106.9 KB · Views: 159
  • 4Runner_crank_timing.jpg
    4Runner_crank_timing.jpg
    107.5 KB · Views: 159
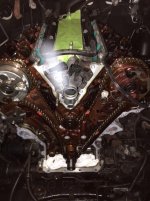
Timing cover is off as shown in the attached pics, no significant sludge on the engine side. The timing cover was a bit sludged and I'm cleaning it next. The new chains are soaking in clean oil in prep for installation, letting it soak into the pins & bushings.

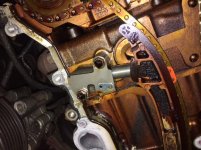
#1 tensioner extended length is shown in the other pic, this was installed back in August after I bought the truck when I suspected the factory tensioner had failed...not the case as I later learned.

Next up is cleaning the old FIPG sealant, cleaning threads, and then changing out the chains, sprockets, guiderails, and tensioners. The shop manual has been a huge help along with the Wells guy's video on YouTube.
 

Attachments

  • 4Runner_engine_internals_front.jpg
    4Runner_engine_internals_front.jpg
    53.9 KB · Views: 135
  • 4Runner_tensioner_May2018.jpg
    4Runner_tensioner_May2018.jpg
    63.7 KB · Views: 141

Members online

No members online now.

Forum statistics

Threads
278,309
Messages
3,554,071
Members
248,016
Latest member
Advally Service

Trending content

Back
Top