

MagusWyatt
New member
While working on a complete suspension rebuild, I found that I had the dreaded cam adjuster sleeved rusted inside the bushing. I didn't have a reciprocating saw to cut them out and couldn't leave at the moment, so I set out to find a new way using what I had. I ended up finding a way to do it using nothing but a socket wrench, an adjustable wrench, and old parts that are already removed during this job.
It looks like there are a lot of steps, but this whole process really only takes around 10 minutes.
For reference, in these pictures I am working on the passenger side, rearmost cam adjuster sleeve.
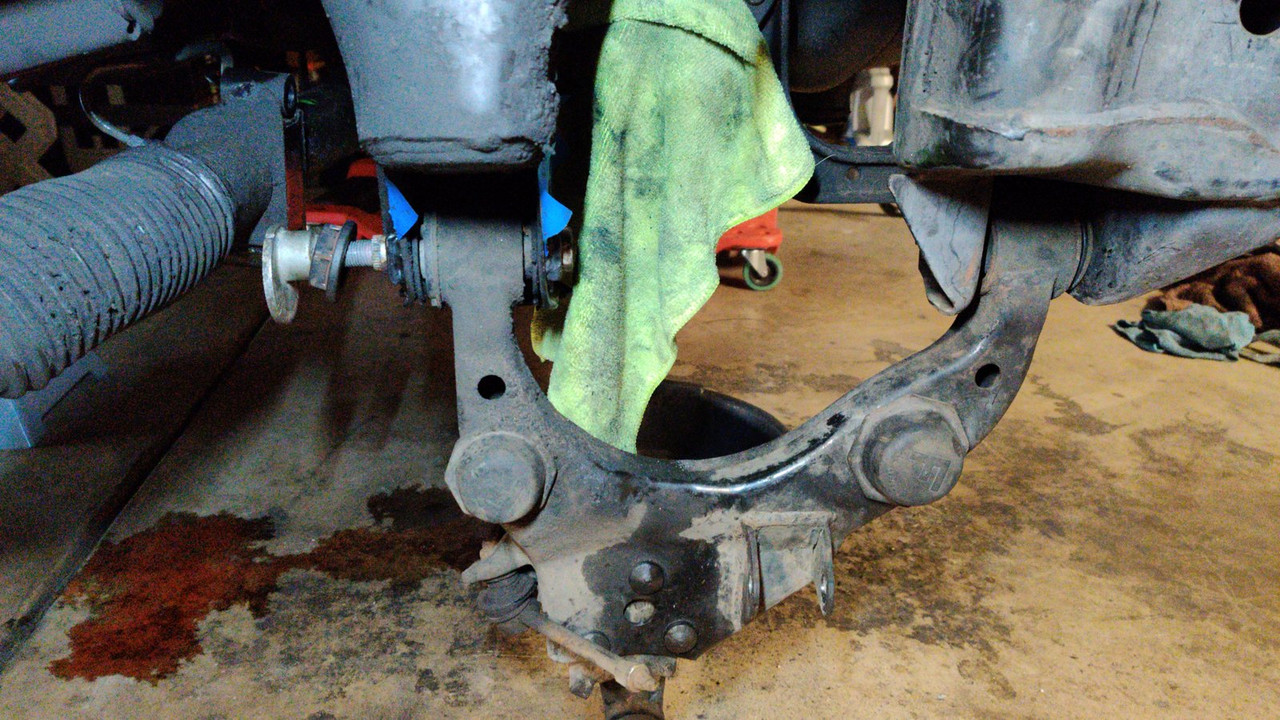
Step 1: Reverse the cam adjuster bolt from the direction it sits when things are assembled. The bolt head should be inserted so it rests against the part of the cam adjuster sleeve that sticks out through the opening in the frame.
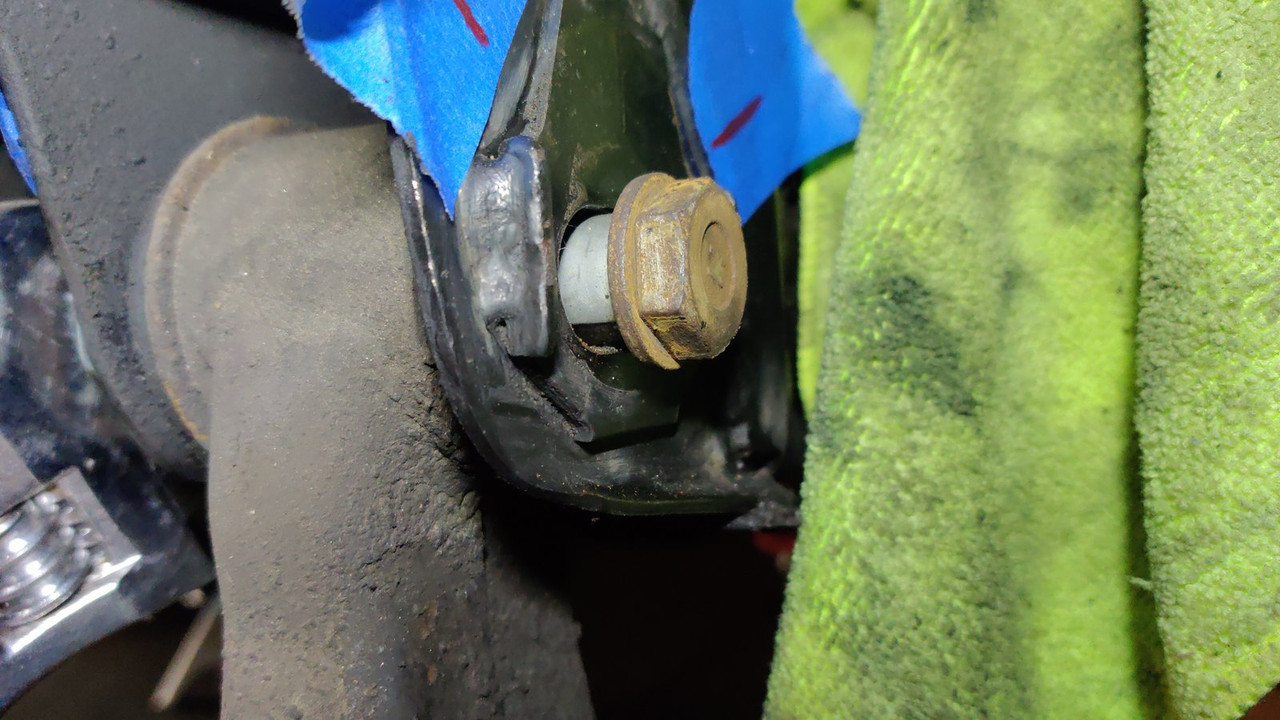
Step 2: Place an axle nut on the other end of the bolt, wider side against the LCA. Then thread one of the cam adjuster plates, reversed from the direction it would normally sit, on to the end of the bolt. Get your adjustable wrench and size it so it fits on the nut section of the cam plate you just threaded on. Hold everything in place and finger tighten the whole assembly. The whole assembly should now be fairly solid, and the adjustable wrench will be captured by the tension between the axle nut and the cam plate.
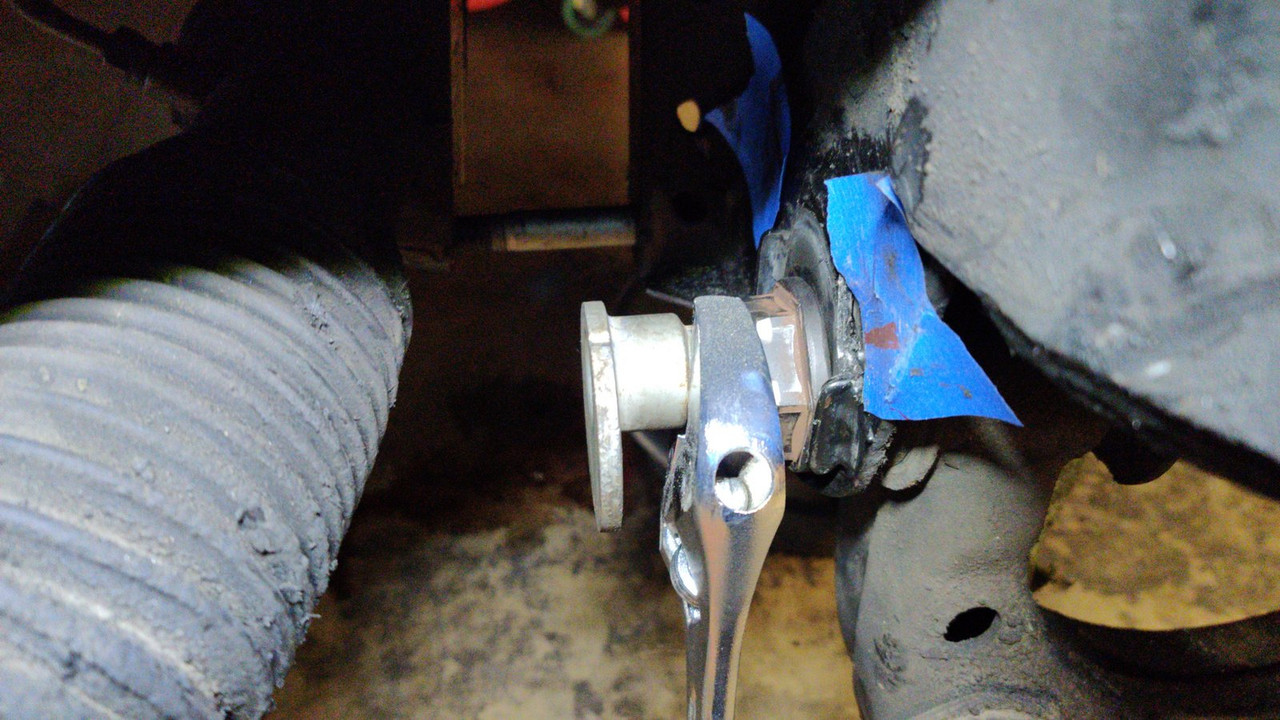
Step 3: Now, you want to make sure that the axle nut is centered around the hole where the cam adjuster sleeve is. You may have to loosen the assembly a bit to get everything centered properly, then finger tighten it back down. The axle nut is essentially acting as a recieving cup for the cam adjuster sleeve, which will be drawn out in that direction. Get your socket wrench with a 22mm socket on it ready for the bolt head. Hold the adjustable wrench with one hand to keep the cam plate from rotating, then start tightening the bolt head with the socket wrench. You should start to notice the bolt head pressing the exposed side of the cam adjuster sleeve back through the frame! Stop when you meet significant resistance and you see the bolt head bottomed out against the frame.
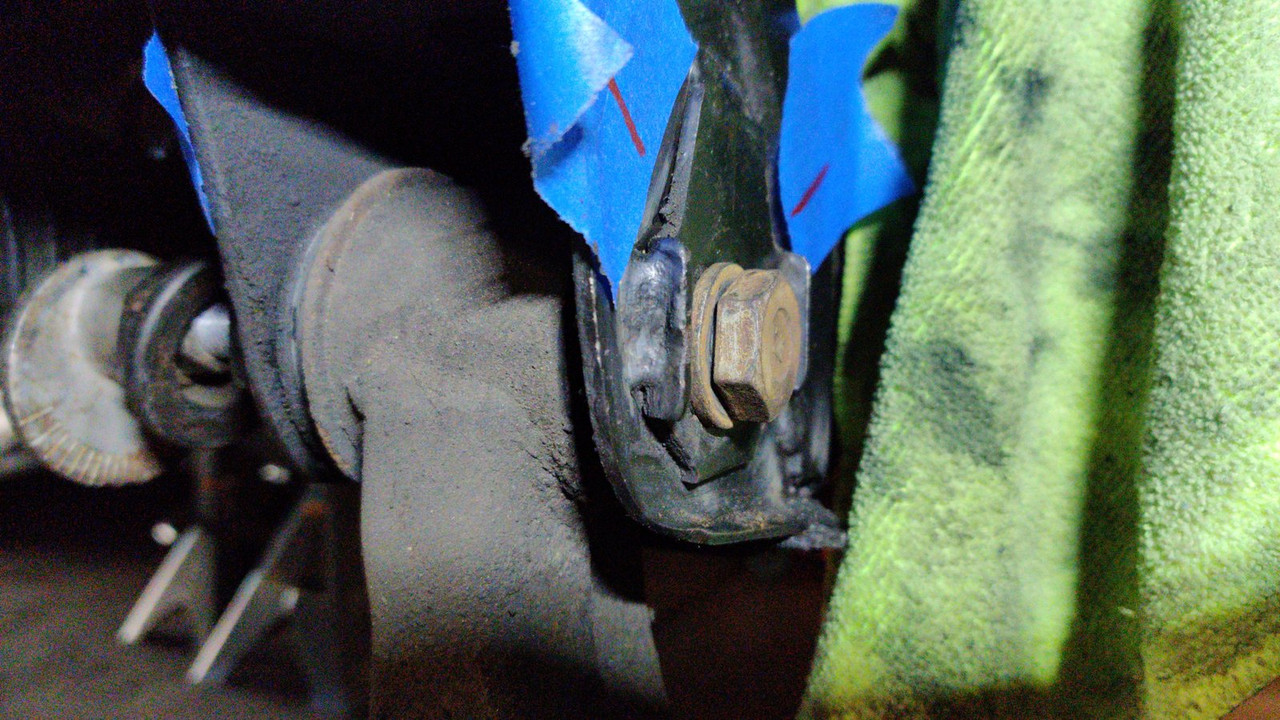
Step 5: Now loosen the whole assembly and you'll see that the ugly rusted mess of that cam adjuster sleeve has been partly drawn out!
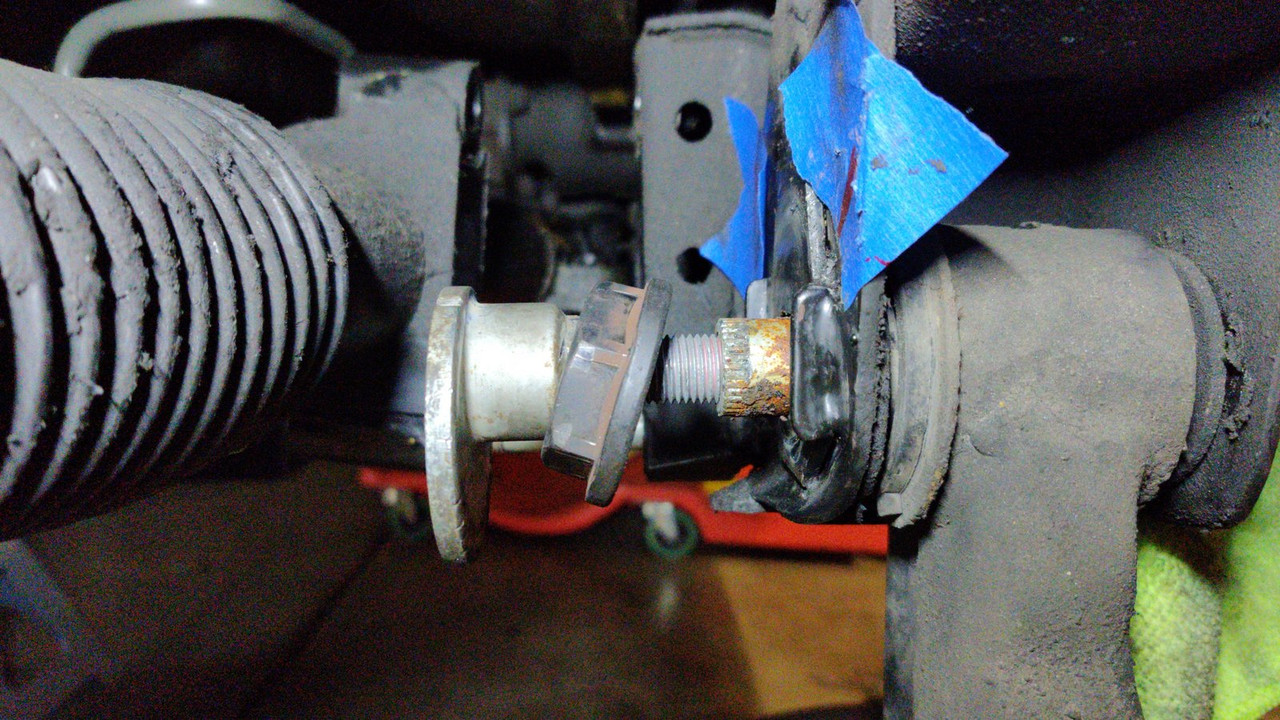
Step 6: Once the rusted surfaces have been broken apart, it's just a matter of getting a prybar or large screwdriver and tapping the sleeve out the rest of the way.
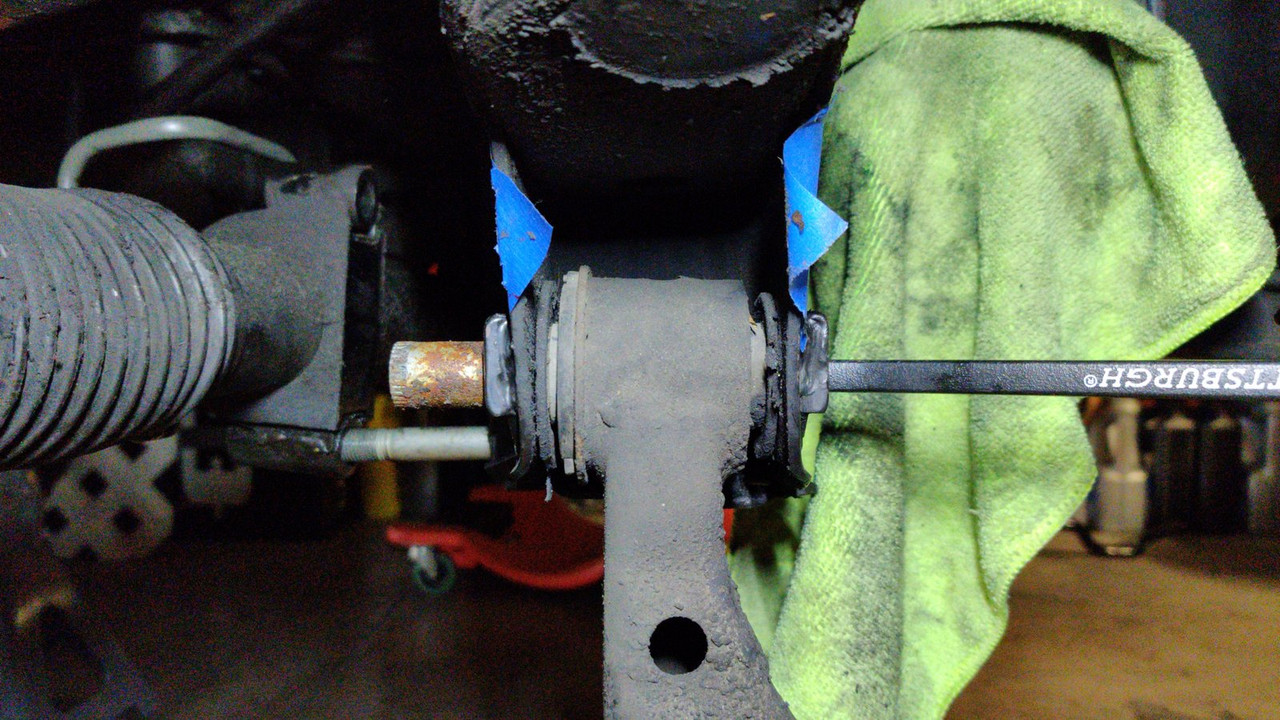
And voila! You've just removed a siezed cam adjuster sleeve without any special tools. I hope this helps someone the next time they're planning on doing a job that requires taking these cam sleeves out.
It looks like there are a lot of steps, but this whole process really only takes around 10 minutes.
For reference, in these pictures I am working on the passenger side, rearmost cam adjuster sleeve.
Step 1: Reverse the cam adjuster bolt from the direction it sits when things are assembled. The bolt head should be inserted so it rests against the part of the cam adjuster sleeve that sticks out through the opening in the frame.
Step 2: Place an axle nut on the other end of the bolt, wider side against the LCA. Then thread one of the cam adjuster plates, reversed from the direction it would normally sit, on to the end of the bolt. Get your adjustable wrench and size it so it fits on the nut section of the cam plate you just threaded on. Hold everything in place and finger tighten the whole assembly. The whole assembly should now be fairly solid, and the adjustable wrench will be captured by the tension between the axle nut and the cam plate.
Step 3: Now, you want to make sure that the axle nut is centered around the hole where the cam adjuster sleeve is. You may have to loosen the assembly a bit to get everything centered properly, then finger tighten it back down. The axle nut is essentially acting as a recieving cup for the cam adjuster sleeve, which will be drawn out in that direction. Get your socket wrench with a 22mm socket on it ready for the bolt head. Hold the adjustable wrench with one hand to keep the cam plate from rotating, then start tightening the bolt head with the socket wrench. You should start to notice the bolt head pressing the exposed side of the cam adjuster sleeve back through the frame! Stop when you meet significant resistance and you see the bolt head bottomed out against the frame.
Step 5: Now loosen the whole assembly and you'll see that the ugly rusted mess of that cam adjuster sleeve has been partly drawn out!
Step 6: Once the rusted surfaces have been broken apart, it's just a matter of getting a prybar or large screwdriver and tapping the sleeve out the rest of the way.
And voila! You've just removed a siezed cam adjuster sleeve without any special tools. I hope this helps someone the next time they're planning on doing a job that requires taking these cam sleeves out.


