Rear Axle Bearings With Complications

WrenchTech

New member
Shortly after I bought this 4runner a year ago I thought the brakes were kind of weak. I should have known that gear oil leaking onto the rear brake shoes was the likely cause. Instead, it took seeing some oil on the inside face of the back wheels to alert me to what was actually happening. I have a press and have done axle bearing work before, so I prepared to do the job. I knew that my 4runner had ABS and that that would add some extra steps. So I looked to YouTube to find a video detailing the work. That’s when I found the excellent Timmy the Toolman series on 3rd gen 4runner repairs and his comprehensive treatment of the axle bearing job. Armed with this good information I tore into the job.

The first problem I encountered was that the bearings had been previously worked on by somebody who, let us say, was not the most conscientious mechanic and not somebody that we would hope to see doing such work. I found that the ABS gears/tone rings were pressed on so far that I could not get a tool on them to to pull them off.

This would also explain why the axle was leaking so much gear oil. The inner axle seals are designed to work with the lock ring. The lock ring is installed so that the lip of the seal rides on the smooth outer surface of the lock ring. If these two pieces are not properly aligned there will be nothing to stop the oil from spilling out. These were so far out of alignment that they weren’t even touching.

I ended up having to remove the ABS gear and the lock ring by grinding them to the point where they were thin enough to crack with a cold chisel. On my first attempt I ground too deep and nicked the axle. By the time I got to the second axle I had figured out a technique to do the job quickly and without damage to the axle shaft. After I got the ABS gear off I could see that someone else had also cut into the axle shafts with what looked like a thin grinding wheel like you would find on a Dremel tool.

At that point I had two damaged axles and two destroyed ABS gears. I ended up buying two used axles from a nearby wrecking yard which came with the ABS gears that I would need. I got them home and began the press work. My homemade axle puller press tool combined with an ABS ring adapter tool, that I purchased for this job, got me through the disassembly work. Now I am having to figure out how I’m going to press the new parts back on. This axle is big enough that it only fits in one direction in the press, and so the technique that I used in the past won’t work. It is just a matter of coming up with right size section of tube so that I can flip the axle so that the flange faces up and the parts get pressed on from below. I’m sure that’s hard to visualize or make sense of from reading what I have written here. I will try to get some pictures to explain better.

This is a picture of the adapter, the red thing, being used with my homemade tool, to pull the ABS gear off.
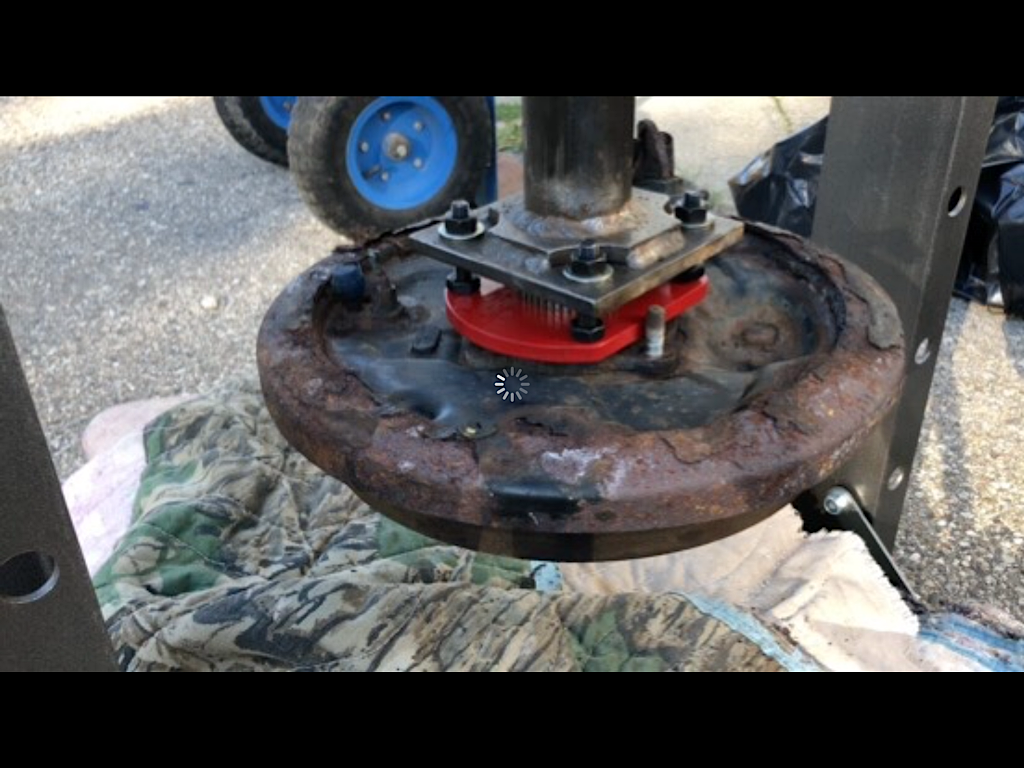

adapter.png


Here I have just pressed the axle out of the backing plate, which is very rusty and will not be reused.
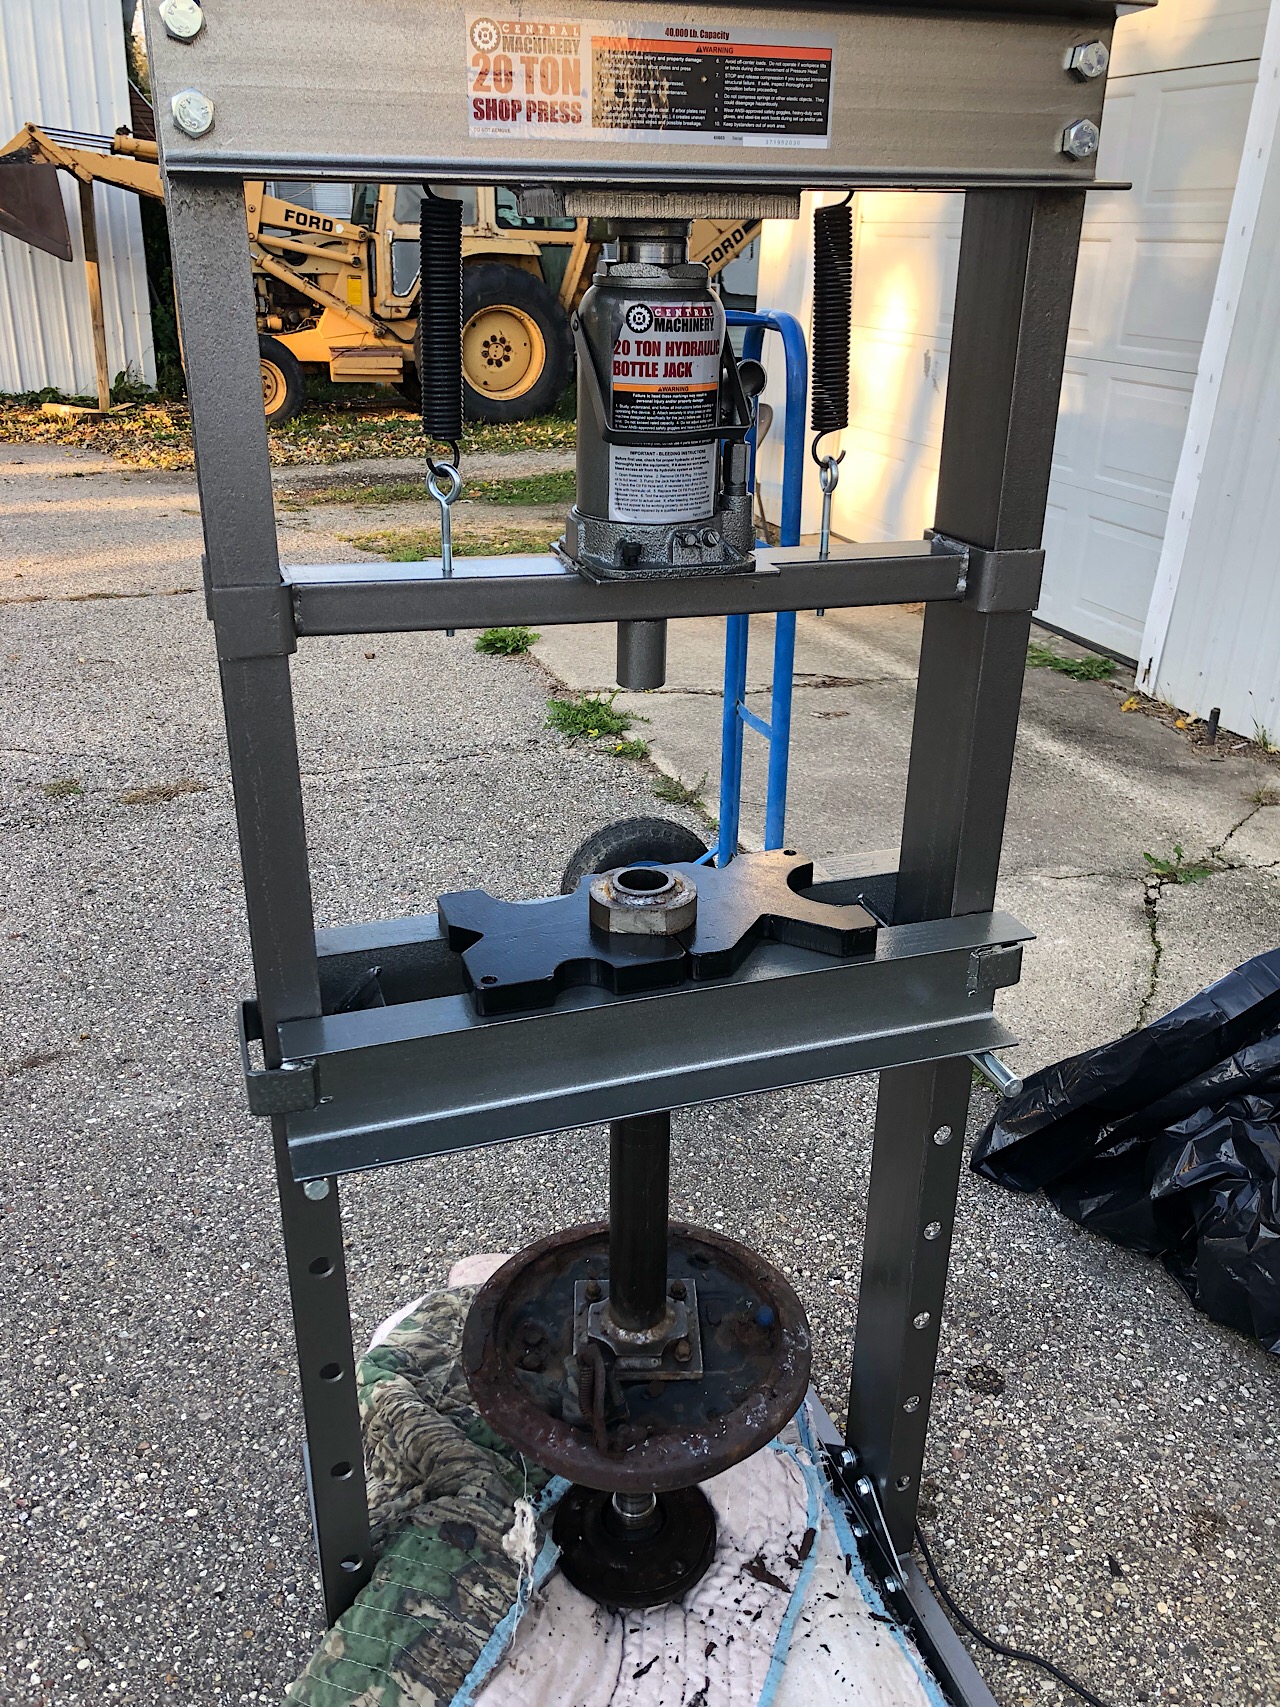

axle-press.jpg
 
Last edited:
Register to hide this ad
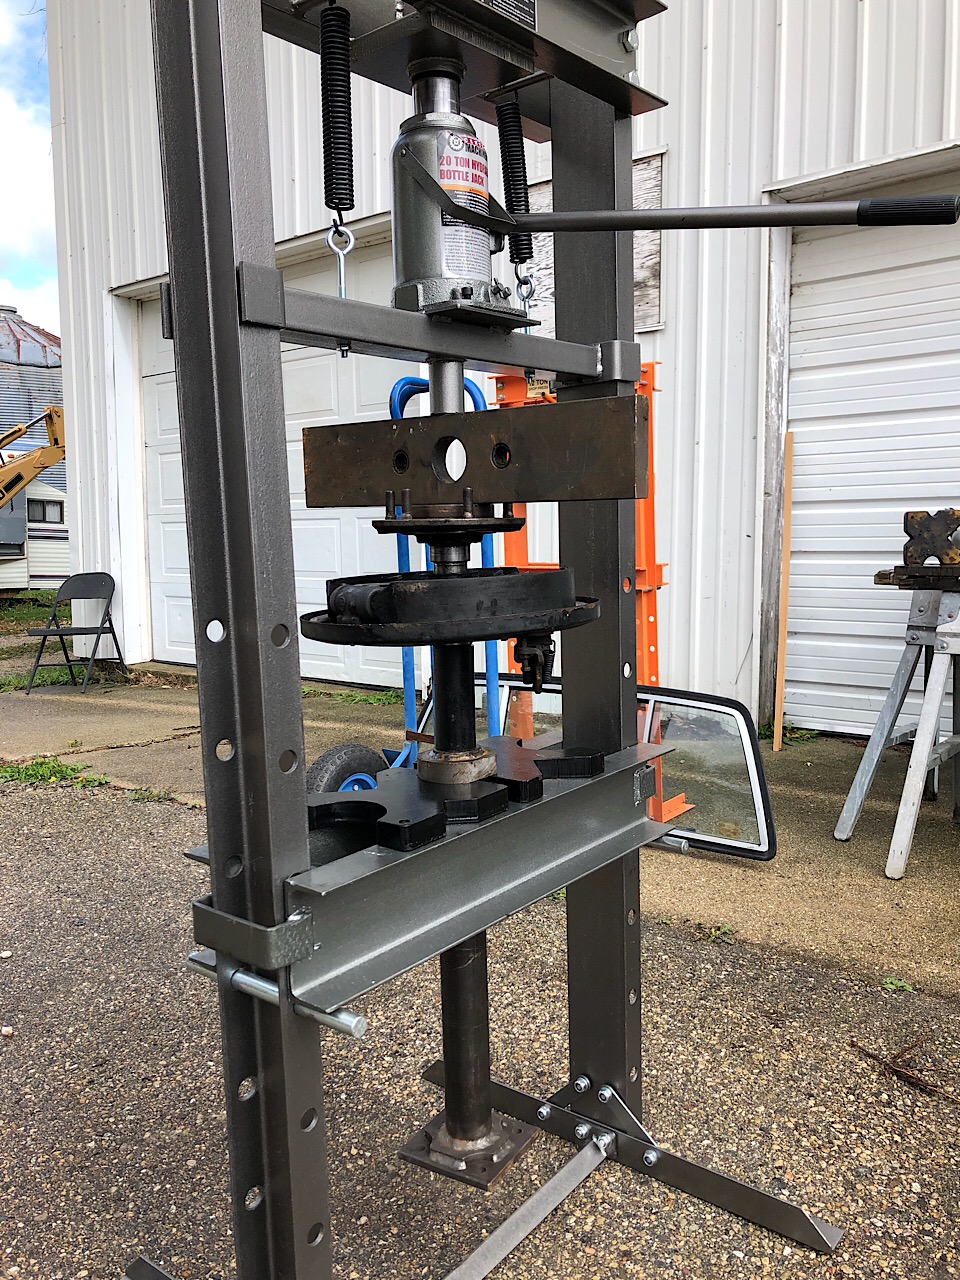
I wasn’t sure exactly how I was going to do it, or if I had the right hardware to set up the press. In the end it was easier than I thought it would be. I hung my axle puller tool from the press plates, Put a 6 inch section of one and a half inch black pipe on top of that and then inserted my axle, with the bearing and the lock collar loose on the shaft and ready to be pressed into place. To transfer the force of the press to the face of the axle flange, I used a piece of 1 inch thick steel that I picked up yesterday at the recycling yard for $1.50. It worked like a charm.

And so I was able to get the axles, the bearings, the ABS gears, and the lock collars pressed on. On the passenger side axle I got the depth setting of the ABS gear locking collar, relative to the oil seal, set perfect on the first try. On the driver side axle I had to return to the press to push the collar and the tone gear on about an additional eighth of an inch to get the oil seal to ride on the middle of the lock ring. It was cold and raining towards the end of the day and I was working outside so I stopped at this point. Tomorrow the brakes get new shoes and the 4runner will be back on the road. I am hoping to experience a new level of breaking power


axle-press-config.jpeg
 
Last edited:
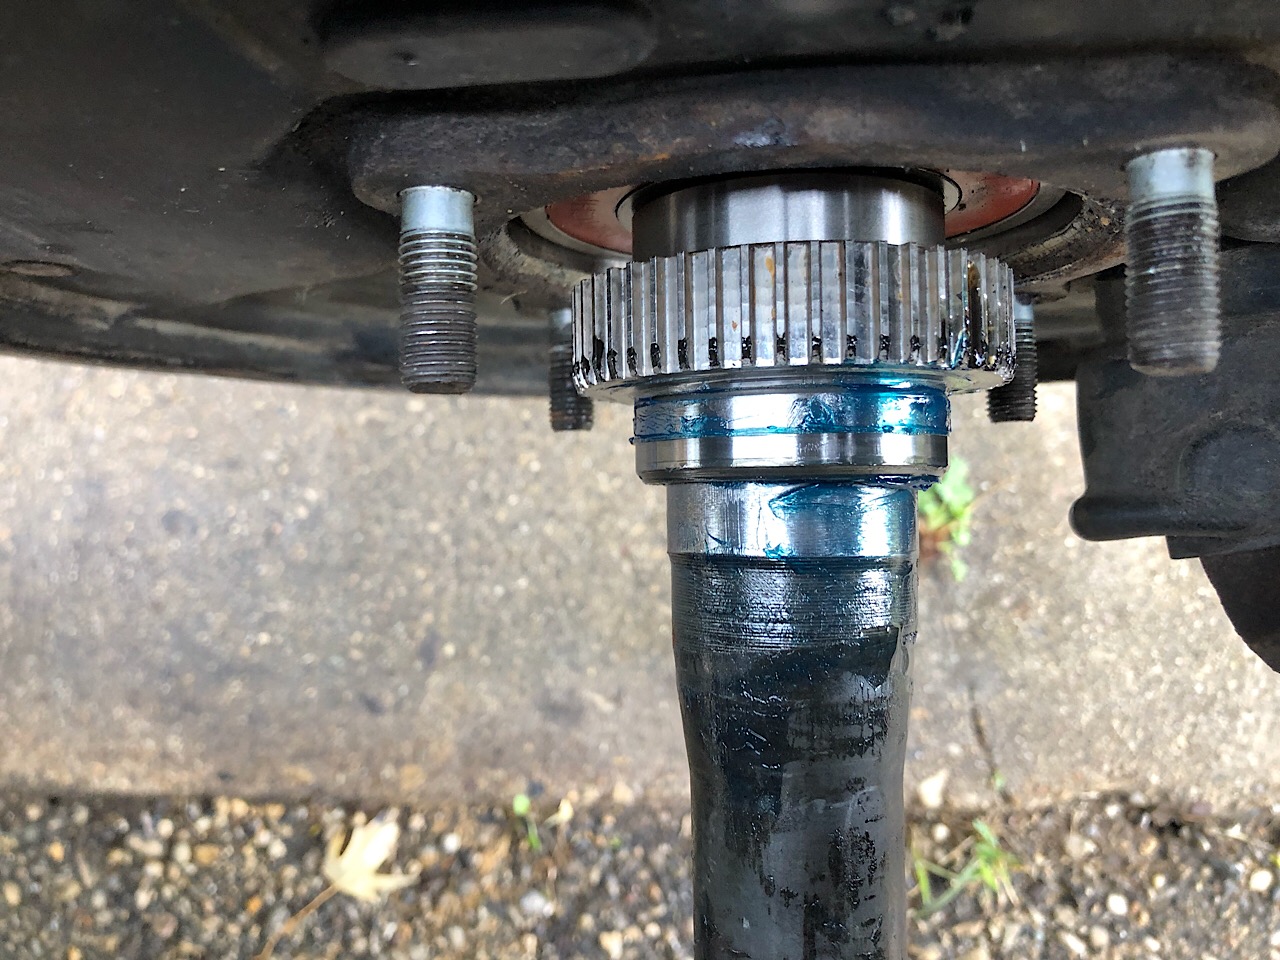
In this picture you can see the results of my grease test to see where the seal is riding on the locking collar. You can see a crisp line where the seal has wiped the grease clean right up onto the middle of the collar. This is a pretty good result. How you get this right depends on how far you press the collar onto the shaft. There is no reference mark to tell you where are you should stop. You basically have to make an educated guess. Mostly by pure luck, I got it right the first time. On the second axle, it took two tries to get a similar result.

grease-test.jpeg


An interesting sidenote is that with the ABS gear pressed on to get these results, they are likely pressed on so close to the backing plate that I would not be able to get my new ABS gear pulling tool under them if I wanted to pull them off.
 
Last edited:
I followed your link and read that post. I don’t see what it has to do with my situation. My seal is riding right on the middle of the collar. What could possibly be wrong with that?

I think what Dr Coffee is picking up on is the fact you have a crap load of polished axle showing above the retainer. Usually 4-5mm of polished axle showing above the retainer puts the seal lip dead center on the inner retainer. I guess somehow your axles look different from other OEM axles, OR, those axles are aftermarket. My bet is they are aftermarket. I've done over a dozen sets of axles and I've never seen anything like your result with OEM axles.
 
What is the measurement on that polished axle showing? It sure looks like a lot, but maybe it’s photo angle.

Try that test again with nice crisp sharpie marker lines instead of the grease. It tends to show a more accurate and clearer seal lip line.

Tim beat me to it. Another possibility is that the seals could be not fully seated??
 
Last edited:
What is the measurement on that polished axle showing? It sure looks like a lot, but maybe it’s photo angle.

Try that test again with nice crisp sharpie marker lines instead of the grease. It tends to show a more accurate and clearer seal lip line.

I know the polished shoulder of the retainer is around 10mm wide. Using that as a comparison, I'd say he's got at least 10mm of polished axle showing above the inner retainer. There's just no way those are OEM axles unless he barely knocked the seal into the axle housing. I've done this job too many times to know without a doubt something isn't adding up from the picture he posted of his grease test.
 
The outer lip is a dust sheild and gives the impression that the “sealing” lip is in the correct location, when in fact the sealing lip is still inboard of the retainer and not contacting the shoulder of the inner retainer. I can see just by looking at the picture, the inner retainer and abs tone ring have been pressed too far on the axle.
 
I think what Dr Coffee is picking up on is the fact you have a crap load of polished axle showing above the retainer. Usually 4-5mm of polished axle showing above the retainer puts the seal lip dead center on the inner retainer. I guess somehow your axles look different from other OEM axles, OR, those axles are aftermarket. My bet is they are aftermarket. I've done over a dozen sets of axles and I've never seen anything like your result with OEM axles.

I was surprised too. I don’t understand why when I took the axles apart, I was able to use the ABS gear puller with room to spare. Now my ABS ring is probably too close to the backing plate to be able to insert the tool. One thing that may be different in this situation, is that I didn’t use the backing plates that came with the axles I just bought. I assembled those axle shafts with the backing plates from my original axles. I suspect that those backing plates had been replaced at some point. They appear to be much newer than you would expect. My seals came as part of a service kit from Marlin Crawler. Nachi bearings and what they represented as OEM seals. I installed the seals with a sealed driver of the correct size and gave it a pretty good pounding. It seemed to sit flush in the recess of the seal pocket.
 
The outer lip is a dust sheild and gives the impression that the “sealing” lip is in the correct location, when in fact the sealing lip is still inboard of the retainer and not contacting the shoulder of the inner retainer. I can see just by looking at the picture, the inner retainer and abs tone ring have been pressed too far on the axle.

That makes sense. I haven’t installed the axles yet. I will look at it tomorrow. to see if I need to pull the ABS gear out some, If I can’t get the ABS gear puller under it, I can probably get my gear splitter under it.

The grease test seems like a waste of time in light of all this. You are not going to get useful information because this dust lip will wipe the shaft coming and going.
 
Last edited:
That makes sense. I haven’t installed the axles yet. I will look at it tomorrow. to see if I need to pull the ABS gear out some, If I can’t get the ABS gear puller under it, I can probably get my gear splitter under it.

The grease test seems like a waste of time in light of all this. You are not going to get useful information because this dust lip will wipe the shaft coming and going.

Use a sharpie. It’ll give a truer line.
 
I don't understand how Toyota didn't poka-yoke this assembly somehow or at least have a spec in place for the retainer locations. Seems ridiculous that it isn't a more straightforward install.

I pulled my abs sensors today and found a film of gear oil on the sensor itself but not enough for a syringe with a tube on the end to pick up when I jammed it into the bottom of the housing past the abs ring. I think it may be residual that the seal wiped off the axle when I was sliding it in and out to do the sharpie test because there was gear oil in the axle tube still...but I'm paranoid now. Just going to keep an eye on it and see if I can figure out a way to soak up what's in there. Maybe a cotton covered pipe cleaner or something.

Sent from my moto x4 using Tapatalk
 
I couldn’t wait. So I went back out to the garage at 11 PM to see what could be done. I could not fit the Dwayne’s plate puller under the ABS gear, however I was able to get my gear splitter under it. I attached it to my long tube bearing puller and hung it in the press. It was very easy to push the axle down through the ABS gear and the lock ring to bring them up to 4 mm from the top of the machined surface that they rest on. I will test it in the axle housing tomorrow and if it works I will do the same to the other axle shaft.

I examined the seal in the axle housing and indeed it does have an outer and inner lip. I can see now that if the outer lip was riding where my grease line indicated, the inner lip may have been riding too close to the edge of the machined surface.
 
Draw lines from side to side across the retaining ring. Then install the axle and spin it a few times. Then pull it out and see where the rubber seal lip rubbed off the sharpie.
 
I examined the seal in the axle housing and indeed it does have an outer and inner lip. I can see now that if the outer lip was riding where my grease line indicated, the inner lip may have been riding too close to the edge of the machined surface.

This is interesting. Are you using OEM parts? The seals I got from Toyota only had one lip while the ones I took off clearly had an inner and outer lip.
 
This is interesting. Are you using OEM parts? The seals I got from Toyota only had one lip while the ones I took off clearly had an inner and outer lip.

I should have grabbed a picture of it. I got my kit from Marlin Crawler. It is all supposed to be OEM stuff. Mine was kind of a thick seal with two distinct ridges that I took to be the lips. Well they were a little more than ridges, but they were connected by a U-shaped trough between themThat separated them buy a little more than an eighth of an inch, not distinctly separate.
 
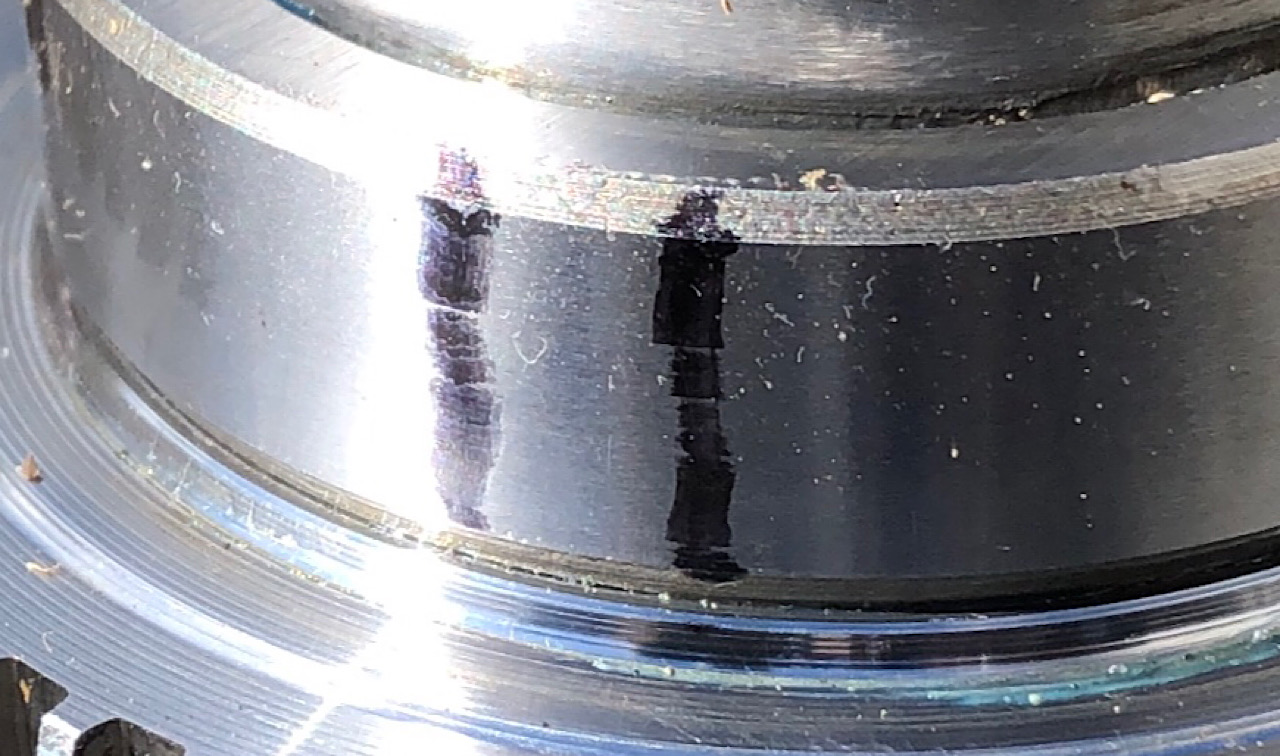
Ok, this is what I got when I moved the ABS gear and the lock ring up so that I had about 6 mm of the machined surface showing. I tried 4 mm and found that the dust seal was running off the bottom edge of the lock ring. When I moved it to 6 mm I got this result, which I think shows the seal riding fairly close to the middle and the dust seal running just inside the lower edge. Ignore the sharpie line on the left and look at the one on the right. The dust seal mark is very faint. Also, ignore all the dust. I’m not sure where it came from, but I cleaned it up.

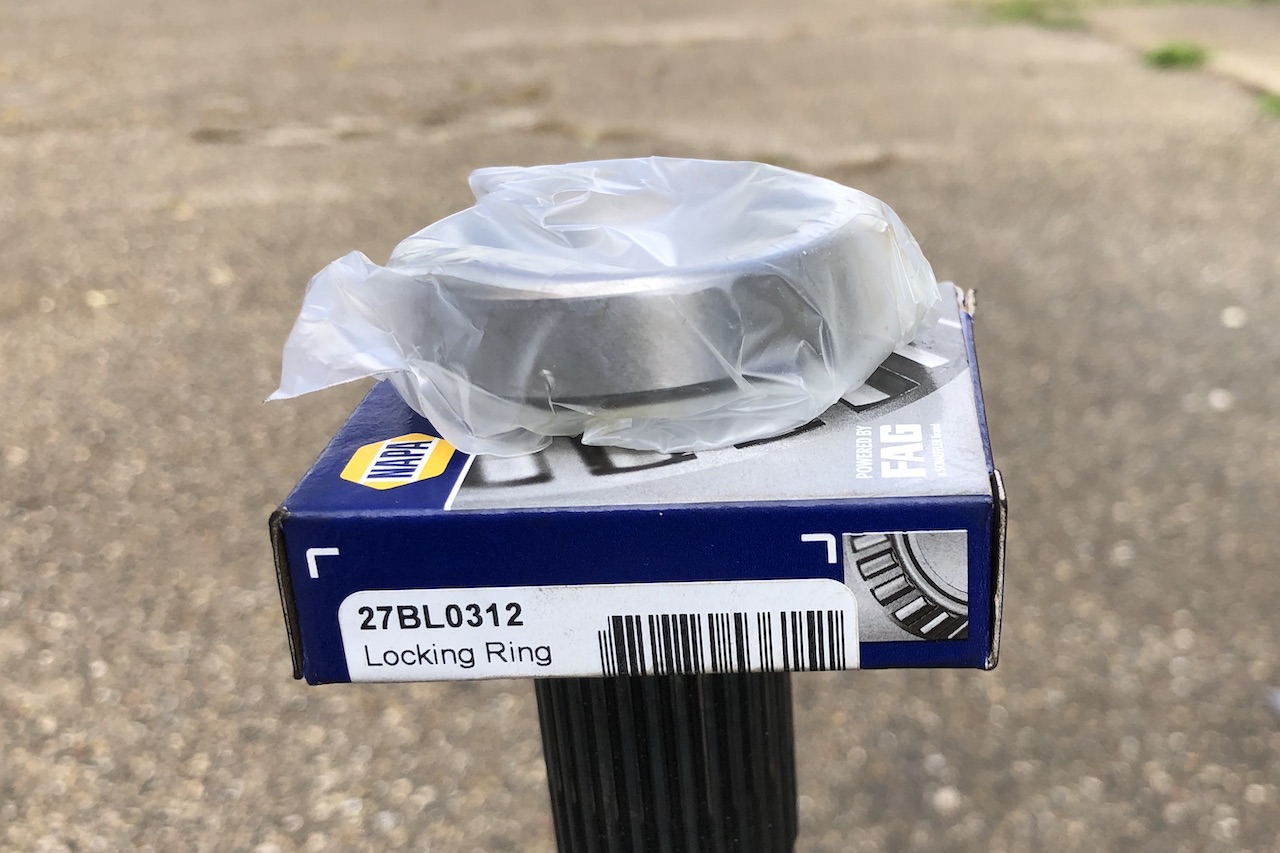
And for what it's worth, the lock ring is not a Toyota part. I got it at my local NAPA. If you ask for one, chances are pretty good they will say they don't carry a lock ring for this application. If you know the part # though, they can get it for you. I paid about $13. part # 27BL0312


lockring-w-marks.jpeg


lockring-part%23.jpg
 
Last edited:

Members online

Forum statistics

Threads
278,316
Messages
3,554,109
Members
248,016
Latest member
Advally Service

Trending content

Back
Top