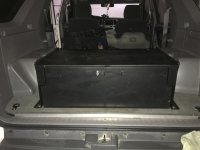
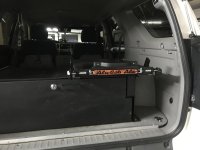
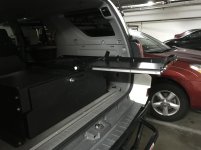
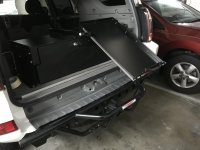
Rear cargo box plate system

drbyrdman

New member
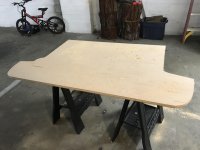
-First make a template with the carpet. Black sharpie.
-Cut the carpet and test fit it. Punch holes in it for mounting points.
-Find the factory mounting points. There are 6 places you can use.
-Get some 3/4"Maple or Birch hard plywood.
-Use the carpet template.
-Cut it out.
-Drill holes for factory mounting points.
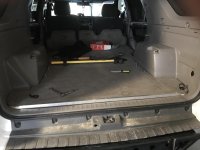
-Install plywood.
-Router the edges if you want to.
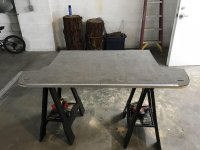
-Paint,carpet,stain it. What ever color you wish.

Pic's coming
 
Last edited:
Register to hide this ad
It's not entirely that simple.

The back of the 4Runner isn't a perfectly flat area, and supports are needed in spots to keep the surface level and properly supported.

If you calculate your time and materials and headaches of making it look like it was made right, the Goose Gear 4th Gen 4Runner plate saves time, money, and headache, as they've figured out all of the contours and mounting supports, 24 threaded inserts for 1/4-20 sized eye bolt mounting holes or Goose Gear components, and then have it professionally bedlined. $400 and you're done.
 
The carpet is a good starting point, but it extends under the side panels, and doesn't go all the way forward. I measured the cargo area w/o the side bits so its one large square and drew that on plywood, and then used cardboard and made templates of the sides. Took a lot of trail and error. I used the 4 d-shackle bolts to mount it. Here is mine
 
unnamed (1).jpg

unnamed (2).jpg

unnamed (5).jpg
 

Attachments

  • unnamed (1).jpg
    unnamed (1).jpg
    131.6 KB · Views: 1,392
  • unnamed (2).jpg
    unnamed (2).jpg
    133.6 KB · Views: 1,408
  • unnamed (5).jpg
    unnamed (5).jpg
    127.3 KB · Views: 1,989
It's not entirely that simple.

The back of the 4Runner isn't a perfectly flat area, and supports are needed in spots to keep the surface level and properly supported.

If you calculate your time and materials and headaches of making it look like it was made right, the Goose Gear 4th Gen 4Runner plate saves time, money, and headache, as they've figured out all of the contours and mounting supports, 24 threaded inserts for 1/4-20 sized eye bolt mounting holes or Goose Gear components, and then have it professionally bedlined. $400 and you're done.

-54 bucks for Maple plywood at Homedepot
-99 bucks for a cordless Milwaukee. Which I needed anyways.
-And 14 bucks for hardware
 
Recommend some additional things if you want to re-do it....

1) use a spray adhesive on the wood before you lay the carpet down so it doesn't move around
2) leave extra carpet and wrap it around the edges and tuck underneath then staple down. That way you'll cover the edges and it will be less likely for the carpet to peal up.

Nice job btw I'm putting this on my to-do once I find myself a good 4th gen to buy
 
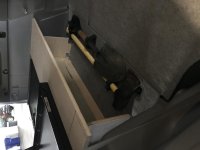
41sN7pSd2NL._SCLZZZZZZZ__SY500_SX500_.jpg
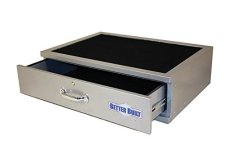
Its' coming out again. I ordered this cargo box and have a ARB fridge still to mount:boxer:
 

Attachments

  • 41sN7pSd2NL._SCLZZZZZZZ__SY500_SX500_.jpg
    41sN7pSd2NL._SCLZZZZZZZ__SY500_SX500_.jpg
    16.8 KB · Views: 1,345
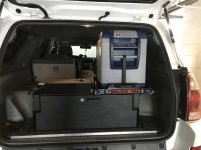
54301439550__BCCA1E43-8E1B-4E40-B54D-352C36C14862.jpg

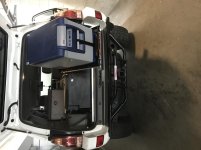
54301834923__FCEC8236-CCCC-4CDF-82ED-14893350EE4E.jpg

54301837164__BB73C56C-33CF-4D7C-B98A-8E0027716348.jpg

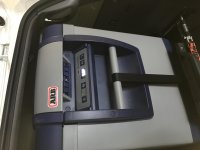
54301932135__4E7C26AD-463D-4C3F-B63A-0720BA0006C3.jpg
Little more done today:hunter:
 

Attachments

  • 54301439550__BCCA1E43-8E1B-4E40-B54D-352C36C14862.jpg
    54301439550__BCCA1E43-8E1B-4E40-B54D-352C36C14862.jpg
    128.6 KB · Views: 1,240
  • 54301834923__FCEC8236-CCCC-4CDF-82ED-14893350EE4E.jpg
    54301834923__FCEC8236-CCCC-4CDF-82ED-14893350EE4E.jpg
    122.3 KB · Views: 1,197
  • 54301837164__BB73C56C-33CF-4D7C-B98A-8E0027716348.jpg
    54301837164__BB73C56C-33CF-4D7C-B98A-8E0027716348.jpg
    124.3 KB · Views: 1,172
  • 54301932135__4E7C26AD-463D-4C3F-B63A-0720BA0006C3.jpg
    54301932135__4E7C26AD-463D-4C3F-B63A-0720BA0006C3.jpg
    122.3 KB · Views: 1,185
Thinking of redoing the back again

Anyone interested in buying my rear cargo setup minus the fridge? Im thinking of gutting it and starting over.
 
Reviving an old thread here.. [MENTION=117775]drbyrdman[/MENTION] do you happen to have better pics of where those mounting points are? Did you use existing mounting points or did you drill new holes in the floor board sheet metal? Or does anyone out there have more info better pics of good mounting points on the floor?

He hasn't logged in for over 3 years so you may not get a response.
 
Ha! Good catch… Figures. Anyone else have any pictures or documentation on what good mounting points are under the carpet or should I plan on drilling my own?


Not the OP but in the process of building my own. I’m using the factory tie down points in the back. There’s 4 in the corners, no need to cut carpet, and already a secure point.


Sent from my iPhone using Tapatalk
 
Not the OP but in the process of building my own. I’m using the factory tie down points in the back. There’s 4 in the corners, no need to cut carpet, and already a secure point.


Sent from my iPhone using Tapatalk

The ones near the hatch seem to be decent but I’m not sure the ones next to the back of rear seats are great… it’s just a removable panel.. they don’t seem to attach to the body at all.
 

Members online

No members online now.

Forum statistics

Threads
278,309
Messages
3,554,075
Members
248,016
Latest member
Advally Service

Trending content

Back
Top