You are using an out of date browser. It may not display this or other websites correctly.
You should upgrade or use an alternative browser.
You should upgrade or use an alternative browser.
rear shock install on 1996 4runner
- Thread starter Garth
- Start date
Register to hide this ad


LINY4Runner
New member
yeah there's no access through the interior of the truck....just gotta squeeze in there....use vice grips on the piston shaft to keep it from turning, you're replacing it anyways so don't worry about damaging it
Ghostrider
Registered User
Asuming the 1996 is similiar to the 2001 I used a socket wrench wedged on the nut and turned the shaft with a stilson wrench. This was after soaking the nuts with PB Blaster. You have to be commited to using a destructive method - once you start you cannot drive away.

techno
New member
I needed to use a deep socket to remove mine because of the amount of thread on top didn't allow a normal socket to fit on securely. I also used a pipe wrench on the old shock to rotate it and not the nut.
I did end up with some impressive looking cuts, scratches and bruises on my hands, they are a total b!tch to remove.
I did end up with some impressive looking cuts, scratches and bruises on my hands, they are a total b!tch to remove.

JohnsD90
New member
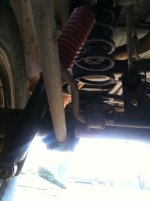
I offically hate toyota now for this, it was quite a Bltch to install, i only did one, and lucky for me i didnt have to unscrew the top cause it was broken off, the runner rides way better with just the one Rancho RS5000. The other will be installed tommorow because sears didn't give me all the required hardware.
Last edited:

JohnsD90
New member
I think the rear shocks might just be the biggest PITA about the 4runner. There's harder jobs to do obviously, but for how easy it should be, it's ridiculously hard.
Yeah especially because its a regular maintenance item.
Ghostrider
Registered User
I really wish someone like Toyota would take into account maintenance as part of the design. Literally a pre planned hole with a rubber cover would change this to a ten minute job. I guess I should be glad I don't have the oil dampening option that showed up a few years later. Hate to have to replace those. Not sure if it will help in the future but I added anti sieze to the thread on the top and then put a piece of surgical tubing over them. Trying to keep water and corrosion of the thread so I can get them off next time

JohnsD90
New member
i had to replace mine by accident broke the damn things installing my lift lol ya dumb i know. i hate it. but once you know what your doing it is a 10 minute job. i just installed my lc and ranchos picks in "installing my 2nd lift" and its soooooooo perfect!
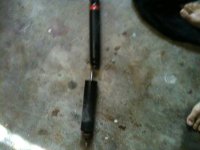
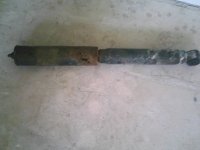
Rust was the worst part of this job, i couldnt even unscrew the top of the shock because of the rusting bolt that looked stripped. Here is one of my old shocks.
Attachments
JohnsD90
New member
that is bad, i painted my ranchos black and ill be replacing the red cushion thing with a different color,
here they are
nevermind i guess my photobucket wants to not work, is there an easier faster way to upload pics on this site?
straight from your computer, it is really anoying to go through fotobucket, all you do is hit "upload file from computer" and search for the pic.
JohnsD90
New member
Wait where would I find that?
go to "manage attachments" at the bottom of the new reply page, i took a photo to show you, its at the bottom of the photo.