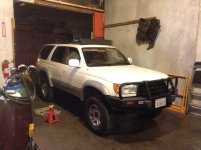
Redwood Family 4runner build

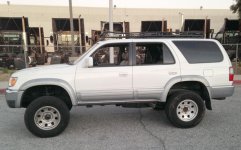
Switched out my 1st gen 4runner for a 3rd gen when the misses and I decided to have a kid. The 1st gen was great for us with the 2 dogs but thought something with 4 seats and 4 doors would be a bit more user friendly for a new family.

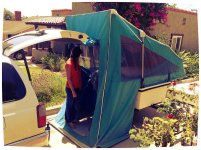
Found a 1997 4x4 with the e-lockerthat had 125k on it. That was in 7/13 or so. Right after I bought the 4runner I found a 1995 Trailblazer trailer, so I picked that up too.

As far the tentative 4runner mod list goes;
Toytec Ultimate Lift >>----> thanks to Drabbits for pretty much installing the lift!
ARB bumper (purchased, waiting for lift to install)
Tundra Brakes upgrade
17" Steel Wheels (purchased, waiting for lift to install)
Cargo/dog barrier (installed)
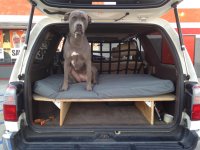
Storage/ dog platform behind rear seats
Dual battery
Fridge
Custom rear bumper (wishlist)


Tentative Trailblazer trailer mod list;
Max Coupler hitch
Lighting
Custom awning or room extender
Fix the bowed trailer cover
Find a replacement fender for the driver side fender or make new fenders out of FRP

The lists may change a bit as time goes.
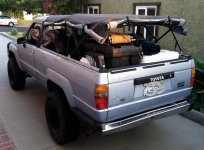
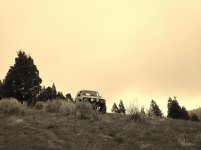
Here are a couple pictures of the 4runner and trailer as they sit as of Labor Day weekend, 2013. Southern sequoia national forest.
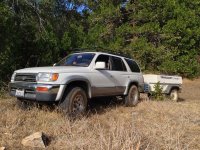
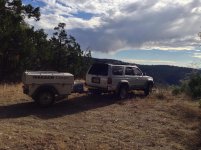
1.jpg

2.jpg

3.jpg
 

Attachments

  • 1.jpg
    1.jpg
    137.1 KB · Views: 1,541
  • 2.jpg
    2.jpg
    103.2 KB · Views: 1,229
  • 3.jpg
    3.jpg
    134.4 KB · Views: 1,159
Register to hide this ad
Thanks to Drabbits

I ordered my Toytec lift last week. Because the ultimate coliovers were backordered they upgraded me to the BOSS kit. Super nice customer service at Toytec. With the generosity of [MENTION=68079]drabbits[/MENTION], we got the kit installed. Front is a little proud right now. I plan on seeing what kind of settling it does by friday then adjust it from there. Next up is the wind fairing for the rack and dog platform, in the next week or 2. Need to decide on tires now...
liftpart1.jpg
 

Attachments

  • liftpart1.jpg
    liftpart1.jpg
    70.8 KB · Views: 1,163
Last edited:
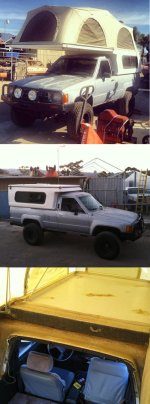
reminiscing over my 1st gen

Had to post a couple picts of my ol' 1st gen. Dang I miss her. ha.
1.jpg

2.jpg
 

Attachments

  • 1.jpg
    1.jpg
    94.2 KB · Views: 2,482
  • 2.jpg
    2.jpg
    57.9 KB · Views: 1,080
Thanks Dizzy. It was a super fun and easy rig to work on. Heres a few pictures of the Flip-pac mod I was almost finished with. Long story though...

That looks awesome! I am wanting to make mine more of a camping vehicle but that is way out of my skill level, haha. But it looks awesome. You going to do anything like that with the current 4runner?
 
That looks awesome! I am wanting to make mine more of a camping vehicle but that is way out of my skill level, haha. But it looks awesome. You going to do anything like that with the current 4runner?

No Im gona keep the 3rd gen pretty minimal. With the last one I found out my skill level wasn't that high and it ended up taking tons of time that I could have spent camping . HAHA
 
which wheels are currently on your new 3rd gen 4Runner?

The 8 hole American Racing aluminum wheels. Im not particularly fond of them. I have a set of 17" FJ steelies I was going to run on it but I think I might try and stick with 16" wheels. Im interested in trading the steelies if anyone has some wheels that might be interesting.
 
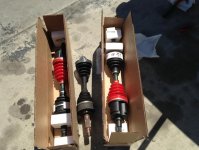
New Axles Installed

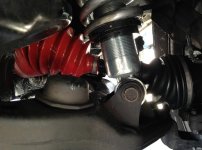
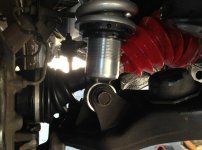
My toytec kit seemed a bit tall after the instal. Thought I would drive around for a week to see how it settled. After a day or two I looked and the boots had both torn, throwing grease every where. I ordered the CVJ axles with the longer boots for replacements. [MENTION=68079]drabbits[/MENTION] and I got both axles replaced in about 2.5 hours using the 4x4wire article as reference.
We had adjusted the coil overs a week or so ago to level the 4runner out but I decided to lower them a bit more. I wanted a slight rake for towing my camping trailer and wanted to see what the ride felt like lowered a tad. The coils are lowered to 9/10" of thread showing. Rides pretty nice now.(the picts are before the final height)
picts
1.jpg

2.jpg

3.jpg
 

Attachments

  • 1.jpg
    1.jpg
    59.2 KB · Views: 783
  • 2.jpg
    2.jpg
    50.2 KB · Views: 918
  • 3.jpg
    3.jpg
    47.5 KB · Views: 801
Last edited:
A dog/storage platform plus

Got the suspension all adjusted nicely. Rides smooth.
Replaced the contacts in the starter, cleaned the MAF, new wires and plugs, also had my mechanic replace the #6 injector.
Waiting for new anti-sway bar bushings.

Been noticing some funny idling still. Even after warming up the idle seems to be between 1100 and 1500 on occasion. Just pulled the EFI fuse to see if resetting will help.

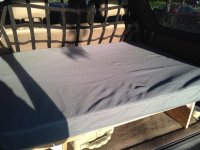
Just working out a simple storage and dog platform. The idea was to make something easily removable that we can just slide duffel bags under. Still working out if I like the height of the platform, its only screwed together for now. When I decide on the final design I'll glue everything down and put some sort of coating on the wood. For the fog bed I cut up an old HD foam mattress to fit and had my wife sew up the outdoor fabric. The pit and Chihuahua love it. Best thing is that the mattress can just be hosed off.

photo 1.JPG

photo 2.JPG
 

Attachments

  • photo 1.JPG
    photo 1.JPG
    108.7 KB · Views: 744
  • photo 2.JPG
    photo 2.JPG
    109.7 KB · Views: 1,879
Archival update

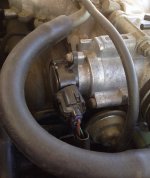
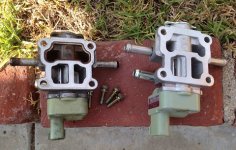
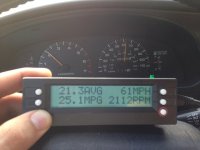
In July I replaced the PCV valve, TPS, and IAC in my rig. Idle even outed and my MPG shot up. Previously I was get 14-16MPG with mostly freeway driving.

image-1.jpg

image.jpg

Nice gain if I drive like a granny.
image-2.jpg
 

Attachments

  • image-1.jpg
    image-1.jpg
    38.1 KB · Views: 591
  • image.jpg
    image.jpg
    54.9 KB · Views: 589
  • image-2.jpg
    image-2.jpg
    23.3 KB · Views: 552
Wheels, Tie rods, and ARB bumper

A few weeks ago I put on new Cooper AT3's. 265/75/16's
The tire shop pointed out my failing LCA bushings and bad inner tie-rods.
Luckily I found some LCA's with 10K old OEM bushings in them on CL.
Had my mechanic put those in.
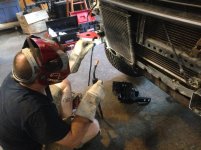
This last weekend [MENTION=68079]drabbits[/MENTION] lent me some of his work space to throw in the new inner and outer tie rods.
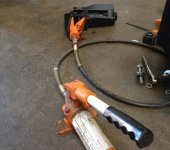
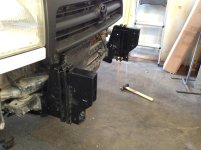
After I finished the tie-rods we got to installing the ARB.

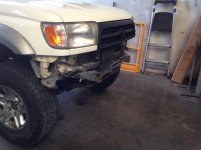
Removed the front bumper.
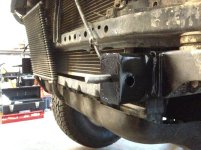
Notice the tweaked end cap from trying to back off a sneaky parking pole.1.jpg

The Impact Absorbers had been toqrued down so much by the previous owner.
They wouldn't fit over the frame rails more than a 1/2 inch.
They got some massaging and the frame ends got a slight shave and clean up.
2.jpg

Got the Impact Absorbers over the rails finally.
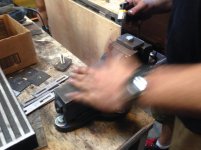
Marked some drill holes in the frame and fabled up the new frame rail caps.
7.jpg
8.jpg
9.jpg

Final frame rail cap.
10.jpg

And the final beauty shot.
11.jpg

THANKS A TON [MENTION=68079]drabbits[/MENTION]. Mad welding skills!
 

Attachments

  • 1.jpg
    1.jpg
    66.7 KB · Views: 441
  • 2.jpg
    2.jpg
    107.7 KB · Views: 403
  • 7.jpg
    7.jpg
    86.9 KB · Views: 399
  • 8.jpg
    8.jpg
    79.2 KB · Views: 381
  • 9.jpg
    9.jpg
    104.5 KB · Views: 397
  • 10.jpg
    10.jpg
    103.9 KB · Views: 458
  • 11.jpg
    11.jpg
    81.5 KB · Views: 383
Last edited:
Jason,

Sorry to see ya go. I hope you have picked up something nice as a replacement.

I also hope you have gained employment.
 

Members online

Forum statistics

Threads
278,316
Messages
3,554,113
Members
248,016
Latest member
Advally Service

Trending content

Back
Top