Repairing brake lines

SwiftRunner

New member
One of the brake lines in my '94 4Runner has started to leak. It rusted through. Unfortunately, the line runs from the front to the back the whole length of the vehicle. Access is blocked by all sorts of parts including the gas tank. I can reach the leak with some effort, though. Is there anyway I can repair it without replacing the whole line? I remember having done this with an old GM J-car. I took a brake line hose and clamped it to the steel. Once I had a tight enough fit, it worked. (As I remember.)
 
Register to hide this ad
The whole line should be replaced. Rubber line should only be used as a temp fix. If you choose to run new line, you dont have to run it in the same place as the old line to avoid dropping the tank, just run it along the frame rail.

Now with that said.....Ive had a "temp fix" on my gas line by the front pass wheel for about 3 years now on my trail rig...still works fine.Haha.
 
yeh, you can repair brakelines. You need a small tube cutter, flange tools, tubing and nuts and farrels. Don't buy brass garbage from the hardware store. Get good steel from an auto parts store. I did my sand rail brakes. Think it was 3/16 hardware. Teflon tapes helps a little. I'll try to snap some pictures of the repairs I made. Just be smart about your repairs.
 
Autozone sells small lines with ends already on them. You can cut out the bad part, flare each end after cutting them out (Autozone loans out flaring tools) and put a coupler on.
 
If your lines are starting to fail in one spot, chances are there close in other spots. Thats why I suggested replacing the whole line. Brakes are not something that should be skimped out on.
 
You should replace the entire hard line.
Splicing in hose should be temporary.
The self crimping ferrules can reduce line pressure causing more problems (been there).
If adding in another section using barrel couplers, remember they use a double flare.
 
The futility of life.

Well, I wasted three or more hours grovelling under the 4runner yesterday. It was a perfect day weather wise. I have decided to replace both lines in question. Only one had a hole, but as stated there's a good chance that there are other sections that are ready to blow. I should have left the currupted line leaking slowly but I got obsessed with finding the leak. It got worse as I was screwing around, and I had to cut the line and block both ends off. If I had decided at first to replace them both, I would not have had to waste such a beautiful morning.
This is going to be a ***** of a job. I have to take the gas tank down, etc. I'ld pay someone else to do it, but there's no money for that.
 
Cut and leave the old lines above the tank, run new lines next to the tank. That way you dont have to drop it.
 
I just went thru this 2 weeks ago. I generally do my own repairs but this one looked liked trouble. So I nervously drove it to an local shop with only front brakes and I was happy to get it fixed for only $160. Well worth it. All he did was splice in a new section of tubing, probably about 18"-24" long and bled the brakes. It is working great. I thought that they would want to drop the gas tank and replace both complete lines from the front wheel well all the way back and was expecting a repair bill way north of $500.
I'm very happy and back on the road again.

Also, everyone should clean off this area where crap builds up and covers up the lines which causes the rust through.
I removed about a 1/2 gallon of oily dirt/sand mix from this area.
 
Last edited:
Yes, I am going to consider that, but isn't it risky to bend lines oneself?

Naa. Just dont kink them. You can create a bend by wrapping them around a broom handle, socket, etc, or break line benders can be had for around $10 most parts stores.
 
The fix

Well, after crawling under the vehicle and studying the undercarriage, I decided it will be easy to run a generic line myself to replace the corrupted one. First I made a call to the part's dept. at the local dealer. The part's guy asked for the VIN before giving out information. He said it sounded odd, but not all 4runners were built the same. I didn't understand, but after getting the price of the lines and telling him that I was considering a generic solution, he said that they had done that, too. Then I hung it up and crawled under the beast. I realized that my previous efforts which took a lot of time weren't a matter of wasted efforts at that point. I cleaned out all that filthy, oily sand and rusted debris and knew a lot about the undercarriage. I traced the leaking line and found it was the easiest to re-route. The other lines seem o.k. for now. At the point that I went shopping the trouble began. I drove into town to the Auto Zone after talking When I arrived at AZ a young guy who really didn't know much helped me pick out the lines and couplers. I let him verify the couplers while I looked around for plugs. When I got home, I tested the couplers myself and found that they were too loose. I went back to AZ and talked with an old timer. I have dealt with him before. He is knowledgeable, but old age has fried his brain. After struggling with him, I learned that the reason the dealer wanted the VIN was because there are five different types of flarings. There's a U.S., a Canadian, a European, a British and a Japanese depending on the country of manufacture. I knew but wasn't sure that my 4-runner was built in Japan. I had left the U.S. lines they sold me back in the vehicle at home. So I have to drive home check the vin, drive back and exchange the parts. On top of that they are busy when I get there, the old man has left and I have to wait. (All this after a full day of house-painting.) Once home at 9 pm, I have to cook my own dinner. Of course I was exhausted, but I had the right parts!!!! It was only steak and potatoes for me at that point!!!!

 
Last edited:
Autozone sells small lines with ends already on them. You can cut out the bad part, flare each end after cutting them out (Autozone loans out flaring tools) and put a coupler on.
When I returned to AZ to obtain the right length of replacement line, the counter guy offered to cut the line to my required length and flair it for me. Of course his flair wasn't as good as a factory flair. Yesterday I installed the line and tightened the fittings. This morning I will check them all for any leaks. After watching the guy use the flaring tool I realized that I could do it myself. If I have another leak, I might just do that. This time, though, routing a new line was the best solution as the leak was in an extremely inaccessible place. I'm including a couple of photos I took in an album. I added a rubber hose to the line that I cut inorder to drain the fluid into a pan. As you can see I crimped the line and then plugged the hose.
 
Last edited:
swiftrunner-albums-brake+job-picture5887-severedbrakeline.jpg


swiftrunner-albums-brake+job-picture5886-locationofseveredbrakeline.jpg
 
More hassles

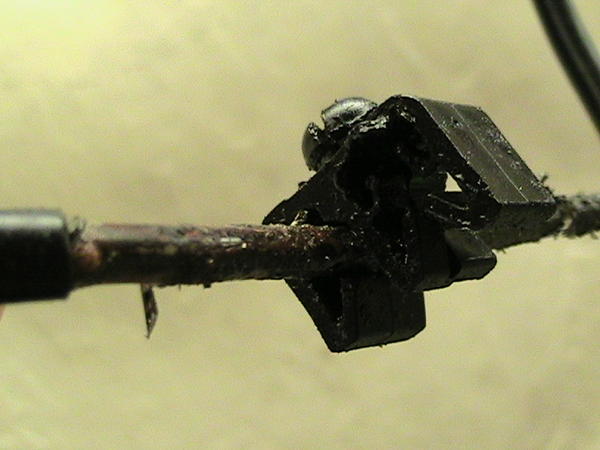
Let me update my brake work. When bleeding the rear wheels, another leak opened in the same place on the second line. I added some photos of the corrupted parts once they were removed. It seems that the clip that was holding the lines on the chassis had caked with salt and caused the lines to rust to leak. It's possible that the protective covering was rubbed off and the bare metal exposed to the elements. All this took place in the gap above the passenger side spring in the rear. It acted as a trap for the sand and salt put down on the New England roads in the winter. The small tan spot in this photo that lied next to the sheave developed a pin hole under pressure and started to leak. It must have been the rubbing of the line against the clip and the bend in it that stressed the line.
swiftrunner-albums-brake+job-picture6249-brakelineclip-leak.jpg
 
Last edited:

Members online

Forum statistics

Threads
278,309
Messages
3,554,071
Members
248,016
Latest member
Advally Service

Trending content

Back
Top