
Rock Light Install

Doc_Fry

New member
Purchased a new set of rock lights to replace the hodgepodge of different led lights I tried out. I ended up looking at different units. But decided to give an 8 piece led light kit, that has a controller for RGB through bluetooth and my phone, most importantly all the conectors are waterproof and well shielded wires, etc. I see it working out and holding up well.

The kit I go was $90 from amazon.

RGB LED Rock Light with 8 pods lights Bluetooth control, Mobile connection, simple fashion, DIY effect-8pods multicolor


The first thing I did after receiving the kit was to unpack it and decide how I was going to mount the lights. They do come with a rubber backing. I am going to use the smaller of the two, not the larger curved one. I pushed the bottom of the bolt up through the rubber so it was flush with the bottom. I will be using construction adhesive to mount it so it will stay connected without issue. Next, I bolted it through the light and secured the nuts on with hot glue to help prevent the nut from coming unscrewed. So, if needed it can be easily unbolted. Then I labeled and numbered each controller connector and at the light connector. Lastly, I performed a function test of the unit before installing it on the vehicle.

Note: connectors labeled for ease of troubleshooting in the future. I would like to find a way to make the label waterproof though. Also, if the lights have any certain strobe or other function then they are put in a series. IE on the drivers starting at the front 1----2----3----4, then the passengers starting on the front 5----6----7----8.

Some pictures of items described.


Example of the lights:
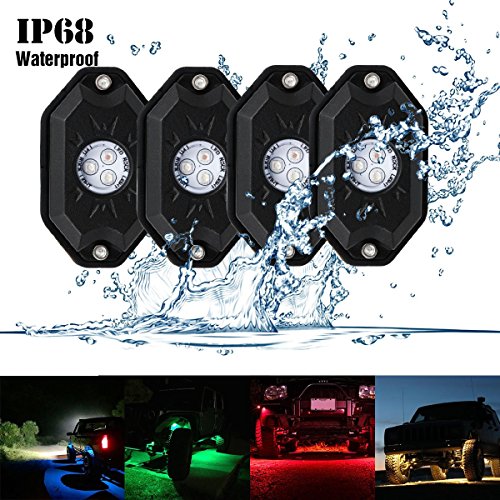
61jsFHhkq4L.jpg


Controller:
Note there is an app for it for your phone. Will look at later.
29506654135_f931b395ac_z_d.jpg


Labelled Waterproof connectors
29506668445_1b1914fab0_z_d.jpg


Mount with the light attached.
28881709604_f53b6c54b9_z_d.jpg


See hot glue securing the nut.
29472496346_1031f0d92a_z_d.jpg


Connectors
album-72157650384715849


So far so good
I have more to come when I am able to finish the install.
 
Last edited:
Register to hide this ad
This week I'll be mounting eight SuperBrightLED's in their rock light kit before a night offroading on Friday night. Don't like the idea of drilling to mount underbody LED's so I'll be using 3M extreme tape and making sure the wire near the LED is zip tied to minimize hang should the LED drop off in the unlikely event. Interested to see how the RGB's turn out vs the dedicated white of the SuperBrightLED's kit. Good luck.
 
This week I'll be mounting eight SuperBrightLED's in their rock light kit before a night offroading on Friday night. Don't like the idea of drilling to mount underbody LED's so I'll be using 3M extreme tape and making sure the wire near the LED is zip tied to minimize hang should the LED drop off in the unlikely event. Interested to see how the RGB's turn out vs the dedicated white of the SuperBrightLED's kit. Good luck.


I have found that construction adhesive hokds the best under the vehicle. Found this out from using it when mounting lights in my fiberglass boat. I will make sure that the wires are well secured as well, there is room between the body and a piece of trim to put the wire in. I will try to document it better.
 
This week I'll be mounting eight SuperBrightLED's in their rock light kit before a night offroading on Friday night. Don't like the idea of drilling to mount underbody LED's so I'll be using 3M extreme tape and making sure the wire near the LED is zip tied to minimize hang should the LED drop off in the unlikely event. Interested to see how the RGB's turn out vs the dedicated white of the SuperBrightLED's kit. Good luck.

I do like how the superbright do not have to use a controller box. I dont really care about the rgb function. My biggest fear is the white function. I will test it tonight. If it isnt as white as a normal light then I may want to go with the superbright modules instead. They look almost the same minus the controller and different colored leds.
 
On a side note, every installation I've seen right above the tires result in just the top of the tires being illuminated while the rocks remain dark. I intend on mounting between the rockers and frame to light up behind the front tires and in front of the rear tires and mounting somewhere along the front and rear bumpers. Just my $0.02. :)
 
On a side note, every installation I've seen right above the tires result in just the top of the tires being illuminated while the rocks remain dark. I intend on mounting between the rockers and frame to light up behind the front tires and in front of the rear tires and mounting somewhere along the front and rear bumpers. Just my $0.02. :)

Agreed, I current have a setup like that. Currently am only using 4 lights that are of questionable quality and very cheap. But they did light up very well mounted about a foot in towardss the middle of the truck from each tire. It did light up very well. Only issue I had was visibility towards the frknt and rear was limited. The extra lights in the kit will make a huge difference. Before I coukd even test the white function on the kights and since you losted the SB lights I went ahead and bought them so I could actually compare side by side and since I really like the idea of just having it controlled by my dash switch. They also had a 10% coupn on FB, so it didnt hurt too bad. Which everyone I use I will nite and post up all the results especially on the end resutls of how I end up installing. Which may be up in the air due to the number of wires and me being a perfectionist it may end up going into the cab with the cables. Time will tell.

So for now this is on hold until I get other lights.
 
A few notes about the RGB rock light as I was testing them tonight. Because of the controller having to be your phone. Whenever you loose power, IE mine is on a switch dedicated for Rock Lights the led modules turn red/green/blue until you can connect to the module through bluetooth. With the app you can turn on and off the lights and change to any color combination you could imagine, not to mention flashing, strobing, dimming, since with music or with the internal microphone. Not any of which are useful for a real rock light. When you are on a single color only one of the leds on the light module light. When on white all three light. Colors my wife and I liked blue and red, though I do not believe it is as useful as white for a rock light. The white light is a combination of all the leds r/g/b and it shows when the outer edge of the light shows a rainbow like effect, I do not like it.

No major issues. Overall a well made unit and would do well for someone but not me. I cannot get past the module being turned on flashing between r/g/b. Having to use the phone to control the unit is neat but limited. A simple switch control would be a better solution, or a memory where the unit saves the last color it was in. Also the white color not truley being white is a major issue. Another issue is that it is not really expandable without a second module.cwhich would most likely have seperate issues with bluetooth controls. I will wait to make my final decision when I get the other lights.
 
Recieved the following SuperBrightleds lights in the mail today.

https://www.superbrightleds.com/moreinfo/led-light-modules/waterproof-off-road-led-rock-light-kit-8-led-rock-lights/3029/

I purchased the white ones and used a 15% off coupon found on superbrightleds.com facebook page.


Initial observations compare to the RGB LED Rock loghts purchased on Amazon.com as seen above.

The housings for the light are aluminum not plastic. The bottom plate is epoxied to insure it is waterproof.

The cabeling is of a better quality as are the waterproof connectors.

It is better packaged, with the lights nestled in foam.

The other connectors that allows you to use the waterproof connectors to the battery are scalable. You get two 6 wired connectors. Whoch allow you to install 12 lights without any extra connectors. This is truly a scalable lights as you are only limited by the circuit since you do not have to rely on a controller and its limitations. A quick look at there sight they do have more connectors.

All the hardware seems to be of a high quality.

Ability to be controlled by a switch. Easy On easy Off. No needing a phone to control the lights. No flashing rgb when first turned on. Just easy on white light easy off white light.

You can select other colors if inclined. All lights shoudl light up the same color making it much brighter than the rgb led lights.

Downfalls:

The extra connectors do not have termination ends included with your purchase, thought they are available Seperately.

There is no extensions for the waterproof connectors. This would be extremely helpful depending on your installation method.

You must purchase a different color light if you want a different color. No ability to change colors. Though you can mix and match colors.

I dont know at this time how they light and will find out later to oght when I test them. I look forward to installing them here soon as soon as some of the other projects I started in the mean time are finished and I have some time.
 
Like Lawndart I'd like to know how you're going to run the wires. I was under the 4Runner and didn't see an easy way to run the wires from the back to front. I gave up and will wait until I have more time and more sunlight to determine where the wiring will go inside a loom. Good luck.
 
Opened the lights and took inventory as well as preprepped them while watching Survivorman Bigfoot and eating dinner.

Items needed for preprep:
Label Maker with plastic labels
Clear scotch type tape
Paint marker preferrably white thin tip. Only had red.
Scissors

Inventory:
8- led light modules and wires with waterproof connectors
2- connectors 6 ends waterproof conmectors
1- harware pack
1- package of screws
8- flat backings
6- curved backings
4- Terminators (yes they are included my bad)

What I did was very similar than before but learnign along the way here is what I did.

Used the label maker to make out labels to help identify wires and lights. I made a set of labels 1A - 12A and put on the two 6 ended connectors. After I finished I used the scotch tape to got over to help hold it in place with the heat and other things it will come in contact with.

I took the 4 terminators and went ahead and applied them at 5A,6A-11A,12A.

Then I took the light side and labeled each from 1B-4B - 7B-10B and labeled each as described above at the end of the connector.

I also discovered that I would not know which light was out without labeling the light itself. At forst I used the label maker but know that will not hold up. So I went to the gun room and got a thin tipped paint marker I use to mark bolts on builds and labeled each light 1B-4B - 7B-10B. Thats it for preprep that you can do while watching tv. Or when you get it in, only thing I need to do before I install is remeter the wires at the end of the switch in the dash to verify that it is functioning correctly. Then I will test each light out.

Next steps are the install..

Pics

29490597751_0bdcc9dc38_z_d.jpg


29571161685_7ce09efd2a_z_d.jpg


Disregard the labels they are marked in paint marker

28945680114_bb59a218f2_z_d.jpg


Close of of paint marker

28945702524_1b9daf6024_z_d.jpg
 
I went ahead mocked up and tested the lights. Guess Harley and the Davidsons is gonna have to wait until I am done on the dvr.

Couple of notes. Very bright. Much broghter than the rgb. There is full coverage with just two in the middle without any dark spot. The cables are much longer.

Note that this is just one side and they are just stuck up there not sure of exact placment

28947904794_730251e862_z_d.jpg


Side lights for show with rear leds. Man its coming along.

29539354146_d669f1dcf5_z_d.jpg
 
i don't see why people would have a big challenge on where to run the wiring for rocklights on any model of truck.
run it along the frame(zip ties) or the rocker panel using a screw in cable fastener. Along the wheel wells, pull back the inner fender well and run the wiring along there. Adequate rock lighting systems should include two near the front and rear of the truck in addition to the side lighting.
10-12 leds usually does the trick
 
Mounting

Great write up [MENTION=117975]Doc_Fry[/MENTION] ! Looking to copy your mod and had two questions on it:

1) Where did you end up mounting the switch?
2) Where did you end up mounting the lights? Your last night pic shows some great coverage but it sounded like it was just a short term setup to test the quality of the lights.

Thanks again!
 
i don't see why people would have a big challenge on where to run the wiring for rocklights on any model of truck.
run it along the frame(zip ties) or the rocker panel using a screw in cable fastener. Along the wheel wells, pull back the inner fender well and run the wiring along there. Adequate rock lighting systems should include two near the front and rear of the truck in addition to the side lighting.
10-12 leds usually does the trick


It can be difficult to be able to secure the wiring to the frame. Screwing in to the frame and body is not at good option as it opens up long term rust possibilities on the vehicle. As well as being able to make sure the wires are secured, and protected. Some systems such as this though waterproof also create a new challenge as each light has its own independent wire toe be run instead of being able to daisy chain together and solder the wires on a one wire run.

There is adequate light next the the fron and rear tires. I would not put in the wheel wells due to bleed out and distracting/blinding spotters or other drivers if I have on while driving.
 
Great write up [MENTION=117975]Doc_Fry[/MENTION] ! Looking to copy your mod and had two questions on it:

1) Where did you end up mounting the switch?
2) Where did you end up mounting the lights? Your last night pic shows some great coverage but it sounded like it was just a short term setup to test the quality of the lights.

Thanks again!

The switch is mounted underneath the center console power/USB/ where the cubby used to be. Can look at my build thread for a write up on the switch mount.

I ended up putting the vehicle up on a lift and though my intent was originally to secure it with fasteners the sues of a. Drilling in the frame b. Rust prevention caused me to rethink this type of mounting. I ended up using Marine Epoxy to glue the lights on where I needed. I would have to find a way to take picture of where they are mounted. But literally put them up in a mock situation and I put two up front near the front body mounts, Two towards the front behind the tires about a 1/4 of the way down the body, the other two the same but a 1/4 from the rear tire, and the back two behind the rear tires up on the frame. Though on the right side there is some blockage from the muffler. I have not had any issues with it coming loose at all. I tend to leave on a lot as I forget it is on lol..
 
How is it holding up against weather rain etc. Awesome build!

It is doing fine. I have recently had one light stop working. Yet should be an easy thing to change out, or trouble shoot. I just noticed it last night and havent had the time to trouble shoot it.
 
It can be difficult to be able to secure the wiring to the frame. Screwing in to the frame and body is not at good option as it opens up long term rust possibilities on the vehicle. As well as being able to make sure the wires are secured, and protected. Some systems such as this though waterproof also create a new challenge as each light has its own independent wire toe be run instead of being able to daisy chain together and solder the wires on a one wire run.

There is adequate light next the the fron and rear tires. I would not put in the wheel wells due to bleed out and distracting/blinding spotters or other drivers if I have on while driving.

I don't see why drilling in the frame would cause any kind of rust issue the frame is full of holes every foot of it from the factory. I do not believe drilling a hole in the frame will have any effect on how much it rusts. that is just a matter of the conditions the vehicle is in more holes or not.
 

Members online

Forum statistics

Threads
278,309
Messages
3,554,066
Members
248,016
Latest member
Advally Service

Trending content

Back
Top