rusty_p's 1985 4runner

rusty_p

New member
1985 4runner...mostly stock

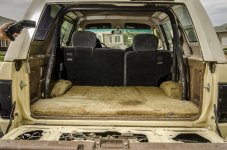
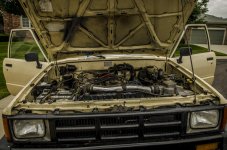
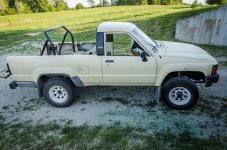
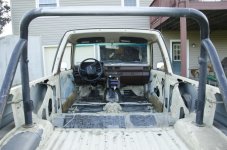
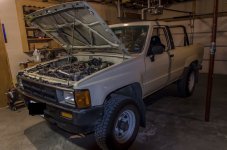
OK, I figured it's about time to start a build thread. I picked up this 1985 runner a little over a month ago...
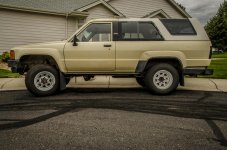
_RPB8556.jpg

Drove it over 600 miles to get home without any issues, so was happy about that. So the plan is to take time and build it up. There's no hurry, since I have no need to drive it right away.

Here's a few more pics to show what we got...
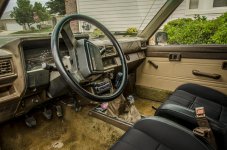
_RPB8565.jpg

_RPB8578.jpg

_RPB8594.jpg

My son and I have been work on this project together, most work being done on the weekends since we got it home. I have some catching up to do to get up to date on our progress, with lots of pictures. Stay tuned...

 

Attachments

  • _RPB8556.jpg
    _RPB8556.jpg
    139.9 KB · Views: 11,161
  • _RPB8578.jpg
    _RPB8578.jpg
    142.4 KB · Views: 1,448
  • _RPB8594.jpg
    _RPB8594.jpg
    144.5 KB · Views: 1,441
  • _RPB8565.jpg
    _RPB8565.jpg
    144.2 KB · Views: 1,532
Register to hide this ad
The build begins

Thank you all for the welcomes and kind words. As we progress, I welcome any advice you all may have. I have learned a lot on these forums and appreciate the input.

After getting the runner home, we wanted to drive it some before beginning the tear down and took the top off to see what that was like. Pretty cool...

_RPB8864.jpg

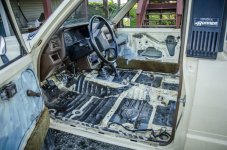
We were anxious to begin work on it, so decided to start with the interior. Removed the seats, carpet, and panels. Then began the process of removing the factory sound deadening/insulating material from the floor in preparation for painting with bed liner. That was no easy task...

_RPB8860.jpg

_RPB8861.jpg

We didn't really have a clear plan when we started and wasn't sure how deep or involved we wanted to get into this "rebuild". Part of the issue was time...just never seems to be enough of it. Plus, we don't have a shop, so work would need to be done outside or take up one side of the two-car garage. That would mean parking either mine or the wife's car outside.

Well, we decided to do this right and start from the bottom and work our way up. So into the garage we go...

_RPB8885.jpg

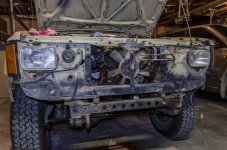
We will be removing the body to clean up the frame. Started out by removing the bumper, grill, and pulling the rad...

_RPB8890.jpg

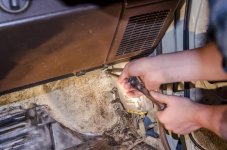
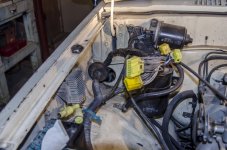
Then we began the process of disconnecting hoses, wiring, brake lines, cables, etc. to free up the body from the frame. We were sure to take pictures along the way to help us remember how everything goes back together, but I won't overload the thread with images.

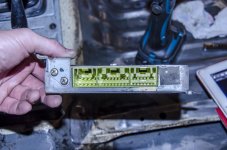
Removal of the ECU...

_RPB8905.jpg

_RPB8910.jpg

_RPB8914.jpg

I'll stop there for tonight and do some more catching up tomorrow...See ya!
 

Attachments

  • _RPB8864.jpg
    _RPB8864.jpg
    143 KB · Views: 4,152
  • _RPB8860.jpg
    _RPB8860.jpg
    136.8 KB · Views: 2,278
  • _RPB8861.jpg
    _RPB8861.jpg
    146.8 KB · Views: 1,939
  • _RPB8885.jpg
    _RPB8885.jpg
    121.9 KB · Views: 1,321
  • _RPB8890.jpg
    _RPB8890.jpg
    84.7 KB · Views: 1,435
  • _RPB8905.jpg
    _RPB8905.jpg
    73.5 KB · Views: 1,208
  • _RPB8910.jpg
    _RPB8910.jpg
    64.7 KB · Views: 1,207
  • _RPB8914.jpg
    _RPB8914.jpg
    78.6 KB · Views: 1,248
you have the same build on yotatech right? I have been following it. You guys have made lot of progress so far!
You are correct Cali. My son is keeping up on the other build thread. I decided to post it here as well to get all the advice we could get. Thanks for following!
 
Still Catching Up!

I'm going to skip the hundred or so photos of the process of disconnecting wiring, brake lines, hoses, and bolts to free the body from the frame. I'm sure it's all been seen before, but if there anyone has questions or would like to see a photo of something specific, let me know and I'll see if I have it.

Everything came off relatively easily, even all the brake line connections. We didn't even break any bolts! Once we thought everything was free, we began the slow process of lifting off the body a little at a time while keeping an eye out for anything that may have been missed. Only thing missed was a vent line to the fuel tank.

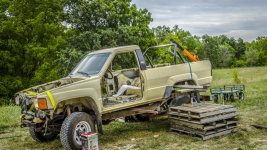
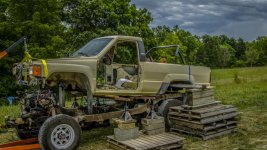
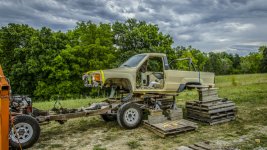
After we knew everything was free, we rolled the runner outside to the new temporary home for the body to sit while working on the frame. Here's a few shots removing the body:

_RPB8994.jpg

_RPB9069.jpg

_RPB9090.jpg

_RPB9139.jpg

And in case you'er interested, here is a Youtube timelapse video of the process:

4runner timelapse h264 420 1080p MQ 4xSlow - YouTube

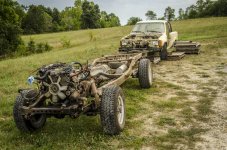
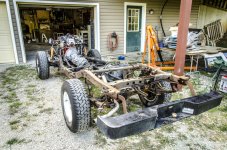
Then cleaned up the frame/motor/trans and back into the garage we go...

_RPB9144.jpg

The next couple of weeks will be spent removing everything from the frame, cleaning and painting as we go...more to come!
 

Attachments

  • _RPB8994.jpg
    _RPB8994.jpg
    114.5 KB · Views: 1,356
  • _RPB9069.jpg
    _RPB9069.jpg
    98.4 KB · Views: 1,339
  • _RPB9090.jpg
    _RPB9090.jpg
    105 KB · Views: 1,608
  • _RPB9139.jpg
    _RPB9139.jpg
    126.4 KB · Views: 1,327
  • _RPB9144.jpg
    _RPB9144.jpg
    137.7 KB · Views: 5,257
That runner looks familiar! I'm glad you're doing some good work to it and having fun with your boys at the same time. I'm horrible about remembering to do things sometimes but I got the fsm burnt to a cd for you and will get it in the mail tomorrow afternoon.
 
That runner looks familiar! I'm glad you're doing some good work to it and having fun with your boys at the same time. I'm horrible about remembering to do things sometimes but I got the fsm burnt to a cd for you and will get it in the mail tomorrow afternoon.

Thanks SV_Dude, good to hear from you. We are having a great time! I know what you mean about remembering to do things...uh...what was I going to say? No worries though.
 
That runner looks familiar! I'm glad you're doing some good work to it and having fun with your boys at the same time. I'm horrible about remembering to do things sometimes but I got the fsm burnt to a cd for you and will get it in the mail tomorrow afternoon.


Great to see it in good hands. Granted part of me wishes "someone" had never sold it. I wanted to work on that beast.
 
Man I wish I had the space to do a frame off like this! Jealous but definitely watching this. I have a new member of the family myself which is going to need frame work so I do enjoy and appreciate the pictures. Looks like somebody in the family is a photoshop guru huh? They look great.
 
Man I wish I had the space to do a frame off like this! Jealous but definitely watching this. I have a new member of the family myself which is going to need frame work so I do enjoy and appreciate the pictures. Looks like somebody in the family is a photoshop guru huh? They look great.

Yea, I am a bit of a photog...I'm trying to take good pictures of our progress, not only for others to see, but also so I can remember how everything goes back together. I hope they are useful and will help someone else along the way. Thanks for the compliment!
 
Thanks Footofgod! If you're ever in NW MO, swing on by...I could use your expertise..:biggrin2:

I don't know about expertise, but I am actually in your area several times a year. My family is in Northeast KS. I'm in the Kansas City area often. Heading out again here soon.
 
Stripping the Frame

The next step was to start removing parts from the frame. Our intent was to wire wheel the frame, then paint it with a good rust inhibitor.

Gas tank and rear bumper removed...

_RPB9148.jpg

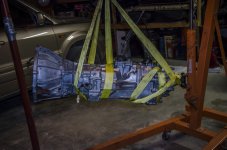
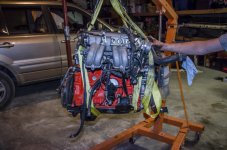
Transmission and motor are coming off...
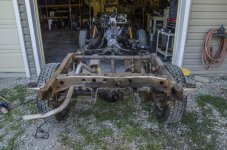
_RPB9166.jpg

_RPB9170.jpg

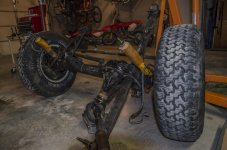
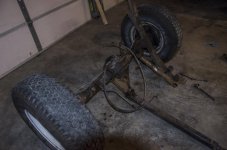
Removing the suspension was no easy task. One of the leaf spring shackle pins had to be cut off as well as one of the U-bolts. We were able to remove the remaining pins using heat and some persuasion. Finally got the axles out from under the frame...
_RPB9189.jpg

_RPB9190.jpg

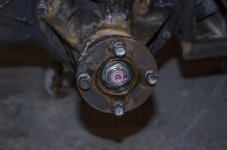
Removal of the drive shaft revealed the factory pink color coding on the end of the pinion flange shaft for the 4.10 gear ratio...
_RPB9224.jpg

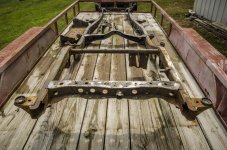
I forgot to mention that although we started wire wheeling the frame, we decided to go ahead and take it to a local shop where it will get sandblasted and a powdercoat finish. Here it is loaded up ready to go for a drive...

_RPB9330.jpg

Whew! Getting close to being caught up to our current progress. Will continue tomorrow...
 

Attachments

  • _RPB9148.jpg
    _RPB9148.jpg
    108.6 KB · Views: 734
  • _RPB9166.jpg
    _RPB9166.jpg
    65.9 KB · Views: 645
  • _RPB9170.jpg
    _RPB9170.jpg
    84.1 KB · Views: 728
  • _RPB9189.jpg
    _RPB9189.jpg
    72.1 KB · Views: 765
  • _RPB9190.jpg
    _RPB9190.jpg
    54.5 KB · Views: 646
  • _RPB9224.jpg
    _RPB9224.jpg
    38.1 KB · Views: 759
  • _RPB9330.jpg
    _RPB9330.jpg
    110.6 KB · Views: 630
Good call on taking it to a shop. You did all the hard work so get it done right.

Coming along well. What are your plans? You're in a great position to take it in any direction you want now with it all apart. Subscribed.
 

Members online

Forum statistics

Threads
278,306
Messages
3,554,045
Members
248,016
Latest member
Advally Service

Trending content

Back
Top