SDHQ hidden winch installation

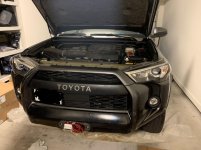
Here's my install on a 2019 ORP. A lot of it is very similar to the install on my 2017 SR5 (which my wife has now laid claim to, thus resulting in the 2019 ORP for me).

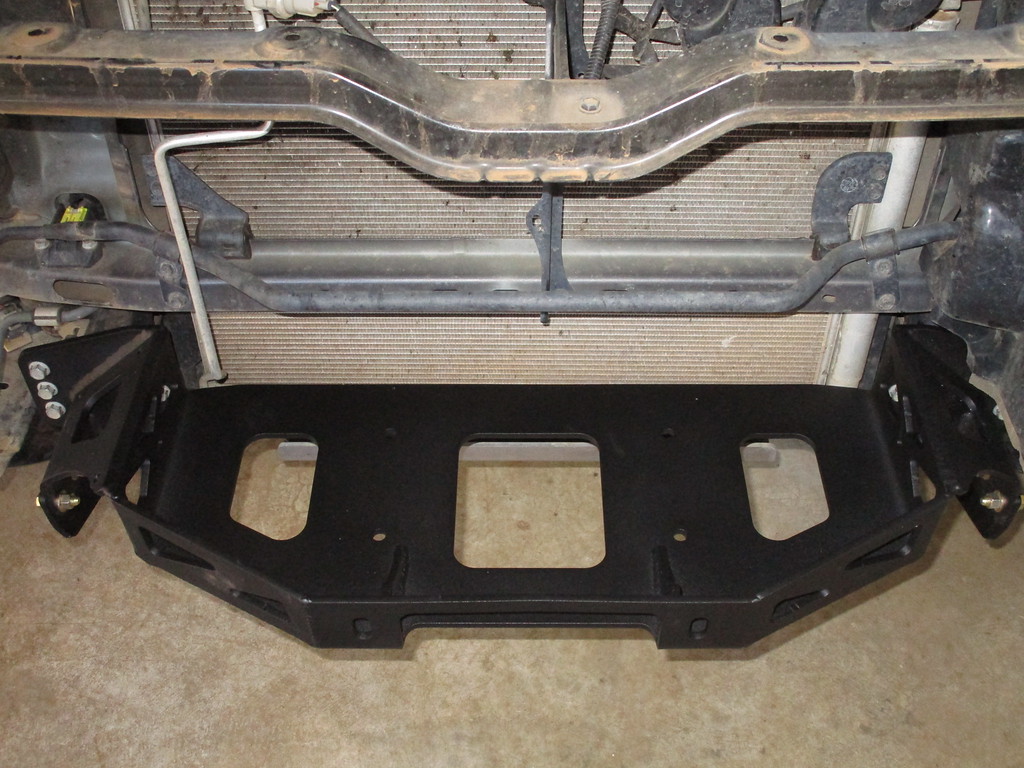
Here's the SDHQ kit. Same as the prior version, except they sent me the directions for a Tacoma by accident. Didn't really need the directions since I've done this before! The powdercoat also appears to be a more matte finish than the semi-gloss from the previous model.

IMG_6328-XL.jpg


I went with a Warn VR-8S EVO. The prior install was a VR-8. At that time I had wanted steel cable as I intended to skid a lot of downed trees with the winch. Fast forward 18 months, guess how many trees I moved? Zero. I did use the winch several times for recovery and the 8k seemed just fine for my applications, so I stayed with that weight rating. This time I went with synthetic line though, just for ease of use and weight. The EVO has replaced the base VR in the Warn lineup. It's very similar but it also comes with a wireless remote, which is a nice touch at its price point. It also has an aluminum hawse, the old VR series had this insane cast iron hawse for both synthetic and steel cable and it weighed like 148 pounds. The EVO also has a quarter turn clutch instead of a 180 degree clutch. Weirdly, it doesn't come with some of the nice add ons that the VR-8 did, like a cable sheath, wire looming, a decal... or good instructions. I actually would have been a little confused with installing it had I not done it before because the instructions were seriously lacking.

IMG_6323-XL.jpg


First step is to remove the front bumper skin and then separate the fascia, easy to do. Watch the video linked in the first post of this thread. By now I can remove the bumper blindfolded and in about 3 minutes!

IMG_6320-XL.jpg


Remove the aluminum OEM sub-bumper with 8 14mm bolts. When you do, keep the steel outer ears. We'll use a piece of them again since the ORP install has one glaring issue!

IMG_6321-XL.jpg


Starting install:

IMG_6331-XL.jpg


IMG_6336-XL.jpg


IMG_6333-XL.jpg


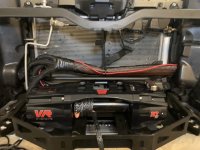
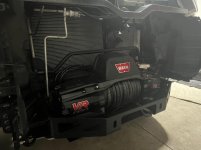
Winch (minus control box) bolted in:

IMG_6340-XL.jpg


It's a little tight... but the clutch does clear the line:

IMG_6342-XL.jpg


You also have to bend the AC line slightly:

IMG_6345-XL.jpg


So on the 2017 SR5 install I had a LED bar above the winch that interfered with the control box, so I had to move the control box. On this one, I don't have that LED so technically there is enough room for the control box on top of the winch. Only problem is that the PS line (I think it's the PS line) runs right through there. I decided to raise the control box an inch to clear the line. First I wrapped the line with a bit of old motorcycle innertube:

IMG_6351-XL.jpg


I replaced the bolts with longer ones (I believe they are M4x30) and put a 1" spacer over the two front bolts to space the control box up. I used a old Tacoma front mudflap, the ones that go in front of the front tire that no one knows the purpose of, as a rubbery baseplate to keep the control box from banging around since it won't be bolted down on the back.

IMG_6353-XL.jpg


IMG_6354-XL.jpg


IMG_6356-XL.jpg


Continued next post
 
Last edited:
Okay, remember above I said there is a glaring issue for ORP installations (or Trail / OR / PRO)? The issue is, if you want to have the fairlead on top of the bumper skin, instead of in the bumper and trimming the skin around it, you have to bolt in spacers under the fairlead to act as a standoff between the SDHQ bumper and the fairlead. You cannot access the back of the SDHQ bumper to hold the nuts for the fairlead bolts in place once the bumper skin is installed. There is a poster above that has done it, I asked him about it, and his advice didn't work for me. I honestly do not see any way to get an arm in there.

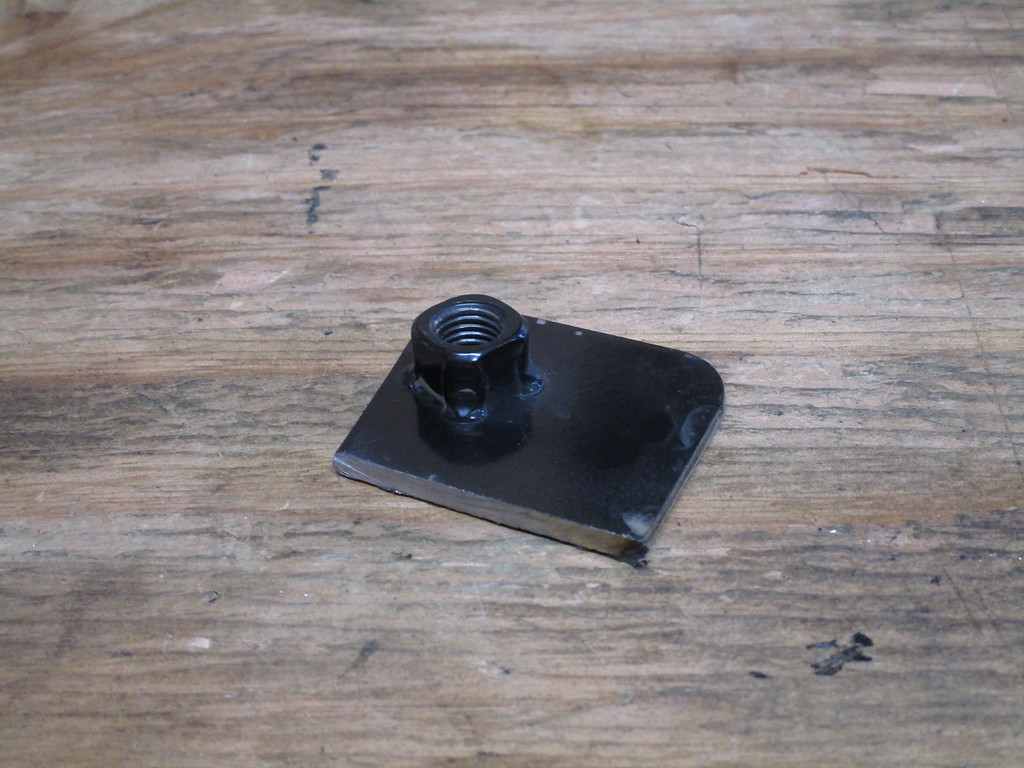
So... I cut off the ends of those OEM sub-bumper ears pictured above. The ears have M10 nuts welded in, and by cutting off about 1.5" of the ear you get a nut with a square backing, that you can drop into the SDHQ bumper. When you tighten the fairlead bolt into that nut, the square backing catches on the bumper and allows you to tighten the bolts.

I painted them before install (shown unpainted):

IMG_6360-XL.jpg


This is how they will interface with the bumper:

IMG_6362-XL.jpg


And this is how I'll hold them in place as I'm seating the bolts: grease!

IMG_6375-XL.jpg


Starting the trimming. This is the part that tears up my gut. You screw this up, it's time for a new piece. The OR / PRO models you can cut the bumper skin in a big rectangle since it'll be covered but you better get the fascia cut right!

IMG_6364-XL.jpg


IMG_6365-XL.jpg


This is one ugly cut! Luckily no one will see it after this!

IMG_6369-XL.jpg


Fascia trimming. I made the holes significantly bigger (in increments) after this picture was taken:

IMG_6373-XL.jpg


I used M10 bolts for the fairlead and used three 1/2" nuts as spacers (the bolt drops through them and doesn't thread into them).

IMG_6374-XL.jpg


Home stretch now! Reinstall the fascia to the bumper skin, reinstall the bumper skin to the truck, bolt up the fairlead:

IMG_6388-XL.jpg


IMG_6392-XL.jpg


Spacing from above. Pretty flush; I'm okay with it. Better slightly too far off the bumper than too snug against it.

IMG_6391-XL.jpg


Cut an access port in the radiator cover:

IMG_6384-XL.jpg


I still need to either reinstall my front plate or plug the holes, get the wiring sheathed and zipped neatly away, add an M8 thumb nut to easily connect / disconnect the power cable from the battery, and I am waiting for a thimble to arrive to get the winch line squared away. I went with a Mile Marker thimble, it is pretty interesting and doesn't need a separate pin like the Factor 55, Smittybilt AWS, etc. It's also smaller, cheaper, and takes one entire link out of the system.

83129_2000x2000.jpg


MM thimble install video: YouTube
 
Last edited:
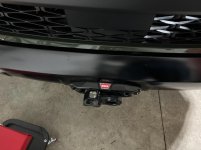
Installation completed with thumb nut to + battery terminal, wire loom on all exposed wiring, 1/4" panel plugs to cover the license plate holes, and Mile Marker thimble:

Smaller gauge red wire is under the nut (not thumb nut) and controls my HAM radio.

DSC_0079-XL.jpg


IMG_6405-XL.jpg


IMG_6403-XL.jpg


IMG_6401-XL.jpg


Ended up not really in love with the MM thimble, so I went with a Factor 55 Flatlink bought from SDHQ with the forum discount!

DSC_0082-XL.jpg


DSC_0089-XL.jpg
 
Last edited:
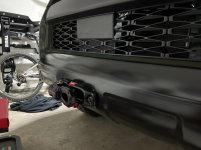
Thank you [MENTION=132734]MeefZah[/MENTION] for all the great info! Which fairlead setup do you like better for the ORP with the extra valence/fascia?

Did you look into the LFD and Rago hidden winch offerings before buying the SDHQ one for your second 4Runner?
 
Last edited:
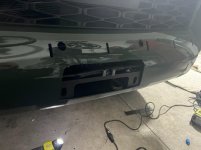
Thank you [MENTION=132734]MeefZah[/MENTION] for all the great info! Which fairlead setup do you like better for the ORP with the extra valence/fascia?

Do you mean do I prefer mounting the fairlead on top of the plastic as opposed to trimming the plastic around the fairlead? I prefer it on top, it's just a cleaner install.

I did not look at other stuff. I was real pleased with the first SDHQ unit so I saw no reason to mix things up.
 
I think I figured out how to attach pictures.
Here is my control box inside my engine bay.
 

Attachments

  • 2000.jpg
    2000.jpg
    72.4 KB · Views: 1,010
  • 2001.jpg
    2001.jpg
    108.8 KB · Views: 1,063
Just finished installing the SDHQ mount and Smittybilt x20 10k on my truck over the weekend. Install was fairly straightforward minus figuring out what to do with the control box. I have the same light bar setup as [MENTION=132734]MeefZah[/MENTION] and followed his lead by mounting the controls to the light bar bracket.

I'll try to get a few pictures of what I did with the front plate and fairlead when I get home later this afternoon.


Any chance you could post what you did with the control box? I have the same setup that I'm installing.
 
Okay, remember above I said there is a glaring issue for ORP installations (or Trail / OR / PRO)? The issue is, if you want to have the fairlead on top of the bumper skin, instead of in the bumper and trimming the skin around it, you have to bolt in spacers under the fairlead to act as a standoff between the SDHQ bumper and the fairlead. You cannot access the back of the SDHQ bumper to hold the nuts for the fairlead bolts in place once the bumper skin is installed. There is a poster above that has done it, I asked him about it, and his advice didn't work for me. I honestly do not see any way to get an arm in there.

So... I cut off the ends of those OEM sub-bumper ears pictured above. The ears have M10 nuts welded in, and by cutting off about 1.5" of the ear you get a nut with a square backing, that you can drop into the SDHQ bumper. When you tighten the fairlead bolt into that nut, the square backing catches on the bumper and allows you to tighten the bolts.

I painted them before install (shown unpainted):

IMG_6360-XL.jpg


This is how they will interface with the bumper:

IMG_6362-XL.jpg


And this is how I'll hold them in place as I'm seating the bolts: grease!

IMG_6375-XL.jpg


Starting the trimming. This is the part that tears up my gut. You screw this up, it's time for a new piece. The OR / PRO models you can cut the bumper skin in a big rectangle since it'll be covered but you better get the fascia cut right!

IMG_6364-XL.jpg


IMG_6365-XL.jpg


This is one ugly cut! Luckily no one will see it after this!

IMG_6369-XL.jpg


Fascia trimming. I made the holes significantly bigger (in increments) after this picture was taken:

IMG_6373-XL.jpg


I used M10 bolts for the fairlead and used three 1/2" nuts as spacers (the bolt drops through them and doesn't thread into them).

IMG_6374-XL.jpg


Home stretch now! Reinstall the fascia to the bumper skin, reinstall the bumper skin to the truck, bolt up the fairlead:

IMG_6388-XL.jpg


IMG_6392-XL.jpg


Spacing from above. Pretty flush; I'm okay with it. Better slightly too far off the bumper than too snug against it.

IMG_6391-XL.jpg


Cut an access port in the radiator cover:

IMG_6384-XL.jpg


I still need to either reinstall my front plate or plug the holes, get the wiring sheathed and zipped neatly away, add an M8 thumb nut to easily connect / disconnect the power cable from the battery, and I am waiting for a thimble to arrive to get the winch line squared away. I went with a Mile Marker thimble, it is pretty interesting and doesn't need a separate pin like the Factor 55, Smittybilt AWS, etc. It's also smaller, cheaper, and takes one entire link out of the system.

83129_2000x2000.jpg


MM thimble install video: YouTube

Hi fantastic setup did u had suspension done on 2nd 4Runner or it’s OEM. If not OEM what ur suspension setup. Did it snag
 
Just got mine installed. Thanks for the advice, the SDHQ mount is sharp, and you can’t beat no lead time. Only issue I had was with one of the welds on the mount that had spilled over into the area the winch sits. Ended up having the grind down the weld about 1/4” to get the winch to bolt up.

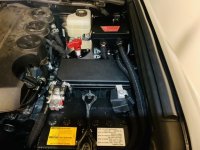
I modified a waterproof aluminum box for the solenoid and wiring and mounted it in the engine bay. Also was able to fit a 500A battery disconnect on the tray next to it. Based on the circuit length and amperage calculations, I went with 2/0 cable. These big cables ended up being a pretty major PITA. Crimping, routing, and general fitment is all just more difficult and time consuming with the big gauges. In the end I think the result was good, just don’t know if I’d recommend running anything bigger than #2 or #3. The winch itself comes standard with much much smaller wires than 2/0 anyway.
 

Attachments

  • 5DF47F2D-F850-4464-816B-5D94433D8D63.jpg
    5DF47F2D-F850-4464-816B-5D94433D8D63.jpg
    127.2 KB · Views: 667
  • 973CB23B-43C2-4374-9972-55910DF8EAA4.jpeg
    973CB23B-43C2-4374-9972-55910DF8EAA4.jpeg
    104 KB · Views: 605
  • B3F399DB-B1B4-4EC6-A815-BEF3BA5B8B10.jpeg
    B3F399DB-B1B4-4EC6-A815-BEF3BA5B8B10.jpeg
    103.2 KB · Views: 632
Installed one today in a 2022 ORP with Warn 8VR

Couple things

The template was no where near for me. I do have a 1/2” body lift, and I measured down a 1/2 inch but way off. Didn’t matter as others showed a big rectangle is all you need. I simply marked the holes where they needed to be for the fascia.

I made mine flush to the fascia. I did this using washers to space it out. It came to 13/16” worth

I moved the cooler line up and the winch fit with the control box just fine.

I was able to tape a nut onto a wrench and fit my arm down to tighten the fairlead.
 

Attachments

  • A1E9DD12-CE94-45A0-A133-D772B670799D.jpg
    A1E9DD12-CE94-45A0-A133-D772B670799D.jpg
    93.6 KB · Views: 456
  • 1CCEB8E7-1586-4D6D-959D-5441258D0E48.jpg
    1CCEB8E7-1586-4D6D-959D-5441258D0E48.jpg
    112.4 KB · Views: 411
  • 9AFACAB4-18FB-4D80-80E7-BCA9E0C3FF90.jpg
    9AFACAB4-18FB-4D80-80E7-BCA9E0C3FF90.jpg
    93 KB · Views: 435
  • BB612C4B-831F-490E-8E21-B66C613B92C2.jpg
    BB612C4B-831F-490E-8E21-B66C613B92C2.jpg
    106.6 KB · Views: 430
  • 0959E500-E662-4490-9E97-89846738E2CF.jpg
    0959E500-E662-4490-9E97-89846738E2CF.jpg
    99.3 KB · Views: 425
Last edited:
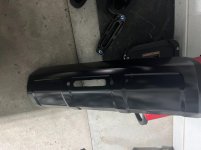
Hi fantastic setup did u had suspension done on 2nd 4Runner or it’s OEM. If not OEM what ur suspension setup. Did it snag

Sorry for the delay, I'm not on this forum anymore. It's basically a 2.5 front 1.5 rear lift using Eibach / Wheeler T1 and T13 coils, and 33" tires. No rub (snag?).
 

Members online

Forum statistics

Threads
278,309
Messages
3,554,075
Members
248,016
Latest member
Advally Service

Trending content

Back
Top