
FinntheT4R
New member
Alright so this is my first write up so bear with me as I stumble through this.
A while back I bought a Switchpros unit in one of the group buys because I loved the clean look and preferred something like this rather than the OTRATTW switches. For a while I tried to figure out where I wanted to place it and despite my use of the search bar and Google, there didn't seem to be any great solutions that didn't involve cutting a hole next to my steering column.
We've all hacked up our cars but I wanted something to look clean and not like I did it myself (I guess that means I'm lazy?).
The four-switch switch bank by your left knee is the perfect size for the Switchpro unit and I just used 3M heavy duty velcro to attach it on front of the switches. The switch blank lines up perfectly with the wiring that comes out of the back of the unit too so I just removed the blank and put the wires through the hole. It was a decent solution for the time being.
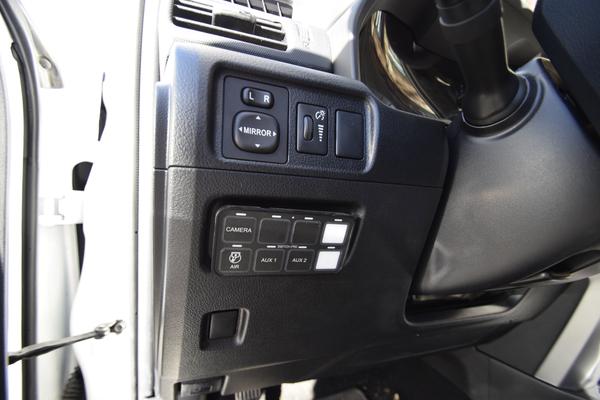
As you can see, I didn't do a great job with this and could have gone further but I wanted to maintain the existing switches down there and was reluctant to hack up that switch bank to make it look the way I wanted. What was nice about running it down there is it took no effort to do and I got a sense for how it would be using it down by the steering column. Its hard to read from the driver's angle and isn't super user friendly. So I knew I needed to find another solution.
There isn't much out there and after reading here and Tacomaworld and Toyota120, I hadn't found much that satisfied what I was going for. I finally came across something on Instagram. [MENTION=165896]SDHQ OFFROAD[/MENTION] had posted pictures of their new 5th Gen T4R Switchpros mount which would place the unit sunken into the dash above the side mirror adjustment buttons.
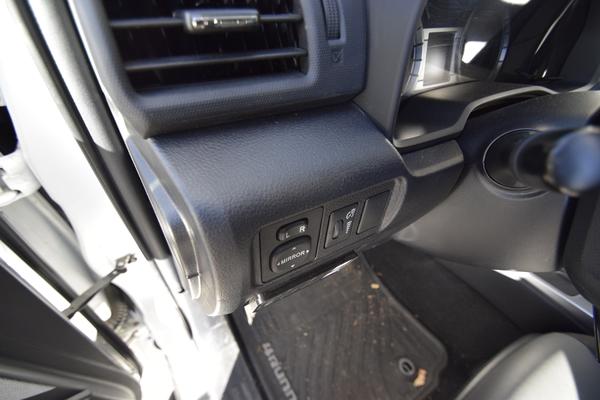
I contacted them here on T4R and was given a forum discount on my order which was great. Their customer service was amazing and I had it just a few days after placing my order. This is a direct replacement of the factory panel with an almost perfect insert for the Switchpros unit. This is a factory Toyota unit that has been laser cut for a perfect fit. Here's what the piece looks like:
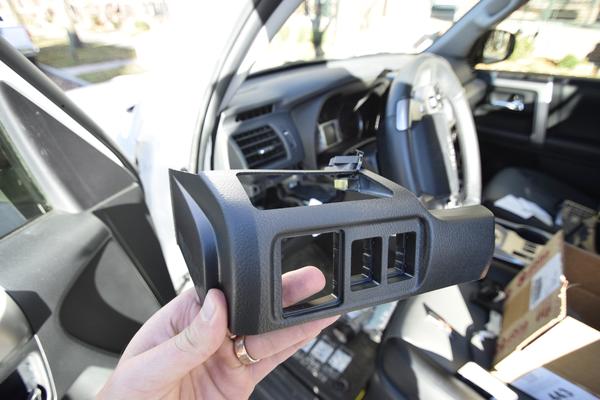
To install this is pretty simple but took me longer for reasons that I'll explain later. First you want to remove your panel. To do this, remove the weather stripping where that dash piece meets the door jam. It pulls easily away and gives you better access to remove the panel. Pull the panel towards you, away from the dash and the retaining clips pop it out pretty easily.
Where the weather stripping comes out.

Here's the panel hanging down.
Now, disconnect all the buttons from the panel and remove the buttons themselves. This is where I ran into issues and I apologize for having no photos but as I'm sure you can all relate, when something is pissing you off, you don't think too much about documenting it. Especially when your wife is texting you to be done already. The new panel does not have a large enough cutout to fit the Switchpros unit. I took my dremel to this thing for about 30 minutes shaving off small amounts at a time and then attempting to fit it in. This ended up being tedious and annoying but relatively easy going. This was my only gripe with the product. And of course I was being impatient and didn't tape off areas I wasn't grinding so I scuffed the new panel. Thankfully nothing terribly noticeable though.
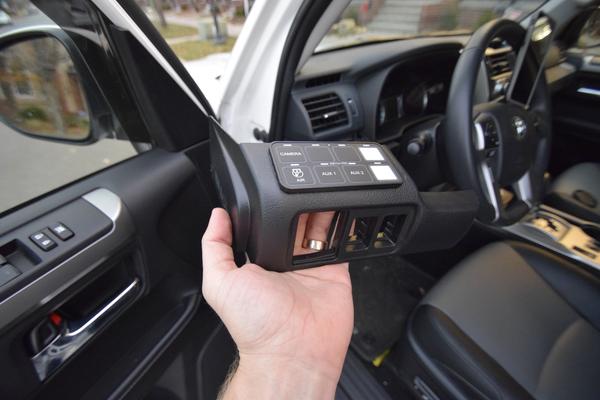
This is what it looks like when you finally get the Switchpro unit to fit in the panel.
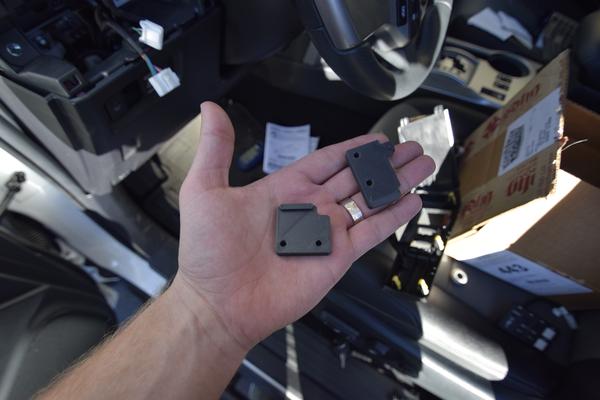
Here is the backside of the panel and the pieces used to clamp the unit into the new panel.
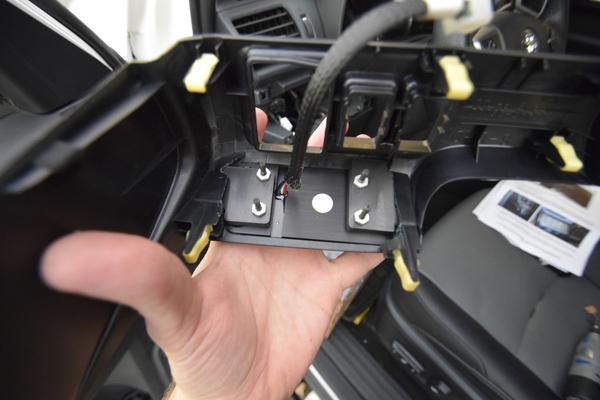
After getting the Switchpros unit into the panel, you'll need to put the switches you took from the original and put them into this replacement panel.
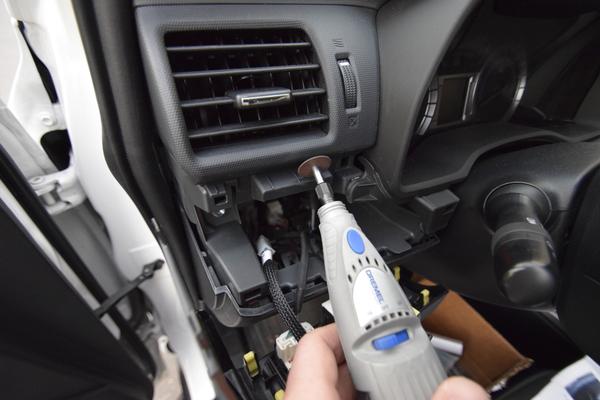
The final major step is to cut this piece of dash. This doesn't provide any important function from what I can gather and cuts out pretty easily. Here are before and after pictures of the part that needs cutting.
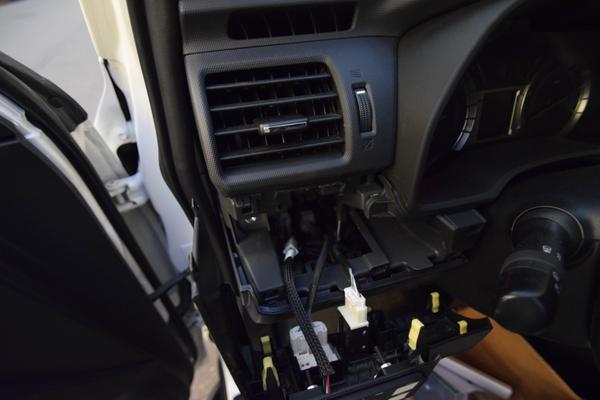
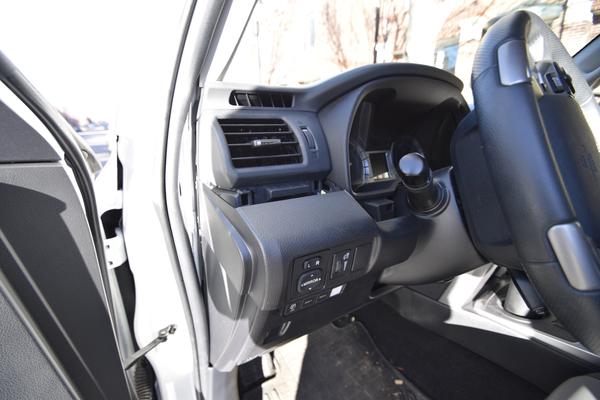
Now that everything is complete, all we need to do is push that dash piece back into place and reinstall the weather stripping. Voila, here's the final product.
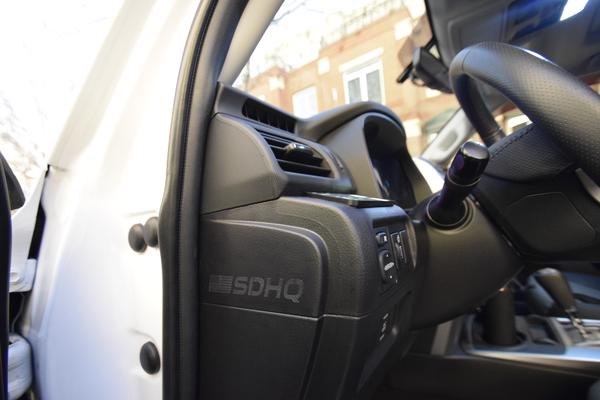
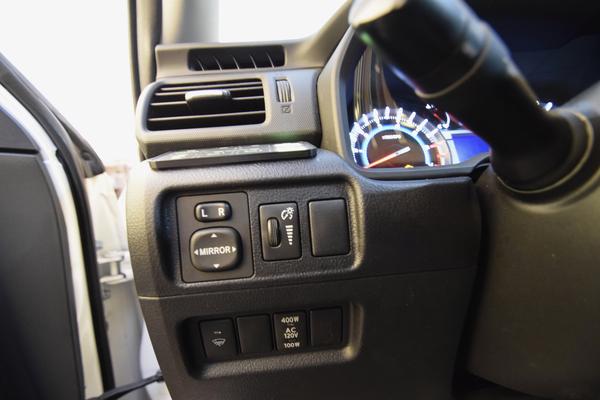
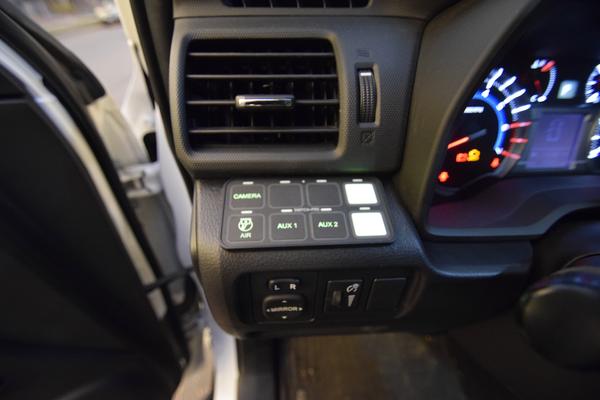
This is a great product and although requiring a little bit of cutting to get the Switchpros unit to fit in the panel, everything fit perfectly and looks factory. The unit sits in the panel cutout very nicely and is incredibly secure. It places the unit in a great spot that is easy to see, very accessible and looks like it could have come from the factory. Hopefully this will give some insight into the install and a great product for mounting your Switchpros SP8100.
We've all hacked up our cars but I wanted something to look clean and not like I did it myself (I guess that means I'm lazy?).
The four-switch switch bank by your left knee is the perfect size for the Switchpro unit and I just used 3M heavy duty velcro to attach it on front of the switches. The switch blank lines up perfectly with the wiring that comes out of the back of the unit too so I just removed the blank and put the wires through the hole. It was a decent solution for the time being.
As you can see, I didn't do a great job with this and could have gone further but I wanted to maintain the existing switches down there and was reluctant to hack up that switch bank to make it look the way I wanted. What was nice about running it down there is it took no effort to do and I got a sense for how it would be using it down by the steering column. Its hard to read from the driver's angle and isn't super user friendly. So I knew I needed to find another solution.
There isn't much out there and after reading here and Tacomaworld and Toyota120, I hadn't found much that satisfied what I was going for. I finally came across something on Instagram. [MENTION=165896]SDHQ OFFROAD[/MENTION] had posted pictures of their new 5th Gen T4R Switchpros mount which would place the unit sunken into the dash above the side mirror adjustment buttons.
I contacted them here on T4R and was given a forum discount on my order which was great. Their customer service was amazing and I had it just a few days after placing my order. This is a direct replacement of the factory panel with an almost perfect insert for the Switchpros unit. This is a factory Toyota unit that has been laser cut for a perfect fit. Here's what the piece looks like:
To install this is pretty simple but took me longer for reasons that I'll explain later. First you want to remove your panel. To do this, remove the weather stripping where that dash piece meets the door jam. It pulls easily away and gives you better access to remove the panel. Pull the panel towards you, away from the dash and the retaining clips pop it out pretty easily.
Where the weather stripping comes out.
Here's the panel hanging down.
Now, disconnect all the buttons from the panel and remove the buttons themselves. This is where I ran into issues and I apologize for having no photos but as I'm sure you can all relate, when something is pissing you off, you don't think too much about documenting it. Especially when your wife is texting you to be done already. The new panel does not have a large enough cutout to fit the Switchpros unit. I took my dremel to this thing for about 30 minutes shaving off small amounts at a time and then attempting to fit it in. This ended up being tedious and annoying but relatively easy going. This was my only gripe with the product. And of course I was being impatient and didn't tape off areas I wasn't grinding so I scuffed the new panel. Thankfully nothing terribly noticeable though.
This is what it looks like when you finally get the Switchpro unit to fit in the panel.
Here is the backside of the panel and the pieces used to clamp the unit into the new panel.
After getting the Switchpros unit into the panel, you'll need to put the switches you took from the original and put them into this replacement panel.
The final major step is to cut this piece of dash. This doesn't provide any important function from what I can gather and cuts out pretty easily. Here are before and after pictures of the part that needs cutting.
Now that everything is complete, all we need to do is push that dash piece back into place and reinstall the weather stripping. Voila, here's the final product.
This is a great product and although requiring a little bit of cutting to get the Switchpros unit to fit in the panel, everything fit perfectly and looks factory. The unit sits in the panel cutout very nicely and is incredibly secure. It places the unit in a great spot that is easy to see, very accessible and looks like it could have come from the factory. Hopefully this will give some insight into the install and a great product for mounting your Switchpros SP8100.
Last edited:


