**The Duster 2.0 - 00' 4Runner SR5**

Addison, I completely agree! I was initially intimidated by this mod. So I tried several 'high quality' bulbs, including some expensive LED replacements before performing this mod. And the Morimoto mini 5.0 D2S HID retro's from the TRS are such a big improvement to any and all of them. My only regret with the HID retro's is, I wish I would have skipped all the replacement bulbs and just did the retro first.

I used a video from another OG on here, [MENTION=8729]Speedy[/MENTION] as my tutorial and it made the project a breeze, even for a knuckle head like me....

Cheers and keep posting the amazing pics!

Durwin

Thanks Durwin and Merry Chirstmas!
 
Addison, I completely agree! I was initially intimidated by this mod. So I tried several 'high quality' bulbs, including some expensive LED replacements before performing this mod. And the Morimoto mini 5.0 D2S HID retro's from the TRS are such a big improvement to any and all of them. My only regret with the HID retro's is, I wish I would have skipped all the replacement bulbs and just did the retro first.

I used a video from another OG on here, [MENTION=8729]Speedy[/MENTION] as my tutorial and it made the project a breeze, even for a knuckle head like me....

Cheers and keep posting the amazing pics!

Durwin

My biggest apprehension with doing this mod is long term durability. It seems like most people have to regularly open the lights back up to repair them or reattach the projectors.
 
My biggest apprehension with doing this mod is long term durability. It seems like most people have to regularly open the lights back up to repair them or reattach the projectors.

I started a small retrofit business while I was in University back when retrofits were just starting to take off. (Literally helped fund my initial t4r build lol). I’ve retrofitted more than 100 headlights and never had a single set come back for a broken or unseated projector. In the last ~7-8 years I’ve had retrofits on my personal vehicles and wheeled/daily driven them all quite extensively.

I think a lot of people over complicate their retrofits and also don’t spend the $$$$ where it is most important. Buy colourful LED’s or spend the money on higher quality components? I know where my money will go every time.

Here’s my thoughts on achieving ultimate reliability in a projector retrofit setup using today’s common retrofitting components:

Ballasts: I have seen a lot of aftermarket ballasts fail. They are cheap and are usually covered under warranty when they fail, but still a PITA to trouble shoot and replace. My time is too valuable for that!

I’ve been running the same set of Denso ballasts for 4 years now (on two separate trucks), without issue. Pay the price for OEM parts and get OEM reliability where you can! Knowing the weak point of the OEM ballasts can be water intrusion, you can even have the ballasts potted by an electrical manufacturer to eliminate the issue (which I have done to mine).

Bulbs: Run Philips or Osram bulbs. They are OEM supplier of bulbs - again, OEM parts for OEM reliability.

Projectors: Morimoto Mini D2S. Years ago they were sub-par to the other OEM-replica projectors that were more difficult to install. The Mini D2S have come a LONG ways and are just too good right out of the box. Tons of value here. The trick to installing them for years of trouble free use (even when you rally gravel/logging roads a lot, like we do up here) is to buy the special socket that allows you to really snug them down when you thread them in. Once they are tight, most people just re-seal the lights and away they go. I like to JB weld the threaded section of the projector in place once I am certain everything is tight and installed properly. This ensures that the locking ring will never back off after years of vibration, causing the projector to slop around or rotate in the housing.

Housings: a very important component. OEM housings are way better than the TYC and DEPO. In my experience they have tighter tolerances on all the plastic components and must use higher quality components in the adjustment mechanisms as they are way less prone to cracking and failing. Even if you have a bad set of OEM 99+ lights - buy a set of TYC’s off RockAuto and swap the fresh lenses onto the old OEM housings, adjusters, and backing plates. The headlight housings were not designed to support the weight of a projector hanging off the reflector. So my logic is that using the higher quality plastic (OEM) components will not eliminate failure but will prolong the life of a retrofitted set of lights as long as possible.

There is my $.02. Now just don’t be like me and forget to connect the ground on the driver’s side ballast and wonder why you have been having intermittent driver’s headlight issues for the last 6 months ;)

Hope some of that helps!
 
Last edited:
This is very helpful! Thank you for the thorough response! I am certainly more convinced. If I do get there someday I would try to keep it as stock looking as I can.
 
Just to add on to what Addison already said about projector retrofits.....
I installed the Morimoto Mini H1 setup in oem 99+ housings about 8 years ago. They're been perfect this whole time. I only had to finally replace one of the bulbs within the past couple of months. Of course, I went with a "cheap" bulb (Xentec)) for the replacement, and it only lasted a few weeks. I should have spent the extra bucks on Morimoto replacement bulbs, as the first set lasted 8 years! lol


Addison, with the Mini D2S, did you have to enlarge the hole in the back of the housing to fit the threaded portion? I thought I had read that the threaded portion on the Mini D2S has a slightly larger diameter than on the Mini H1.
 
Cheers as always dude! Need to line up and wheel! (been saying this forever...)

No doubt! If you sneak into the states to Moab or something let me know.

Thanks for posting the info on retrofits too, that's getting higher on my to-do list so it's good to know what has worked long-term.
 
Just to add on to what Addison already said about projector retrofits.....
I installed the Morimoto Mini H1 setup in oem 99+ housings about 8 years ago. They're been perfect this whole time. I only had to finally replace one of the bulbs within the past couple of months. Of course, I went with a "cheap" bulb (Xentec)) for the replacement, and it only lasted a few weeks. I should have spent the extra bucks on Morimoto replacement bulbs, as the first set lasted 8 years! lol


Addison, with the Mini D2S, did you have to enlarge the hole in the back of the housing to fit the threaded portion? I thought I had read that the threaded portion on the Mini D2S has a slightly larger diameter than on the Mini H1.

Wow that's a great review about the long-term on these things. That's why you use OEM and quality parts in the first place! Great info, thanks for sharing.

I did not have to enlarge the holes. One thing I will say is that the actual threaded 'retainer' that threads onto the actual projector body is a slightly larger diamter than the ID that it is supposed to nest into on the back of the housings. I used my Dremel to remove maybe 1/8" so it would nest flush. But honestly I think you could just tighten it up as much as possible and then JB weld everything in place without even having to take that extra step that I did. This probably doesn't make sense until your actual doing this retrofit and have the parts infront of you. Lol

No doubt! If you sneak into the states to Moab or something let me know.

Thanks for posting the info on retrofits too, that's getting higher on my to-do list so it's good to know what has worked long-term.

Totally! I'm planning a Wyoming trip as soon as the borders open again. I am sure I'll be trying to line up with [MENTION=88391]NateMob[/MENTION] and some of the Sherpa crew as well. Would be rad for you to join us too!
 
**UPDATE** - Magnaflow Overland Exhaust Install

https://www.youtube.com/watch?v=CBD9BOwE5qw&feature=youtu.be

First of all, hope you enjoy the video. I want to do more quick & dirty edits like this instead of just posting photos. It's nothing special but I think it's a good way to supplement information in the forum post.

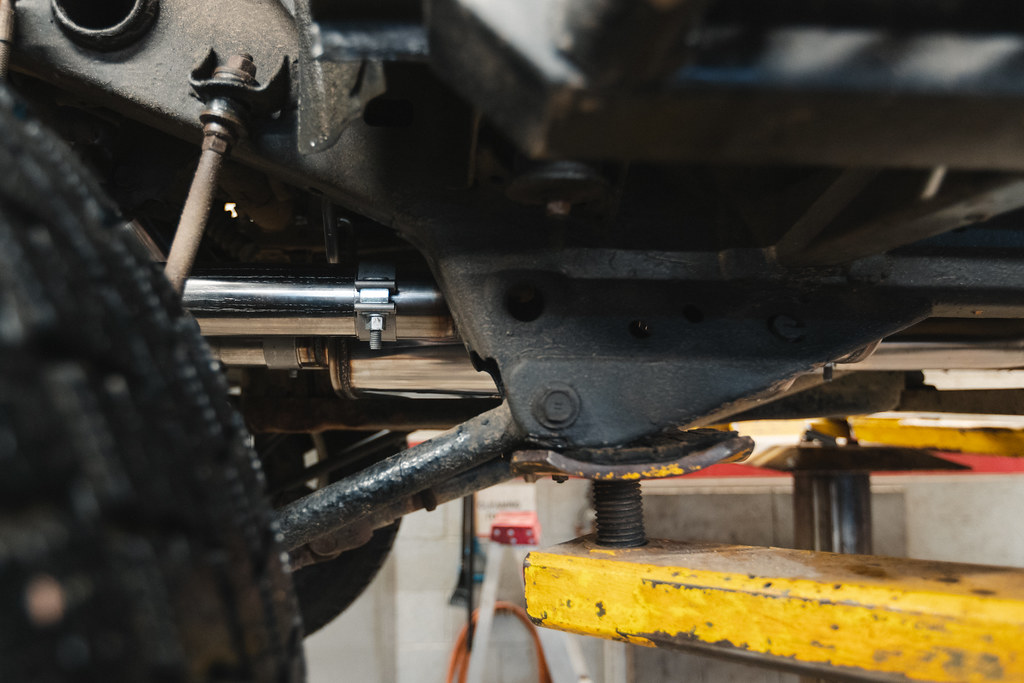
I was lucky enough to get an early version of this kit direct from Connor at Magnaflow. My stock exhaust was getting crusty at 300,000kms and it was time to swap it out and upgrade at the same time. Definitely not a mod where I was hoping for a noticeable performance gain. I actually was hunting long and hard to find something mainly quiet, with minimal highway drone. I guess I would describe the exhaust note as 'tight' and 'mature' - certainly not obnoxious or loud.

Fitment was OEM or better. I was previously a Toyota Parts Manager and this felt better than an OEM system and fit beautifully. Welds and quality of construction are amazing. The ability to 'tune' the sound is limited, but you can install the extra 'NPT' resonator (like I did) or if you want more of an aggressive sound, you can install the system without. I will say that the exhaust is slightly louder in person than it appears in the video.

My Cliff Notes on the system:

- Fit and finish are superb (installed in less than 45 mins with the help of a die grinder to cut out the old studs/system)
- The least amount of drone I've ever heard/ran in a 'performance exhaust' system at highway speeds
- tail is pre bent/tucked so it's not low hanging fruit on the trail
- entire system is tucked up higher than OEM to help with the whole 'flat belly' principle
- A little noticeable drone from 1000-2000 RPM (a low RPM hum... sounds good)
- 2000-2500 RPM on the highway it's virtually silent
- Closer to 3500RPM is where it is probably the loudest (it's a great tone here)
- Overall very very happy with the product

I should note that I did not pay full retail for this. But I want people to know that I actually reached out to Magnaflow as the entire concept of the system was intriguing to me (not vise-versa). If I had bad words, I would say them, but I truly think they executed well on their objectives for the design. Also cool to see an old forum member actually led the design on this, so props to the T4R community once again.


_08I7016.jpg by Addison Rickaby, on Flickr


_08I7036.jpg by Addison Rickaby, on Flickr

Tucked up nice!

_08I7043.jpg by Addison Rickaby, on Flickr

Exit below the Eimkeith bumper

_08I7333.jpg by Addison Rickaby, on Flickr
 
Last edited:
**UPDATE** - Shifter Leak & Clutch Pedal Bushings

Going to start putting more mods AND repairs in there. As these things get older, they seem to get more needy. But that's ok because 3rd Gen's rule.

I had a leak that was dripping onto my belly pan. I could see what looked like gear oil running down the side of the trans between the T-Case and the Trans. At first I though it was the seal between the two units but I called my good friend (Ex - Toyota Master Tech) and he told me to check the metal gasket at the shifter. Knowing I did Marlin shifter bushings about 8 months ago and it wasn't leaking then, I was honestly in doubt, but thought before I dig too deep and make a rash decision, I should check. Low and behold, I pulled the shifter trim and shifter boot off and this is what I found. (I re-used the metal gasket when I did the shifter bushings)

Harder to see than I remember - but rearward of the shifter you can see the dark oil stain from the leak.

_08I6737.jpg by Addison Rickaby, on Flickr

Pulled the shifter and cleaned off the base in prep for some RTV.

_08I6739.jpg by Addison Rickaby, on Flickr

RTV'd this face as well as both faces of the black metal "plate" pictured above.

_08I6750.jpg by Addison Rickaby, on Flickr

Then I re-assembled - wish I had some brake cleaner to clean the oil residue but I was out!
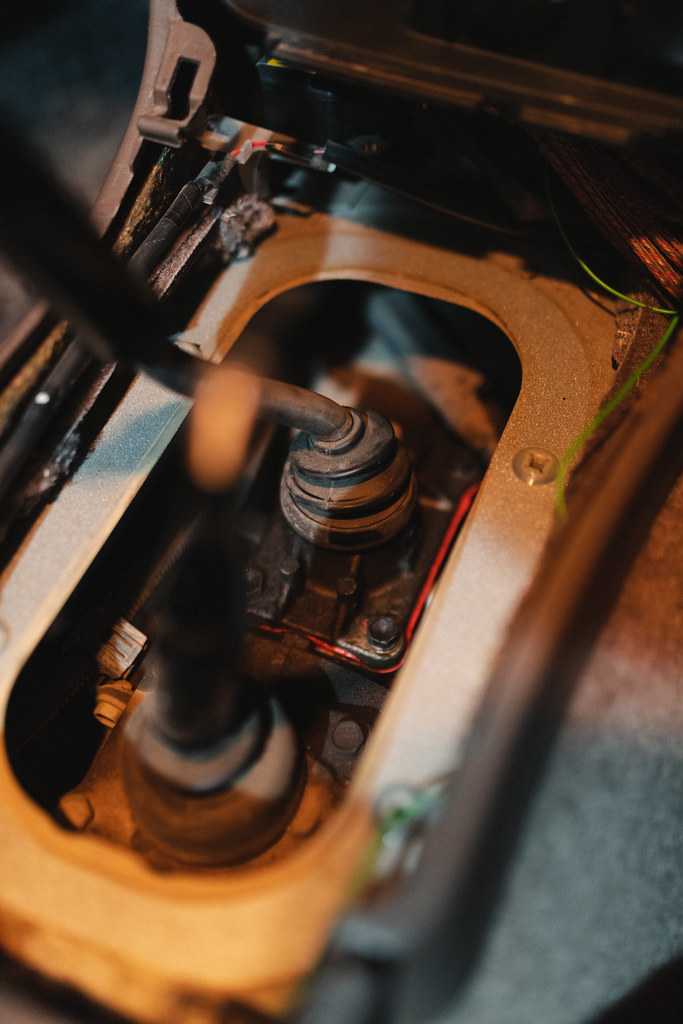
_08I6752.jpg by Addison Rickaby, on Flickr

Been about 7 weeks now and the oil leak has stopped. Good news!

Next up was the shifter bushings in my clutch pedal. As you can hear in my Magnaflow exhaust video, I had a prominent squeak on clutch depress. I had read all the horror stories of a squeaky clutch pedal being left too long causing the actually clutch pedal retain to wear and eventually require you to buy a new pedal with all the bushings. It appears Toyota never really did "fix" this issue and a lot of people have attempted fixes on the forums - using a brake spring instead, different bushing material (rubber types, brass, and even 3D print). However, I just think this is going to become a frequent maintenance item for me. Once it squeaks - remove the pedal assembly, pay the ~$100 for new parts, and put it back together. I bought everything including a new OEM spring, even though mine wasn't showing any wear.

I used this thread for reference (some Part #'s in here too):
5-speed clutch pedal sticks on floor in morning (three days in a row)

First off, I highly recommend removing the whole pedal assembly. I tried to do this job while it was in the truck and ended up tweaking my neck pretty bad. hahah (I guess I'm getting old?). Should have just unbolted it in the first place and I would have been done in 1/4 the time.

Checking the old parts as they come out - Pedal assembly pivot bushings actually in decent shape.
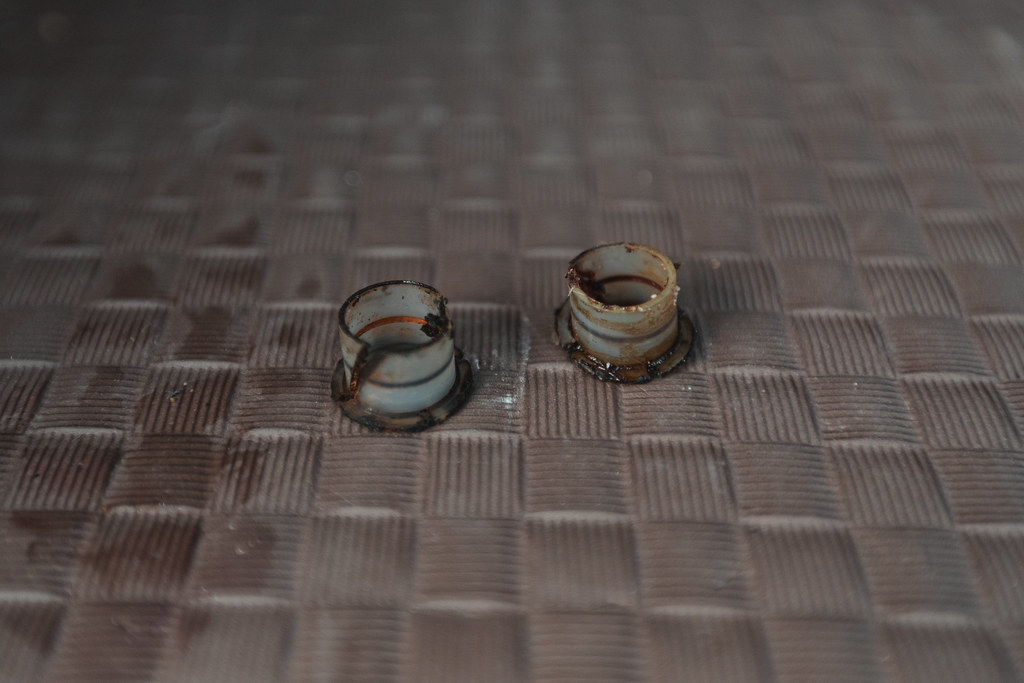
_08I7902.jpg by Addison Rickaby, on Flickr

Here you can see the black clutch spring bushing was cracked and starting to deteriorate. Spring retainer bushings exploded when I tried to remove them (white bushings). Can also see that my clutch spring wasn't worn in the metal like some are when they do this job.

_08I7899.jpg by Addison Rickaby, on Flickr

Here you can see the groove where the black clutch spring bushing sits. on the pedal assembly. Luckily for me, the metal shape has not been eroded at all and therefore the new bushing will fit in there as it should, upon replacement. A keen eye can also see the Toyota parts sticker on the side of the assembly. This makes me think that the previous owner had it done at the dealer early in the trucks life under warranty when Toyota "updated" the design. I have every receipt for this truck since it was brand new, and there is no invoice for this item, so that's why I'm thinking it was a dealer/warranty fix. My truck has ~305,000kms (~190k miles) of mainly highway driving its whole life. Surprised it's held up so long.
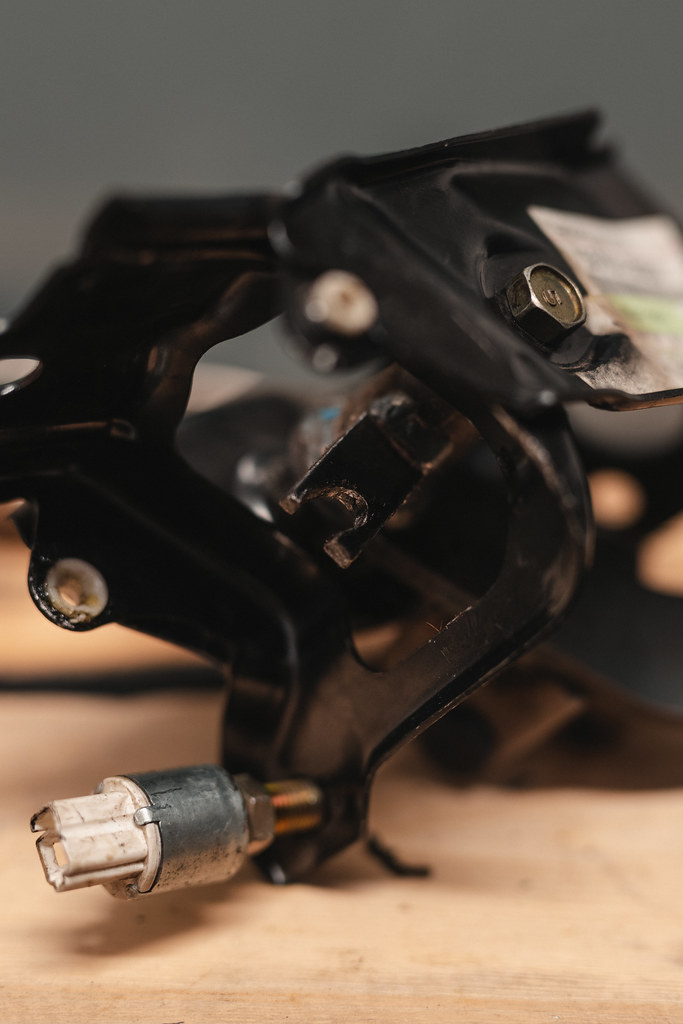
_08I8488.jpg by Addison Rickaby, on Flickr

I installed all the new parts on my work bench. Before I did that though, I greased everything heavily in Moly grease. I know it works good for these plastic-type bushings, so I thought why not? Put it back in the truck and it's been absolutely silent in operation for the last few weeks. So happy to have that annoying squeak gone!
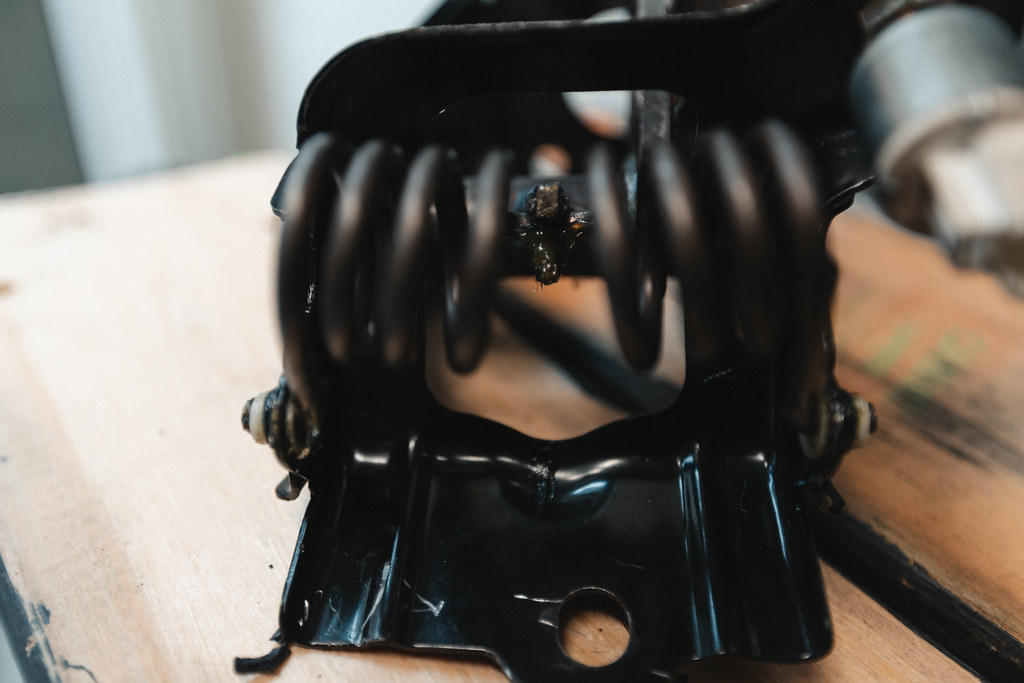
_08I8763.jpg by Addison Rickaby, on Flickr

 
Addison, I missed the fact that your 4runner is manual. I always assumed it was an auto. Do you enjoy driving the manual more than your 'Duster', which I'm pretty sure was auto?

Also, thanks for the thorough write up. This is a PM that I should do soon. My 4runner has 233k and the clutch doesn't make any noise (yet), but I'm sure it could benefit from it.

Thanks and take care

Durwin
 
Clutch pedals/springs/throw out bearings are the "pink milkshake" of the manual world. Keep up on the maintenance and it won't be catastrophic.

In my Camry, the *one* non-OEM part I put on there (throw out bearing) squeaks like mad on the first few engagements in the morning... Not gonna tear out the trans for a noise - but it is quite annoying.

-Charlie
 
I feel late to the party, but going through your build pages (just starting on the OG Duster) inspires even the most meek of us! Funny enough, I never caught this thread while doing my own research on the 4th gen 5160's last year, but it helps to reinforce my justification for going that route over a more traditional 3rd gen shock option. Running the 210v's with a fully loaded storage system, roof rack, and soon-to-be rear bumper, I'm hoping to settle out with ~1" rake compared to what I'm about to go back to...

I'll be taking out the 1/4" strut spacer plates tomorrow so the 3rd gen 6112's can go back to their designed working height. They're at 8/9 (2.3") right now, but what are your impressions on going down to 7/8 to keep the front around 2"? By doing that, I'll be at ~2.5-3" of a rake, though! Also, what are you impressions on diff drops? Not sure if you've covered it on other threads, but I didn't catch you putting them on this build.

I plan to keep an eye on your posts to see what someone far-more knowledgeable than I can find that will handle the rear weight, while still being progressive, and not adding a ton of unnecessary lift. If you're ever down around WA/OR, hit me up!
 
Last edited:
Addison, I missed the fact that your 4runner is manual. I always assumed it was an auto. Do you enjoy driving the manual more than your 'Duster', which I'm pretty sure was auto?

Also, thanks for the thorough write up. This is a PM that I should do soon. My 4runner has 233k and the clutch doesn't make any noise (yet), but I'm sure it could benefit from it.

Thanks and take care

Durwin

Hey Durwin, yah manual this time around. If I'm honest, I love the manual from a DD and highway cruising perspective. I am also getting around 19MPG (calculated/corrected) on the highway with the 4.30 gears and 315's (which I still think is actually pretty crazy). It's just fun rowing gears and not having the auto trying to constantly correct for the lack of power.

On the trail, I prefer an auto. It's so easy to be smooth and controlled at all times. I consider myself a pretty good manual driver (and always trying to improve) but you still can't touch the auto in very technical situations. I am sure gears and a crawl box would help a ton with that but it is what it is. Would I trade this for an auto truck though? Absolutely not.

Amazing photos

Thank you sir!

Clutch pedals/springs/throw out bearings are the "pink milkshake" of the manual world. Keep up on the maintenance and it won't be catastrophic.

In my Camry, the *one* non-OEM part I put on there (throw out bearing) squeaks like mad on the first few engagements in the morning... Not gonna tear out the trans for a noise - but it is quite annoying.

-Charlie

I totally hear you on that Charlie. My clutch pedal wasn't THAT bad but that squeak drove me crazy. Glad I tackled it sooner than later now that I have read more into the issue and the long-term negative effects associated with leaving it alone.

Wyoming trip huh?

As soon as the flood gates open. ;) I'll keep you in the loop!

Hey brotha, any reason in particular you didnt modify the magnaflow to work with the eimkeith bumper exit?

We were texting about this but it's a valid question to answer here for people.... I want to do it but you would have to modify the tail section of the Magnaflow to jump over the frame rail. I think it would be fairly easy to do but is just another small project that I have yet time to do. Like you... I'll probably leave it like this until I do the F150 swap.

New to the forum... Really enjoyed reading about your builds!

Thanks for reading through. cheers

I feel late to the party, but going through your build pages (just starting on the OG Duster) inspires even the most meek of us! Funny enough, I never caught this thread while doing my own research on the 4th gen 5160's last year, but it helps to reinforce my justification for going that route over a more traditional 3rd gen shock option. Running the 210v's with a fully loaded storage system, roof rack, and soon-to-be rear bumper, I'm hoping to settle out with ~1" rake compared to what I'm about to go back to...

I'll be taking out the 1/4" strut spacer plates tomorrow so the 3rd gen 6112's can go back to their designed working height. They're at 8/9 (2.3") right now, but what are your impressions on going down to 7/8 to keep the front around 2"? By doing that, I'll be at ~2.5-3" of a rake, though! Also, what are you impressions on diff drops? Not sure if you've covered it on other threads, but I didn't catch you putting them on this build.

I plan to keep an eye on your posts to see what someone far-more knowledgeable than I can find that will handle the rear weight, while still being progressive, and not adding a ton of unnecessary lift. If you're ever down around WA/OR, hit me up!

Funny you commented hear as I was just reading some of your notes in the Rear Coil Thread. What is your "hub-to-fender" measurements with the 210v?

I would love to drop my front end down to 1" or 1.5" of suspension lift. This way the front suspension would be in a great "centered" position with a lot of uptravel and downtravel available. I think even at the ~2.5" front lift, you still have a lack of downtravel which is associated with a rough ride. Often people think it's because your coils are preloaded, therefore the ride is rough, but it's actually the lack of downtravel available when you go over bumps, making it ride more poorly than a comparison point at a lower front ride height.

You seem to be arriving at my same conclusions where keeping the front low is more ideal, but then you have a lack of rear coil options that work effectively without massive rake. My dream coil is 890 or 891 ride height with some super soft/wide wraps at the end that allow for the full droop of a 4th gen or LX80 rear shock, without the coil dropping out. 2.5" or unloaded rear lift and even 2" when loaded but with tons of droop. This would excite me a lot, but does not exist!

I am starting to get my head back into all this though. I have found a vendor who will do small-batches of custom coil springs. If I can get all the info I need together, I am going to inquire about doing a run of custom rear coils. I have heard you need to do a run of 20-40 for them to do it. Which honestly doesn't seem that bad.
 
Funny you commented hear as I was just reading some of your notes in the Rear Coil Thread. What is your "hub-to-fender" measurements with the 210v?

I would love to drop my front end down to 1" or 1.5" of suspension lift. This way the front suspension would be in a great "centered" position with a lot of uptravel and downtravel available. I think even at the ~2.5" front lift, you still have a lack of downtravel which is associated with a rough ride. Often people think it's because your coils are preloaded, therefore the ride is rough, but it's actually the lack of downtravel available when you go over bumps, making it ride more poorly than a comparison point at a lower front ride height.

You seem to be arriving at my same conclusions where keeping the front low is more ideal, but then you have a lack of rear coil options that work effectively without massive rake. My dream coil is 890 or 891 ride height with some super soft/wide wraps at the end that allow for the full droop of a 4th gen or LX80 rear shock, without the coil dropping out. 2.5" or unloaded rear lift and even 2" when loaded but with tons of droop. This would excite me a lot, but does not exist!

I am starting to get my head back into all this though. I have found a vendor who will do small-batches of custom coil springs. If I can get all the info I need together, I am going to inquire about doing a run of custom rear coils. I have heard you need to do a run of 20-40 for them to do it. Which honestly doesn't seem that bad.

I actually just got to my shop with the intention on doing a full write-up on the travel specs of the 6112's on here once I take some measurements with the springs off. Yesterday was another day spent obsessively scouring the internet trying to get more details on the 4Runner specific ones with nothing. The goal is to try to get as much up-travel as possible back before hitting the top of the wheel wells. I'm hoping that between the perch settings and the 1/4" strut spacers I have a little extra to play around with to get me there.

I'm down for a run of custom springs! I'm at ~24" hub-to-fender in the back at the moment, which I believe is 3" of lift? I really want the most efficient travel range with a healthy balance between on and offroad comfort for ~400 lbs. of extra weight in back and up top when fully loaded up. I never thought this would be so much work! lol
 
**UPDATE**

Spring feels like it is about to arrive. I've been planning several things over the winter as "spring" projects for the 4Runner. My plan is to realistically wrench less and camp/wheel more as my daughter is more of-age this year to actually be able to get out some more with the family. I say that and then laugh at the list below.

Duster projects include:
- SPC rear LCA installation (they've been sitting in my truck for 1.5 years lol)
- Grille swap (new 01+ chrome OEM grille sitting in a box for the last 6 months)
- JDM Forged 3-piece wheel rebuild (I sold my beadlocks in the fall)
- New front bumper (Excited for this... CAD drawings will be posted in the coming weeks)
- RTT (we might be building one :spy:)
- New rear brakes (disk conversion or replace drums soaked in gear oil)
- [MENTION=28464]eimkeith[/MENTION] F150 tank setup (waiting for someone to make the fuel filler a simple solution!)

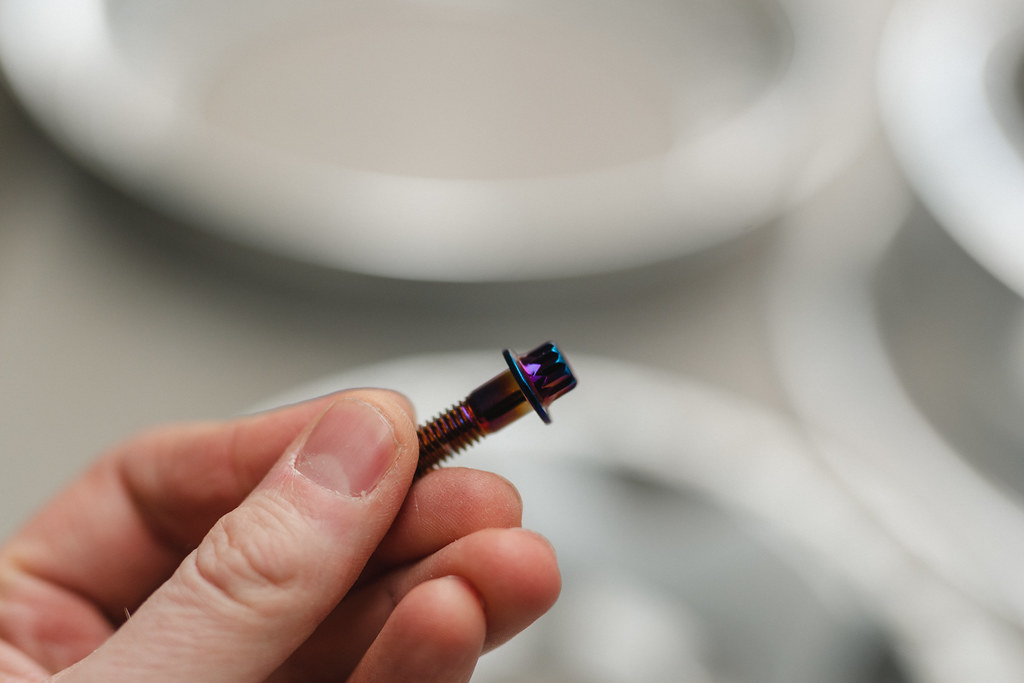
Sneak peak at the new kicks - JDM 90's 16" Bridgestone BERG 3-piece wheels. They are forged aluminum 16x8 and 4.5" BS 0 Offset. I scored a set of 5x wheels on a Yahoo japan auction after hunting for a clean set for a long time. Super excited to refinish them with the new hardware I've purchased already, some painted faces, and refinished barrels. Did I mention they were forged and weigh 17lbs per corner?:hungry::thumb3: Here you go [MENTION=554635]JBend[/MENTION] making me all jealous of wheel pics lol


_08I5654.jpg by Addison Rickaby, on Flickr


_08I5656.jpg by Addison Rickaby, on Flickr


_08I5660.jpg by Addison Rickaby, on Flickr
 
Last edited:

Members online

Forum statistics

Threads
278,312
Messages
3,554,086
Members
248,016
Latest member
Advally Service

Trending content

Back
Top