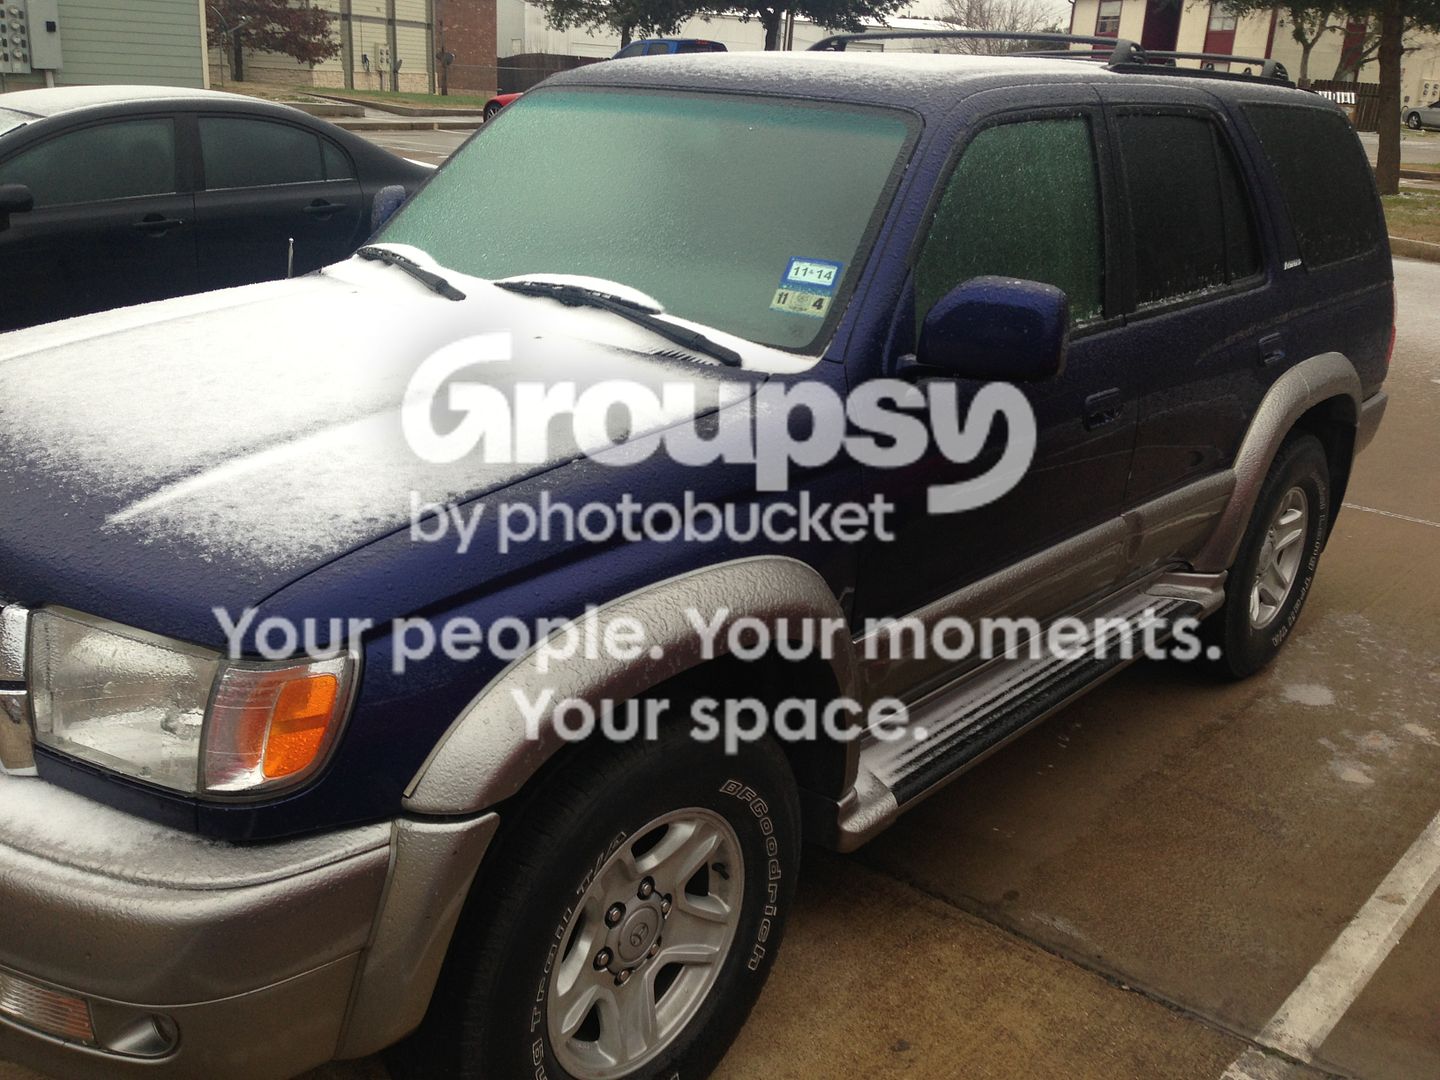
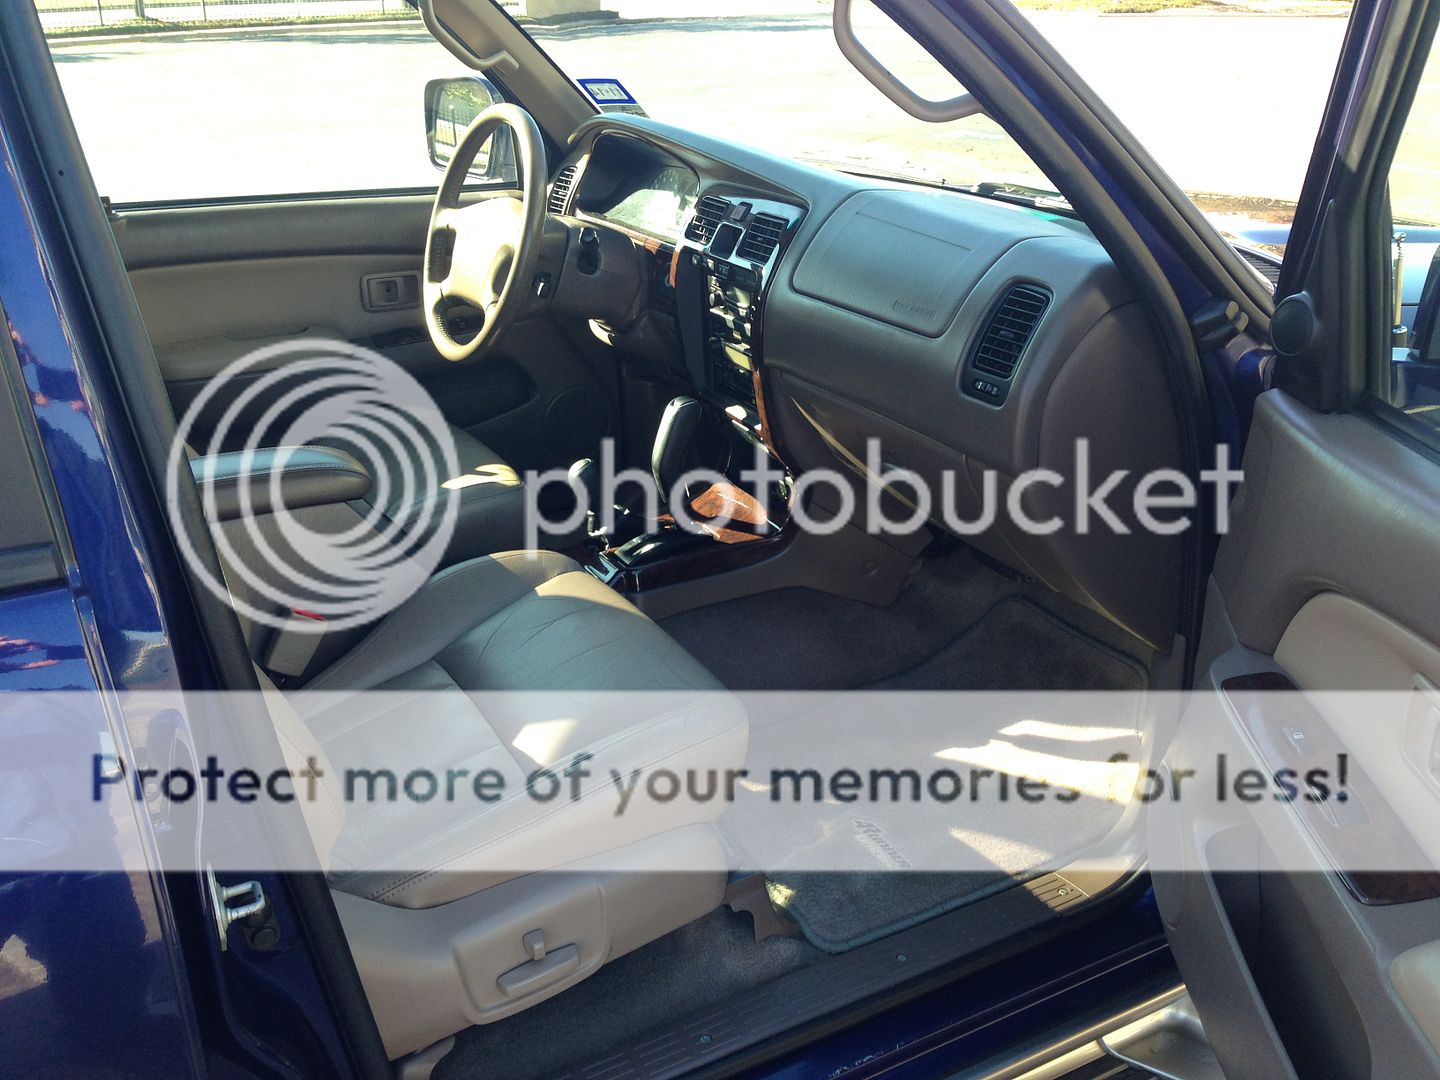
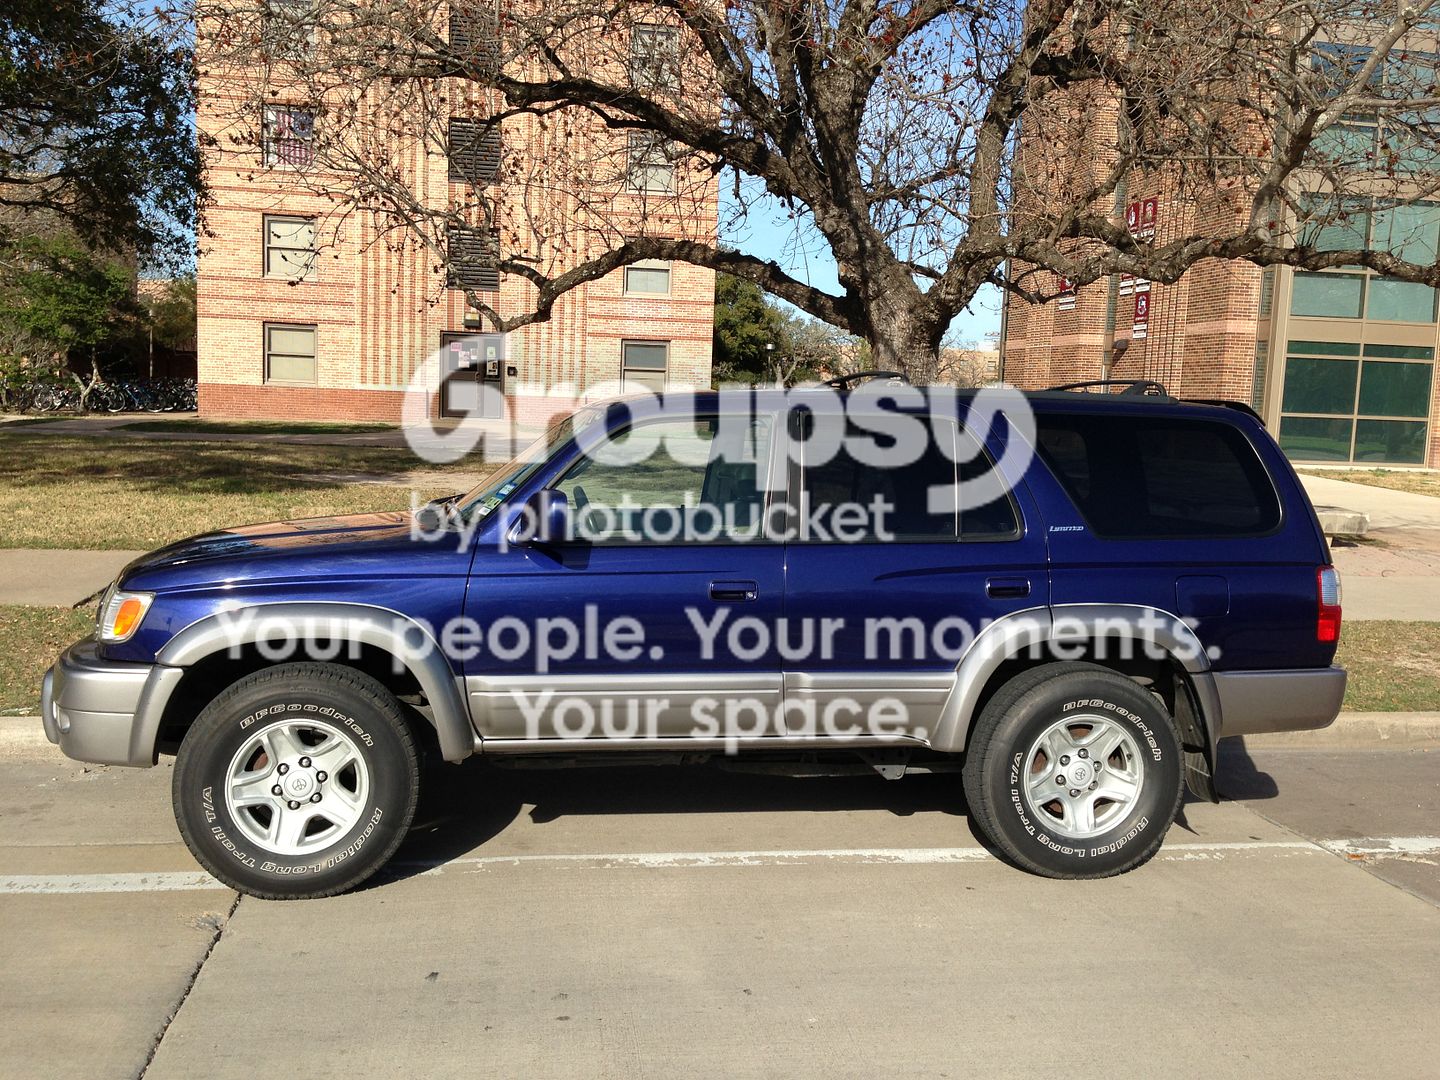
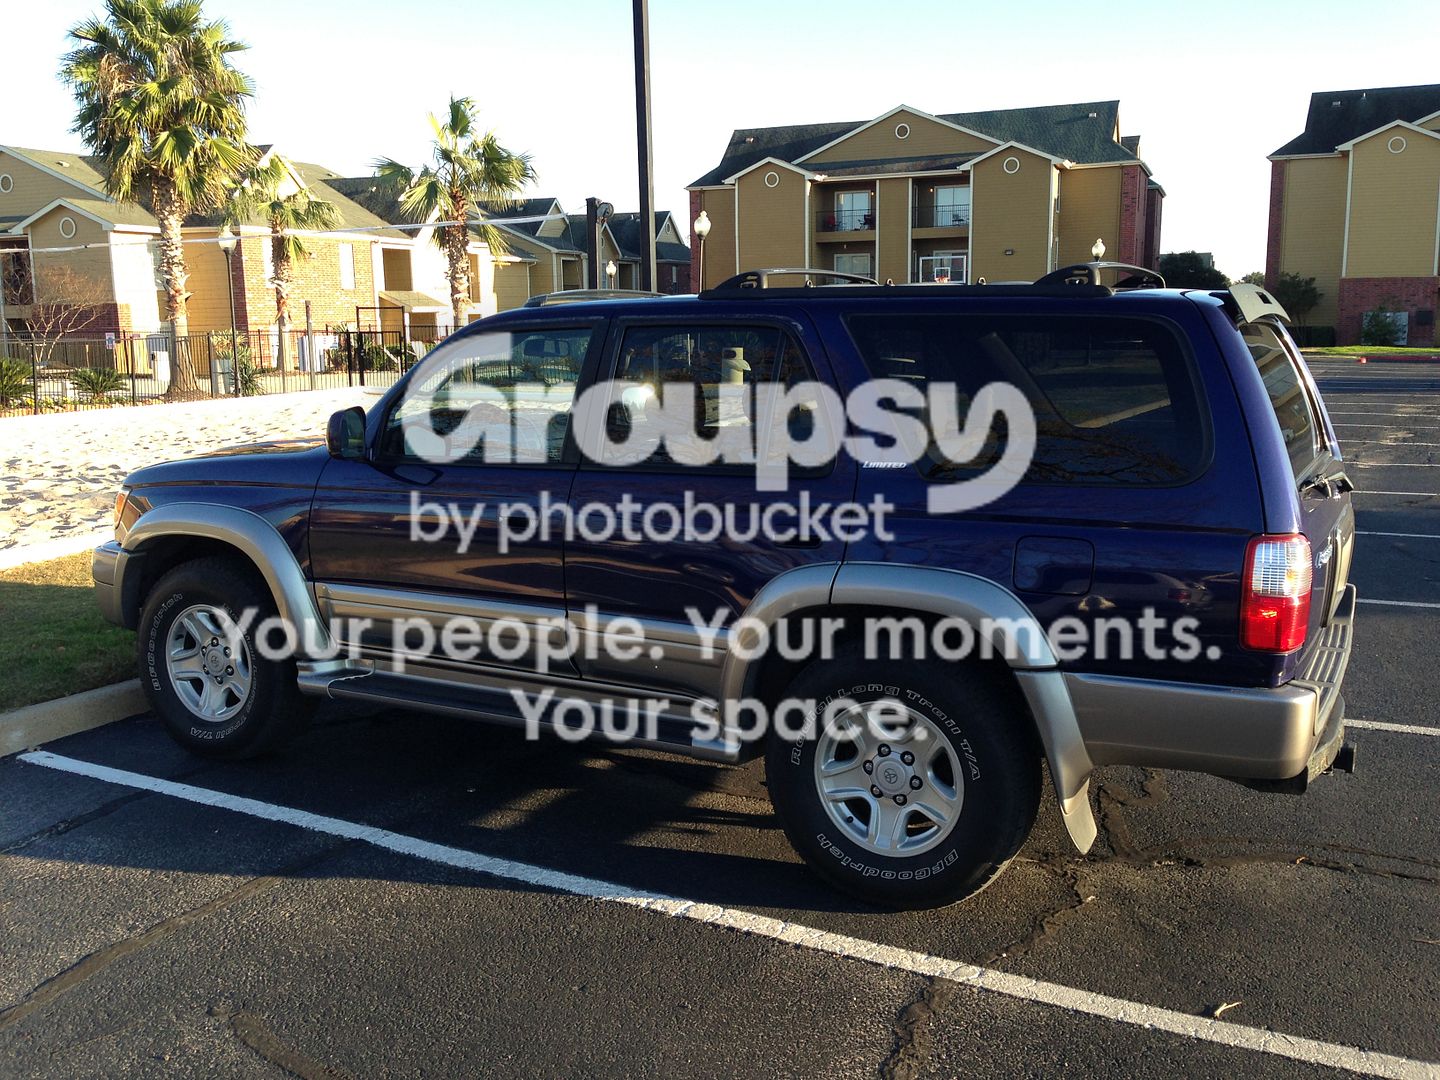
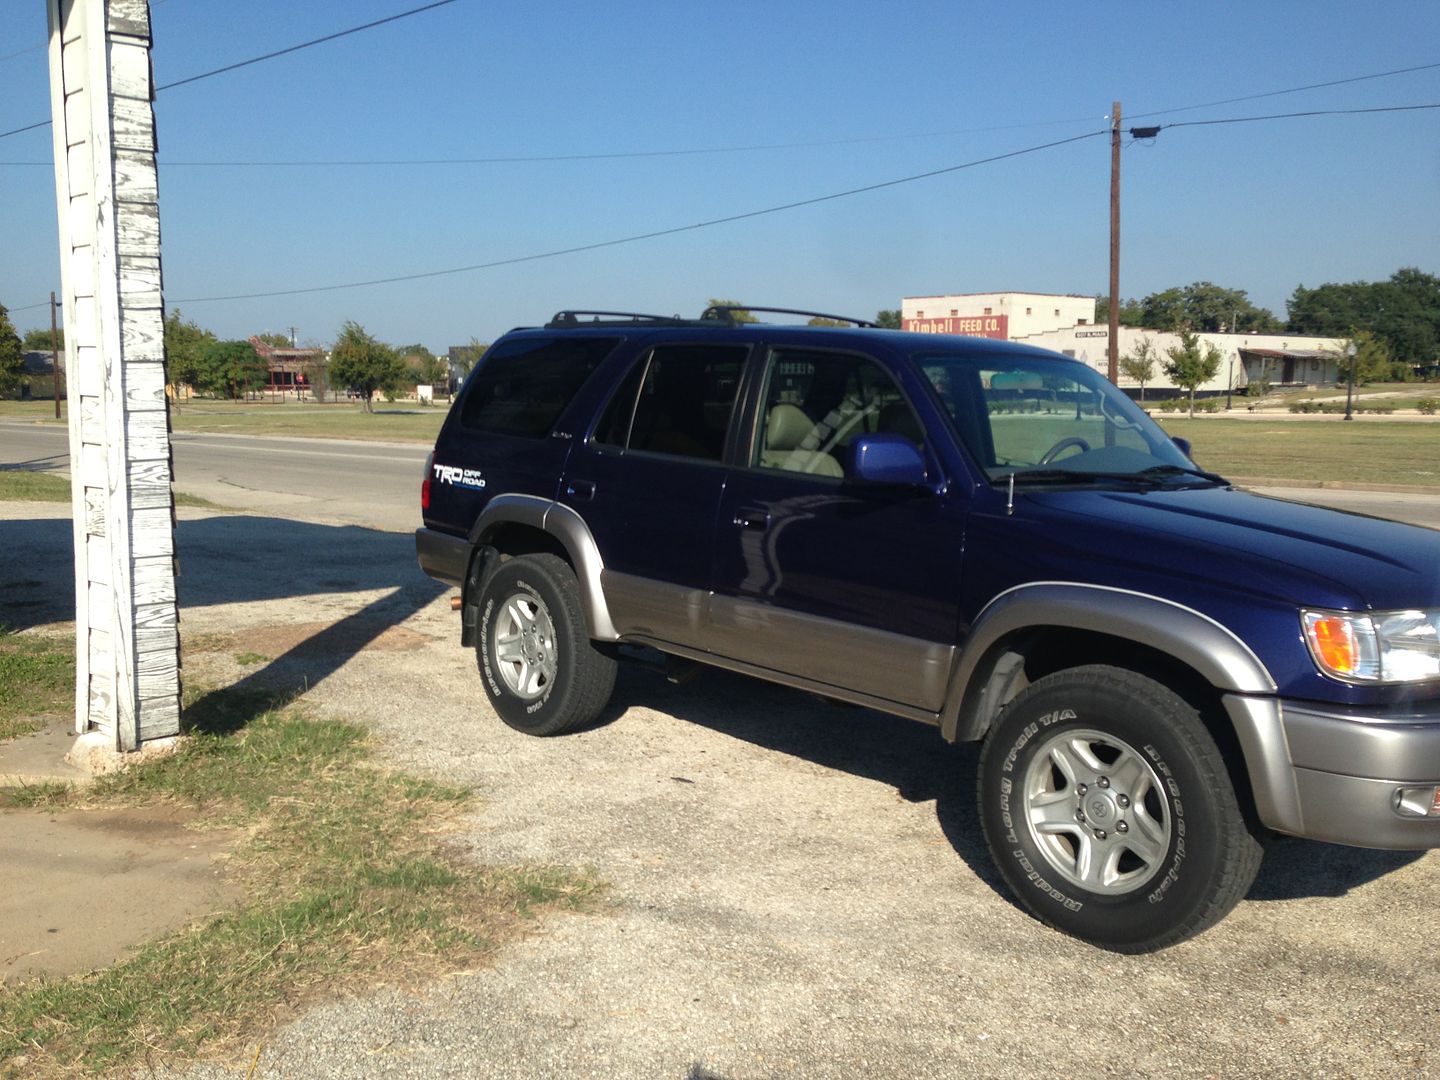
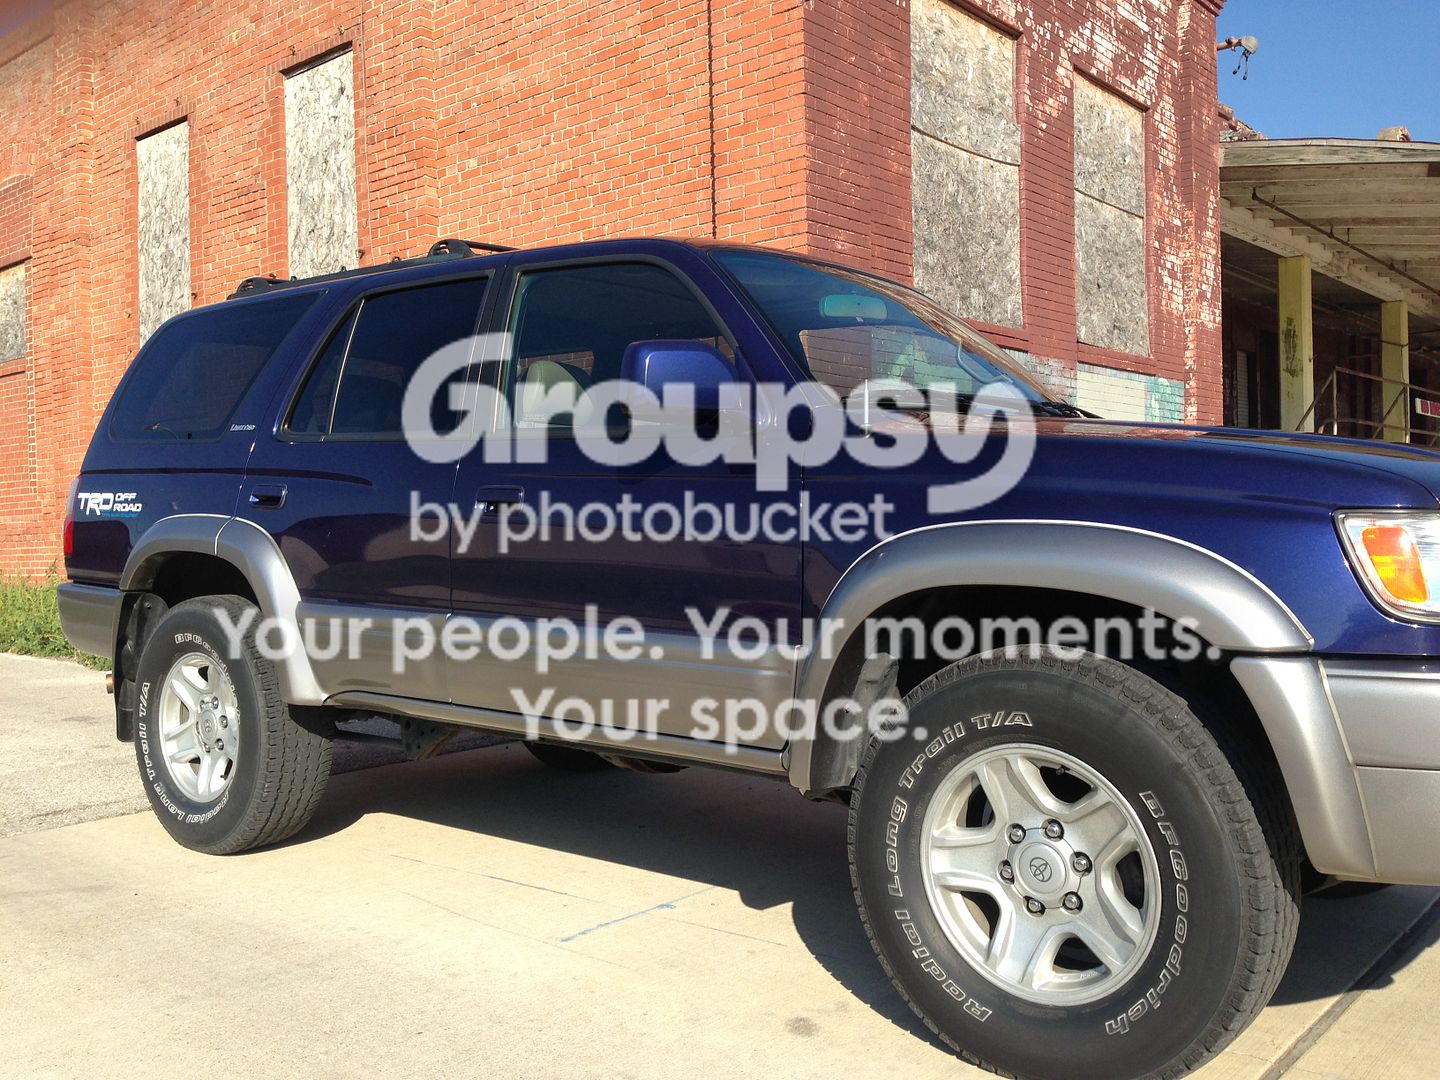
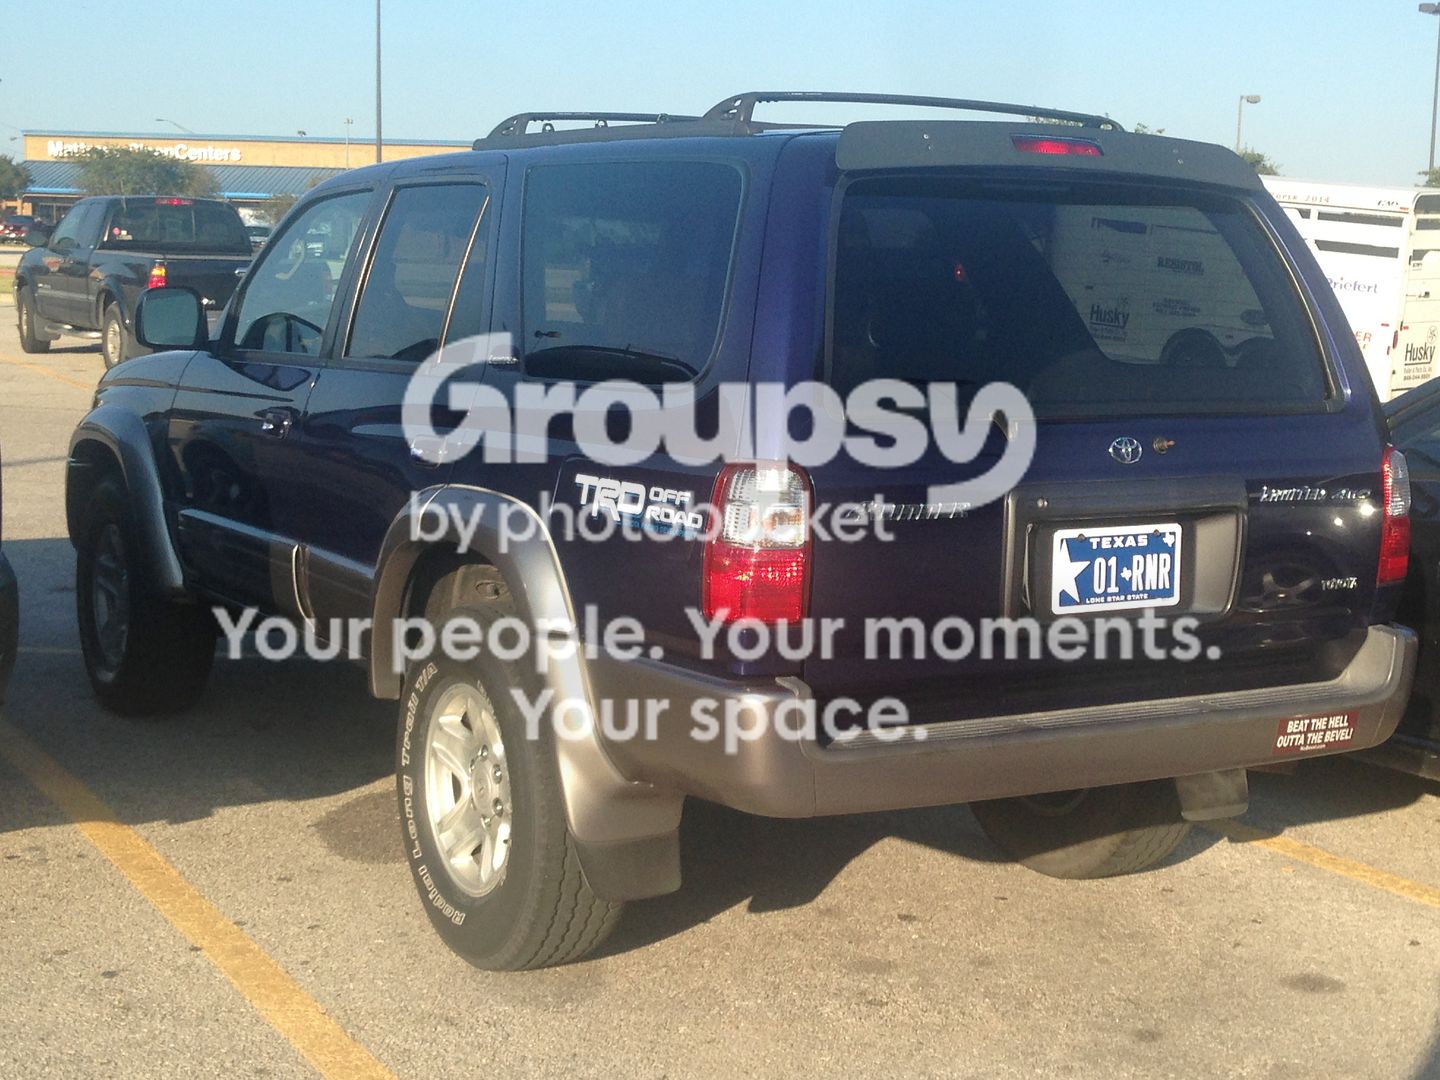
The SURF RUNNER Build: 2001 Stellar Blue Limited 4WD

Nice...that is still one of my top 3 favorite bumpers if not my favorite...just cant bring myself to drop a G on a bumper.
 
Silver FJ Cruiser TRD Wheels

MileHighClub,

You and I were on the same page, except I went with the silver TRD wheels, not gunmetal.

The TRD gunmetal grey rims would look good on your rig. Like the ones on the Black 4Runner with the snorkel and ARB bumper

So after a lot of research and consideration I decided to go with the 6 spoke FJ Cruiser TRD wheels. I'm not sure if these were originally available only on the Trail Teams edition or not, but where I live I have yet to see one FJ Cruiser with these silver wheels. I've seen several recent Trail Teams with the gunmetal and flat black wheels. I've always liked silver wheels on my vehicles, but I think all 3 versions of this TRD wheel look great.

Yesterday I called my local Toyota dealership (5 minute drive from where I live and work) and asked about the price of these wheels. I was quoted $170 each. I told the parts guy that in my research they are being sold online for between $128 and $150 each. I only heard about the $128 as a "buddy" or "wholesale" deal, but I think mentioning this price helped. Anyway, he ended up giving me a quote for $136 each. I think this is a great deal since it is a genuine TRD wheel (no eBay/internet doubts) and no shipping cost since I am picking them up. The total price including tax was $147.22 per wheel. The wheel comes with the TRD center cap, 6 chrome lug nuts, and a rubber valve stem. Considering all of the TRD research and development that goes into these wheels I think that getting 4 for $588.88 out the door is a solid deal.

Other wheels I was considering were the TRD "beadlock" wheel, the FN Five Star, and the factory five star that is currently on my 4Runner. The first two choices don't come in silver, so that factored into my decision.

Picture005.jpg~original


Picture007.jpg~original


Picture008.jpg~original


Picture009.jpg~original
 
Last edited:
Hey thats my rig!

You should drop me a line in my build if your such a big fan haha :wave:


Your truck looks great. I love the color.

About the flares, its your truck but I would recommend (highly) that you photoshop a preview of that electric blue before spending $500 to paint them. I think satin black or matching factory gloss blue would look best on those flares. Or leave them alone.

About the stereo ... I'd recommend you look at this. It is great for the money and has everything except navigation (who needs that crap when we have supercomputer phones that update weekly) but the features and price are top notch. I"m thinking about putting it in my DD.

You can find it for $550 online.
* build in HD Radio
* 720p touch screen
*only 2V pre-outs but that doesn't matter if you have a good quality 4 channel amp (look it up 2v vs 4v)

http://www.alpine-usa.com/product/view/ics-x7hd


Subscribed
 
Last edited:
Man those rims are going to look awesome!
You may also want to take a look at this head unit.

Kenwood - DDX770

Kenwood DDX770
Has a lot of awesome features and is fairly priced. You can find it for $350-400.
Bluetooth, dvd, cd, aux, pandora, and nav if you have an IPhone.
They made it so you can have nav on a cheaper priced HU bc its not actually built into the HU itself. You download a certain app on the iphone and use it through the HU through a usb. Its pretty neat. I have an older version of this and still love it.
 
how much did you end up paying?? and who did you buy it from?
i cant find one for less than $866.00

infamousRNR,

http://www.toyota-4runner.org/3rd-gen-t4rs/160209-arb-taco-bumpers-back-order-any-ideas-how-find-one-texas.html

In the thread linked above you can see that I had an extremely difficult time finding an ARB 3423020 bumper. I wasn't necessarily ready to buy one until I learned that they were on back order from Australia. Autoplicity listed almost 20 on their website, but in reality they only had 3. Below are some updated excerpts from my thread linked above. If you can get one for $866 I would jump on that. My final price was $981 including tax and shipping.

I bought my bumper from Autoplicity late January. At that time they actually had a total of 3 Taco ARB bumpers spread around the country in 3 different warehouses. One sold to someone before I ordered, I bought the one that was in Kentucky, and as of my purchase date one was still available in one of their west coast warehouses. This was the good news. The bad news was that there was no flexibility on the shipping cost from these particular warehouses. The grand total on mine was $1,050 and it was delivered in 3 days.

The day after I ordered my ARB bumper I received an email from Autoplicity about 30% off on shipping for my next order. I called Autoplicity and asked if I could use the 30% discount on the order I had just placed. The guy put me on hold for one minute and then came back and said yes.

I thought I was spending $1,053.81 for the bumper and $240 of that was shipping. With the discount applied my total cost was $980.86 shipped from Kentucky to Texas. In my opinion that isn't bad since these are on back order and there is probably very few of them in warehouses around the country.


About the flares, its your truck but I would recommend (highly) that you photoshop a preview of that electric blue before spending $500 to paint them. I think satin black or matching factory gloss blue would look best on those flares. Or leave them alone.

BrianSD_42,

Thanks for your comments and advice. Your 4Runner is one that I have been admiring, especially from the front.

At this point I am planning to use the medium blue only for my accent color.

I will be painting the following Millennium Silver: ARB front bumper, Shrockworks rear bumper/tire carrier/jerry can holder, Limited cladding/flares, Stubbs Welding HD-SKO rock sliders, and the WMW roof rack. The TRD wheels will be the factory silver color, but obviously it is close to Millennium Silver.

The medium blue accent color is probably going to be GM/Corvette Electron Blue or Chrysler/Jeep Intense Blue Pearl... I'm leaning towards Corvette Electron Blue. This blue accent color will be used for the following: Custom perforated steel bottom on rock sliders, custom perforated steel bottom on WMW roof rack, pinstripe on TRD wheels, TRD logo on center caps, Jerry Can (probably), Savage skid plates, calipers, recovery hardware/hooks, and Hi Jack.

Brian, I've seen some Stellar Blue Runners with black or Stellar Blue cladding/flares... I agree that they look sharp, but I have a different idea for my T4R. Note to Thunder Cloud owners (solid and two tone): There is nothing wrong with the Thunder Cloud gray that is currently on my T4R... in fact I think that Toyota did a brilliant job selecting Thunder Cloud as the primary color for the cladding/flares on so many "late" 3rd Gens. I say this because Thunder Cloud looks good with so many different colors. It is a very strong "default" color. The reason I didn't want to paint my aftermarket front and rear bumpers Thunder Cloud to match my flares/cladding is because I wanted a lighter/brighter color for the bumpers that was closer to a "natural" steel color. I think that having Millennium Silver on the front and rear bumpers and all the way across the bottom of my T4R will tie everything together - at least I hope it will. I agree on the value of photo shopping, but I'm not sure who I could get to do it.

This photo illustrates the difference between Thunder Cloud and Millennium Silver. The Millennium Silver color is on the bottom.

Toyota-4Runner-Limited-thunder-cloud-millenium-silver-2001-01HLG370155708A.jpeg~original


Here are two examples of Corvette Electron Blue sandwiched between photos of my Stellar Blue Runner.

ElectronBlue01.jpg~original


BLUERUNNERDealership.jpg~original


ElectronBlue02.jpg~original


4RunnerSnow.jpg~original


Brian and CShaver1025,

I appreciate the comments on the Kenwood head unit. I really want the Garmin Nav, so I'll probably stick with Kenwood for that reason. Honestly I don't think that you can go wrong with Pioneer, Alpine, or Kenwood. All 3 of these awesome brands have been around since before I bought my first 8-Track (I'm 48), and they all have their merits.

Two nights ago I ordered a Hilux Surf 185 Field Monitor, so I'll have my hands full with that installation before I can even think about the Kenwood again.


Those rims are going to look great. Are you going to do a lift and bigger tires at the same time?

cdrewferd,

Thanks for the comments. After I purchase all 5 TRD wheels I'm going to get someone to do a medium blue pinstripe and medium blue TRD logo. After that is done I'm going to mount my current BF Goodrich tires on them (I'm assuming that these will fit since the TRDs are only 1/2" wider than the factory 5 Stars.

After I get my 1" 4Crawler body lift and 1.25" Spider Trax hubcentric spacers I will be closer to getting my 285/75/R16 Mickey Thompson Baja MTZ tires. I'm buying 5 and painting the inside (of the white letter outlines) white. There is a company in England that specializes in this kind of paint. If I can get away with running the MTZs with the spacers and a 1" body lift (and some pounding on the pinch welds) I'll do that. If I have to wait for the Sonoran Steel 1.3 lift then I'll wait for that before I get the MTZs. Right now this Runner is my daily driver (and only vehicle) and I'm not a big-time 4 wheeler just yet... I'm focusing on trying to plan, coordinate, budget, and just getting everything done. Does anyone know if I can run the 285 MTZs with just the 1" body lift and 1.25" spacers?

Picture009.jpg~original
 
Last edited:
Selling a few items...

To make further progress on my build and to free up some money I am selling a few items. Above each photo is the link for the for sale post in T4R Items.

http://www.toyota-4runner.org/sale-t4r-items/165028-fs-3rd-generation-4runner-oem-limited-tan-carpeted-floormats.html

BLUERUNNERTexasAampM4.jpg~original


http://www.toyota-4runner.org/sale-t4r-items/165046-fs-2001-2002-tan-cargo-luggage-shade-cargo-cover-mounts-rounded-bottom.html

CargoCover1.jpg~original


Running boards (I will deliver or meet someone within an hour drive of Bryan-College Station only; NW Houston is OK)

Tow Hitch (I will deliver or meet someone within an hour drive of Bryan-College Station only; NW Houston is OK)
 
Nice truck! Man I wanted to do a double din pioneer or kenwood, but the fact that we live in a world where we can't have nice things A N Y W H E R E anymore due to possibly being stolen, just plain sucks. I use to live in Texas, which was a bit more o.k, but over in NW Houston it was becoming more and more ghetto. Now I'm in New York, and even with the amount of people walking around I'd still be afraid. I forgot which double din I saw once that turns into a single or is detachable.. Of course that's more money, or then you have to worry about your motor blowing on your radio.

World sucks. I have to hide my emergency tools ):
 
Removed Running Boards and Tow Hitch

I've been behind on updating this thread. Several months ago I had my running boards and hitch removed. I don't need these accessories because I am going to buy Stubbs Welding rock sliders and I have a Shrockworks rear bumper on order that has a built-in hitch.

Around that time I also changed my user name from BLUE RUNNER to SURF RUNNER. Sorry about any confusion this may have caused. SURF RUNNER suits my build more since I am going to incorporate elements from the Hilux Surf into my build design. I was never crazy about BLUE RUNNER since it is also the name of a harmless snake.

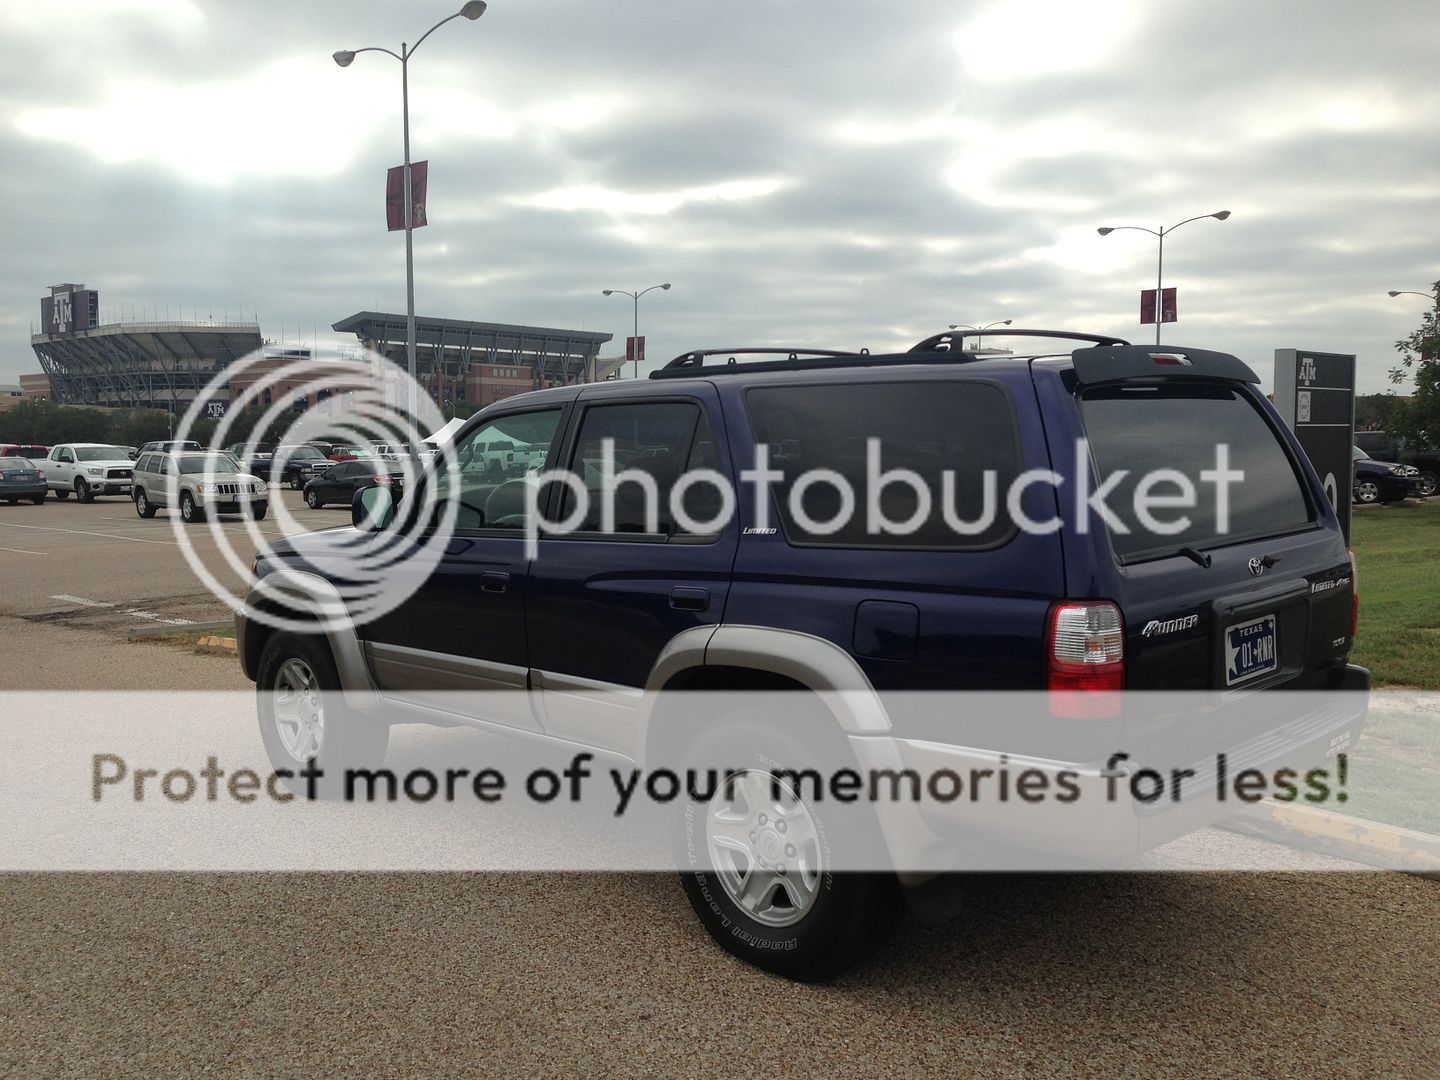
In the background are the corps dorms at Texas A&M. These were built in the late 1930s, are still in use, and form a historic quadrangle two hundred yards from Kyle Field. I think that there are 12 in total.

Those that said this was like lifting your 4Runner weren't kidding. It even seemed like it was higher when I was getting in, and I never used the running boards to get in before.

The factory hitch is one of the few design flaws on the 3rd Gen 4Runner in my opinion. It is solid and functional, but it isn't integrated with the design - it looks "tacked-on" in my opinion.

NoRB02.jpg~original


NoRB03.jpg~original


NoRB01.jpg~original


Before photos...

5-StarPicture.jpg~original


Picture009.jpg~original


BLUERUNNERDealership.jpg~original
 
Looking good. Did you install those TRD wheels? It looks like you put different ones on from the pictures. Perhaps I scolled too fast.
 
4Runner Wheel Options

I picked up one ($142 out the door) from my local Toyota dealer to make sure that I liked it. This is the one pictured below. I still need to buy 4 more! Before I get them installed I am going to get an Electron Blue pinstripe (between 1/8" and 1/4" thickness) painted around each rim.

My 4Runner originally had the coke bottle limited wheels when I bought it, but I switched them out for 5 Stars a while back in the barrio. It only cost me $100 total to trade and get them mounted. I did this all at the same place. There are a lot of 5 Stars sitting around in tire and wheel shops like this - I went to several different places in town with a photo of the 5 Stars that I wanted. Finally I found them at the 4th place I visited.

I think that the 5 Stars and the FJ TRD wheels (both in the 2nd pic below) are two of the very best options for the 3rd Generation 4Runner. I did a ton of research on this. The other "finalists" were the Tacoma Baja wheel (3rd photo), the FN 5 Star wheel (4th photo), and the TRD wheels with the removable ring (5th photo). I'll give my thoughts behind each wheel below. Eventually I plan to mount Mickey Thompson Baja MTZ 285s on them.

As I mentioned the factory 5 Stars and the FJ TRD wheels were the two best choices in my opinion. If you don't want to do the research (and visualize dozens of different wheels on your 4Runner) you can't go wrong with the 5 Stars. I only like silver wheels (on my vehicles) and these already come in a nice silver color. The only reason I am moving to the FJ TRDs is because I want to do something different and I think that the "blocky" look of these wheels will look good with the "blocky" side biters on the MTZs. On my 4Runner the wheels below would be silver and the MTZs would be white letter out.

185014d1355589817-sale-mickey-thompson-baja-mtz-265-75-r16-imag2713.jpg~original


I also like the fact that they are 7.5" wide compared to 7" for the 5 Stars. These wheels are manufactured in silver, gunmetal and black. Fortunately for me the silver are the easiest to get. I made a deal over the phone with my local Toyota dealer for $142 - they started at $180. The price I got seems to be about the best you can do, even compared to eBay... and at least I know I am getting them brand new.

Picture009.jpg~original


The Tacoma Baja wheels pictured below were an interesting choice. I love the design on the outside of the wheel (closest to the tire), but there seems to be something missing in the design of the center. I also thought that perhaps the scoops on the outside might do something strange to the airflow... maybe even make a whistling noise. I think this is a great option, but ultimately not for me.

DSC01193.jpg~original


I like the simplicity and elegant design of the FN 5 Star, but believe it or not it does not come in silver. I know that it is available in bronze, gun metal and black for sure. Even if I got them powdercoated silver I would have to put some type of logo on the center cap, so this one was just too expensive and a lot of work to get what I wanted.

five_star_all_caps_2.jpg~original


The TRD (fake) beadlock style wheel pictured below was actually my number one choice for a long time. The fake ring doesn't bother me - it helps to protect the wheel and can be painted any color if you don't like how they look from the factory. They are very expensive (over $200 each if I remember correctly) and they are available in bronze, gun metal, and flat black. I was going to have to powdercoat them silver so the cost of these was getting ridiculous. I was going to paint the ring Electron Blue to match my accent color and that would have looked very cool. These wheels are 8 inches wide which is also a bonus. In the end the more I looked at them (on line and in real life) the more I came to realize that these wheels looked small... it is an optical illusion and has to do mostly with the ring and the recessed slotted look. These wheels definitely look smaller than other 16" wheels.

188225d1357359940-photoshop-request-thread-trd2.jpg~original


Silver FJ TRD wheels look damn good on 3rd Generation 4Runners in my opinion.

2012-03-20~original
 
Last edited:
Picked up Shrockworks rear bumper/tire carrier/jerry can holder

Saturday I picked up my Shrockworks rear bumper/tire carrier/jerry can holder from Shrockworks. This thing is really solid... heavier than I thought. I was able to unload my ARB bumper and carry it into my apartment by myself, but this was not possible with the rear bumper... I had to recruit some help from a neighbor. The bull bar on the ARB bumper does make that one easier to handle as well.

My plan was to drive to Houston (Tomball area) and be back in College Station early in the afternoon for ample tailgating. Texas A&M is opening Phase I of Kyle Field - we had 104,000 fans there yesterday. Anyway, I ran into some traffic on 249 and didn't start tailgating until almost 4:00.

I met Justin there and he helped me load the bumper into my 4Runner. That is his 4Runner on the lift. My bumper has a new piece that allows 2 jerry cans holders to be attached side by side instead of just one (but you can mount them either way). I like pleasant surprises like this, but I'm not sure which way I am going to go on this.

My bumper was built to allow for a 1" body lift. I am also going to paint both bumpers and all of the Limited trim/flares Millennium Silver. You can see in two of the pics how close this color is to the machined areas of the bumper - the can is painted Millennium Silver. That is what I want - a paint color close to the color of steel with a metallic flake to match the metallic effect of my Stellar Blue.

Shrockworks1.jpg~original


Shrockworks2.jpg~original


Shrockworks3.jpg~original


Shrockworks4.jpg~original


Shrockworks5.jpg~original


Shrockworks6.jpg~original


Shrockworks7.jpg~original


This can is painted Millennium Silver

Shrockworks8.jpg~original


Shrockworks9.jpg~original


This photo shows the swinging tire and jerry can holder arm sitting where it will be installed.

Shrockworks10.jpg~original


My rear bumper will look similar to these except that it will be silver in color. I'm also going to have some type of license plate holder/light mounted. I want to use the one for the Hilux Surf, but I have not been able to find one yet.

t_16263.jpg~original


d_1044.jpg~original


d_1043.jpg~original


JcWdptBh.jpg~original


Does anyone have a photo of this bumper with two jerry cans mounted side by side? I've seen this on other bumpers, but not on the Shrockworks bumper.
 
Last edited:
Benefits of scouring auto salvage yards

I might be in the minority, but I love going to auto salvage yards. I keep a list of 4Runner parts that I need or want, both major and minor items. One of the major items I want is a sports hood. The last time I was in Kansas City I visited several auto salvage yards and I saw a Sports Edition that had recently arrived with a pristine-looking sports hood. I had flown there to visit, so I wasn't able to pick it up.

Saturday was my day to check out some of the local salvage yards in the Bryan-College Station area. Nothing major, but I was able to find some small interior items that I needed. One of the places I went recently got a silver 2001 SR5 in and this one was ripe for picking.

My experience has been that you can get bargains at these salvage yards. Currently on eBay one of the square brackets pictured below was listed for $29.99. If you value the cup holder insert at $10 eBay would sell the three items pictured below for $70 plus shipping. I got all three of these items for $10 cash.

I haven't even been able to find the cup holder insert on eBay. I check every time I go to the salvage yards (this is why I keep a written list of parts I need in my 4Runner), but this is the first time that I've actually seen one. You would think that Toyota could order one for you, but they can't seem to understand what I want. I kept getting quotes for over $200 because they are trying to sell me the entire center console.

See my earlier post in this thread to find out why I am getting the square cargo cover brackets instead of the round ones that came on my 4Runner.

Cupholderbrackets.jpg~original


Cupholder.jpg~original


Below are two photos that I took earlier today in front of expanded Kyle Field. We are averaging 104,000 in attendance per game.

IMG_0337.jpg~original


IMG_0336.jpg~original
 
Last edited:
TRD OFF-ROAD decals

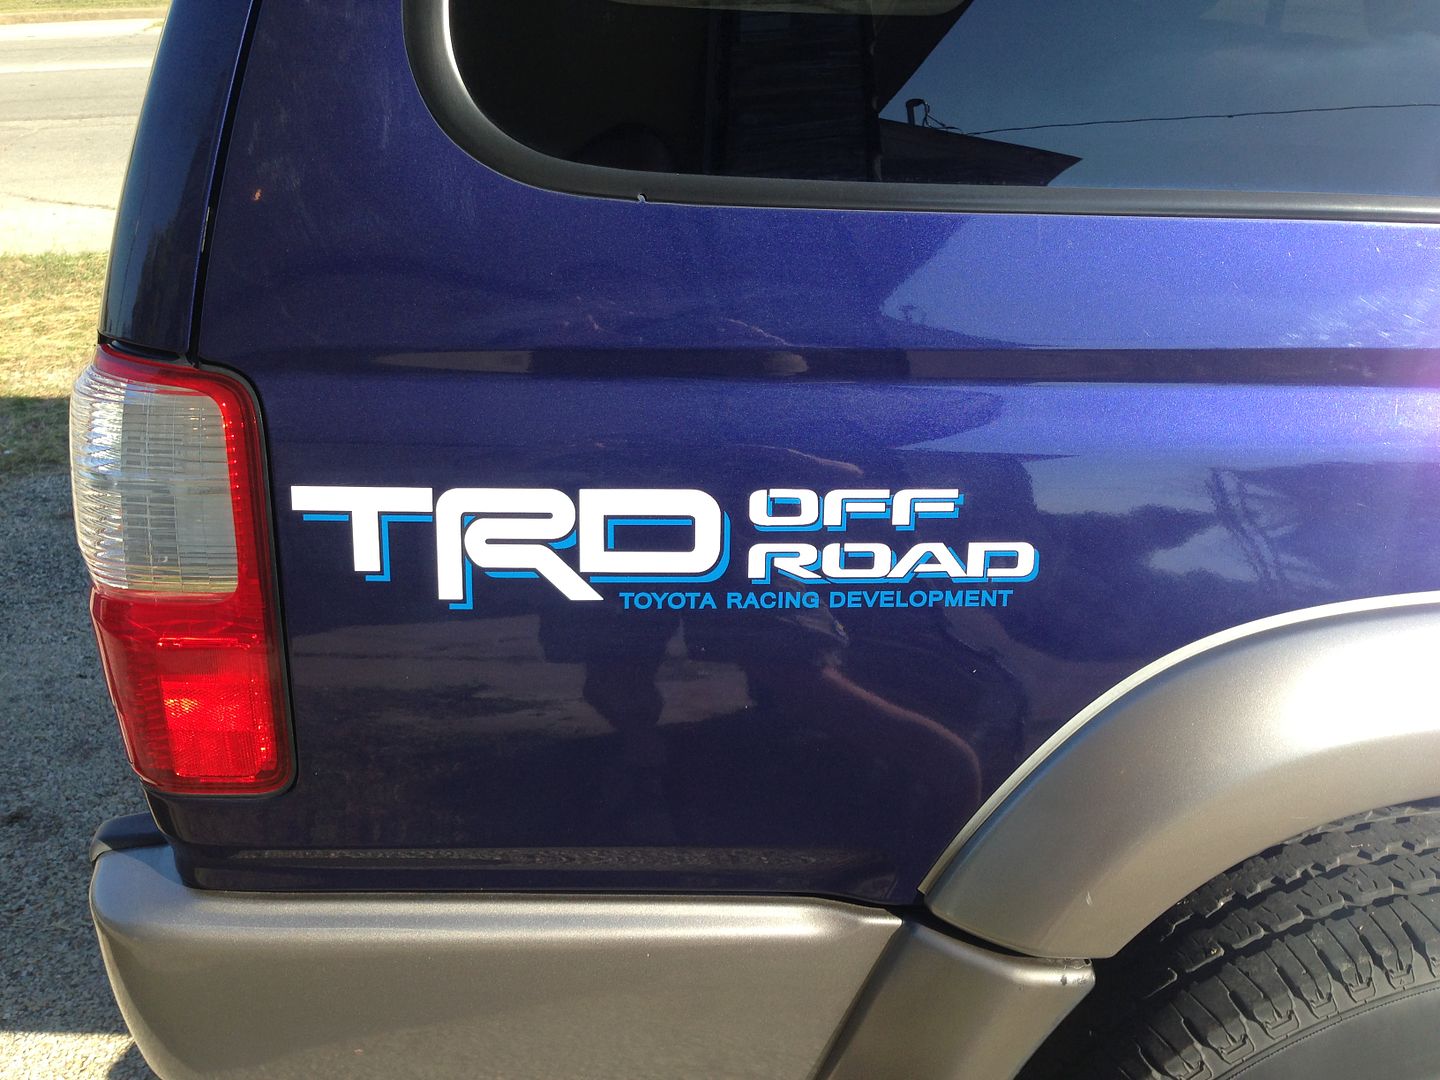
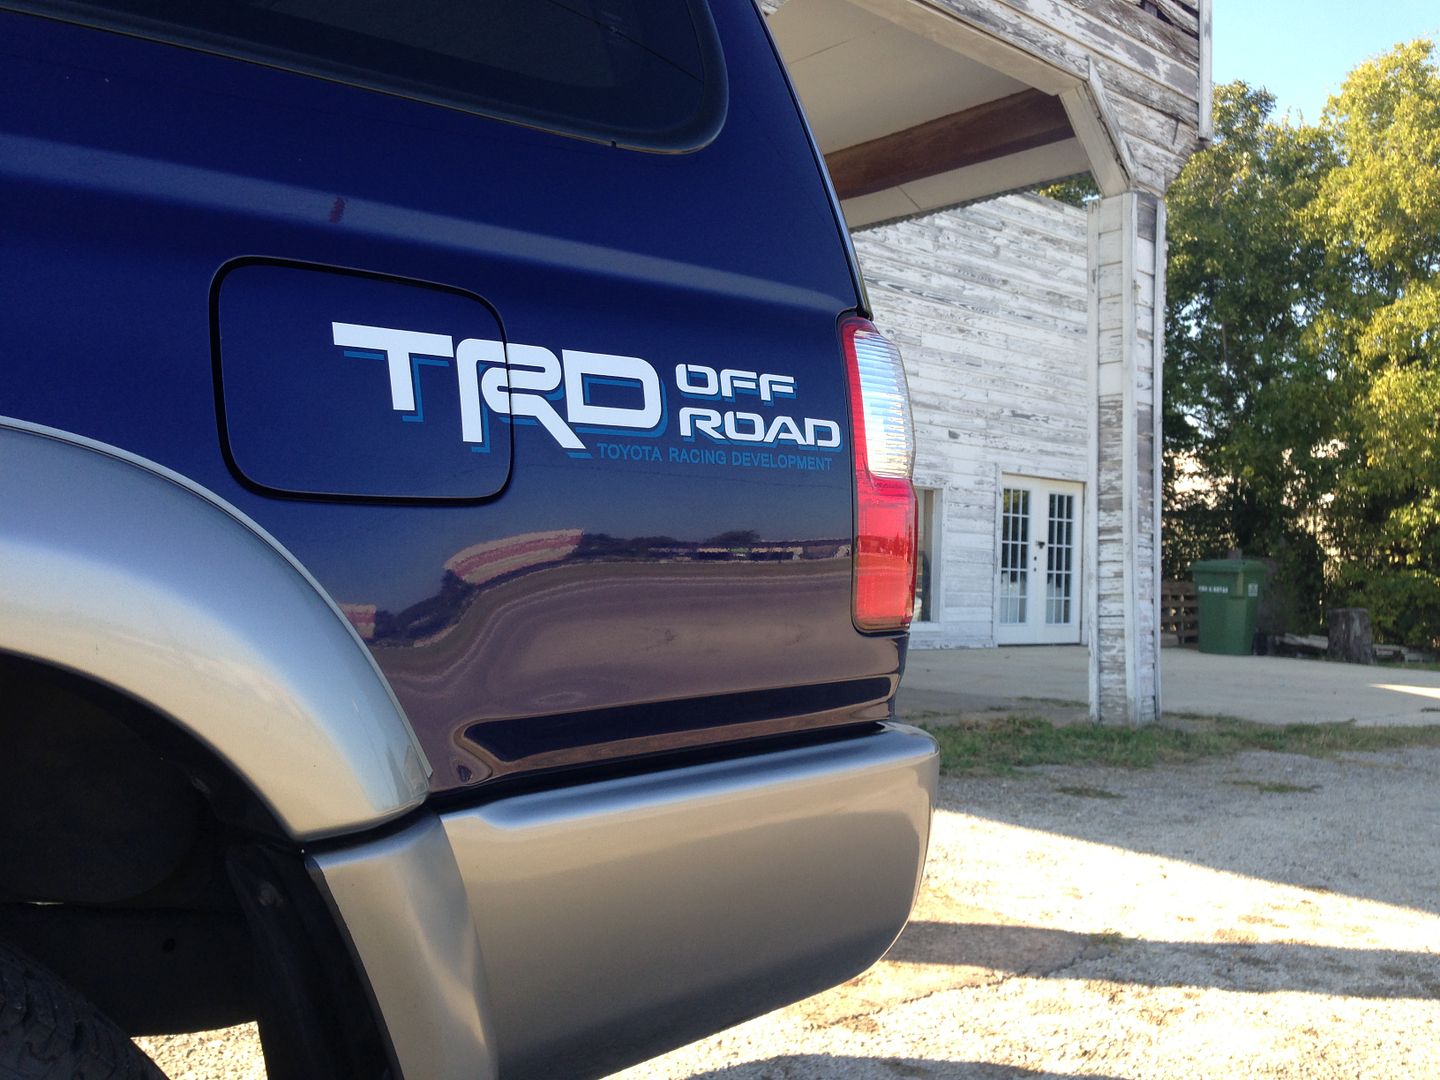
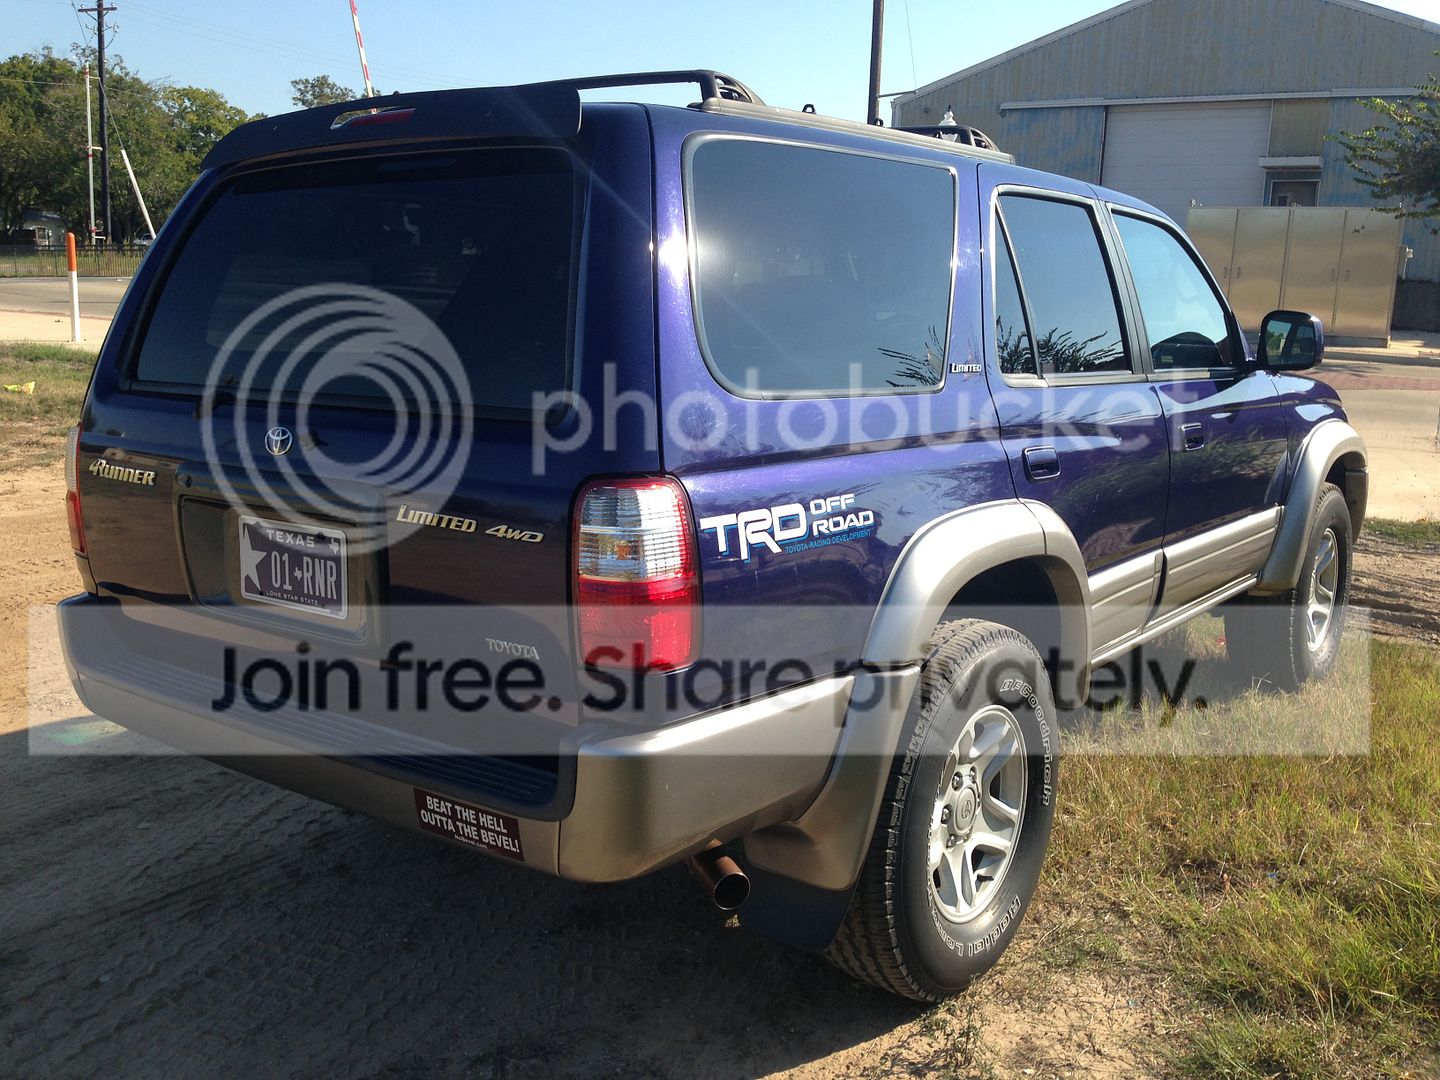
I ordered the decal below off of eBay - $12.95 for a set of 2. I had a $15 credit I needed to use, so they were free to me. With this seller you can choose any 2 colors out of 26. I selected large white letters with blue shadows/ blue small letters. I'm sure most of you don't need the write-up below, but this is the first time that I have ever applied a decal to one of my vehicles. I did better than expected, so I thought I would include a play by play in case it helps a fellow forum member.

eBay seller: stickycreationz
770428780_tp.jpg~original


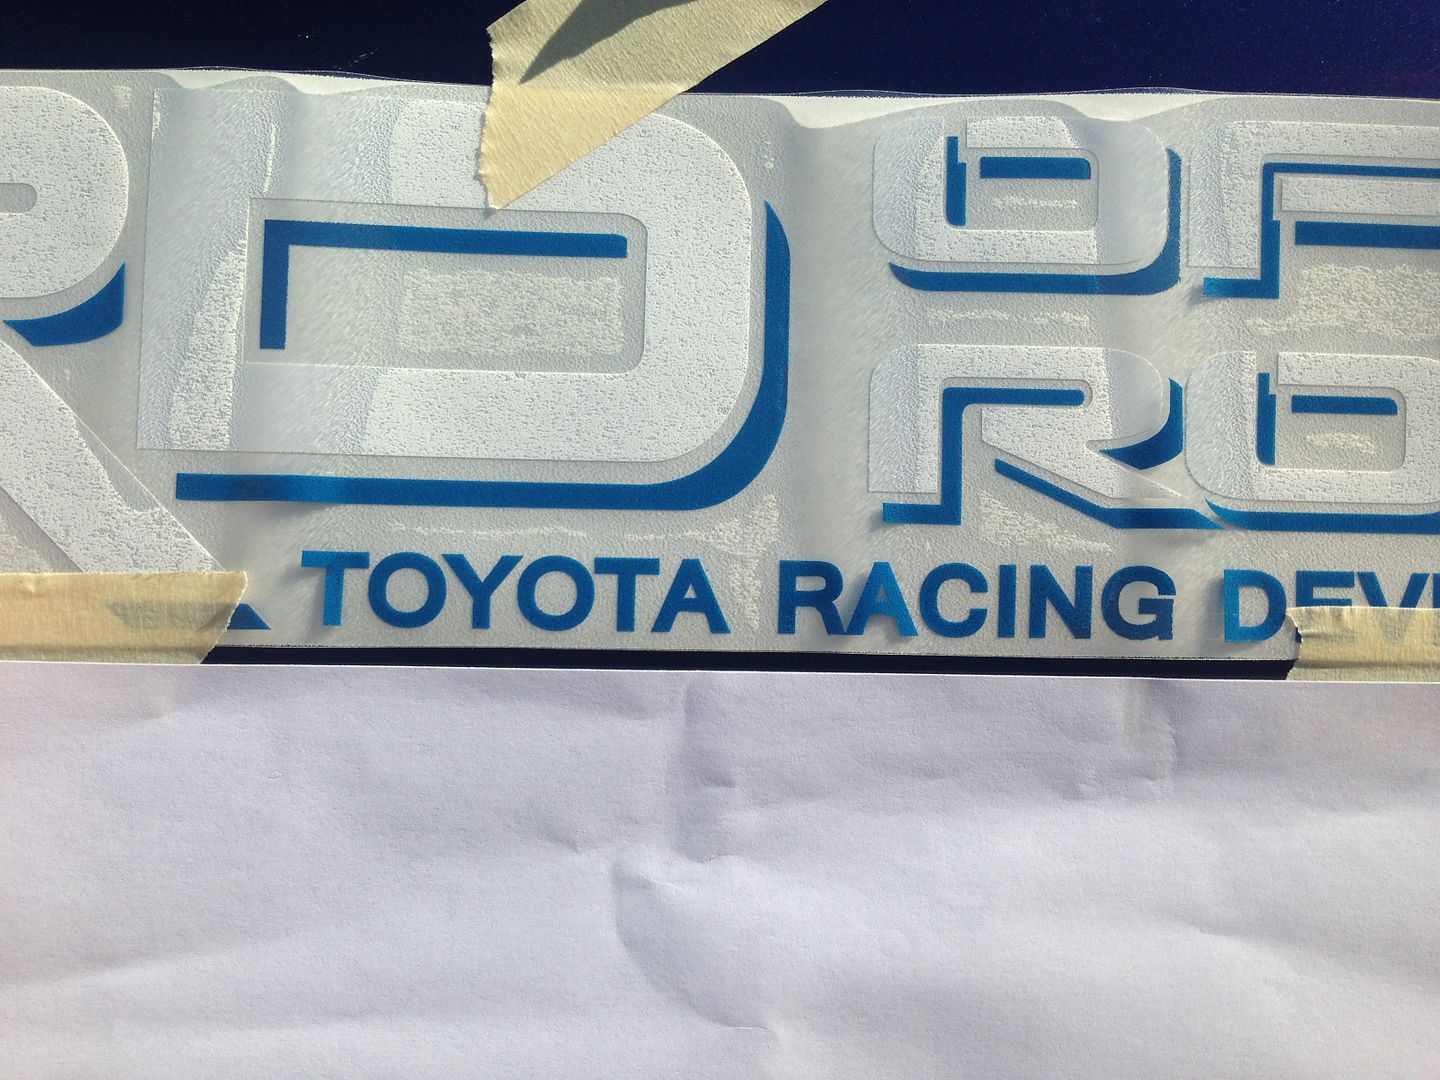
In the end the decals looked better on my vehicle than I expected, but it was a bit of a nightmare from the beginning. The decals arrived in a tiny 5" x 5" x 5" box. I was expecting a large envelope, so I had no idea what was in the cube box until I opened it. For some reason the seller had my decals all coiled up inside this small box. If they had coiled up in a smooth curve it wouldn't have been a big deal, but there are 3 layers to these decals and creases were created every few inches as the result of crappy packaging. This made the job of putting these on my vehicle about 10 times harder than it should have been.

I ordered white TRD OFF-ROAD letters with medium blue (seller lists as blue) shadows/small letters. When I unwadded the decals from the small box I thought that these were the ones with a clear sticker in the background, which I didn't want. Upon closer inspection I realized that these were the kind that only applies the graphic to the vehicle (no clear decal in the background) which is what I wanted.

Had the seller not shipped these in such a small box I could have applied pressure and smoothed out the 3 layers to make sure everything would be as easy as possible. With the creases every few inches it was impossible to smooth these out and apply even pressure to the decal.

The best way to apply a decal with a bunch of creases like mine is to tape the decal in the middle once it is positioned correctly, then work out to each side from the middle. As far as I know this actually may be the best way to apply a decal in perfect condition. There was a youtube video link included with an instruction sheet, but the link was invalid.

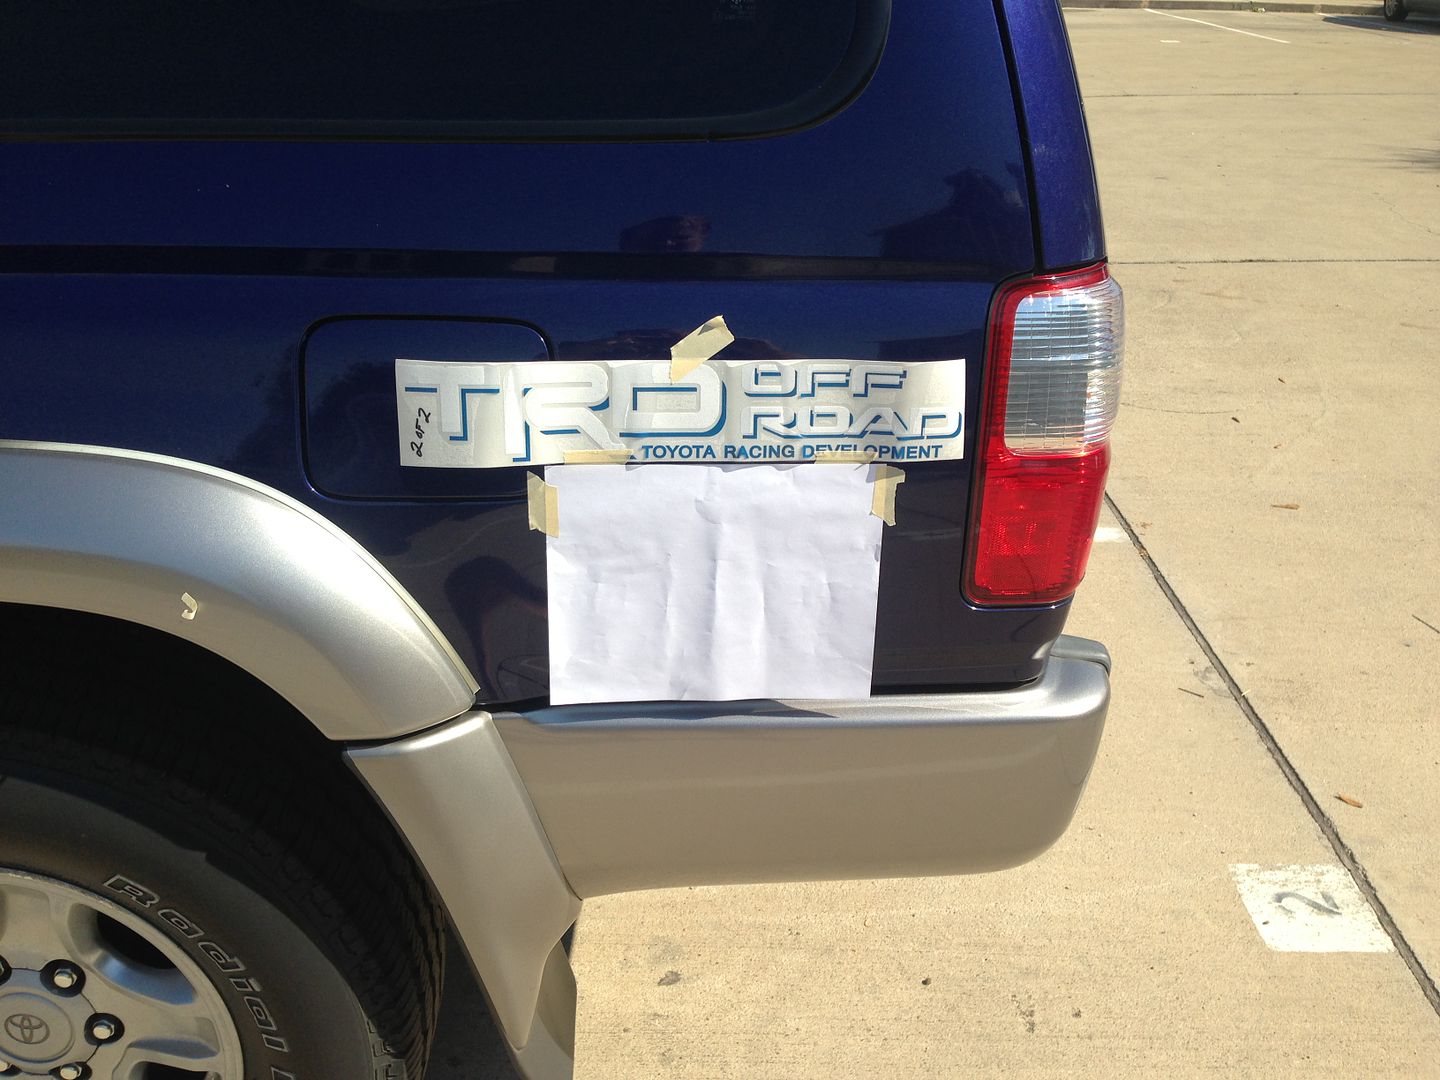
The supplies I used included my TX driver's license, rubbing alcohol, clean hand towel, exacta knife, masking tape, and one sheet of 8.5" x 11" of paper.

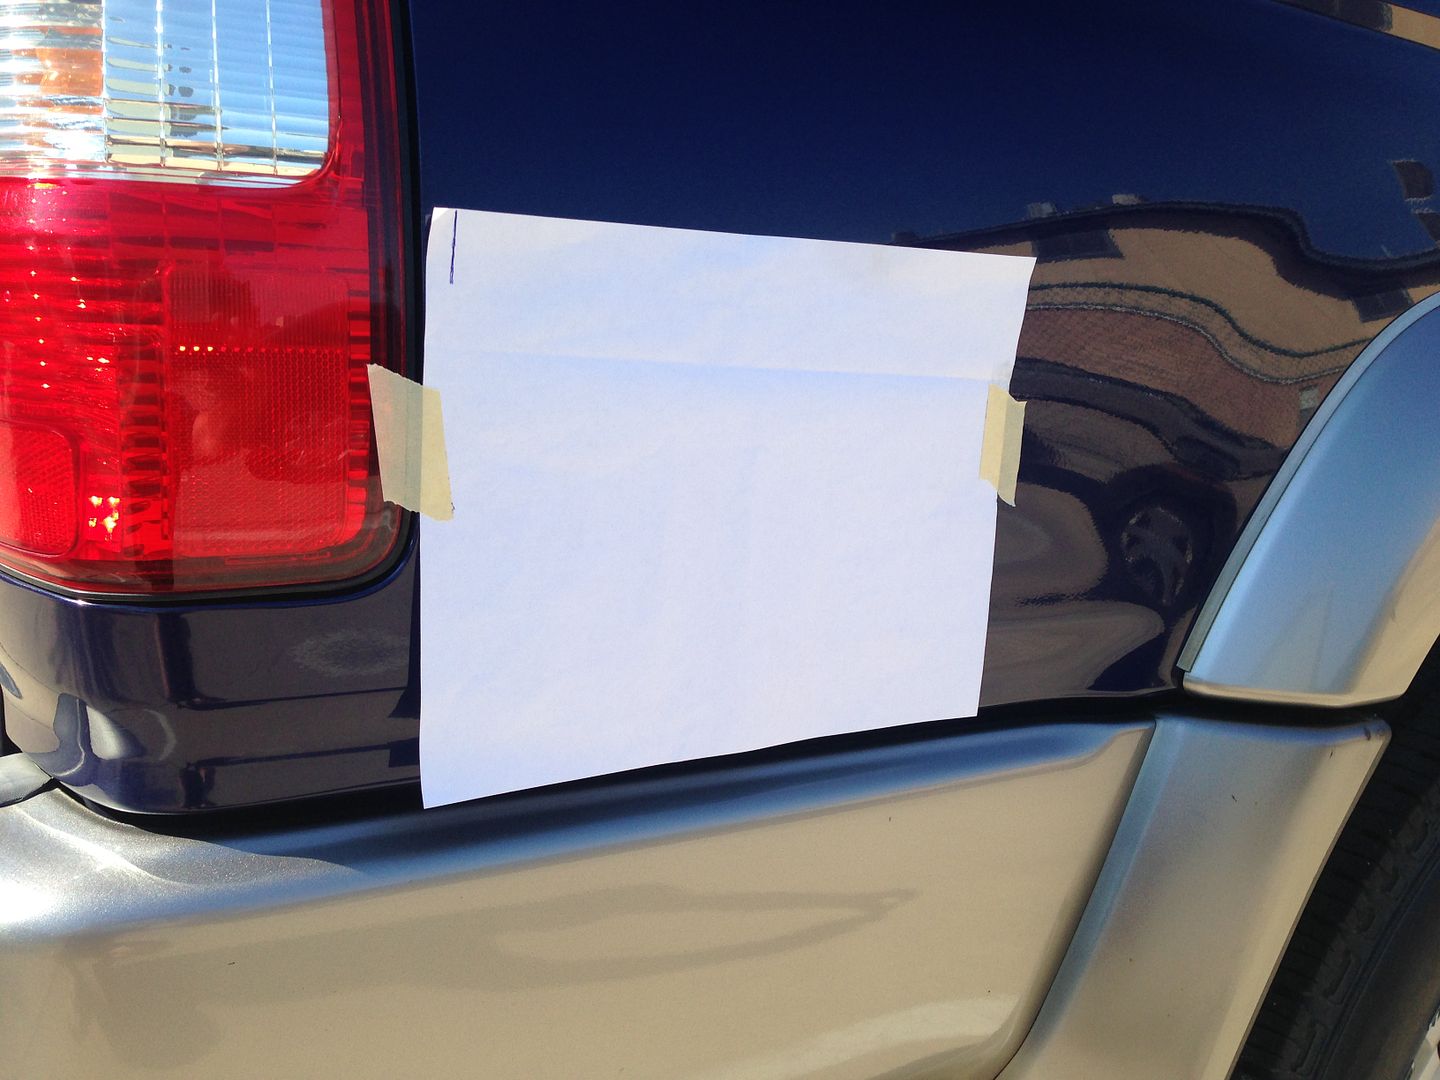
I applied the decal right after I went thru a car wash. After you have cleaned the vehicle surfaces with rubbing alcohol start with the driver side decal. The gas lid makes this one easy to position. Don't worry about the gas lid - it looks great when it is done. Tape your sheet of paper to the vehicle lining it up with the bottom edge of the body panel. Only use the gas lid and the bottom edge of the body panel to line up the decal. Don't try to use the sheet metal crease or the window above that.

TRD001.jpg~original


The bottom edge of my decal (not the letters, but the extra material that you are going to peel off later) ended up about 1/16" above the top edge of the paper. A decal from a different seller may have different dimensions, so don't rely soley on that. The most important thing is to make sure that the right side of the gas lid intersects the "R" vertically exactly in the middle of the "R". Also make sure that there is equal space above and below the edges of the "R" with respect to the top and bottom opening of the gas lid.

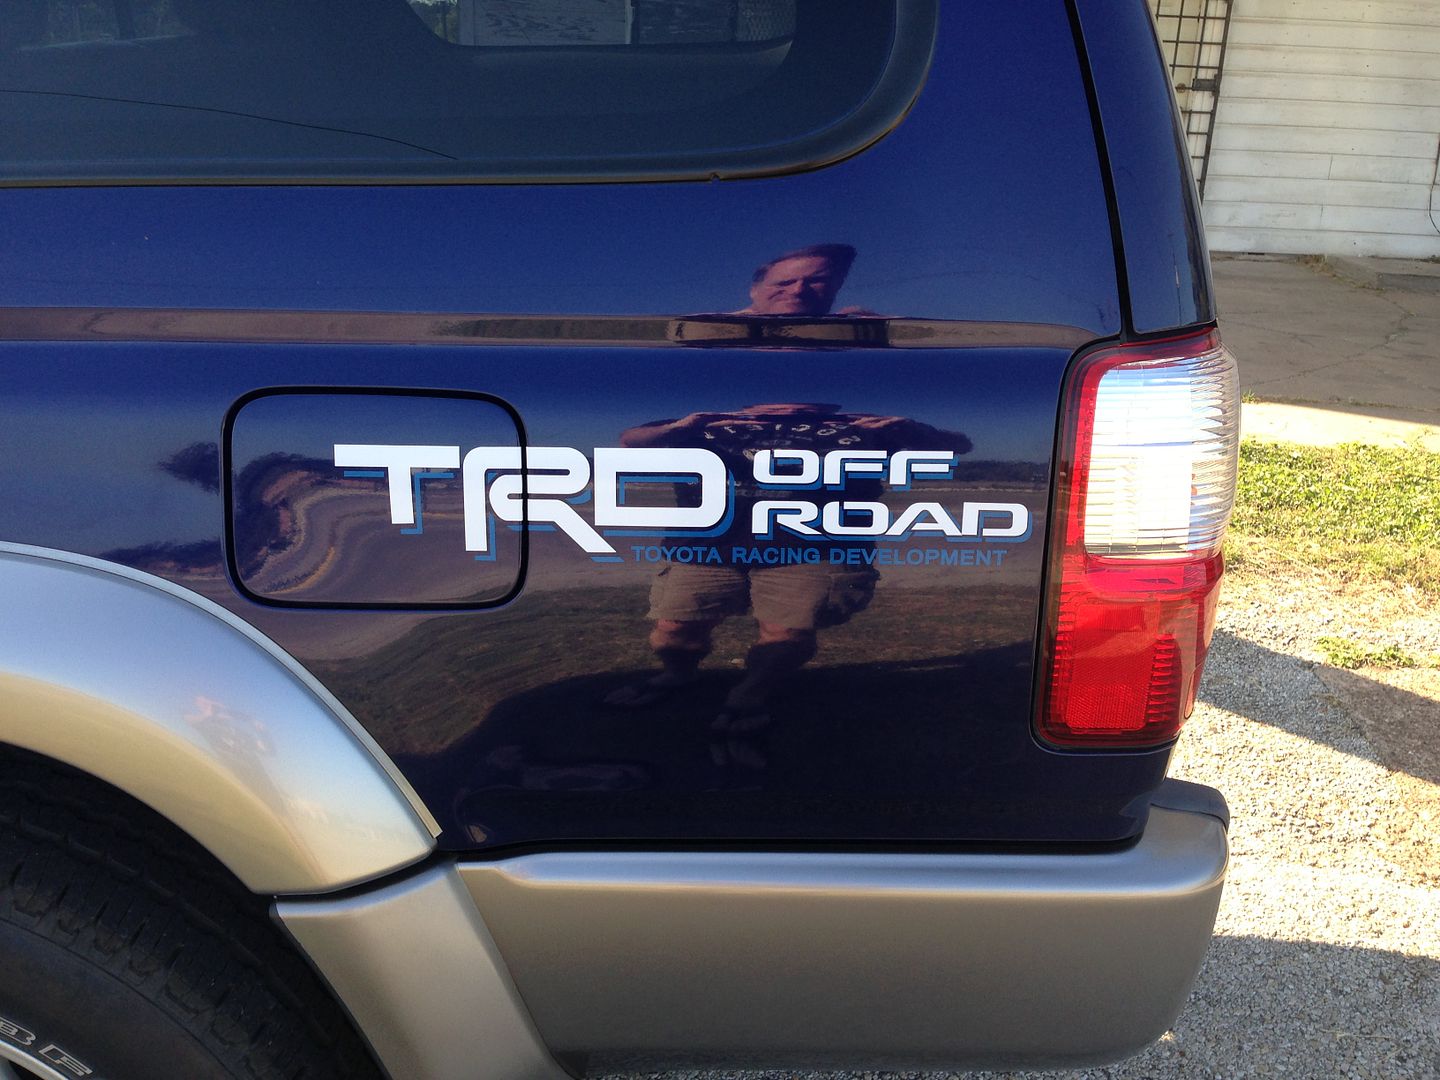
(Finished application to show placement)
TRD013.jpg~original


Once you have done this and the space along the sheet of paper is exactly parallel you can be confident that your decal is positioned perfectly. Smooth it out the best you can and tape it in the middle. As you can see above the right edge of the shadow of the "D" in ROAD will be about 3/8" from the edge of the body panel.

TRD002.jpg~original


With this decal I had to start from one edge and try and remove the backing paper (might have been wax paper) without having the sticker adhere to it. The multiple creases and the fact the larger letters and the backing paper were white made this very difficult to do. Peel slowly and pull back the backing paper at an angle parallel to vehicle. You don't want the letters to adhere to the backing paper like mine did several times. You want the letters and shadows to adhere to the clear sticker part.

Once the backing paper is peeled from one side to the center cut it with your exacta knife then slowly apply the decal from the middle to the edge watching for creases, bubbles and other potential issues. Using a drivers license seems to help. The drivers license seemed to work better than a credit card. Once it is smoothed out apply pressure going from the middle to the outside edge. Once everything appears smooth try to peel away the clear part of the sticker going from the outside to the middle and then cut the clear layer away with your exacta knife. Once this is done move the tape to the remaining backing that is closest to the middle. Repeat the process from the other side. Cut down the middle of the gap in the "R" with your exacta knife. After you pop the gas lid smooth remaining decal along the edges of the lid. Now you are halfway done!

TRD003.jpg~original


On the passenger side position the decal with the same spacing to the 8.5" x 11" paper as you did on the driver side. You obviously don't have a gas lid to deal with so just make sure that the left edge of the "T" is 3/8" from the left edge of the body panel. I didn't know the measurement at the time, so I marked the tail end spacing with a pen. With all of your measurements and positioning make sure to count the shadow as an edge of the decal.

TRD014.jpg~original


Overall I am satisfied with how the TRD decals turned out. Someone told me that they add horsepower and off-road capability, so that is a pretty good deal for $12.95.

TRD012.jpg~original


TRD007.jpg~original


TRD015.jpg~original


TRD010.jpg~original


TRD016.jpg~original
 
Last edited:
I'm not sure... it is a money issue right now. I need to do a number of things at the same time I have these bumpers painted and installed. I need a 1" body lift and the bumpers and fender flares/Limited trim will all be painted the same color. I would like to do the 1.2 Sonoran Steel lift as well, but that may have to wait for later.
 
Hey i'm a fellow cstat 4runner! I actually saw yours driving around the other day and then just happened to stumble upon your build thread. I wasn't actually driving mine though, she was in the shop.
 
I had no clue that those cup holder inserts ever existed! I'm gonna have to look around a bunch for some. Keep up the good work, looks good!
 

Members online

Forum statistics

Threads
278,316
Messages
3,554,120
Members
248,016
Latest member
Advally Service

Trending content

Back
Top