mtbtim
Elite Member
Hey Dudes,
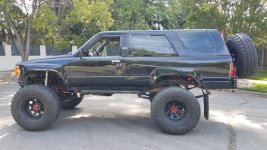
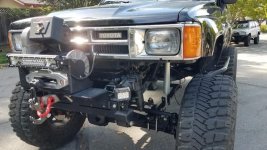
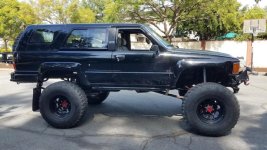
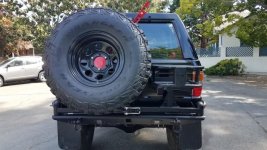
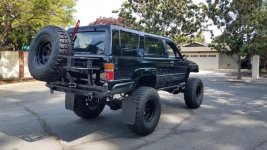
I finally joined the club. I have (2) 3rd Gen 4runners and I'm very active in the 3rd Gen section of the forum but now I'll be frequenting this section as well since I bought a built 85 a few days ago. I almost bought this rig 2 years ago but chickened out. The original guy who built the rig was asking $15k for it but it wasn't selling so he reduced it to $12.5k and another guy scooped it up. This guy who bought it took it wheeling several times and ended up smashing it up a bit on both sides. Since his kids weren't into hard core wheeling, he decided to sell it. He put some money into it himself, around 4k adding a rear bumper, buying a spare tire, adding some lights, built a rear slide out toolbox and did some other maintenance stuff.
I paid 12k for it. The body damage sucks because the rig was beautiful when it sold originally but I bought it more for it's off-road capabilities rather than for it's looks. I didn't take any pics of the interior but it's in truly amazing shape. The front and rear seats are immaculate. The door panels are very nice. The dash has a couple cracks in it. And, there's one tear in the headliner. But, for a rig that's 34 years old, it's amazing how well it looks inside. It has working AC. The power windows on both doors work and so does the rear window.
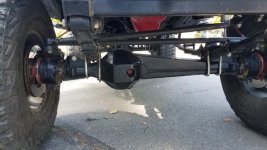
I just noticed the front driveshaft needs some work. The front u-joint is wasted and there seems to be excessive play in the shaft splines. I'm going to let a driveshaft place take a look at it for me. If I knew what u-joint to use as a replacement, I'd replace it myself but I have no clue. The guy I bought it from unfortunately didn't ask the original seller for any paperwork so I'm in the dark as to all the parts that were used to build this beast.
Some of you that own a 3rd Gen as well might have heard of the YouTube channel I started with my buddy Sean around 3 years ago. It's called "Timmy the Toolman". As I work and learn about this 1st Gen I bought, I'll be making some videos for Y'all as well.
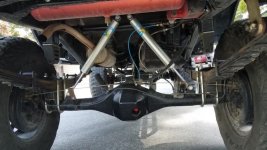
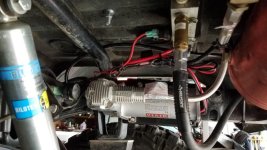
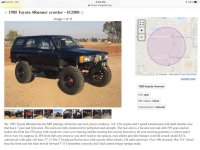
Here's the ad from 2 years ago to let you guys know how it was built:
I finally joined the club. I have (2) 3rd Gen 4runners and I'm very active in the 3rd Gen section of the forum but now I'll be frequenting this section as well since I bought a built 85 a few days ago. I almost bought this rig 2 years ago but chickened out. The original guy who built the rig was asking $15k for it but it wasn't selling so he reduced it to $12.5k and another guy scooped it up. This guy who bought it took it wheeling several times and ended up smashing it up a bit on both sides. Since his kids weren't into hard core wheeling, he decided to sell it. He put some money into it himself, around 4k adding a rear bumper, buying a spare tire, adding some lights, built a rear slide out toolbox and did some other maintenance stuff.
I paid 12k for it. The body damage sucks because the rig was beautiful when it sold originally but I bought it more for it's off-road capabilities rather than for it's looks. I didn't take any pics of the interior but it's in truly amazing shape. The front and rear seats are immaculate. The door panels are very nice. The dash has a couple cracks in it. And, there's one tear in the headliner. But, for a rig that's 34 years old, it's amazing how well it looks inside. It has working AC. The power windows on both doors work and so does the rear window.
I just noticed the front driveshaft needs some work. The front u-joint is wasted and there seems to be excessive play in the shaft splines. I'm going to let a driveshaft place take a look at it for me. If I knew what u-joint to use as a replacement, I'd replace it myself but I have no clue. The guy I bought it from unfortunately didn't ask the original seller for any paperwork so I'm in the dark as to all the parts that were used to build this beast.
Some of you that own a 3rd Gen as well might have heard of the YouTube channel I started with my buddy Sean around 3 years ago. It's called "Timmy the Toolman". As I work and learn about this 1st Gen I bought, I'll be making some videos for Y'all as well.
Here's the ad from 2 years ago to let you guys know how it was built: