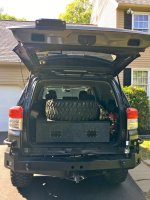
Tips to build a professional looking rear storage drawer

Thanks. The top will change.
I have 1/8" black diamond tread matting to permanently glue to the top as well as stainless edge trim for the top.
The gray mat will get cut down and used as drawer liners. I have a j track tie down system to install on the deck.
The turn buckles will get changed out. They make that space almost unusable


Sent from my iPhone using Tapatalk


That is pretty awesome. :hatsoff:
 
I went a slightly different route. I welded up a steel, square tube frame and then built wood drawers with a wood top plate. The drawer slides and plate mount to the frame. The frame ended up being lighter than expected and much lighter than what I estimated a wood box weighing. The drawers and top plate are 1/2" baltic birch ply which has proven to be plenty strong. The top plate has a cut out for the water can/faucet along with l-track and a fridge slide. Drawer faces and top plate were coated with bed liner.


35985169486_4a8d7bff61_b.jpg


Do you have a link to your tie-Down tracks?
The design I wanted to use won't work like intended. Thanks.


Sent from my iPhone using Tapatalk
 
I went a slightly different route. I welded up a steel, square tube frame and then built wood drawers with a wood top plate. The drawer slides and plate mount to the frame. The frame ended up being lighter than expected and much lighter than what I estimated a wood box weighing. The drawers and top plate are 1/2" baltic birch ply which has proven to be plenty strong. The top plate has a cut out for the water can/faucet along with l-track and a fridge slide. Drawer faces and top plate were coated with bed liner.

35985169486_4a8d7bff61_b.jpg

Nicely done sir!!
 
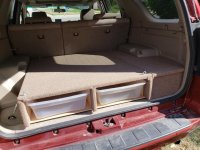
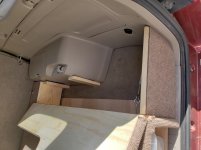
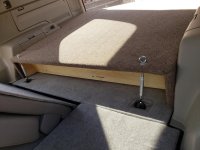
Rear Storage w/2 Hidden Compartments!

I read this and several other threads on building a rear storage unit with the added weight in mind, material available to me, and also the need to leave my bag in my vehicle w/o being seen. So, for a father-daughter weekend project, we came up with this. Used 3/4" cabinet shop plywood for the body, 1/4" plywood for the bottom, pine shelving for the vertical pieces, piano hinge for the lg hidden compartment, covered it in rubber backed outdoor carpet, and 1/4" turnbuckles x4 to anchor the unit and to make it easily removable if I needed to. I was able to keep the area behind the backseats open for additional out of sight storage. Not bad for my first venture and made possible by all of the generous information found on this forum!
Thank you!
Sue
 

Attachments

  • 20180929_151751.jpg
    20180929_151751.jpg
    137.4 KB · Views: 670
  • Hidden Compartment.jpg
    Hidden Compartment.jpg
    127.8 KB · Views: 708
  • Front Compartment.jpg
    Front Compartment.jpg
    138 KB · Views: 660
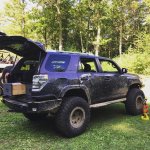
I used birch ply for mine. No sliders but used some flat plastic tack things to help the drawers slide in and out. Mounted my Power Tank bracket to the side of it too. Kept it as basic as I could. Works great for me.
 

Attachments

  • 37989601_10156508225118374_1624336633979469824_n.jpg
    37989601_10156508225118374_1624336633979469824_n.jpg
    140.2 KB · Views: 665
  • FullSizeRender-4.jpg
    FullSizeRender-4.jpg
    136.6 KB · Views: 661
This was my first attempt at a project like this. I learned a lot and am mostly pleased with the results. The design I am very please with. There are some execution details I would improve on.


Members online

No members online now.

Forum statistics

Threads
278,316
Messages
3,554,120
Members
248,016
Latest member
Advally Service

Trending content

Back
Top