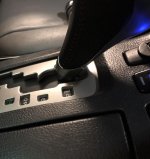
TRD Pro Shift Knob Installed

Formidable

New member
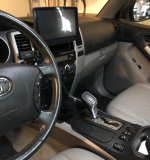
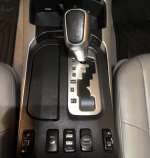
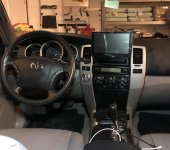
Haven’t seen this done before so thought I’d share. Picked up a used TRD Pro shift knob from a member on this forum. Twist original knob counterclockwise to remove. Take apart TRD Pro knob. Bottom is held on with glue. I used a plastic panel pry tool to push it off the end. Place some adhesive in the bottom part of the shift knob and place it over the shifter shaft first. Next place two M8 nuts and a rubber washer. Twist new knob clockwise. Press bottom of shift knob back into place. Done. Before and after pic below.
 

Attachments
  • 105B4FED-B88E-493D-AF68-864283F90244.jpg
    105B4FED-B88E-493D-AF68-864283F90244.jpg
    123.4 KB · Views: 4,498
  • 4CA20DD4-296D-4527-964E-589C1488A2C0.jpg
    4CA20DD4-296D-4527-964E-589C1488A2C0.jpg
    119.3 KB · Views: 4,935
  • 6A8BCBB0-80E1-4EAD-B159-139DC578A65C.jpg
    6A8BCBB0-80E1-4EAD-B159-139DC578A65C.jpg
    122.6 KB · Views: 6,715
Last edited:
Register to hide this ad
I thought about doing this but, I seem to remember reading that the TRD shifter is a bit longer and interfere with shifting all the way down to 2-L. Have you tried that yet?
 
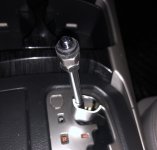
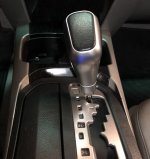
You are 100% correct. However, I took the knob apart. I placed two M8 stainless nuts down to act as spacers along with a rubber washer. I also threw some 3M double stick tape on the very top of the threads before twisting it into place. The knob now sits tighter than ever before. Pics below. Clearance is tight but she goes. The tapered bottom of the knob tracks perfectly without contacting the sides. Mission accomplished.

I thought about doing this but, I seem to remember reading that the TRD shifter is a bit longer and interfere with shifting all the way down to 2-L. Have you tried that yet?
 

Attachments

  • 5DC683AF-4B95-4EA6-BC92-70E9D0D70E14.jpg
    5DC683AF-4B95-4EA6-BC92-70E9D0D70E14.jpg
    108.5 KB · Views: 6,066
  • 6C1764EF-2C5F-4663-9550-7A815FAFEE04.jpg
    6C1764EF-2C5F-4663-9550-7A815FAFEE04.jpg
    121.1 KB · Views: 7,792
  • 7C2478B8-3B33-4ABC-AC65-DC83650FF20A.jpg
    7C2478B8-3B33-4ABC-AC65-DC83650FF20A.jpg
    120.9 KB · Views: 3,913
Last edited:
Good to know! I think I read of others cutting the plastic bottom piece to clearance it. This seems much cleaner.
Well done.
 
Very nice and looks factory. I ended up ordering a leather one with carbon fiber insert for mine off eBay because I had read about people having issues with the one you used. My stock one was fairly worn and just looked cheap since it was just the stock, non leather SR5 version.
 
Looks good. I went a different directION for a knob...
LOL Fed my inner nerd.
2ad25e6746e50c139f4b1791a0882ef3.jpg


Sent from my iPhone using Tapatalk
 
Last edited:
Could you please show how you took the knob apart? I want to do the same with my 4Runner but I'm afraid to break the knob.... Thank you.
I don't think he's on here anymore. Get a plastic trim removal tool and wedge it in the groove at the bottom where the two pieces meet. Pry it apart, very easy. Just don't use a screwdriver or you'll gouge the plastic, ask me how I know.......

Sent from my SM-G986U using Tapatalk
 

Members online

Forum statistics

Threads
278,309
Messages
3,554,067
Members
248,016
Latest member
Advally Service

Trending content

Back
Top