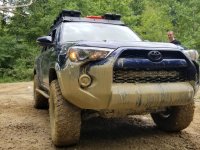
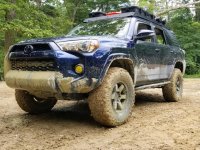
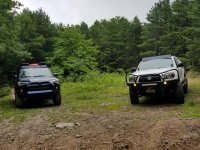
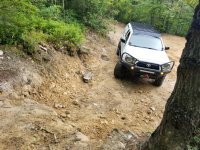
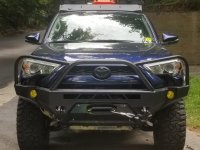
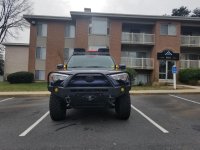
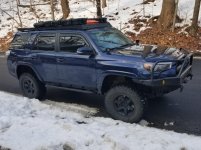
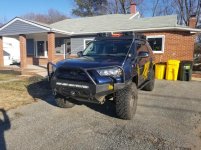
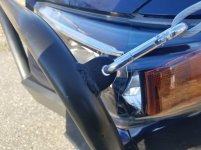
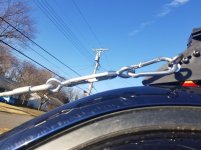
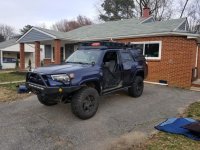
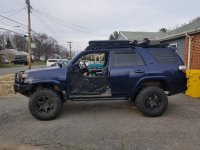
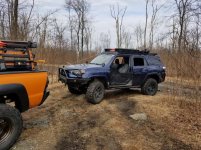
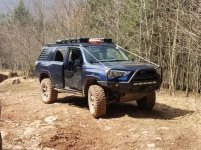
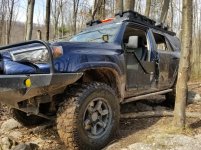
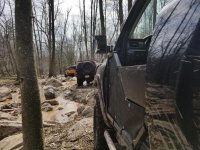
Twheat's Build and Adventure Thread

How tall are the drawers and how tall is the ice chest? I’m getting ready to pull the trigger on drawers by Goose Gear and I’m debating if I want dual drawers, like yours, or a single cabinet for a fridge and a single drawer for gear.

Thank,
MJ

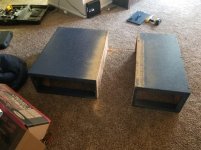
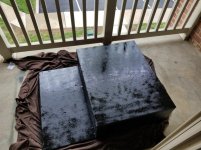
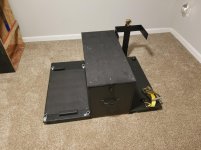
This week I took a trip back home to TN to see my family for Christmas. While there, I took some time to use my Dad's tools and help, along with my grandpa, to build a drawer system for the 4R. It is mostly plywood. We used blue paint because we already had the paint, so we didn't have to buy any, and it almost matches the 4R.

View attachment 279528

View attachment 279529
 
How tall are the drawers and how tall is the ice chest? I’m getting ready to pull the trigger on drawers by Goose Gear and I’m debating if I want dual drawers, like yours, or a single cabinet for a fridge and a single drawer for gear.

Thank,
MJ

The drawer box is 12" tall. The cooler on top is 28.75" tall. The left side is a drawer, and the right side is an empty cabinet that will eventually have a 10 gallon water tank and a pump for on-board water.

As far as what you want, it really just depends on how you want to set up your stuff. You could always do something like dual drawers, and have the fridge on top sitting on a pullout system. It is 100% up to you on how you want your cargo space to be utilized. I love the setup I have, and will love it even more once I get the water mod done.
 
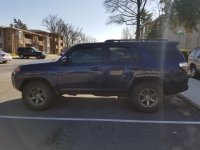
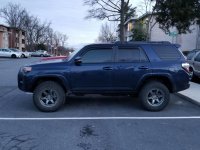
Last night I got the new suspension installed. Got a full OME setup with 883's and 895e's from another member on the forum. Took us about 3 hours to install and gave me just under 2" of lift all around. Not quite as high as I want, but soon I will replace the 883's with some 885's in the front, which will put me where I want to be.

Before:
20180228_133348.jpg

After:
20180228_180849.jpg

Not too noticeable, but I'm still happy with it for now.
 

Attachments

  • 20180228_133348.jpg
    20180228_133348.jpg
    134.4 KB · Views: 426
  • 20180228_180849.jpg
    20180228_180849.jpg
    133.5 KB · Views: 422
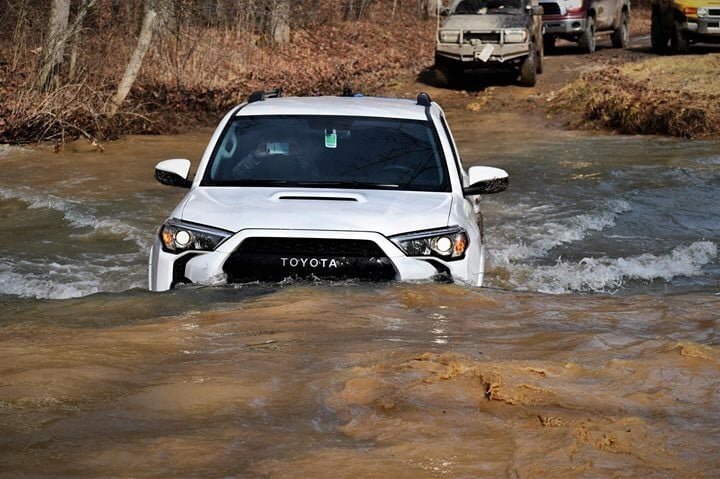
Great pics of Green Ridge. Did you have a chance to do the water crossing?
a210b617a80796bdb00c625e19b91a3d.jpg


I was up there 2 weeks ago with 30+ 4runners from the MD/VA area.
 
Great pics of Green Ridge. Did you have a chance to do the water crossing?
a210b617a80796bdb00c625e19b91a3d.jpg


I was up there 2 weeks ago with 30+ 4runners from the MD/VA area.
I've done it a couple times. So far I only take the 4runner to GR caus I don't have armor for rausch and AOAA and I just got the lift put on this week.

We go up every month or so. I mostly hang out with Tacoma World guys.

We're y'all at the big BBQ thing that was going on?
 
I've done it a couple times. So far I only take the 4runner to GR caus I don't have armor for rausch and AOAA and I just got the lift put on this week.


We go up every month or so. I mostly hang out with Tacoma World guys.


We're y'all at the big BBQ thing that was going on?


Yes we did the BarBQ meet and greet. I’ve been able to complete all Greens and a few Blues at Rausch without armor. All my scuffs are usually on the rear bumper due to the poor departure angle. A few of us from Fort Meade are doing Flagpole next weekend if you are interested.
 
Yes we did the BarBQ meet and greet. I’ve been able to complete all Greens and a few Blues at Rausch without armor. All my scuffs are usually on the rear bumper due to the poor departure angle. A few of us from Fort Meade are doing Flagpole next weekend if you are interested.

Yeah I'm getting my sliders sometime this month and then I'll be more willing to do the greens and some blues at Rausch. I rode in a buddies tacoma on one of his trips to Rausch and he runs harder blues and that was super fun. But he has full armor underneath and front and rear bumpers.
I'm definitely interested in Flagpole though. I've heard about it, but never been. I'm down to go depending on the day. If you don't mind, PM me the details and I'll let you know.
 
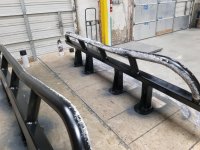
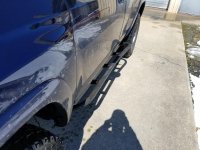
Yesterday I got my Mobtown Offroad Weld-on Sliders installed. We used self-etching primer and Satin Black paint to paint them.

sliders 1.jpg

We also added a layer of sand after a heavy coat of black paint so as to give the sliders some texture so they aren't as slippery when wet. I don't like the look of bed liner or grip tape (yes, I am a very picky person), so I found this method in a jeep forum somewhere. It was a good first attempt, but I don't think it will hold long. If I had to do over again, I would use sprayable adhesive before laying down the sand, then lightly brush the excess sand off with a paint brush. We used an air hose to spray it off, but it didn't work as well as I had hoped. They still look very good, but I don't think the paint on top of the sand will hold long.

sliders 2.jpg

They got dirty as soon as I pulled out of the garage to snap some pictures.

sliders 3.jpg

In the end, I am happy with them. Mobtown did a very good job with these. They are very sturdy, and I am excited to try them out on a few rocks.
 

Attachments

  • sliders 1.jpg
    sliders 1.jpg
    135.5 KB · Views: 364
  • sliders 2.jpg
    sliders 2.jpg
    134.7 KB · Views: 332
  • sliders 3.jpg
    sliders 3.jpg
    135.3 KB · Views: 341
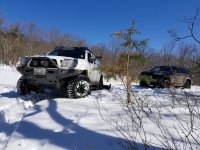
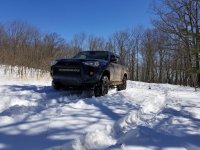
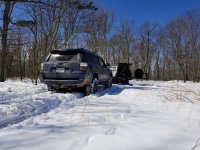
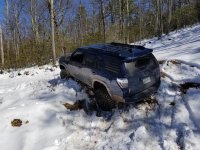
Went to Sleepy Creek over the weekend. We were gonna camp, but after the snow and everything last week, we decided against it. There was about 8" of snow on the ground on most of the trails.

Sleepy Creek 3262018 1.jpg

Sleepy Creek 3262018 2.jpg

Sleepy Creek 3262018 3.jpg

Sleepy Creek 3262018 4.jpg

Didn't have much trouble with a slick as it was. But I was sliding around some. Definitely has me thinking about upgrading tires in the fall.
 

Attachments

  • Sleepy Creek 3262018 1.jpg
    Sleepy Creek 3262018 1.jpg
    137.1 KB · Views: 363
  • Sleepy Creek 3262018 2.jpg
    Sleepy Creek 3262018 2.jpg
    137.6 KB · Views: 360
  • Sleepy Creek 3262018 3.jpg
    Sleepy Creek 3262018 3.jpg
    137.8 KB · Views: 377
  • Sleepy Creek 3262018 4.jpg
    Sleepy Creek 3262018 4.jpg
    139.5 KB · Views: 363
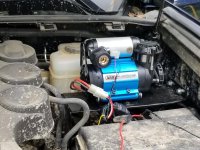
Last week I installed my ARB single air compressor. We used a home built mount and mounted it driver side behind the battery and fuse housing.

ARB 1 mount.jpg

ARB 2.jpg

ARB 3.jpg


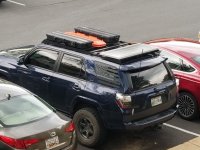
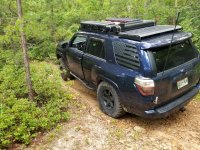
Then this weekend, we finally got my Prinsu full length installed. The drilling into the roof was a hassle, but it ended up working out in the end. Also mounted two 42" Plano cases to it for recovery gear and to store my air compressor hose and nozzles.

prinsu 1.jpg

prinsu 2.jpg

prinsu 3.jpg
 

Attachments

  • ARB 1 mount.jpg
    ARB 1 mount.jpg
    104.6 KB · Views: 522
  • ARB 2.jpg
    ARB 2.jpg
    137.8 KB · Views: 532
  • ARB 3.jpg
    ARB 3.jpg
    141 KB · Views: 539
  • prinsu 1.jpg
    prinsu 1.jpg
    142.2 KB · Views: 536
  • prinsu 2.jpg
    prinsu 2.jpg
    139.4 KB · Views: 540
  • prinsu 3.jpg
    prinsu 3.jpg
    143.1 KB · Views: 521
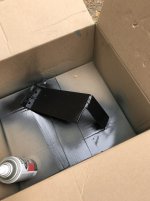
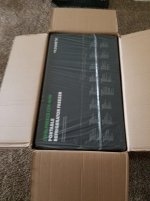
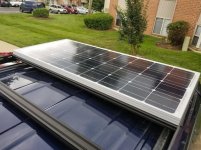
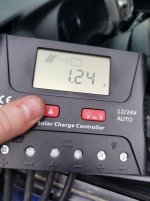
Got my [MENTION=212966]Dometic[/MENTION] cfx-40w fridge in a couple days ago. Had to modify my drawers so it would fit without taking up too much room in the back. Haven't been able to fully use it since I still need to rewire the back outlet, as well as finish wiring the solar panel/charge controller, which I got in last night.

Cut box.jpg

Decided to repaint the box, but left the drawer blue because I'm lazy/ran out of paint. Will repaint it when I get the chance.
painted box.jpg

fridge.jpg

Fridge in! For now it only runs when the truck is on. Once I rewire everything, it will be on 90% of the time.
fridge 2.jpg

Ran the solar wiring through the grommet for the hatch wiring. It worked out perfectly. I need to zip tie them together, but I also need to go buy zip ties, and as I've said before, I'm lazy.
solar wiring.jpg

solar panel.jpg

solar 2.jpg

Did a mock wiring setup to make sure everything worked. We have power! Not much, but more than I expected since it is fully overcast.
power.jpg

Oh, and I also bought some traction boards off of a friend, but nobody really cares about those.

Hopefully I can get the wiring done this week/next week. I'm pretty excited to not have to mess with ice in a cooler anymore.
 

Attachments

  • Cut box.jpg
    Cut box.jpg
    126.4 KB · Views: 493
  • painted box.jpg
    painted box.jpg
    119.8 KB · Views: 480
  • fridge.jpg
    fridge.jpg
    116.2 KB · Views: 480
  • fridge 2.jpg
    fridge 2.jpg
    133.7 KB · Views: 483
  • solar wiring.jpg
    solar wiring.jpg
    110.1 KB · Views: 507
  • solar panel.jpg
    solar panel.jpg
    118.3 KB · Views: 507
  • solar 2.jpg
    solar 2.jpg
    127.7 KB · Views: 1,135
  • power.jpg
    power.jpg
    124.8 KB · Views: 506
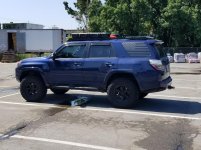
Ordered a set of 295/70R17 Cooper MTPs last week and got them mounted and balanced this weekend. Had to do some minor cutting to get them to fit, but not too much.

They are quieter than my ST MAXX, but those were starting to age, so I'm not surprised. I also painted my wheels black last week.

Tires 1.jpg

tires 2.jpg

tires 3.jpg
 

Attachments

  • Tires 1.jpg
    Tires 1.jpg
    137.2 KB · Views: 531
  • tires 2.jpg
    tires 2.jpg
    140.9 KB · Views: 469
  • tires 3.jpg
    tires 3.jpg
    141.5 KB · Views: 477
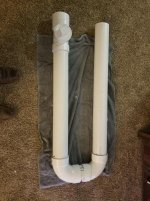
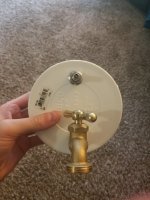
Finished my Solar shower setup this weekend. Used 4" PVC for the tube, a tire valve stem for the air inlet, a garden hose faucet for the hose connection, and black paint to help it absorb heat. It is held on to the prinsu with 5" hose clamps.

Total, it will hold just over 5 gallons of water. I figured I'm trying to harness the power of the sun with the solar panel, might as well harness some more for a decently warm shower on longer trips.

solar shower 1.jpg

solar shower 2.jpg

solar shower 3.jpg
 

Attachments

  • solar shower 1.jpg
    solar shower 1.jpg
    137.4 KB · Views: 439
  • solar shower 2.jpg
    solar shower 2.jpg
    127.7 KB · Views: 413
  • solar shower 3.jpg
    solar shower 3.jpg
    144.3 KB · Views: 459
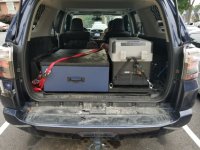
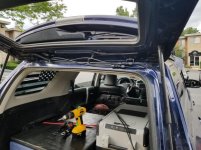
Took a trip to Peter's Mill Run with a couple TW folks this weekend. The trail wasn't hard, but was very bouncy and a good beginner/intermediate level trail. There were some fun obstacles, but nothing crazy. Somebody could definitely mess up their rig there if not careful.

Also decided to do the mud hole towards the end of it. I would not recommend this. We tested the depth, knew what we were getting into, and prepared ahead of time for the probability that I got stuck. Definitely not the smartest thing I've ever done, and could have ended a lot worse. Thankfully nothing was broken, no water got into the cab, and I got further than I thought I would. If you go, and decide to do the mud pit, please make sure you are either prepared to make a quick recovery or prepared to get wet.

Peters mill 1.jpg

peters mill 2.jpg

peters mill 3.jpg

peters mill 4.jpg

peters mill 5.jpg

<iframe width="500" height="300" src="https://www.youtube.com/embed/9_rrAbdqkFY" frameborder="0" allow="autoplay; encrypted-media" allowfullscreen></iframe>

<iframe width="500" height="300" src="https://www.youtube.com/embed/wei-KkdtUjI" frameborder="0" allow="autoplay; encrypted-media" allowfullscreen></iframe>
 

Attachments

  • Peters mill 1.jpg
    Peters mill 1.jpg
    140.7 KB · Views: 429
  • peters mill 2.jpg
    peters mill 2.jpg
    142.2 KB · Views: 445
  • peters mill 3.jpg
    peters mill 3.jpg
    141.3 KB · Views: 426
  • peters mill 4.jpg
    peters mill 4.jpg
    143.6 KB · Views: 449
  • peters mill 5.jpg
    peters mill 5.jpg
    144.8 KB · Views: 437
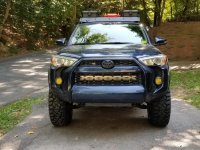
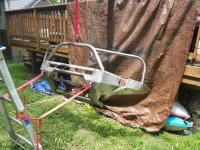
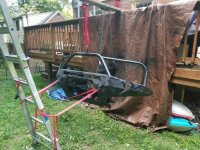
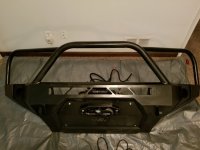
Received my CBI full front bumper with hoops last week. Started painting the next day.

bumper 1.jpg

bumper 2.jpg

After painting and then sanding it down and repainting because the paint messed up, it was finally time to install the winch. I have a Smittybilt XRC 9500 lb winch with steel cable that I ordered shortly after I ordered the bumper.

bumper 3.jpg

I had to wait a couple days to install the bumper, but we finally got to it over the weekend. This thing is heavy. We used a 3 ton jack to hold it up, with 2 people keeping it stable on the jack. I took the stock bumper completely off to make sure the new one fit, then put it back on to cut. I didn't take any pictures of the cutting process, as I was trying to concentrate on not messing up. But I did cut about 1/4 - 1/2 an inch below where they recommend to cut, and it lined up better than some of the pictures I've seen. Once the bumper was cut, the new bumper was bolted up and everything fit pretty well. I re-used the stock fog lights until I can find something else to use in their place.

bumper 4.jpg

This bumper is beefy! The winch and fogs are all hooked up and ready to go. I do need to spool the winch, as well as clean up some of my cuts. I also have a factor 55 flatlink on its way, so that will be installed sometime this week.
 

Attachments

  • bumper 1.jpg
    bumper 1.jpg
    143.3 KB · Views: 394
  • bumper 2.jpg
    bumper 2.jpg
    142.6 KB · Views: 391
  • bumper 3.jpg
    bumper 3.jpg
    132.4 KB · Views: 407
  • bumper 4.jpg
    bumper 4.jpg
    126.2 KB · Views: 424
So I kinda let this thread go due to being busy in my day to day life with a new house and getting married and all that, but that didn't stop me from doing stuff to the truck and finding time to pick up welding.

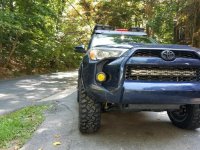
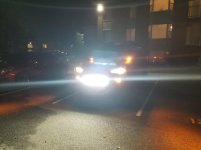
First mod was to add some ditch lights and a light bar. Both from Amazon and work really well.

20190104_120107.jpg
20190106_184701.jpg

Then I upgraded my coils to 886's front and 889's rear

20190118_141804.jpg

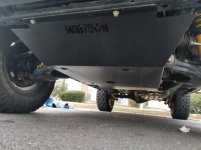
Then I got some Motown off-road skids put on, finally.

20190126_112127.jpg

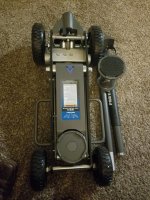
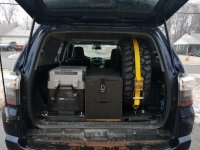
Then I picked up a pro eagle 2 ton jack and a full sized spare and remade my cargo setup.

20190208_204755.jpg

20190307_204128.jpg

20190308_175821.jpg
 

Attachments

  • 20190104_120107.jpg
    20190104_120107.jpg
    132.6 KB · Views: 351
  • 20190106_184701.jpg
    20190106_184701.jpg
    102.6 KB · Views: 365
  • 20190118_141804.jpg
    20190118_141804.jpg
    133.9 KB · Views: 339
  • 20190126_112127.jpg
    20190126_112127.jpg
    127.9 KB · Views: 342
  • 20190208_204755.jpg
    20190208_204755.jpg
    139.4 KB · Views: 387
  • 20190307_204128.jpg
    20190307_204128.jpg
    136.9 KB · Views: 329
  • 20190308_175821.jpg
    20190308_175821.jpg
    125.3 KB · Views: 338
Next up was adding some limb risers to combat our tight trails around here.

20190311_173614.jpg
20190311_173620.jpg
20190311_173625.jpg

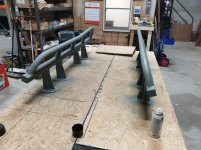
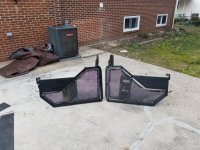
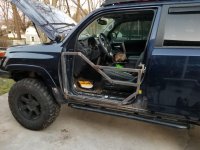
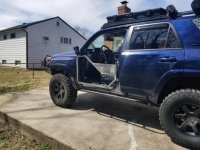
Then I decided I want some tube doors. Why? Well, because I needed a project to practice welding and this was something I've wanted for a while. That's why.

20190323_192725.jpg
20190324_131439.jpg
20190328_174353.jpg
20190328_180739.jpg
20190328_180748.jpg
 

Attachments

  • 20190311_173614.jpg
    20190311_173614.jpg
    140.3 KB · Views: 341
  • 20190311_173620.jpg
    20190311_173620.jpg
    110.3 KB · Views: 339
  • 20190311_173625.jpg
    20190311_173625.jpg
    124.7 KB · Views: 341
  • 20190323_192725.jpg
    20190323_192725.jpg
    129.8 KB · Views: 332
  • 20190324_131439.jpg
    20190324_131439.jpg
    135.4 KB · Views: 352
  • 20190328_174353.jpg
    20190328_174353.jpg
    136.8 KB · Views: 364
  • 20190328_180739.jpg
    20190328_180739.jpg
    138.7 KB · Views: 449
  • 20190328_180748.jpg
    20190328_180748.jpg
    134.6 KB · Views: 358
Last week, we hit some blues and purples at Rausch and I got to put the tube doors to use.

20190330_094445.jpg

20190330_144914.jpg

20190330_153443.jpg

20190330_153452.jpg

They performed wonderfully and I could not be happier. Even got a few sideways looks throughout the day lol
 

Attachments

  • 20190330_094445.jpg
    20190330_094445.jpg
    141.8 KB · Views: 355
  • 20190330_144914.jpg
    20190330_144914.jpg
    146.4 KB · Views: 359
  • 20190330_153443.jpg
    20190330_153443.jpg
    142.4 KB · Views: 382
  • 20190330_153452.jpg
    20190330_153452.jpg
    139.4 KB · Views: 365

Members online

Forum statistics

Threads
278,316
Messages
3,554,105
Members
248,016
Latest member
Advally Service

Trending content

Back
Top