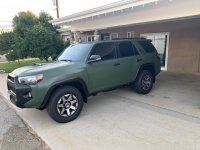
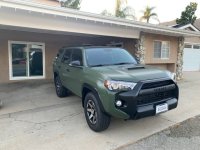
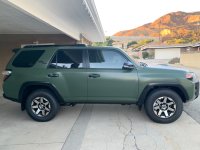
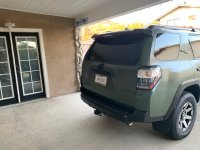
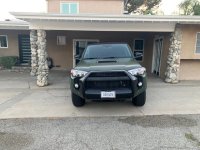
Just bought a dark gray 2019 4Runner TRD Offroad Premium with KDSS. Only reason I chose premium is for the power sunroof.
My first Toyota. First lesson: Toyota is extremely difficult to negotiate with on pricing! Got about 4K off MSRP though with the sales and 2020's coming on the lots.
Background: I have a JK on 40's with beadlocks that I take to the hammers. Done everything there except wrecking ball and backdoor (did it with a winch but that doesn't count). Had fun daily drivers and then decided to lease a Mercedes as a DD. Hated it... boring as hell. So decided to get a 4Runner as a DD. Figured I can make it more luxurious than my Mercedes and more fun to drive. Maybe some light offroading and expeditions. Not a hammer rig though.
Basically... I'm trying to build a badass mallcrawler (those two words shouldn't be in one sentence).
(Done) Stage 1: Electronics
- Alpine Halo9
- Replace all speakers
- Alpine Sub and Amp (under seat)
- ARB Fridge with switch (factory location)
- Dual Batteries
- Cell ram mount and additional USB port near ram mount
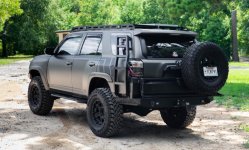
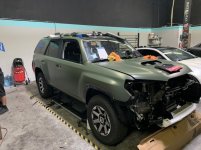
(Done) Stage 2: Wrap matte green with matte black accents
(Done) Stage 3: Lift and Tires
- King shocks w/ adjusters
- Toytec front UCA, rear UCA and LCA, rear trackbar
- Flat black non beadlock rims
- KO2's (34")
- King Air bumpstops with custom mounts (front and rear)
(Done) Stage 4: Magnuson Supercharger
Borla Exhaust
Did a bunch of minor stuff too. All below.
(Done) Stage 5 (most exciting): Custom leather wrap seats, door panels, steering wheel, shifters, black headliner, blackout all plastic (that is currently gray like the pillars, and everything attached to headliner). This stage is in mid-November as I ordered flat green leather to match exterior wrap... and I think they didn't kill the cow yet. Also... replacing seat heaters with a cooling and heating system for front. Lastly... while everything is out... soundproofing everything basically.
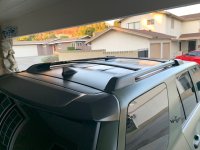
(Done) Stage 6: Southern Style Offroad Trailgator, Roof rack, and Front Bumper (with side skid things). SSO Slimline w/ stage 2. Winch. 30" Rigid light. RCI Skids (including control arms and diff).
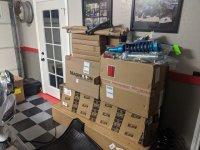
(Done) Stage 7: Drawer system... ordered Goosegear and custom stuff. AluCab tilt fridge slider, Front Runner storage and Roam storage, Aluminum Radiator, Tranny Cooler with fan. MaxTrax...
(Done) Stage 8: Front ARB Locker, re-geared to 4.56, Beadlocks, Cooper ST Max 34's.
(Planned early 2021) Stage 9: Remove KDSS... do some magic and get 37's and Atlas T-Case.


My first Toyota. First lesson: Toyota is extremely difficult to negotiate with on pricing! Got about 4K off MSRP though with the sales and 2020's coming on the lots.
Background: I have a JK on 40's with beadlocks that I take to the hammers. Done everything there except wrecking ball and backdoor (did it with a winch but that doesn't count). Had fun daily drivers and then decided to lease a Mercedes as a DD. Hated it... boring as hell. So decided to get a 4Runner as a DD. Figured I can make it more luxurious than my Mercedes and more fun to drive. Maybe some light offroading and expeditions. Not a hammer rig though.
Basically... I'm trying to build a badass mallcrawler (those two words shouldn't be in one sentence).
(Done) Stage 1: Electronics
- Alpine Halo9
- Replace all speakers
- Alpine Sub and Amp (under seat)
- ARB Fridge with switch (factory location)
- Dual Batteries
- Cell ram mount and additional USB port near ram mount
(Done) Stage 2: Wrap matte green with matte black accents
(Done) Stage 3: Lift and Tires
- King shocks w/ adjusters
- Toytec front UCA, rear UCA and LCA, rear trackbar
- Flat black non beadlock rims
- KO2's (34")
- King Air bumpstops with custom mounts (front and rear)
(Done) Stage 4: Magnuson Supercharger
Borla Exhaust
Did a bunch of minor stuff too. All below.
(Done) Stage 5 (most exciting): Custom leather wrap seats, door panels, steering wheel, shifters, black headliner, blackout all plastic (that is currently gray like the pillars, and everything attached to headliner). This stage is in mid-November as I ordered flat green leather to match exterior wrap... and I think they didn't kill the cow yet. Also... replacing seat heaters with a cooling and heating system for front. Lastly... while everything is out... soundproofing everything basically.
(Done) Stage 6: Southern Style Offroad Trailgator, Roof rack, and Front Bumper (with side skid things). SSO Slimline w/ stage 2. Winch. 30" Rigid light. RCI Skids (including control arms and diff).
(Done) Stage 7: Drawer system... ordered Goosegear and custom stuff. AluCab tilt fridge slider, Front Runner storage and Roam storage, Aluminum Radiator, Tranny Cooler with fan. MaxTrax...
(Done) Stage 8: Front ARB Locker, re-geared to 4.56, Beadlocks, Cooper ST Max 34's.
(Planned early 2021) Stage 9: Remove KDSS... do some magic and get 37's and Atlas T-Case.
Attachments
Last edited: