Unique, hidden XM/GPS antenna install.

Rivalsock

New member
Unique, hidden XM/GPS antenna install (picture heavy)

About 2 years ago I bought the Pioneer Avic-Z1 unit for for 05 4Runner. At the time my landlord was pretty strict about working on your vehicle in the parking lot so I forced to have a shop install it.

The install was unimpressive (was told Illumination wire was not compatible, and that the VSS wire was impossible to get to in my vehicle --- needless to say I got a full refund when I showed them they were wrong on both accounts) and the XM and GPS antennas were installed on the top corners right above the windshield.

While it didn't look the best it did work so I didn't worry too much about it, until I noticed one of the wires was starting to crack and would eventually fail if left to deal with the weather and high wind it recieves right there so I decided to move the antennas to somewhere more protected - I wanted to move them UNDER the roof-rack end covers.

I had tested the antennas here for a few days to make sure there was no problem with signal reception. The GPS always saw its full complement of satellites and the XM signal remained 'Strong' or 'Very Strong'. The bonus is the antennas and wires are completely hidden from view so it is not obvious from the outside that there is anything extra installed in the truck.

Didn't dawn on me to take pictures until partway into the install so here is what I have:

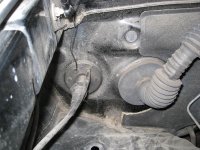
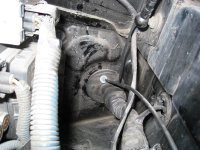
GPS antenna wire comes out of the driver side through this grommet:
 

Attachments
  • 1_grommet_driver.jpg
    1_grommet_driver.jpg
    111.4 KB · Views: 8,321
Last edited:
Register to hide this ad
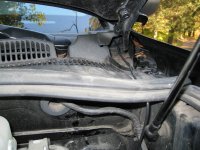
Both wires run up go towards the weatherstripping on the side of the windshield:
 

Attachments

  • 3_wire_driver.jpg
    3_wire_driver.jpg
    109.1 KB · Views: 10,269
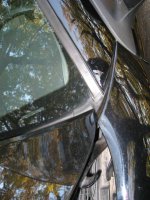
They then run under the weatherstripping towards the roof:
 

Attachments

  • 3a_driver_wire_to_weather.jpg
    3a_driver_wire_to_weather.jpg
    87.8 KB · Views: 8,071
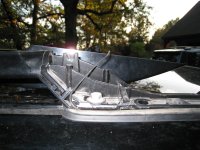
Then they continue under the weatherstripping and under the roof rack mount, coming through the hole already in the mount's weatherstripping for the bolts. You can wrap them around and fit them through the cut-out where the back cover snaps on:
 

Attachments

  • 6_wire_into_housing_pass.jpg
    6_wire_into_housing_pass.jpg
    105.2 KB · Views: 8,233
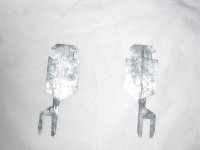
Since there was nowhere besides the bolt heads for the magnetic antennas to stick to, I cut out these plates from some ductwork connectors I had laying around. They are cut so that one of the roof rack bolts will hold them securly in place:
 

Attachments

  • 7_unpainted_mount.jpg
    7_unpainted_mount.jpg
    59.7 KB · Views: 7,952
Last edited:
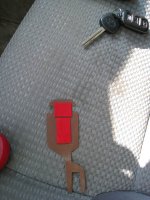
I then painted the pieces (brown because that happened to be the color of rust-o-leum that was around the house) so that they will resist rust and I added some double-sided mounting tape to the back so that they had a little cushoning and would stick and not vibrate:
 

Attachments

  • 8_painted_mount_tape.jpg
    8_painted_mount_tape.jpg
    79.7 KB · Views: 8,003
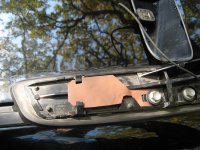
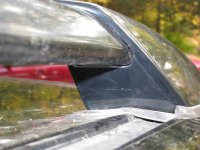
Notice how the wires are completely hidden and not directly exposed to the elements or malicious people wanting to cut antenna wires:
 

Attachments

  • 15_cover_back_pass.jpg
    15_cover_back_pass.jpg
    92.7 KB · Views: 8,407
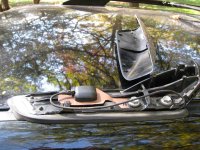
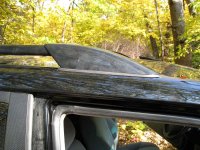
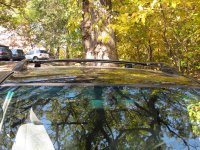
With both covers back on it is impossible to see that there are antennas installed:
 

Attachments

  • 16_both.jpg
    16_both.jpg
    133.9 KB · Views: 7,945
Hmmmm, Great idea... That is really cool man! I like it!

I may just have to immitate that. I bet you get a great signal.
 
Very cool setup, very cool. Now I need to decide if I'd rather do it like this or mount it in the spoiler. At the very least we have options to hide these things, I'm not crazy about the whole exposed sat. radio / gps antenanas.
 
Rivalsock excellent work,

Please, You can explain to me step by step the procedure to remove roof-rack end covers , I have tried several times remove it, but I can not and I fear that could mark or damage the covers

thank you very much for your help
 
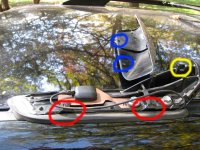
No problem. If you look at the attached pictures the covers have 4 little claws, 2 on each side (two circled in blue) that attach to the rack end at the points circled in red.

I used a small flathead screwdriver that I taped over with electrical tape to prevent from scratching things up. You can sort of push down the rubber to get a view inside to make sure you have the screwdriver in the right place to pop the claw out.

The ones facing the outside of the vehicle are far easier to get out than the ones facing inward. Once you get two off you should be able to twist the cover a little to disengage the other side.

One thing to note there is a tab on the cover that slides into the slot circled in yellow, this does not snap in or anything but is very easy to break off when taking the cover off.

Let me know if I can help out any more.
 

Attachments

  • cover_attach.jpg
    cover_attach.jpg
    125.2 KB · Views: 3,574
GREAT install!!! I'll be telling my dad about this (he has an '03).

Just make sure that if you ever get your windsheild replaced, the installers know about the wires (or better yet, remove them first). A friend of mine had the installers cut his XM ant. wire this way, since they typically just use razor blades to cut the weatherstripping off when replacing the windsheild.
 
I just did this install, and I think you actually circled the wrong piece in yellow...

Basically when you pull up the entire front portion, there is still a little "catch" on the very back top of the plastic piece, it actually hooks into the rail.

If anyone is trying to get it out, don't "tilt" the piece and break it off. You have to lift straight up on it. It's just a little bowed out piece that clips in, and not a hook. If you bend the piece in any direction too much you'll snap it off. Instead just go straight up (you'll have to pull pretty damn hard) and it'll eventually pop out in one piece.
 

Members online

Forum statistics

Threads
278,310
Messages
3,554,080
Members
248,016
Latest member
Advally Service

Trending content

Back
Top