Ur2ez 2014 Build Thread

ur2ez22

New member
Ur2ez22 2014 Build Thread

Hey guys, spent the last few months lurking around and asking a few questions but my 2014 SR5 Premium finally came in Monday! I won't be going nearly as crazy as some of you, but your vehicles have been inspirational and I'll borrow a few ideas here and there.

The Toytec Ultimate lift kit, Light Racing UCAs, Konig Countersteer 17x8 wheels, Goodyear Duratrac 285/70/17 tires and Weathertec floor mats are in, as are the Budbuilt bump out sliders.

Mods
ToyTec Ultimate lift
Light Racing UCAs
Konig Countersteer Type X 17x8 wheels
Goodyear Duratrac 285/70/17 tires
BudBuilt bump out sliders
Plastidip all badges black
RCI skid plates
ARB CMKTA12 Twin Air Compressor
Gobi Stealth roof rack
Desert Rat Night Stalker 40" curved lightbar


Trips
4th of July SW Colorado Trip
Moab - Fins n Things
Moab - Hell's Revenge
Moab - Top of the World
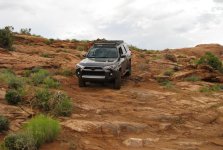

7.jpg


We went to pick up the truck from having the lift and everything installed, and my 4 year old daughter quickly says "daddy you need sliders, it's too big for me to get in!" Of course, once she was in that didn't stop her from having a blast sliding out of it and "falling to the ground" haha.

Also, the TRD wheelcaps came with the wheels from the shop who ordered them. I know I don't like the shiny part of them...haven't decided if I'm going to plastidip just the shiny part while leaving the red TRD logo, plastidip all of it or just remove them like most people seem to do. I also plan on taking plastidip to the front and rear emblems and either remove the SR5 emblems or plastidip those as well.
 

Attachments

  • 7.jpg
    7.jpg
    139.9 KB · Views: 759
Last edited:
Register to hide this ad
Great looking rig! I did the same thing had the lift and parts in my garage before I even made the deal on the runner. Those wheels are perfect, I almost pulled the trigger on a silver set and probably will buy a set in the future. Any way looks like you are off to a great start.
 
Sweet!

I have the same wheels and tires in my garage. Hopefully I can get them on next week. I think I'll try it sans center caps first.

A long time ago I bought some Volks for a G35 I never ended up buying..
Now I make sure the car is in the driveway before I start buying stuff for it ha.
 
[MENTION=13906]ur2ez[/MENTION] Very nice looking rig... question for you, when you traversed that river, did you get water into the cabin?
 
[MENTION=13906]ur2ez[/MENTION] Very nice looking rig... question for you, when you traversed that river, did you get water into the cabin?

Not a drop, and as soon as I pulled through a ways I checked all four doors and under the hood. Not used to water like that in AZ so I was on edge to say the least, but I was impressed!
 
ARB CKMTA12 Twin Air Compressor Installed!

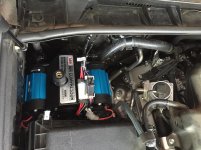
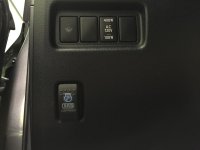
Decided to build a new house, and while I should be saving up money for all the crap I have to put into that once it's done (window coverings, landscaping, etc.) I figured it was now or never to get a few more things done to the truck. So yesterday I had a mount fabricated and got the ARB CKMTA12 twin air compressor installed.

I really debated getting the single vs the twin, but I have to say so far I'm glad I got the twin. No, I don't have lockers and I'm not lugging around any major air tools...but I am very impatient. I had initially bought a Viar 300P and used it on my trip to Ouray, CO...sort of. I tried it once, realized that I didn't have anywhere near enough patience for it combined with the fact that every gas station near there has free air and then used theirs the rest of the trip. And while I haven't used this on the trails yet, I did air down one of my tires (Duratrac 285/70/17) to 15psi and then timed airing it back up to 40psi. Including 2 stops to check the air pressure, it hit 40psi in 1 minute and 42 seconds...THAT I have the patience for!

The compressor was mounted in the open space in front of the passenger firewall, which is a surprisingly cool area under the hood because after driving home for 35 minutes I immediately popped the hood and it wasn't even warm...was cool to the touch. It also stayed cool to the touch after being on for a couple minutes while doing my little experiment above, so while it's early...this thing is awesome and I'd highly recommend it.

Compressor.jpg

Switch.JPG
 

Attachments

  • Compressor.jpg
    Compressor.jpg
    71.3 KB · Views: 1,007
  • Switch.JPG
    Switch.JPG
    74.2 KB · Views: 955
Last edited:
RCI Skid Plates Installed!

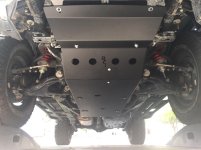
Took advantage of the recent RCI group buy and picked up a set of their skid plates (thanks for organizing that [MENTION=119516]jicko[/MENTION]!). Went with the standard set that includes the front, transmission and transfer case plates (including the cross-member) in steel, as well as the front filler plate that only comes in aluminum. Debated painting them myself, but figured I'd be like a kid in a candy store and would just want to get them on as soon as I got em, so I had RCI powdercoat them black. Josh at RCI was also kind enough to throw in the Fumoto oil drain valve for free even though I was $10 short of the "package price" that Josh had negotiated with RCI to get it - great service!

Shipping time was great, got here in less than 2 weeks even though I didn't order them until the last day of the group buy. Installation was really easy, had my wife help start a few of the bolts while I supported the weight of the plates just to make the awkwardness easier, but it could definitely be done by yourself if needed. Instructions come separately for each plate, so I had to look at it for a second before realizing which plate to start with. Easily makes sense once you realize that the front bolt locations for the transmission and transfer case plates are slotted and intended to slide in between the existing rear bolts of the plate in front of it however, but just by quick reference for anyone who doesn't want to look at it: Start with the front plate and work your way back, then come back and do the filler plate last.

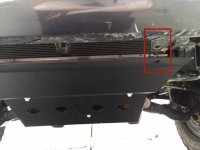
The only challenge I had was that I couldn't get the filler plate to reach the bumper tabs...was about an inch too low as you can see in the first pic below. After a lot of back and forth texting pictures with Josh at RCI, he figured maybe my plate had been bent to the wrong angle and I shipped it back to him. The day UPS showed it was delivered, he called me and asked if I had a front diff drop kit as a part of my Toytec Ultimate lift kit that I had mentioned I had installed last year. Since I didn't do the install for that I had to double-check my invoice from last year and also went and looked under the 4R, sure enough I did indeed. The result? The diff drop kit puts two blocks under the radiator, pushing mounting points for the front skid plate and subsequently the filler plate down about half an inch. Combine that with the angle, and that's why the front of the filler plate couldn't reach the bumper tabs. Josh kindly bent the plate about an extra 3/4 of an inch, I gave me $13 for shipping and he shipped it back to me that same day. So while I mentioned this as a possible drop-down option on his site to add...if anyone is considering this filler plate (or likely other filler plates too since they all mount the same), make sure you have the plate bent up an extra 1/2-3/4 of an inch if you have a front diff drop installed!

Here's the gap of the bumper tabs
Filler Plate Gap.JPG

And here's the final product once I got the re-bent filler plate back from Josh
RCI Skid Plates.jpg
 

Attachments

  • Filler Plate Gap.JPG
    Filler Plate Gap.JPG
    126.9 KB · Views: 886
  • RCI Skid Plates.jpg
    RCI Skid Plates.jpg
    63.1 KB · Views: 1,959
Last edited:
Moab - May 2015 - Fins n Things

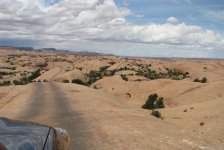
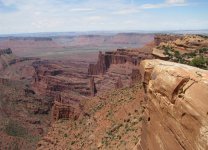
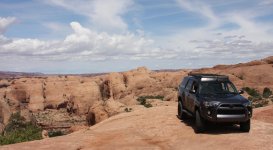
Spent a couple days in Moab, had a chance to run Fins n Things and Hell's Revenge the first day and then Top of the World with a few of the 3rd gen guys and a couple Tacos. Always wanted to get up to Moab on my mountain bike as a kid but never did, so this was a fun trip for me even though I was on 4 wheels instead of 2.

I took quite a few GoPro videos as well, but I'll need a little more time to edit those before I can post something up. In the meantime, the next few posts will have some photos...here's a few from Fins n Things...does anyone know why the photos are showing as different sizes? I resized them ensuring the pixel rate and size were all the same but not appearing that way in the post?

3.jpg

1.jpg

2.jpg

4.jpg

5.jpg

21.jpg
 

Attachments

  • 3.jpg
    3.jpg
    137.6 KB · Views: 778
  • 1.jpg
    1.jpg
    140.5 KB · Views: 765
  • 2.jpg
    2.jpg
    141.6 KB · Views: 782
  • 4.jpg
    4.jpg
    137.3 KB · Views: 802
  • 5.jpg
    5.jpg
    140.6 KB · Views: 793
  • 21.jpg
    21.jpg
    141 KB · Views: 771
Last edited:
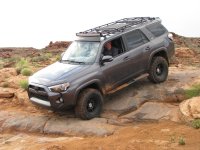
Moab - May 2015 - Hell's Revenge

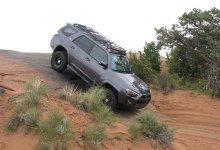
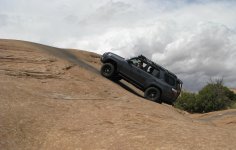
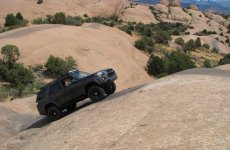
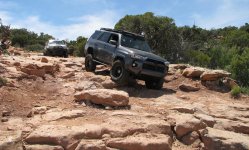
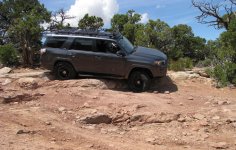
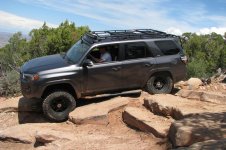
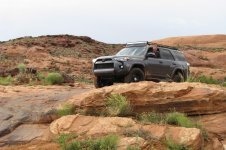
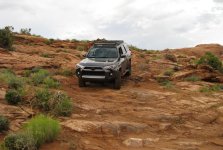
Here are some pictures from Hell's Revenge. From a difficulty perspective this trail wasn't as hard as I expected it to be, but we (my wife and daughter) were running it alone and ran into horrible weather at the worst possible time. Right as we climbed to the top of the last fins by the Hot Tubs, the weather poured in with 50+mph wind gusts, rain and for a few minutes hail. And while I'm impressed with how much traction the slickrock maintains when wet, the rubber tracks showing you the way complete disappear when it's pouring rain and the Hot Tubs and coming down the Dragon's Tail is NOT where you want to be in those conditions! It was still a fun trail, but we were all pretty glad to get off of it after that experience.

6.jpg

7.jpg

8.jpg
 

Attachments

  • 6.jpg
    6.jpg
    142.8 KB · Views: 842
  • 7.jpg
    7.jpg
    139.9 KB · Views: 905
  • 8.jpg
    8.jpg
    139.8 KB · Views: 830
Moab - May 2015 - Top of the World

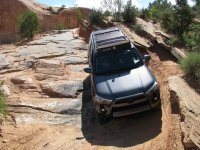
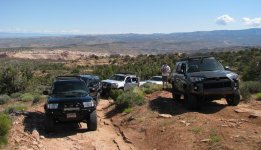
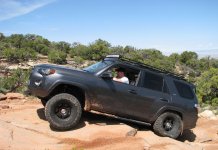
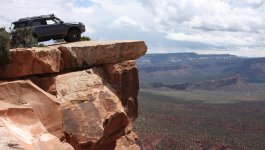
And lastly, here are some from Top of the World with some of the 3rd gen and Taco guys. Great group of guys who were more than patient and helpful even though their rigs were all modified for this trail better than mine and were much more capable (thanks again [MENTION=65101]BrianSD_42[/MENTION], [MENTION=95069]TBuzz[/MENTION], [MENTION=107971]derpiful[/MENTION] and others). Top of the World was also the most difficult trail out of the three I ran on this trip, and resulted in my hitch and skid plates getting used and abused more than the first two trails combined. Also caught my front bumper a couple times, but nothing too bad just some light scratches that you have to squat down to even see.

10.jpg

12.jpg

22.jpg

14.jpg

16.jpg

17.jpg

19.jpg
 

Attachments

  • 10.jpg
    10.jpg
    143.2 KB · Views: 816
  • 12.jpg
    12.jpg
    141 KB · Views: 895
  • 14.jpg
    14.jpg
    141.1 KB · Views: 874
  • 16.jpg
    16.jpg
    144.1 KB · Views: 801
  • 17.jpg
    17.jpg
    141.1 KB · Views: 830
  • 19.jpg
    19.jpg
    142.4 KB · Views: 841
  • 22.jpg
    22.jpg
    143.8 KB · Views: 774
Last edited:

Nice looking ride.

Thank you! It's turned into more than I originally planned, and after doing Top of the World I've decided I regret going with the Toytec Ultimate lift kit and will eventually be swapping it out for something better...

Very nice pictures and beautiful countryside. Looks like lots of fun.

Thanks! If you ever have the chance to head out to Moab I'd highly recommend it, my pictures don't get even remotely close to giving that area justice.
 
Last edited:

Members online

Forum statistics

Threads
278,309
Messages
3,554,068
Members
248,016
Latest member
Advally Service

Trending content

Back
Top