shootmymime
New member
URD 7th Injector Tuning Guide
Thread Operation Status: Ready for Use
Helpful Links
http://www.toyota-4runner.org/3rd-gen-t4rs/140556-urd-7th-injector-tuning-maps.html
http://www.toyota-4runner.org/3rd-gen-t4rs/154740-urd-7th-injector-install.html
U-Tune by gadget - This is where i get most of my information concerning this thread.
Introduction
Tuning a vehicle after adding forced induction is important so that it protect the internals of your motor. The sole purpose of tuning a vehicle is to inject the proper amount of Air to Fuel Ratio, aka (AFR) and Timing so that you maximize efficiency and decrease heat within the motor.
In order to properly tune a vehicle, it is best to have the correct gauges and tools already in place so there is no guessing of values, or seat of the pants feel.
My Vehicle and Components
2000 Limited 4Runner,
3.4L Second Generation Black Supercharger,
URD 7th Injector (click for link),
URD 2.2" Pulley (click for link).
Things You Will Need
A Wide Band AFR sensor installed in the exhaust,
A Windows based laptop (I am unsure if it will work on widows 10),
R4 programming CD rom,
USB to Serial cable,
Base tune map from URD, this can also be emailed to you.

The 7th injector previously installed on your truck. (if you need installation instructions contact URD at [email protected] and ask for the installation instructions provided some information about yours truck (year, engine ect.)
Lets get started
Begin by installing the R4 software on your laptop, this is done the same as any other program previously installed from a CD. Save it and create an icon in a recognizable place such as the desktop. Go ahead and run the program.
Most of the instructions will be taken from URD U-Tune guide, but i will also simplify the instructions and describe problems I experianced along the way.
We are going to start by creating a file, ground zero for our tune.

1. Click on FILE in the menu and select NEW CUSTOMER.
2. TYPE whatever name you want for the new file you are creating and click SAVE.
3. Click FILE and OPEN CUSTOMER.
4. SELECT the file that you just named.
Now we are going to adjust settings according to our vehicle so that the R4 software and the vehicle can communicate properly.
1. CLICK on OPTIONS in the menu.
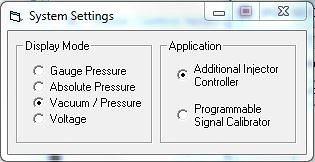
2. Select SYSTEM SETTINGS. In DISPLAY MODE select VACUUM/PRESSURE and in APPLICATION select ADDITIONAL INJECTOR CONTROLLER. Now close that window.
3. Click on OPTIONS in the menu.
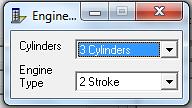
4. Select ENGINE SETTINGS, and then select the CORRECT number of cylinders and stroke referenced from the APPLICATION section of this guide.
For the 3.4L engine.
Model AIC/Timing Calibrator: AIC with Timing Control
Engine: 5VZ-FE 3.4 V6, 1MZFE 3.0 V6, 1GR-FE 4.0 V6
Year All
Engine Settings: 3 Cylinders / 2 Stroke
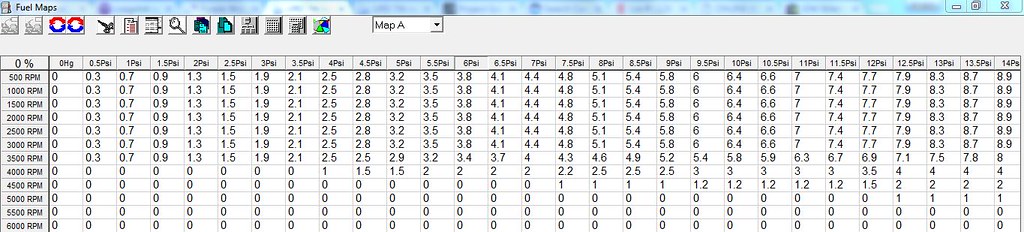
Map A: Controls Timing Calibration
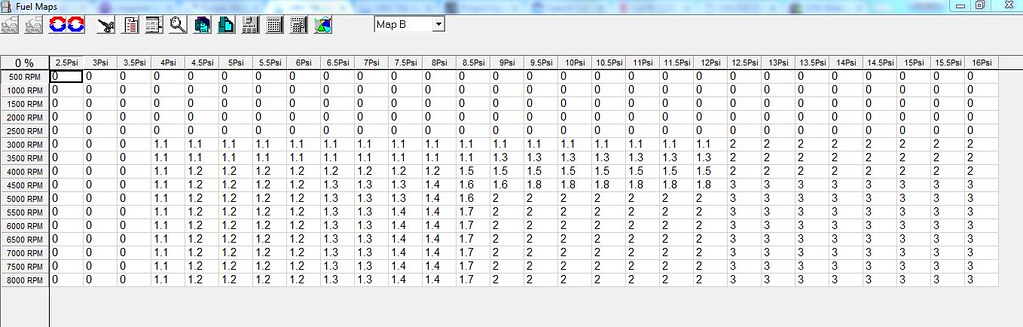
Map B: Controls Injector control
This is usually very different from what you might expect. Then close that window.
Sometimes URD loads the base map on the AIC prior to shipping to as a quality check. We need to extract that map off the AIC and save it to the laptop. To do so:
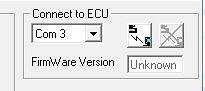
1. Connect your PC to the Calibrator with a USB Serial cable. Select the proper COM 1-8 port. Turn the key to the ON position to provide power to the Calibrator, (but dont start the vehicle). Click on the CONNECT TO ECU button. This will connect you to the Calibrator. The disconnect button should become active once the connection is made. If you can not connect, try switching to a new com port.
2. Click on MAPS in the menu and select FUEL MAPS. This will open the map page.
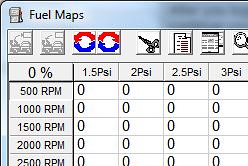
3. In the upper left corner of the map page are two buttons. One will write data to the ECU (AIC) and one will read data from the ECU (AIC). You want to click on the “READ DATA FROM ECU” button. This will pull the map from the AIC, to your PC so you can start tuning. ( Or inversely, you can load a map from a computer and save it to the AIC by clicking WRITE DATA TO ECU.) (mine is not highlighted because I am not currently connected to my truck)
It is recommended that you save a copy of the map as a backup in a safe place before doing any editing. This way you can get back to where you started if necessary.
Output Settings
as you can see, the only value that should be changed is the overage pressure. i set mine from factory "3" down to "2". what that does it makes the 7th injector turn on 1 psi sooner for more fuel spray at lower RPM. you can keep yours at 3, i personally needed a touch more fuel sooner due to my smaller 2.2 pulley starting to give boost faster.
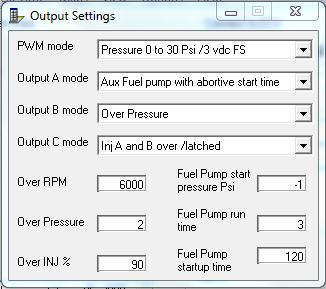
Becoming Familiar with the Tuning Maps A & B of the R4 Software
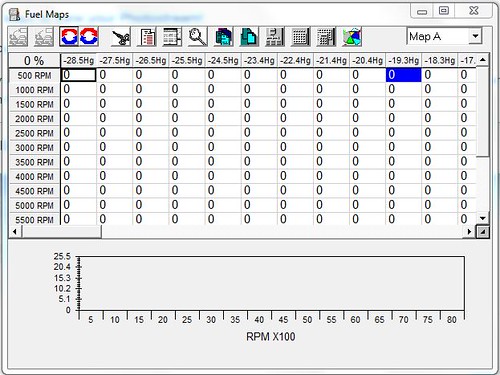
This is a full screen shot of the tuning maps A and B we will be working with.
As you are already familiar with in the upper left hand corner, the Read and Write data to ECU of the AIC (mine is not highlighted because I am not currently connected to my truck) the other buttons along the top are helpful with moving, and editing values in each cell.
In the upper right of this page you can toggle between MAP A and MAP B. Above we mentioned that with the metal case of the AIC controller; Map A: Controls Timing Calibration and Map B: Controls Injector control.
The lower bar graph (empty now) shows levels of injector duty cycle and RPM.
Duty Cycle, It is important to understand how this injector system works. (MAP B only, remember this map controls the 7th injector). A value placed in a cell corresponds to how many milli seconds that injector is spraying fuel. In the upper left hand corner we see a 0%, that will change corresponding to the values in the highlighted. As the value increased, the % will increase. Basically the duty cycle is the % flow the injector can withstand. As for our application 50% duty cycle is flowing at 100% max.
Last edited: