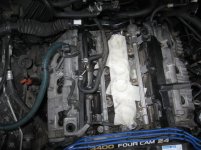
Valve cover gasket thread???

Jon

New member
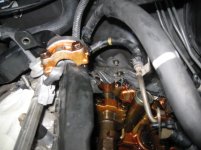
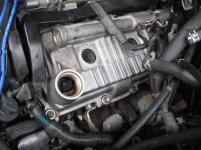
I know I've seen it on here before! A well put together "how to" on changing out these gaskets. I swear I even saw one where you didn't have to remove the intake manifold. I'd really appreciate the link if someone knows where it is, I've spent a good 30min hand jammin the search bar with no results. Thanks guys
 
Register to hide this ad
Okay, I made a trial run at this yesterday, and now I understand the problem many guys had with the wiring harness for the fuel injectors. The harness is very brittle, and the clips and mounts holding it up off the engine block are pretty much shot. Some guys replaced theirs with a flexible hose harness; the original is more like a long boxy harness that snap-closes underneath.

Although the mounting points have broken, my harnesses are still in one piece except for the underside on the driver's side harness. I was thinking of taping it off underneath on that side, and I *think* the harnesses will still stay up off the block.

For those that may have replaced theirs with the flexible hose, how did you keep it up off the block? Or does it matter that much?
 
Okay, I made a trial run at this yesterday, and now I understand the problem many guys had with the wiring harness for the fuel injectors. The harness is very brittle, and the clips and mounts holding it up off the engine block are pretty much shot. Some guys replaced theirs with a flexible hose harness; the original is more like a long boxy harness that snap-closes underneath.

Although the mounting points have broken, my harnesses are still in one piece except for the underside on the driver's side harness. I was thinking of taping it off underneath on that side, and I *think* the harnesses will still stay up off the block.

For those that may have replaced theirs with the flexible hose, how did you keep it up off the block? Or does it matter that much?

haven't personally done it, but. I know they make high heat wire loom. Perhaps, that is what was done.
 
For those that may have replaced theirs with the flexible hose, how did you keep it up off the block? Or does it matter that much?


Use some adel clamps ...

Adel%20Clamp.jpg


https://www.google.com/search?q=adl...,cf.osb&fp=c1bbd447c7562c37&biw=1563&bih=1040

should be available from just about any hardware store, and will bolt back to the valve cover.
 
The thing I like about that video is the guy doesn't remove the throttle body from the intake manifold. He just flips it over. Seems like a nice workaround instead of messing with the coolant lines that run through the TB. Although removing it does allow a good cleaning...

I need to do this soon, too. I'm not looking forward to the shattering plastic wire guard.
 
That's a good video, but he skips the changing of the half-moon plugs and camshaft plugs.
yeah It skips a couple points but I'm thinking he didn't replace them or he would of touched on it.
I'm going to skip replacing them leaks around top corner of gasket roughly half inch from half moon area.
 
I'm in the process of doing this job as we speak. I started last weekend and didn't have time to finish up, but then again this is my first time tackling something like this. Before beginning, I seafoamed my T4R and cleaned up the engine compartment. I'm using a FSM and obtained all factory Toyota parts including the gaskets, camshaft housing plugs, spark plug tube seals, spark plugs, plug wires, PCV grommet, and valve cover grommets. I've taken many pics and can share if anyone needs additional points of reference.

A few other things I've made sure to get and would suggest are the Toyota FIPG, anti-sieze, dielectric grease, and blue threadlocker. Also make sure you have both a ft-lb and inch-lb torque wrench. The guy in the youtube video does a good but shotty job, hurries, and doesn't address many things I'm paying attention to.

I've found that my biggest culprit for burning oil was the camshaft housing plugs on the back of the engine. The FSM doesn't discuss the replacement of these, but at least offers torque specifications for the camshaft cap bolts.

BTW the black plastic electronic housing on mine was already cracked from previous servicing. It's not attached to anything.

 
I'm in the process of doing this job as we speak. I started last weekend and didn't have time to finish up, but then again this is my first time tackling something like this. Before beginning, I seafoamed my T4R and cleaned up the engine compartment. I'm using a FSM and obtained all factory Toyota parts including the gaskets, camshaft housing plugs, spark plug tube seals, spark plugs, plug wires, PCV grommet, and valve cover grommets. I've taken many pics and can share if anyone needs additional points of reference.

A few other things I've made sure to get and would suggest are the Toyota FIPG, anti-sieze, dielectric grease, and blue threadlocker. Also make sure you have both a ft-lb and inch-lb torque wrench. The guy in the youtube video does a good but shotty job, hurries, and doesn't address many things I'm paying attention to.

I've found that my biggest culprit for burning oil was the camshaft housing plugs on the back of the engine. The FSM doesn't discuss the replacement of these, but at least offers torque specifications for the camshaft cap bolts.

BTW the black plastic electronic housing on mine was already cracked from previous servicing. It's not attached to anything.
yeah post up your pics f,sure.
 
FYI guys, make sure the VC bolts are tight first, Toyota's are notorious for them coming loose. My MR2's was leaking a bit too, but the bolts were hand tight only, very loose, same with my 4runner, tightened up the bolts and it's not leaking a drop any more.

Not saying the gaskets don't wear out, but try that first!
 
FYI guys, make sure the VC bolts are tight first, Toyota's are notorious for them coming loose. My MR2's was leaking a bit too, but the bolts were hand tight only, very loose, same with my 4runner, tightened up the bolts and it's not leaking a drop any more.

Not saying the gaskets don't wear out, but try that first!

During my trial run, I noticed that the VC bolts were very loose. They came loose easily by hand. I tightened them all and will wait til later to finish the job, but already have the new gaskets and seals, so will probably go ahead and do it soon. I really need to clean the engine first, then maybe watch for the leaks. Right now the engine is covered in oily gunk.
 
The thing I like about that video is the guy doesn't remove the throttle body from the intake manifold. He just flips it over. Seems like a nice workaround instead of messing with the coolant lines that run through the TB. Although removing it does allow a good cleaning...

I need to do this soon, too. I'm not looking forward to the shattering plastic wire guard.

I took note of the flipping over as well, and thought it was a good idea...at first. But he must have removed those hoses at some point. It would be a real pain to try and remove the valve cover on that side without doing so. And as you point out, it's a good chance to give the TB a cleaning.
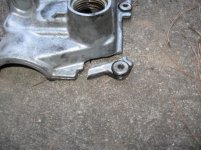
 
I finished up my job this weekend. In total, I did the valve cover gaskets, plus the plugs, plug wires, gaskets, grommets, etc, and cleaned the MAF sensor and
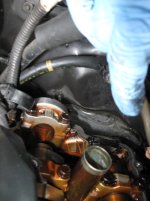
Throttle Body. Here's some pics to share:

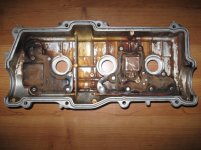
My leak came from both the leaking valve cover gaskets and a crack in the valve cover itself. Note to others - I would not recommend tightening your valve covers beyond the factory specs (53 inch-lbs) or else you'll end up like me. Luckily I found a used valve cover for $30.
2012-01-08 002.jpg
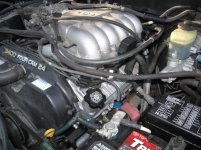
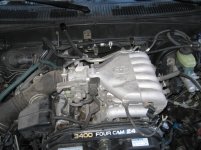
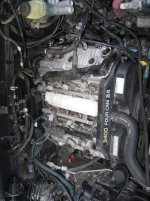
Degreased engine, not sure if you can see the leaks now
2012-01-14 001.jpg
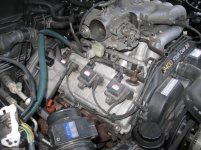
Vacuum hoses removed
2012-01-14 004.jpg
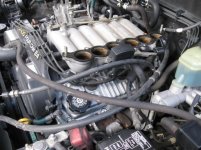
Intake removed
2012-01-14 005.jpg
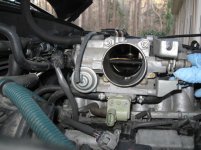
Dirty throttle body
2012-01-14 006.jpg
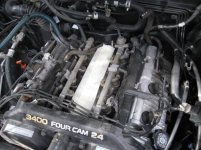
Upper plenum removed
2012-01-15 001.jpg
Intake manifold taped off
2012-01-15 002.jpg
Full size
2012-01-15 003.jpg
Crack in old valve cover

More below
 

Attachments

  • 2012-01-08 002.jpg
    2012-01-08 002.jpg
    53.6 KB · Views: 2,886
  • 2012-01-14 001.jpg
    2012-01-14 001.jpg
    61.4 KB · Views: 11,444
  • 2012-01-14 004.jpg
    2012-01-14 004.jpg
    52.5 KB · Views: 2,541
  • 2012-01-14 005.jpg
    2012-01-14 005.jpg
    60 KB · Views: 2,835
  • 2012-01-14 006.jpg
    2012-01-14 006.jpg
    51.7 KB · Views: 2,620
  • 2012-01-15 001.jpg
    2012-01-15 001.jpg
    60.8 KB · Views: 8,978
  • 2012-01-15 002.jpg
    2012-01-15 002.jpg
    55.5 KB · Views: 2,903
  • 2012-01-15 003.jpg
    2012-01-15 003.jpg
    56.2 KB · Views: 2,455
My old valve cover cracked upon minor pressure after i removed it
2012-01-15 005.jpg
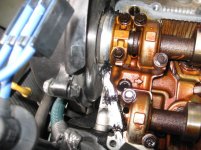
Another major leak point was the camshaft housing plugs on the rear of the engine. They seem kind of pointless if you ask me. Why would you want an extra hole to seal an oil leak?
2012-01-15 006.jpg
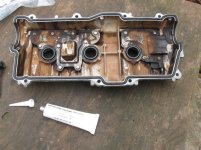
Toyota FIPG, gasket set in valve cover, ready to be installed
2012-01-20 001.jpg
FIPG on driver's side
2012-01-20 002.jpg
FIPG on front of driver's side (according to FSM)
2012-01-20 003.jpg
Driver's side reinstalled
2012-01-20 004.jpg
Both sides reinstalled
2012-01-20 006.jpg
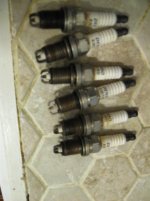
My old plugs (they don't look too bad at all)
2012-01-22 002.jpg

I hope this helps out anyone the same way as this forum helped me out. I just figured I'd show mmmmmore pics to help.
 

Attachments

  • 2012-01-15 005.jpg
    2012-01-15 005.jpg
    57.1 KB · Views: 3,380
  • 2012-01-15 006.jpg
    2012-01-15 006.jpg
    45.9 KB · Views: 6,138
  • 2012-01-20 001.jpg
    2012-01-20 001.jpg
    59.2 KB · Views: 8,039
  • 2012-01-20 002.jpg
    2012-01-20 002.jpg
    40.1 KB · Views: 2,325
  • 2012-01-20 003.jpg
    2012-01-20 003.jpg
    61.5 KB · Views: 2,568
  • 2012-01-20 004.jpg
    2012-01-20 004.jpg
    50.7 KB · Views: 2,318
  • 2012-01-20 006.jpg
    2012-01-20 006.jpg
    50.7 KB · Views: 2,313
  • 2012-01-22 002.jpg
    2012-01-22 002.jpg
    34.2 KB · Views: 2,290

Members online

Forum statistics

Threads
278,307
Messages
3,554,056
Members
248,016
Latest member
Advally Service

Trending content

Back
Top