Warthog Build and Adventure Thread

Horray!

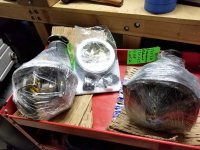
Got my diffs from EGCS today!

Front and rear, 4.88 gears, with ARB locker in the back.

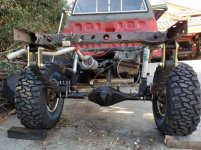
I am in the middle of adding a long travel setup in the back but I needed a new driveshaft that I am still waiting on to set the pinion angle and finish all the welding on that before I can install these babies.

Eventually when I end up with 36 inch tires I'll be sorry I didn't just go to 5.29 probably :P
 

Attachments

  • 20190110_152110_sm.jpg
    20190110_152110_sm.jpg
    120.3 KB · Views: 523
Got my diffs from EGCS today!

Front and rear, 4.88 gears, with ARB locker in the back.

I am in the middle of adding a long travel setup in the back but I needed a new driveshaft that I am still waiting on to set the pinion angle and finish all the welding on that before I can install these babies.

Eventually when I end up with 36 inch tires I'll be sorry I didn't just go to 5.29 probably :P

For the '86 with 36, yeah, 5.29's would be better. At least Marlin can take your money for a doubler. I miss my old 86 SR5.
 
Finally a day off of work without it raining!

20190119_142758sm.jpg

Got the spring mounts welded up, painted and the springs installed, the spring perches on the axle aren't welded yet as I am STILL waiting for my drive shaft. I'm not sure but 50/50 chance I'm going to be screwed on it and losing a months worth of work. :(
 

Attachments

  • 20190119_142758sm.jpg
    20190119_142758sm.jpg
    131.5 KB · Views: 441
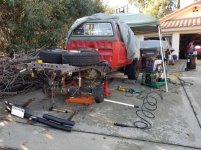
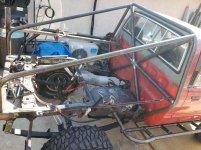
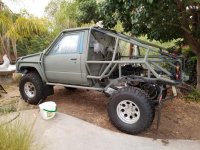
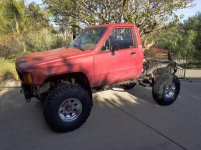
Three days of work on the truggy this weekend. Completed the back end, new drive shaft, reman diff with 4.88 gears and arb locker, replaced axle bearings and seals, new springs and shocks. And finally new wheels and tires.

20190127_135826-sm.jpg

Look at that rake!

Well the back end has zero weight on it, should go down a couple inches or more when done :D Also I have a ball joint spacer kit for the front which I would rather not use, but if after finishing the roll cage/flatbed and mounting the spare it still looks ridiculous I'll put it on.

20190127_144310-sm.jpg

The cab still has a 3in spacer lift which I will be removing.

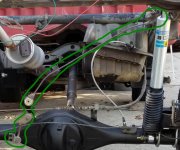
Hey so... does anyone know what this thing is? Part of the braking system. I'll need to fab up an extension for it but.. what is it? Some kind of primitive anti-chatter/bounce device when braking hard?

20190127_135826-sm-2.jpg
 

Attachments

  • 20190127_144310-sm.jpg
    20190127_144310-sm.jpg
    84.1 KB · Views: 432
  • 20190127_135826-sm.jpg
    20190127_135826-sm.jpg
    92.3 KB · Views: 408
  • 20190127_135826-sm-2.jpg
    20190127_135826-sm-2.jpg
    128.2 KB · Views: 389
What is this?

That appears to a brake proportioning valve, if the brake lines run through a little block on the upper end.

As you add weight, either a trailer or stuff in the bed, the linkage allows more brake bias on the rear wheels as your traction (weight) increases, and vice versa, keeps the rear tires from locking up too easily when there is no weight (like your bedless config right now).

Hope that helps!

Narat
 
Some Truggy pics because I'm bored...

20190206_133803_sm.jpg

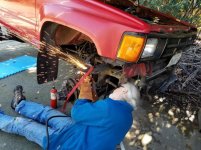
First a puzzle. Can you count the OSHA violations going on here? I did forget to wear my welding smock anbd burned a couple of big holes in a shirt I wasn't really ready to throw away yet.

I am cutting a notch on the underside of the UCA to fit in a cheap spacer lift until such a time that I go crazy and spend $$$ on a solid axle swap.


20190209_161209_sm.jpg

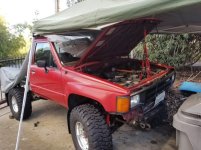
In the middle of removing the stupid 3 inch body lift I installed 30 years ago for no good reason. Straps are suspending the radiator til it's completely down and I can reattach it at it's normal mounting points.


20190210_131755_sm.jpg

The ***** part was shortening the shifters by 3 inches. This is the transfer case one and was the easiest. The gear shift is so long that the tiniest fraction of an inch off on rotation or angle when reattaching it made the shift knob move like three inches in the cab. I tacked and retacked it 5 times before it was right :P


20190211_151736_sm.jpg

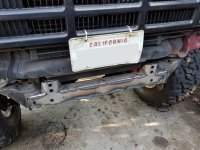
Welded on a front frame brace to try to keep the front of the frame from ripping off when using a winch or a tow hook on the bumper that is going on there. Hope it works!


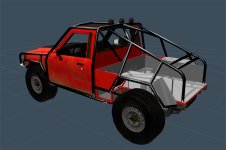
Cage_sm.jpg

Finally, a bit of Blender 3D work to envision how the roll cage might look.
 

Attachments

  • 20190206_133803_sm.jpg
    20190206_133803_sm.jpg
    86.7 KB · Views: 963
  • 20190209_161209_sm.jpg
    20190209_161209_sm.jpg
    76 KB · Views: 980
  • 20190210_131755_sm.jpg
    20190210_131755_sm.jpg
    70.7 KB · Views: 937
  • Cage_sm.jpg
    Cage_sm.jpg
    114.4 KB · Views: 926
  • 20190211_151736_sm.jpg
    20190211_151736_sm.jpg
    117.6 KB · Views: 950
Compressor is doing fine there. My only worry is the heat from the engine compartment. No problems so far, used it a lot, but not sure if it might be shortening it's life or something :/

The mounting bracket I made is really sturdy and it bolts to preexisting reinforced mounting points on the body so it's really solid!

As for the wiring. I bought the ARB harness to SPod adapter and plugged it into the SPod. Then used one of the switches on ITS cable. (I did pry off the ARB logoed switch rocker and pot it on the SPod switch :D)

I just realized I never took any pictures of the SPod or where I mounted the switches... But anyway the hollow slot at the bottom of the center console behind the drivers cup holder was just large enough to make a metal bracket to hold all 6 SPod rocker switches...

View attachment 167769

any more info you could provide about what kind of braket you had to make to mount switches? I have an sPOD with custom switches very similar to what you have. im just wondering how much plastic im gonna have to cut.
 
any more info you could provide about what kind of braket you had to make to mount switches? I have an sPOD with custom switches very similar to what you have. im just wondering how much plastic im gonna have to cut.

Well good news is I didn't cut any plastic there! (Er well I did need to put a hole in the back of the cubby large enough to get the cable through it)

I used some steel from an old computer case cover. I marked (But didn't cut) a rectangular slot just big enough to fit all the switches into it. Then I cut it to the width of the little cubby hole I was going to put it into, Then I left about an inch of metal above and below the switch hole which I bent back using my vice.

So I now had a channel shaped piece of steel which I could slide into the hole and adjusted the top and bottom tabs a bit so it fit a little loose but as flush to the top and bottom of the cubby hole plastic.

I then cut out the actual hole for the switches and mounted them in to it.

Thinking back on it I may have used a piece of chipboard to make a template that fit well before cutting the metal.

As for mounting it. This may seem a tad Janky but it's been holding well for a while now. I used Servo Tape. It is a thinish but very strong two sided foam tape for mounting servos in RC planes.

Clean the plastic and metal with alcohol, peel tape on once side and stick to bracket. Peel back a corner and fold over and towards the front so that like 1/4 in is sticking out for both strips. Then carefully insert the whole thing in the cubby (not too tight). Peel off the tape from both strips, holding it in place. Then press it in really tightly. Tada!


Now that was a few years ago. I JUST bought a new one, same model (The cheapest one they make) and it came with a nice simple plastic holder for all the switches! It looks like it might be a little too big for the space, but some modification of it might make it fit.
 
Axel wrap!

Ok so... I put on a long travel rear leaf kit. Removed a couple leafs to soften ride (And actually attain some of that long travel)

So now the axle wrap is palpable. Feel it mostly going from 3rd to 4rth and REALLY bad when slowing down from high speed.

So I know that "ladder bars" are like the go-to way of fixing this on high performance cars/trucks, but anyone that HAS fixed this, is that what you did? May be kind of overkill for this application... But if so, where did you get them?

If not, is it possible to rig up an articulation point directly to the top of the pumpkin using a heim joint and attaching it to a frame cross member or something simpler?

Looking for ideas.

Thanks :)
 
The FauxRunner truggy is still at the fabricators and I'm chomping at the bit for it's return! I was warned that it would only be worked on 2 days a week though. So far the work is looking really nice.Might be about half done.
 

Attachments

  • Resized_20190417_163056.jpg
    Resized_20190417_163056.jpg
    135 KB · Views: 642
  • Resized_20190417_163251.jpg
    Resized_20190417_163251.jpg
    139.4 KB · Views: 630
Awesome thread, lots of good info here and a drawer system I may attempt to copy. Thanks Warthog.

Also, I dig the '86, I have a long travel '92 that needs some love and you're inspiring me to wrench on it.
 
Awesome thread, lots of good info here and a drawer system I may attempt to copy. Thanks Warthog.

Also, I dig the '86, I have a long travel '92 that needs some love and you're inspiring me to wrench on it.

THanks!

And nice about the 92 :D

The one thing I am still debating is what to do on the front. Long travel or SAS. I know why I would do one or the other, meaning what the main purpose of the vehicle is. I just can't make up my mind about what I really want from it. Rationally I think it'll be more of an all over desert rig, rocks, trails, dunes, mud-hills long travel would probably be better. But if I want to concentrate more on rocks and MOAB type stuff... SAS.

Decisions decisions...
 
THanks!

And nice about the 92 :D

The one thing I am still debating is what to do on the front. Long travel or SAS. I know why I would do one or the other, meaning what the main purpose of the vehicle is. I just can't make up my mind about what I really want from it. Rationally I think it'll be more of an all over desert rig, rocks, trails, dunes, mud-hills long travel would probably be better. But if I want to concentrate more on rocks and MOAB type stuff... SAS.

Decisions decisions...

I know what you mean, I struggled with this for years (all the time I spent saving for LT ha!) and ended up with the long travel over the solid axle. I think the trend of KOH and fellow pros going to independent suspension speaks volumes, and I like to go fast as much as anyone. I am running the Total Chaos Caddy kit with the lower uniballs and boxed lower arms. This was the best for a "go everywhere" kind of rig, which is what I think you're looking for also. My plan is to change the springs out for something softer, slow down the valving on the coilovers and run a second bypass shock for the higher speed stuff. I don't foresee myself running anything as tough as the hammers, but Big Bear is my usual stomping grounds and it should be more than capable of a smooth ride there, handling business on the trails and a smooth ride back. :rockon:
 
I know what you mean, I struggled with this for years (all the time I spent saving for LT ha!) and ended up with the long travel over the solid axle. I think the trend of KOH and fellow pros going to independent suspension speaks volumes, and I like to go fast as much as anyone. I am running the Total Chaos Caddy kit with the lower uniballs and boxed lower arms. This was the best for a "go everywhere" kind of rig, which is what I think you're looking for also. My plan is to change the springs out for something softer, slow down the valving on the coilovers and run a second bypass shock for the higher speed stuff. I don't foresee myself running anything as tough as the hammers, but Big Bear is my usual stomping grounds and it should be more than capable of a smooth ride there, handling business on the trails and a smooth ride back. :rockon:

Oh nice! Heh I could use the same kit :D

The truggy is still at the fabricators, but they are on the last segment of the build so hopefully I'll have it back soon.

Thanks for the info!
 
I finally got the truggy back!!

Just in time for the hottest part of the year to do more work on it myself :P

All the piping was starting to rust (Though was mostly covered with oil. So First thing was to wash all the oil off the tubing, and the cab, scotchbrite everything and and primer the entire thing to stop any further rusting.

I have got the taillights all installed and working though, also all the other offroad light tabs as well as custom made radio antenna brackets and dune flag brackets.
 

Attachments

  • Promered_Web.jpg
    Promered_Web.jpg
    140.4 KB · Views: 434
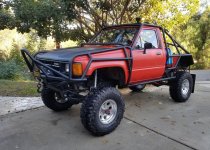
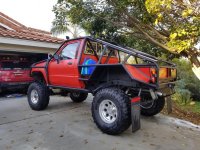
Quick truggy update. Finished painting, bed, bedsides/fenders, trunk, tailgate and SAS. Only missing front drive shaft at the moment.

Thinking of naming this one "Bessie" because it steers like a cow :D
 

Attachments

  • imgur-truggy-098.jpg
    imgur-truggy-098.jpg
    138.7 KB · Views: 409
  • imgur-truggy-101.jpg
    imgur-truggy-101.jpg
    140.7 KB · Views: 391
Last edited:

Members online

Forum statistics

Threads
278,310
Messages
3,554,077
Members
248,016
Latest member
Advally Service

Trending content

Back
Top