Warthog Build and Adventure Thread

The minimal looks pretty good to me, but if you use the original fog lamps for close in lighting I believe there will be a lot of cut off of the pattern. The mid is my favorite though. Very clean.
 
low or mid look the best to me. I didn't like the "low" at first, but it kind of grew on me. cant wait to see what you come up with.

your build is pretty freaking sweet. sub'd. :pop2:
 
Top or medium height looks great, let me know if you decide to make limited production of them [emoji6]
 
I like the middle bumper option Larry. Although it would be a bummer to lose stock fogs it looks the cleanest/most functional.
 
Man your runner is awesome. Really enjoyed looking through your build thread. Great pics and great ideas. Thanks! Also, very jealous of the amazing back country you get to explore.
 
I like where you are heading with those bumper designs. If someone were to produce something along the lines of your minimal design...I might be inclined to purchase one, if the price was right. Just saying...
 
Sooooooo...

I don't /really/ need a new project right now but. After the last trip I was sort of pining for a more full bumper. Just, something I can use to bump into a rock or cliff face if needed without worrying too much about the front fender/lights being the first thing to contact the wall.

Given that I also kind of feel like a goof for buying expensive bumpers when I SHOULD be making them since I have all the tools to do so. I've been thinking about what it would take to extend my SSS slimline bumper to cover more of the front.

The slimline bumper is a great base already, with hidden winch mount and everything. All I'd have to do is add some more metal and bracing on the sides!

SO last night I took a recent picture and photoshopped up a couple of possible designs from the front.

First. As it is now:
View attachment 160355

The minimal approach. Low bumper but high enough for my typical rock climbing limits. Top of bumper goes just under the built in fog lights.
View attachment 160356

Med height. Top of bumper goes to just the top of the current fog lights.
View attachment 160357

Top height. Top of goes to the top of the plastic bumper cover at the wheel well.
View attachment 160358


Leaning towards the low or medium ideas... Overall I still want to keep it light as possible and look nice with the current front end. SO no over the top hoops or anything :)

Not sure if you belong to the 4runner group on Facebook, but have you seen Helmo Rodas Palacios...
10628315_10153508834224369_4483062374934912062_n.jpg
 
He's got a build on his page via facebook. I've asked him to join here and post a build thread because he did a AWESOME job. He did a slimline front/rear for 900.00 total...
 
Ha yes, there was a thread or two here about that guys work a few months ago. :D

Beautiful work for sure!

Yeah I remember that, but I couldn't find it and I have him friended on Facebook, lol.

I really wanted to do something similiar for my build, but limited due to disability. My dad is going to build my rear bumper. Swear's he can do it for like material and 2 weeks..lol
 
Sooooooo...

I don't /really/ need a new project right now but. After the last trip I was sort of pining for a more full bumper. Just, something I can use to bump into a rock or cliff face if needed without worrying too much about the front fender/lights being the first thing to contact the wall.

Given that I also kind of feel like a goof for buying expensive bumpers when I SHOULD be making them since I have all the tools to do so. I've been thinking about what it would take to extend my SSS slimline bumper to cover more of the front.

The slimline bumper is a great base already, with hidden winch mount and everything. All I'd have to do is add some more metal and bracing on the sides!

SO last night I took a recent picture and photoshopped up a couple of possible designs from the front.

First. As it is now:
View attachment 160355

The minimal approach. Low bumper but high enough for my typical rock climbing limits. Top of bumper goes just under the built in fog lights.
View attachment 160356

Med height. Top of bumper goes to just the top of the current fog lights.
View attachment 160357

Top height. Top of goes to the top of the plastic bumper cover at the wheel well.
View attachment 160358


Leaning towards the low or medium ideas... Overall I still want to keep it light as possible and look nice with the current front end. SO no over the top hoops or anything :)

I love the low one. I want a full width but to keep the awesome look of the front end. I'd happily spend money on the low or mid option.
 
Whoa this thing is slow tonight!

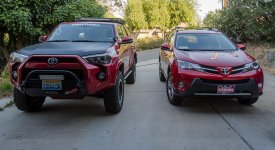
Ok so... I couldn't talk her into becoming a dual 4Runner family, but at least we are now a dual Yota family!!!

RunnerNRav4.jpg

2015 AWD Rav4 XLE with upgraded Navi. And Barcelona red just like the Warthog!

Now lets see... needs blacked out hood, lift, tires, skids and some lights. That aught to do it. :biggrin1:
 

Attachments

  • RunnerNRav4.jpg
    RunnerNRav4.jpg
    132.2 KB · Views: 1,666
Nice rig. Just curious, are you running the 2.5 Icons standard or extended travel up front?

Hi, thanks :)

I have the standard and am running them at +2.5 inches (out of a max of 3) The extended will do 3.5 but you start to run into other problems in the front end at that point (and need a 3 in lift in back instead of 2)
 
Well I finally got delivery of the SmittyBilt rack awning last weekend. Just had to weld up some brackets to mount it properly to the rack!

unfortunately after cutting the metal and getting ready to weld I noticed that I popped the diaphragm on the regulator :( $80 later I was able to finish them up...
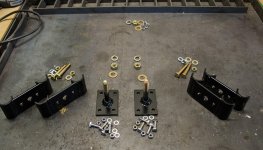
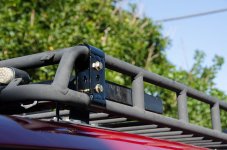
Awning1.jpg

They won't win any welding beauty contests, but are pretty beefy for what they are.

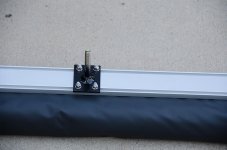
Awning2.jpg

The part that attached to the awning rail. I'm not going to drive everywhere with it on so I wanted to make it a quick attach/detach like the high-lift. So the part on the rack is permanent and then just two big nuts to tighten on and I'm good to go.

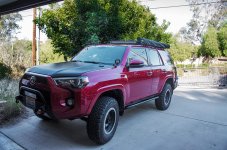
Awning3.jpg

Attached!

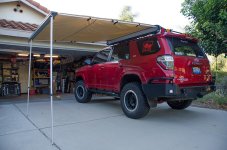
Awning4.jpg

Open!

Awning5.jpg

This'll be so sweet for the end of the day for shade and when it's raining.

Quick to setup and take down though one handed it is a /little bit/ tricky. If the wind was blowing it might be a chore by myself. With two people it's like a 2-3 minutes setup/teardown.

I have a lightweight stand alone one I take too, but this'll be really nice to have even for a lunch stop if the sun is out.
 

Attachments

  • Awning1.jpg
    Awning1.jpg
    103.6 KB · Views: 1,477
  • Awning2.jpg
    Awning2.jpg
    108 KB · Views: 1,461
  • Awning3.jpg
    Awning3.jpg
    70.7 KB · Views: 1,465
  • Awning4.jpg
    Awning4.jpg
    143.4 KB · Views: 1,435
  • Awning5.jpg
    Awning5.jpg
    136.8 KB · Views: 1,806
Nice! That will definatetly come in handy. Your rig has become one of my favorite 5th gens out there.....as far as the cosmetics of the welds I'll just stick to what our moms told us " lf you dont have anything nice to say dont say it at all".
:behindsofa:

J/k functionality over looks is what matters anyway
 

Members online

No members online now.

Forum statistics

Threads
278,312
Messages
3,554,083
Members
248,016
Latest member
Advally Service

Trending content

Back
Top