
levi.watson
New member
So this won't be anything too terribly exciting for most of y'all, but for me it is hah. This will be my build thread for my 89 4Runner that I will be slowly adding to, for my own records and so I can ask more questions =).
When I started:
4Runner had been sitting in the field 3 years, put there by a head gasket/other issues.
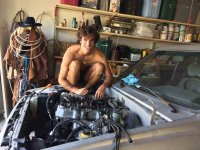
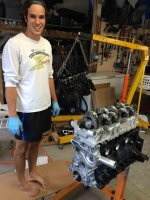
Stock everything as I know. It was my parents, it was totaled in the first month of their owning it, mom fell asleep and rolled it. Luckily she was fine, the car got put back together, move on 20 more years and it's in the field. I bought a 97 Subaru Outback that had blown HG's (unknowingly), and that put that one in the field as well. I traded my dad for his 4Runner and bought a rebuilt engine from Oregon Engine Rebuilders, which my dad and I put it in over the course of two months. Neither of us had done any mechanic work of this type before, so there was lots of forum searching and YouTubing. Now I have it still fairly stock, with pretty much all new engine components that were needing replaced. Only things that aren't stock are the tires (30") and an electric fan instead of the clutch driven fan.
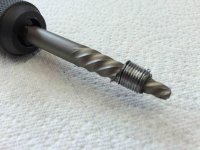
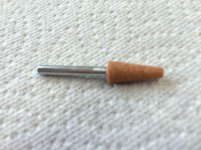
The treads you see on the easy out definitely deserve to be in here, they probably represented the hardest part of this entire process. I was installing the new oil pressure sending unit, and decided to torque it a little too much. Broke off. Not the end of the world, shouldn't be too hard to get off, and it's like a $10 part. Wrong. It was REALLY hard to get out. I had to leave the next day to go to a conference, so my dad got the joy of pulling it out. Ended up breaking an easyout on it, getting that stuck in there, and then having to take the blurry cone looking deal and grinding that out, and then taking another easyout to pull it out. Glad to miss out on that one.
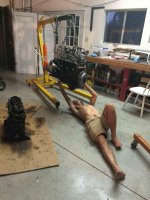
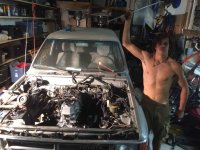
The last picture is one also representing triumph, as we finally got the engine to hook into the bell housing.... that took a couple nights! Planning a big overhaul on my interior (that looks like crap) either this weekend or next.
*Can someone tell me how to add captions to the pictures? Slightly annoying that I can't figure that one out ha.
When I started:
4Runner had been sitting in the field 3 years, put there by a head gasket/other issues.
Stock everything as I know. It was my parents, it was totaled in the first month of their owning it, mom fell asleep and rolled it. Luckily she was fine, the car got put back together, move on 20 more years and it's in the field. I bought a 97 Subaru Outback that had blown HG's (unknowingly), and that put that one in the field as well. I traded my dad for his 4Runner and bought a rebuilt engine from Oregon Engine Rebuilders, which my dad and I put it in over the course of two months. Neither of us had done any mechanic work of this type before, so there was lots of forum searching and YouTubing. Now I have it still fairly stock, with pretty much all new engine components that were needing replaced. Only things that aren't stock are the tires (30") and an electric fan instead of the clutch driven fan.
The treads you see on the easy out definitely deserve to be in here, they probably represented the hardest part of this entire process. I was installing the new oil pressure sending unit, and decided to torque it a little too much. Broke off. Not the end of the world, shouldn't be too hard to get off, and it's like a $10 part. Wrong. It was REALLY hard to get out. I had to leave the next day to go to a conference, so my dad got the joy of pulling it out. Ended up breaking an easyout on it, getting that stuck in there, and then having to take the blurry cone looking deal and grinding that out, and then taking another easyout to pull it out. Glad to miss out on that one.
The last picture is one also representing triumph, as we finally got the engine to hook into the bell housing.... that took a couple nights! Planning a big overhaul on my interior (that looks like crap) either this weekend or next.
*Can someone tell me how to add captions to the pictures? Slightly annoying that I can't figure that one out ha.
Attachments
Last edited:


