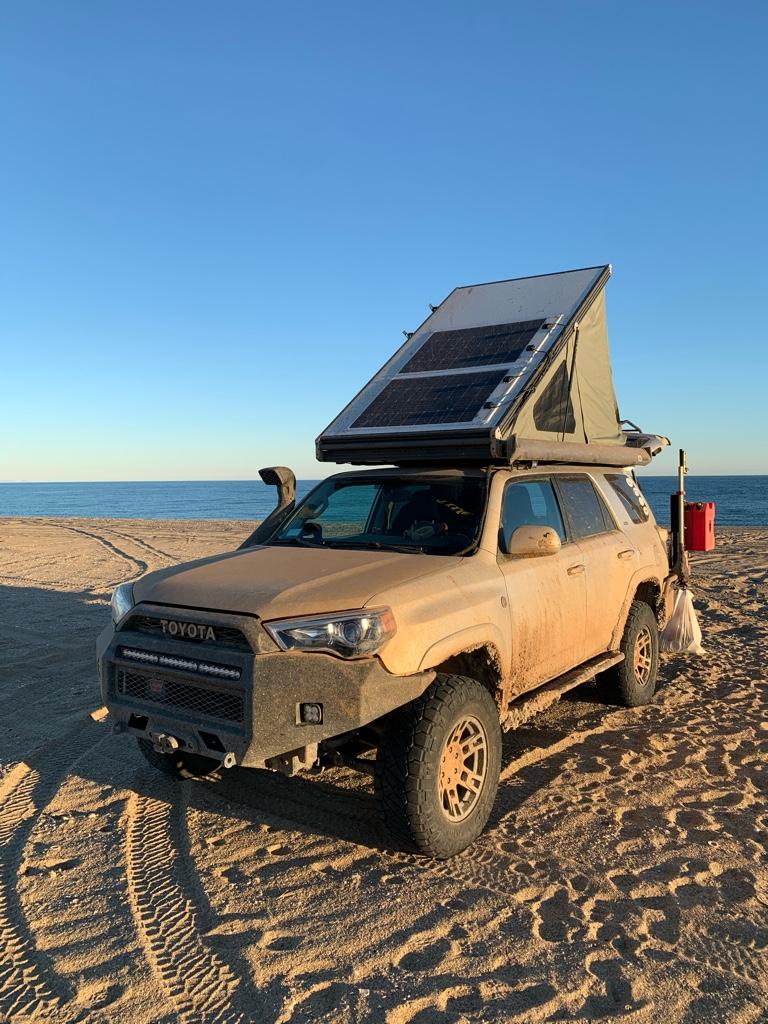
Where to run cables for solar?

DaPole

New member
I've tried searching for solar panel installs, but haven't really come across much other than an install on a 3rd gen where they ran the wires through the back, I believe it was. I was a little surprised at my lack of results, as it seems talk of solar panels on our trucks is frequent enough.

Anyhoo, I live in Arizona, where sometimes it gets warm. I also have an ARB fridge, which I've found drains my aux yellow-top battery in about a day or so, since the temp inside the 4R reaches 140-150 during the day. I bought the fridge to have cold drinks anytime, anywhere. Now with my job being only a 2 mile drive, I don't drive enough to keep the battery regularly charged. I was wanting to get a 100W panel to leave on my roof rack to try and keep the battery more charged.

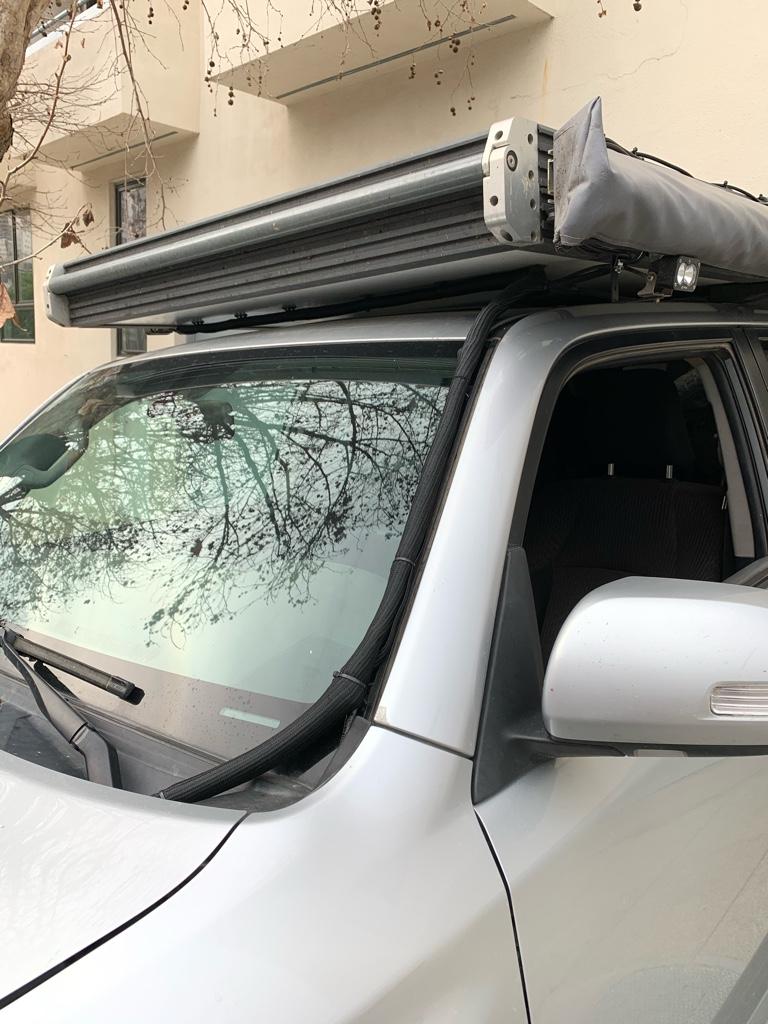
Obviously, the best performance would be by having the shortest distance wires from the panel to the battery. But the wires are 10ga each, and if the 4R exterior panels on the A pillar are anything like the FJ's (from what I remember), I doubt I'd be able to get 2 under there and get the panel back on and looking stock. Am I wrong on that? Or are my only solutions to either go through the back (or maybe through the sharkfin) or otherwise, drill through the roof? I plan on keeping the 4R "forever", so I'm not completely against drilling, although it would be a last resort. Otherwise, does anyone know how much performance of a solar panel might degrade by running the wires to the back of the vehicle and then through the interior into the engine compartment, rather than the much shorter distance of either drilling or going down the A pillar?

Thanks!
 
Register to hide this ad
You might want to check this out for the things you were looking for a good read about this website is they specialize in solar powered equipment. Best of luck dude. :keyboard:
 
Figured I would update a dead thread to show my solution and ask for any better options

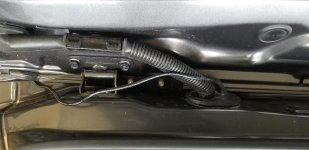
I wanted the wires to basically come straight off the back and into the tailgate, but the tailgate pinches too closely against the roof when you raise it. A little to the side and there was no pinching.

BRnqWiZ.jpg

uYRP7U4.jpg

fRuq52o.jpg

wn7fsp1.jpg
 
Thanks for posting the pics [MENTION=135175]jhguth[/MENTION] !! I'm working on this same project currently and your tips are just what I needed.

I'm curious; how did you get the wires through the grommet (ie - make a clean hole without destroying it)? Also, any concerns about it leaking there? Cheers!
 
Thanks for posting the pics [MENTION=135175]jhguth[/MENTION] !! I'm working on this same project currently and your tips are just what I needed.

I'm curious; how did you get the wires through the grommet (ie - make a clean hole without destroying it)? Also, any concerns about it leaking there? Cheers!

I just used a knife and made a small x, it's easy to remove the grommet and there is loads of space through the grommet and in the rubber boot. The hole is at the top so water shouldn't be able to get in and I have a drip loop on the wire, but I also covered with tesa tape to make sure none of the hole is exposed and the wire is loomed.
 
Still need to clean up the engine bay wiring and mount the charge controller in its final spot, but i connected everything to test and it's working perfectly
c53ccccaa07031a76b4495306b06d788.jpg


Sent from my SM-G960U using Tapatalk
 
I did a similar thing. Routed the wires slightly differently but ended up through the grommet. I brought mine down to where the jack is and plug it into my goal zero yeti when I have it in the truck. I also recently wired a chase light and also brought it through the grommet so i could bring it through the cab, through the firewall, to the battery.

Good luck! Its pretty easy overall. I did put some silicone on the grommet just to be safe.
 

Attachments

  • gz2.jpg
    gz2.jpg
    78.3 KB · Views: 3,719
  • gz1.jpg
    gz1.jpg
    55.6 KB · Views: 3,760
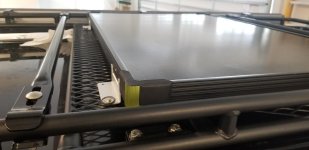
[MENTION=135175]jhguth[/MENTION] - Really like this setup. I have been looking for some examples of solar panels on different roof racks. I was curious how you secured the panel so neatly between the crossbars? Thanks again for the great post and pics.
 
[MENTION=135175]jhguth[/MENTION] - Really like this setup. I have been looking for some examples of solar panels on different roof racks. I was curious how you secured the panel so neatly between the crossbars? Thanks again for the great post and pics.

I drilled through the side of the LFD crossbars and through the aluminum frame of the panel and used small SS screws to attach them together. When i aligned the holes i set the panel on spacers so that it is slightly recessed, i can still throw lumber or something on the rack without the panel being in the way (although in a couple minutes i could remove the whole assembly of crossbars and panel if i wanted with a single tool)

Only thing that didnt work well were the 3m wire clips to organize the wires under the panel, i think it wasnt real 3m adhesive and some of them have popped off. Need to take it off and and replace a couple with zip ties

Crossbar attachment - Album on Imgur
 
Last edited:
I don't permanently mount mine. It's on for trips, off otherwise and stored in my garage. There's no reason I have to leave the wiring in place during driving. I literally just glued the charge controller to the back of the solar panel. So... when I'm parked at camp - I run aligator clips to my battery. When I'm driving - I coil them up and put them in the back.

In generally I think you'll find that you're better served to have solar panels that are not fixed to the roof. If it's hot - you want to park the car in the shade and have the solar panels in the sun. You will typically also want to move the panel orientation through the day to get the best charging. If I didn't already have rigid solar panels for my trailer - I would not buy rigid panels. I would buy a fold up solar setup.
 
Last edited:
Obviously, the best performance would be by having the shortest distance wires from the panel to the battery. But the wires are 10ga each, and if the 4R exterior panels on the

Thanks!

With a 100 watt panel, you could get away with significantly smaller than 10 AWG. Closer to 14 AWG would be adequate for the current generated by that panel.

Keep in mind the panel operating voltage is different than the cars electrical system. You only need to worry about wiring between the panel and the solar charge controller.

Under load from the solar charge controller the panel is usually sitting around 17.5 volts, and at 100 watts that would be approx. 5.7 amps, well within the capability of 14 AWG wire.

I highly recommend getting a nice MPPT controller like the Victron Smart Solar units. I have bought many over the years and these have been the best of the best.

SmartSolar MPPT 75/10, 75/15, 100/15 & 100/20 - Victron Energy
 
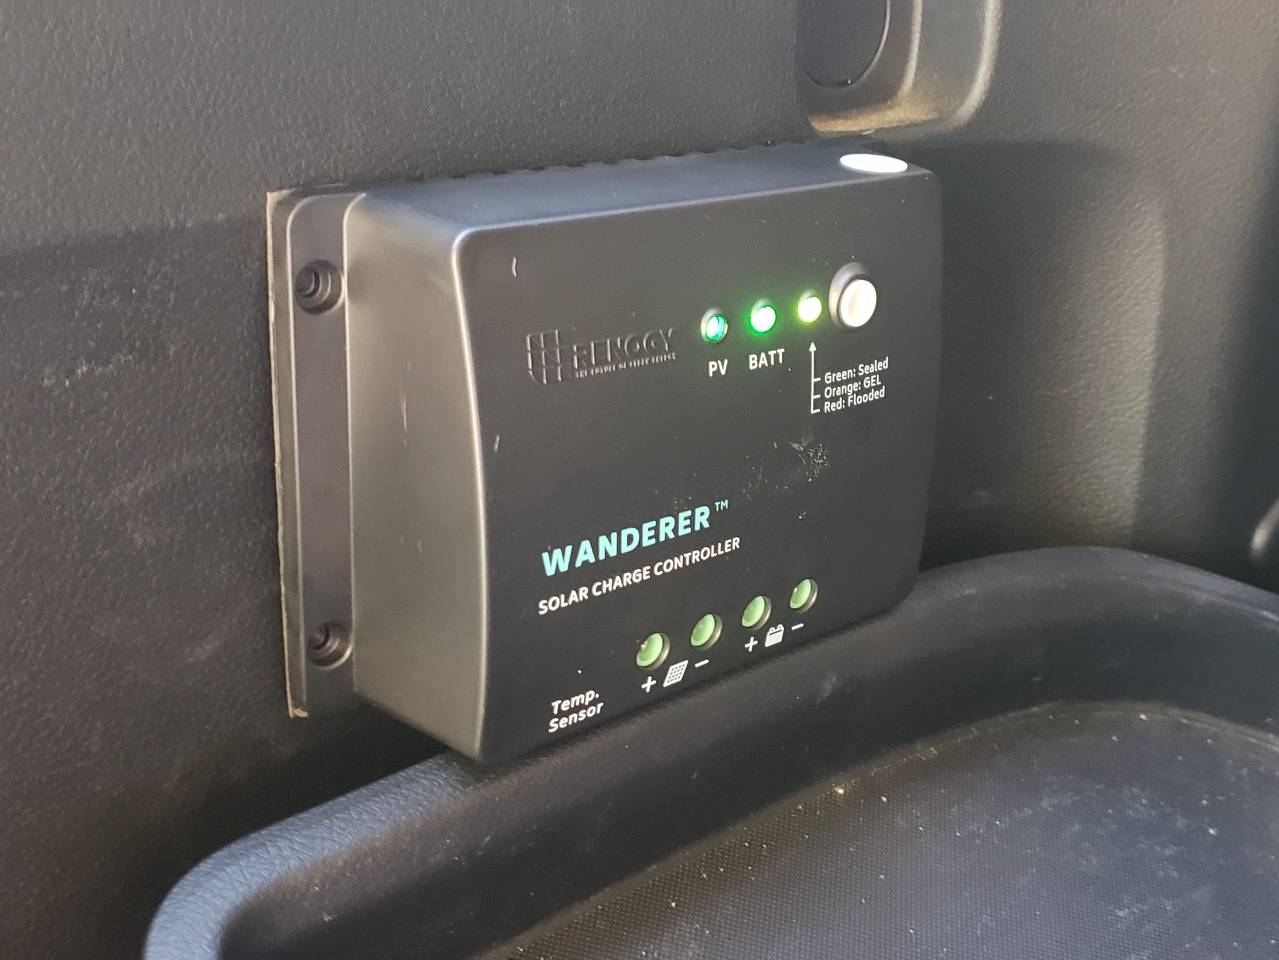
Does anyone have good experience with mounting solar charge controllers in the engine bay? I'm currently trying to find a good MPPT that is weather proof but just wanted to understand the best location for it given the heat inside the bay etc. My current thinking is to mount it on top of the factory fuse box but that space may, in the future, be occupied by S-Pod so I really want to avoid doing that. Any good place on the passenger side?
 
Does anyone have good experience with mounting solar charge controllers in the engine bay? I'm currently trying to find a good MPPT that is weather proof but just wanted to understand the best location for it given the heat inside the bay etc. My current thinking is to mount it on top of the factory fuse box but that space may, in the future, be occupied by S-Pod so I really want to avoid doing that. Any good place on the passenger side?

Depends on the controller... some are and some are not.

Take a look at Victron Energy Smart MPPT... excellent units.
 
Depends on the controller... some are and some are not.

Take a look at Victron Energy Smart MPPT... excellent units.


Thanks. The Victron 70/10 or 15 are on my shortlist but they are not fully sealed. The bluetooth is the best feature which is going to be pretty useful. Thinking of trying to fit a 1/2" thick MDF under the carpet under the passenger seat adjacent to the AC vents. Want to experiment with double sided gorilla glue tape instead of bolting it in. Could mount it there and still have room for mounting a future HAM radio as well.
 
Thanks. The Victron 70/10 or 15 are on my shortlist but they are not fully sealed. The bluetooth is the best feature which is going to be pretty useful. Thinking of trying to fit a 1/2" thick MDF under the carpet under the passenger seat adjacent to the AC vents. Want to experiment with double sided gorilla glue tape instead of bolting it in. Could mount it there and still have room for mounting a future HAM radio as well.

It is IP43 (electronic components), IP22 (connection area), which is probably more protection than most controller out there.

Still, I prefer to install inside clean spaces, but I have one installed in my patio at home and it's held up well. That said, I do try and keep it protected. Mine is installed in the rear of the 4Runner, make sense for my panel and battery setup. Its just feeding the aux battery directly from the power point for my fridge.

I have used a lot of different controller and these are by far my favorite.

CgDWZRK.jpg
 
Last edited:
It is IP43 (electronic components), IP22 (connection area), which is probably more protection than most controller out there.

Still, I prefer to install inside clean spaces, but I have one installed in my patio at home and it's held up well. That said, I do try and keep it protected. Mine is installed in the rear of the 4Runner, make sense for my panel and battery setup. Its just feeding the aux battery directly from the power point for my fridge.

I have used a lot of different controller and these are by far my favorite.

CgDWZRK.jpg

Could you please share how you did the install in the back? And how you ran the wires from the roof into the trunk. I too plan on running a 4 AWG wire back to the trunk and into a box to power the fridge. It would make some sense to just place the MPPT there.
 
Last edited:
Could you please share how you did the install in the back? And how you ran the wires from the roof into the trunk. I too plan on running a 4 AWG wire back to the trunk and into a box to power the fridge. It would make some sense to just place the MPPT there.

My setup isn't permanent... primarily because my roof load-out changes based where I am going and what I am doing.

I also have enough battery that I really don't NEED solar. I can run the fridge for at least 3 days without any supplemental charge. It's a custom 24v lithium battery that I made and is charged using a Victron DC-DC converter. For charging it plugs directly into the 12v accessory jack in the back of the 4Runner. No permanent modification needed to the 4Runner to have a "dual battery"

All the power connections in my truck are on Anderson quick disconnects... I can just plug it in/out as needed. I just drape loomed power cable into the back thru the hatch and close it. Not elegant but it works fine.

YouTube

SelAI0U.jpg


FbRCgUo.jpg


CaB3TvM.jpg
 
Last edited:

Members online

Forum statistics

Threads
278,312
Messages
3,554,085
Members
248,016
Latest member
Advally Service

Trending content

Back
Top