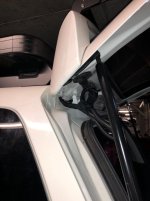
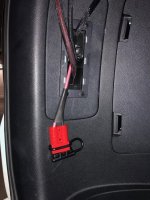
Where to run cables for solar?

My setup isn't permanent... primarily because my roof load-out changes based where I am going and what I am doing.

I also have enough battery that I really don't NEED solar. I can run the fridge for at least 3 days without any supplemental charge. It's a custom 24v lithium battery that I made and is charged using a Victron DC-DC converter. For charging it plugs directly into the 12v accessory jack in the back of the 4Runner. No permanent modification needed to the 4Runner to have a "dual battery"

All the power connections in my truck are on Anderson quick disconnects... I can just plug it in/out as needed. I just drape loomed power cable into the back thru the hatch and close it. Not elegant but it works fine.

Thanks for that.

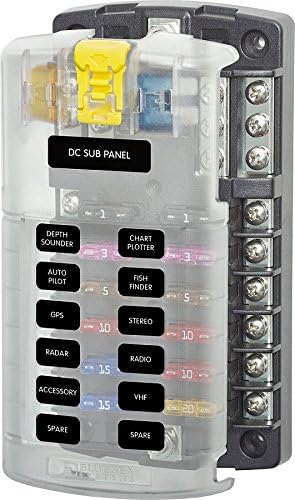
I am a bit stuck in how and where I plan on mounting my MPPT. I have a Victron 75/15 and an MPPT controller on the way along with a blue sea fuse block. The fuse block will live in the trunk's jack access panel and I'll wire 2 x 6 AWG cables into it from the the engine bay (with a breaker located in the bay) with the positiving and negative coming off my starter (and only) battery. When I do add the fridge (whenever Engel launches its new line in the US)

I'll hard wire it into the panel. The part that I need help on is figuring out where, and how to wire the MPPT. Should/Could I connect through the fuse block? If so how exactly?
518W5pWSqWL._AC_.jpg
 
Thanks for that.

I am a bit stuck in how and where I plan on mounting my MPPT. I have a Victron 75/15 and an MPPT controller on the way along with a blue sea fuse block. The fuse block will live in the trunk's jack access panel and I'll wire 2 x 6 AWG cables into it from the the engine bay (with a breaker located in the bay) with the positiving and negative coming off my starter (and only) battery. When I do add the fridge (whenever Engel launches its new line in the US)

I'll hard wire it into the panel. The part that I need help on is figuring out where, and how to wire the MPPT. Should/Could I connect through the fuse block? If so how exactly?

Good choice on the fuse panel, I use those quite often. I like the models that have a negative bus built into them, it simplifies wiring.

Just mount the Victron wherever you can find space for it. It's got Bluetooth connectivity so it's not like you actually need to see it to figure out what's going on.

I would connect the Victron MPPT battery screw terminal output directly to one of the fuse panels outlets and just backfeed the system. Perfectly acceptable way of going about it.

Just a fun tip... the load output of the Victron is basically a programmable low voltage disconnect, similar to the BlueSea m-LVD. It's only a 10-15 amp output which is pretty useful to make sure things like always on USB outlets or small always on loads don't drain the system down. If you need to control a much larger load you can use that output to control a relay or contractor. System is pretty flexible and you can get creative with it in may ways.
 
Last edited:
I would connect the Victron MPPT battery screw terminal output directly to one of the fuse panels outlets and just backfeed the system. Perfectly acceptable way of going about it.

Thanks again for all your help and patience. So you recommend just running the + cable from the MPPT into a fused (20A for a 15 A MPPT?) + terminal on the blue sea fuse box? and the negative will go into one of the ground locations. I didn't realize you could backfeed this and utilize one of the 12 to send power back into the battery. I hope I'm understanding this correctly This will make my life a lot easier. I have to order cables tonight but haven't yet decided on 4 AWG vs 6 AWG. I probably won't ever install a very large inverter and fear that I may get stuck getting 2 4 gauge wires through the grommet given that I have 2-3 cables that I've sent through there already (and into the switches).
 
Thanks again for all your help and patience. So you recommend just running the + cable from the MPPT into a fused (20A for a 15 A MPPT?) + terminal on the blue sea fuse box? and the negative will go into one of the ground locations. I didn't realize you could backfeed this and utilize one of the 12 to send power back into the battery. I hope I'm understanding this correctly This will make my life a lot easier. I have to order cables tonight but haven't yet decided on 4 AWG vs 6 AWG. I probably won't ever install a very large inverter and fear that I may get stuck getting 2 4 gauge wires through the grommet given that I have 2-3 cables that I've sent through there already (and into the switches).

All these devices are connected in parallel... so you can connect both + and - terminals from the solar controller onto the BlueSea fuse block.

You have a common negative bus on your panel, I would use that instead of searching around for an alternate ground location.

In terms of your mains sizing, you should size it based off your anticipated load. Just look at the spec sheet for every accessory you think you might ever need, add up all the max current values, and size accordingly. For such a long run from front to back of the truck, I would use a fuse for circuit protection, but feel free to add a breaker as a supplement. A breaker is NOT a replacement for a fuse.

d7pdJEF.jpg
 
Last edited:
I would use a fuse for circuit protection, but feel free to add a breaker as a supplement. A breaker is NOT a replacement for a fuse.

I'm upgrading my battery terminals with the SDHQ billet terminal kit. I had been meaning to order the blue sea battery terminal fuse so I think that will take care of it. The breaker is really for me in case I need to shut the rear down completely when I'm off the starter battery and using the portable lithium. Do you think a blue sea breaker would do or should I just use a switch?
 
I'm upgrading my battery terminals with the SDHQ billet terminal kit. I had been meaning to order the blue sea battery terminal fuse so I think that will take care of it. The breaker is really for me in case I need to shut the rear down completely when I'm off the starter battery and using the portable lithium. Do you think a blue sea breaker would do or should I just use a switch?

Using a breaker as a switch is fine... I do it all the time. Whatever you decide to use, just make sure the breaker is rated for DC current.

Battery terminal fuse is fine. Any reputable brand should do. Stay away from no-name import sources.

As far as the terminals go... use what you like, but I am a big fan of the Fastronix Milspec terminal kit... It's so easy to stack up to 4 lugs per post and its built like a tank. It's also pretty affordable and super high quality. It's just a battery terminal, it doesn't need to cost $70 or be made out of machined billet aluminum.

Fastronix Solutions--Ground Strap

Amazon.com: Fastronix Military Spec Battery Terminal Top Post Kit: Automotive

$23/pair if you dont need the extras.
Amazon.com: Fastronix Top Post Military Spec Battery Terminal and Cover Kit: Automotive

crUmrTu.jpg
 
Last edited:
Obviously, the best performance would be by having the shortest distance wires from the panel to the battery.

Otherwise, does anyone know how much performance of a solar panel might degrade by running the wires to the back of the vehicle and then through the interior into the engine compartment, rather than the much shorter distance of either drilling or going down the A pillar?

Thanks!

This isn't always the case... your best performance would be to have the shortest wire distance from the panel/controller to the load, which is your fridge.

My ARB uses about 5 amps at full load (60 watts)... so your solar system would be feeding the load locally it was installed close to the fridge in the rear.

100 watt panel is going to produce about 8 amps in an ideal conditions, so you would return 3 amps (36 watts) back to the battery while the fridge is in operation.

Carrying 3 amps from the rear to the front battery over 10 AWG cable is more than sufficient.

In a nutshell... the degradation or loss of energy in transport isn't enough to worry about in this application. Just install it where ever its most convenient for you.
 
Last edited:
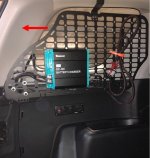
Any suggestions on how to route the PV cables through the headliner? I'm planning to do what others have done in terms of routing it through the grommet in wires through the trunk grommet and through the headliner? I want to sneak it through there and have it terminate in an Anderson connector mounted around where the arrow is in the picture.
 

Attachments

  • Solar Wires.jpg
    Solar Wires.jpg
    112.2 KB · Views: 1,007
Any suggestions on how to route the PV cables through the headliner? I'm planning to do what others have done in terms of routing it through the grommet in wires through the trunk grommet and through the headliner? I want to sneak it through there and have it terminate in an Anderson connector mounted around where the arrow is in the picture.

Super easy. Mine comes to the cubby where my jack is. Panels come off easily.
 
Super easy. Mine comes to the cubby where my jack is. Panels come off easily.


Thanks! Did you have to make a hole in the headliner? I'm trying to figure out what's the best way to go through the headliner with least amount of cutting into it.

The reason I want to terminate ahead of the jack area is because it will be feeding two charge controllers so I want to be able to disconnect and plug into a different CC when I have my auxiliary battery installed, and connect to the starter when I don't. The wire from the starter battery CC to the PV will sneak through the jack area while that for the aux battery will just come out externally and into the box.
 
Thanks! Did you have to make a hole in the headliner? I'm trying to figure out what's the best way to go through the headliner with least amount of cutting into it.

The reason I want to terminate ahead of the jack area is because it will be feeding two charge controllers so I want to be able to disconnect and plug into a different CC when I have my auxiliary battery installed, and connect to the starter when I don't. The wire from the starter battery CC to the PV will sneak through the jack area while that for the aux battery will just come out externally and into the box.

Gently use a pry tool to take off those 3 (i think 3) plastic things in the back of the headliner and it loosens right up. You can get underneath it to route to the pillar. Pillar comes loose easily too to route. Depending on what you want to accomplish you may be able to have cord sneak out somewhere vs drilling a hole.

I've routed solar that way and a chase light. No cutting of headliner.
 
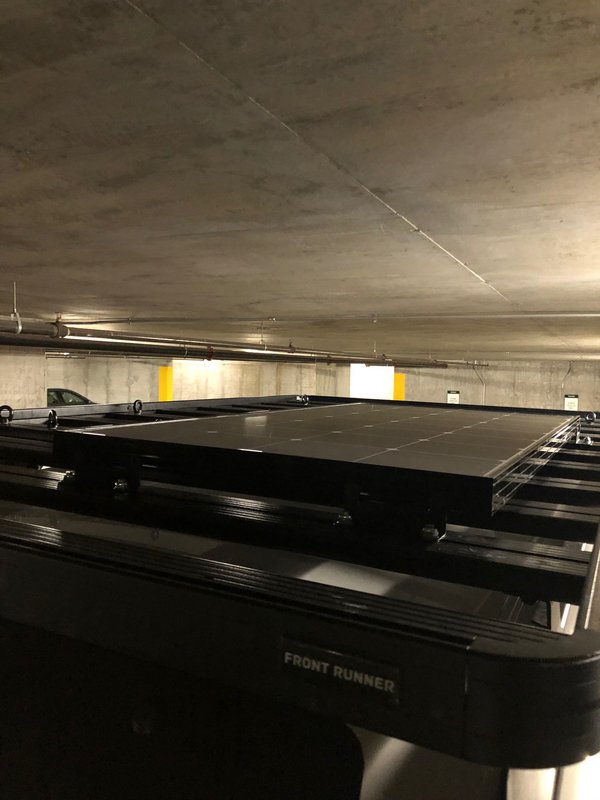
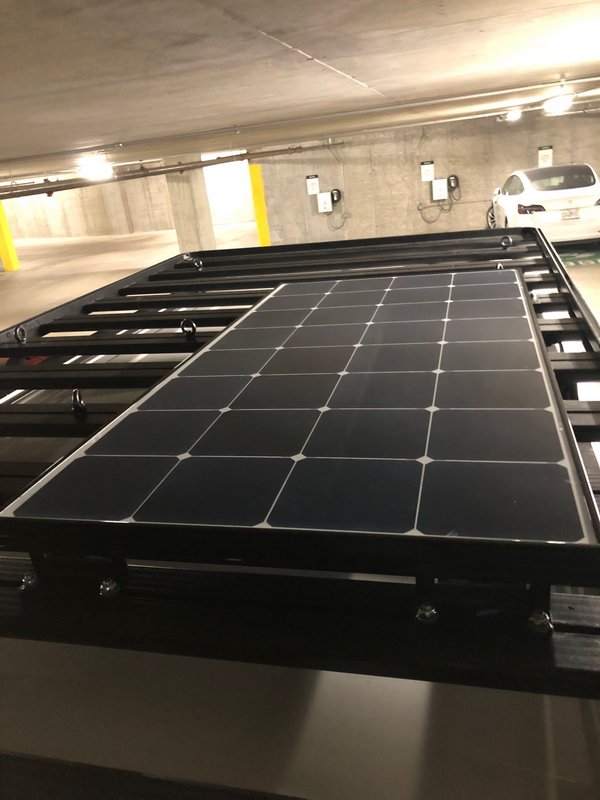
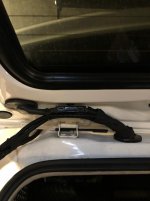
Mounted the panel and ran the wiring through the grommet in the rear as others here have done. I had two rather thick (solar cables) 10 AWG cables covered in some split wire loom so squeezing it through the hatch was tricky. It still pinches slightly when the trunk is open but not with the pressure that would impact the wire inside the loom.

Would appreciate some tips on getting the grommet to sit the way it was before I removed it. The headliner and the side panels all went back easily. Will post more pictures soon.

IMG-3612.jpg


IMG-3613.jpg
 
Last edited:
Finally managed to get the grommet to fit back. I needed to remove the plastic housing completely and then re-insert it after wrapping the grommet around it. Here's my setup at the moment. Still need to tidy things up but it all checks out. The solar wires terminate to a SB50 connector so that I can run wires either into my auxiliary battery (when it's inside) via an MPPT or to the starter battery, via a PWM that is always in the vehicle.
 

Attachments

  • PV1.jpg
    PV1.jpg
    54.7 KB · Views: 732
  • PV2.jpg
    PV2.jpg
    65.5 KB · Views: 716
  • PV3.jpg
    PV3.jpg
    134.6 KB · Views: 727
Coming along nicely. Panel mounting and transition into the truck came out clean.

The SB50 Anderson is a bit overkill, but run it if you got it.
 
Yeah the SB-50 is an absolute overkill but I had 4 red and a couple of gray ones sitting at home (bought them for when I was considering other options) and decided that it was just easier to use those and use the powerpole connectors for everything else. The red are for solar and the gray for DC-DC. All other connections are via the more compact powerpole connectors. I think eventually, I'll migrate everything to anderson powerpole.
 
Took my vehicle through the car wash today, first time since installing the panel. I checked to make sure there was no water seepage through the grommet and did find that some water had trickled down into the headliner. It wasn't a whole lot but I could see it when I pushed the headliner down to view inside. It had come through the wire and was dripping off of it down the headliner. I've applied some fresh silicone to where the wire enters the grommet so hopefully that will do the trick.

Given how expensive the headliner is to replace, if the silicone doesn't stop water ingress, does anyone know what and where to get in case I need to completely re-do the grommet in there?
 
Depending on how much clearance you have... you can search around "waterproof bulkhead connectors" or "waterproof cable glands"

I usually use waterproof cable glands to make exterior to interior connections on sheet metal just because it's cheap, but if you have to pass a lot of wires then the DEUTSCH system is pretty great, but it's expensive and requires special tools.

It does look at bit too tight to use these... I would just run with the silicone fix you did and keep a close eye on it. Perhaps evening building some kind of awning for the wires to help move water away from it.

A27C_1_201707162106172659.jpg


hero-product-master.jpg


dscf0024-jpg.575433
 
Last edited:

Members online

Forum statistics

Threads
278,312
Messages
3,554,089
Members
248,016
Latest member
Advally Service

Trending content

Back
Top