mynameistory
New member
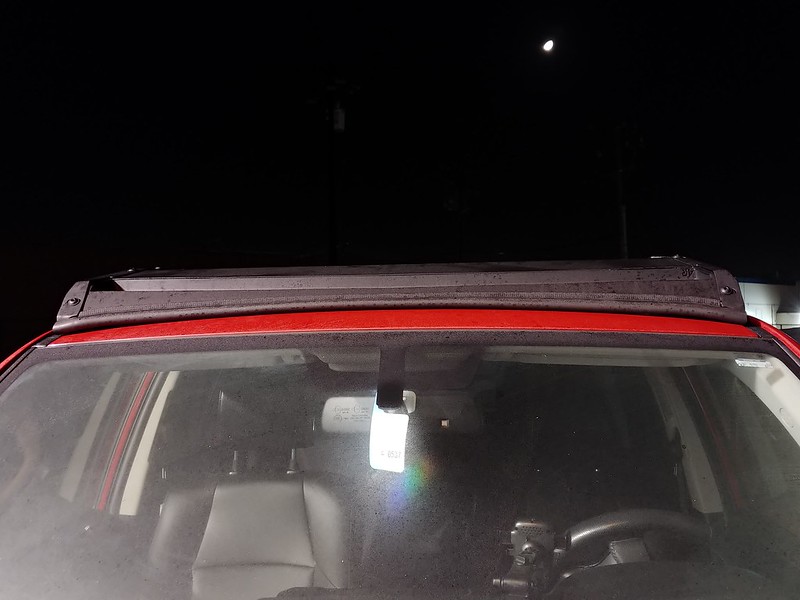
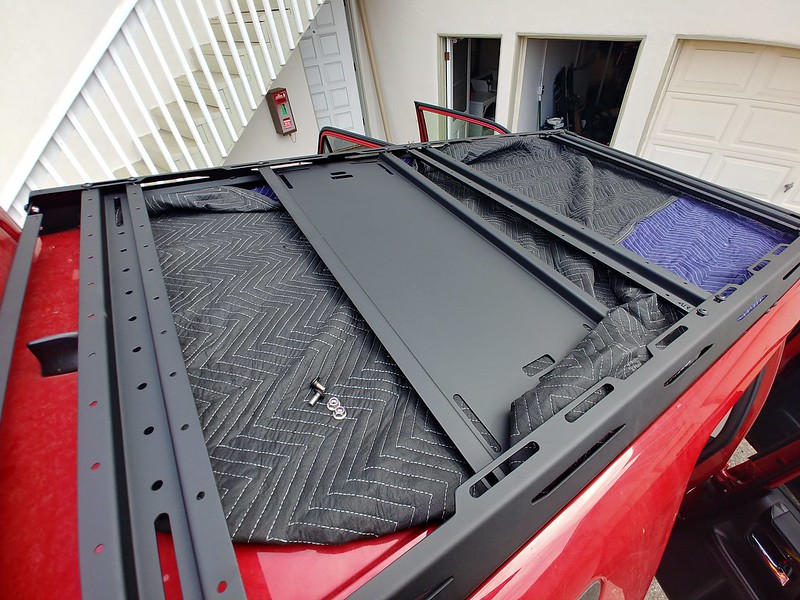
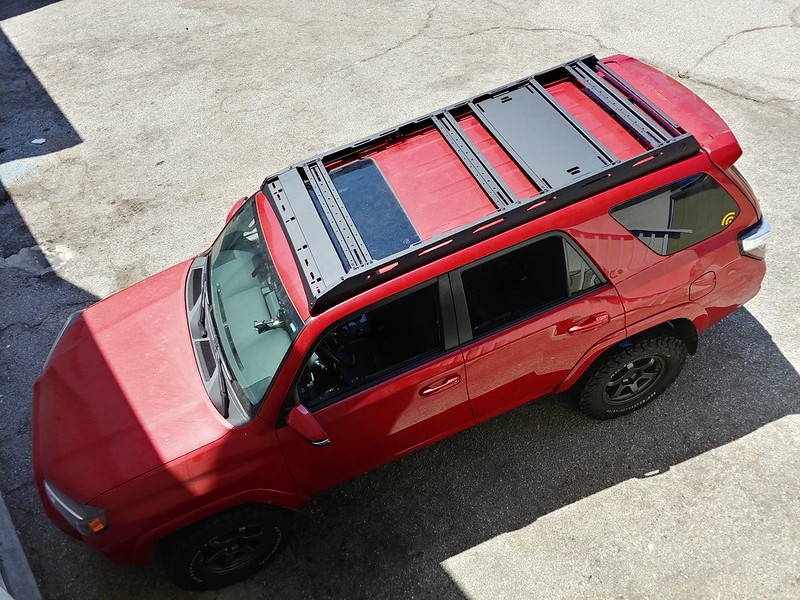
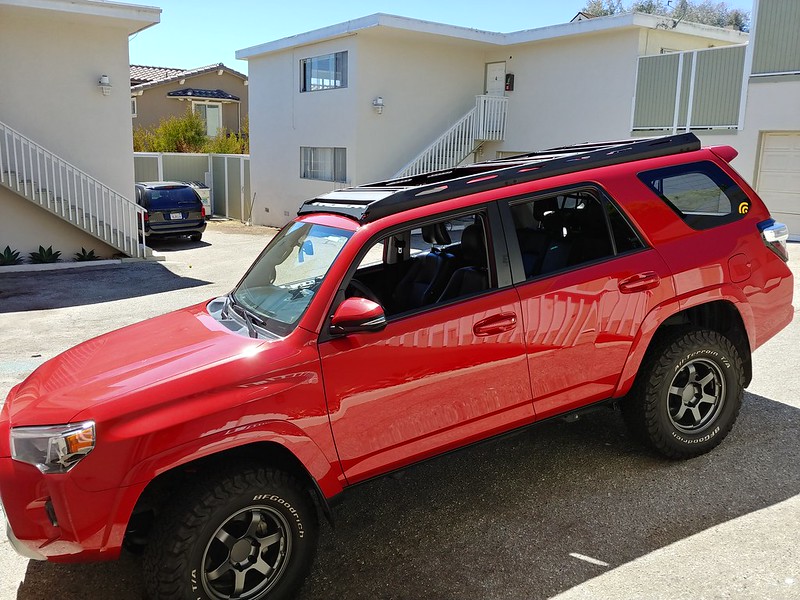
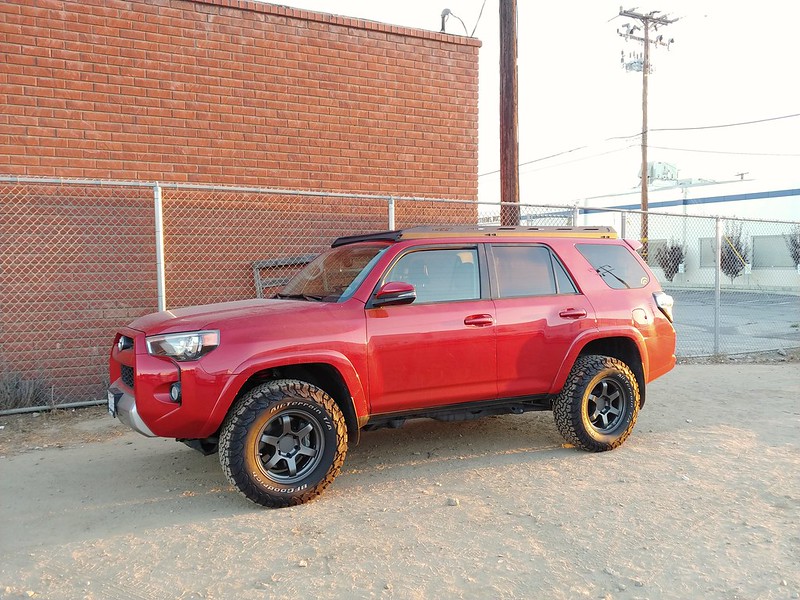
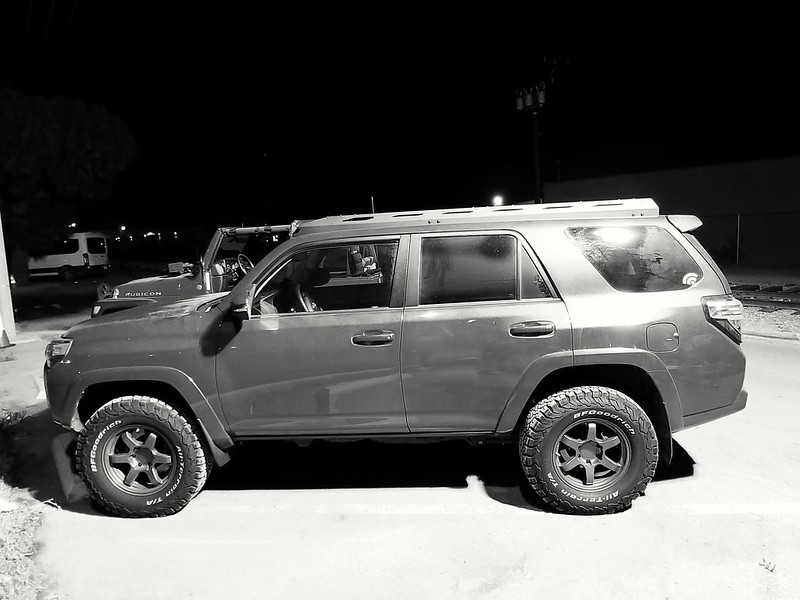
I finally have my EcoTechne roof rack sorted out and installed, and I wanted to share my thoughts as well as some of the work and parts I've selected for it. Hopefully this post can be used as a resource for those thinking about buying this rack system.
First, the pros:
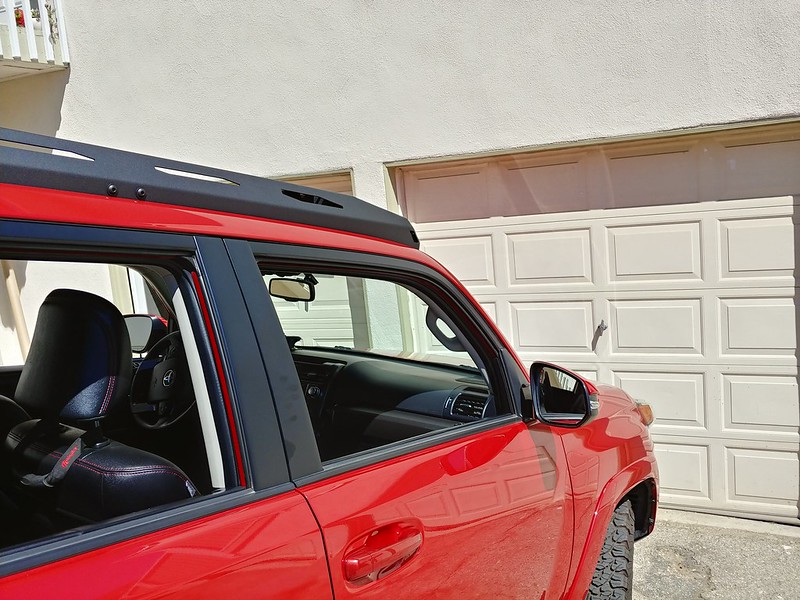
- In my opinion, this is one of the best looking full-length racks you can get for the 5th Gen. It has a sharp, chiseled look that complements the design language of the truck. Yet at the same time, it has a low profile and doesn't scream "mall safari" like some other, more popular tube basket racks.
- The side rails are probably the strongest part of the design. They are CNC plasma-cut and brake-formed steel, about 0.100” thick. Cutting them flat allows the bottom edge to follow the contour of the roofline, and brake-forming (cold working) with boxed ends creates a ton of strength without much weight. That’s why they’re inherently stronger and more supportive than simple flat side rails like the Prinsu or SSO designs.
- The crossbars attach using the hardware in the stronger “tensile” direction of force, rather than shear. Also, I have some reservations about threading bolts directly into extruded and tapped aluminum crossbars. They’re probably strong enough for most purposes, but I wouldn’t take it apart more than necessary. Once those threads are worn out or cross-threaded, you need new bars.
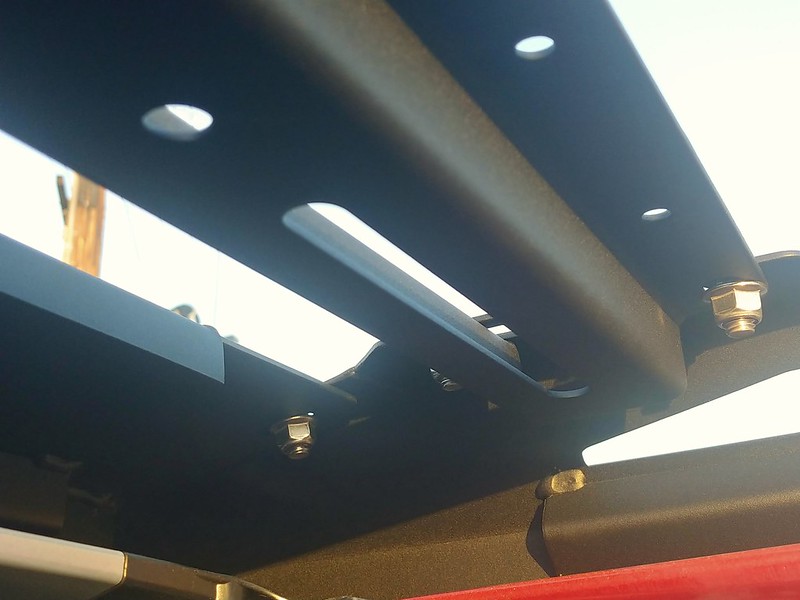
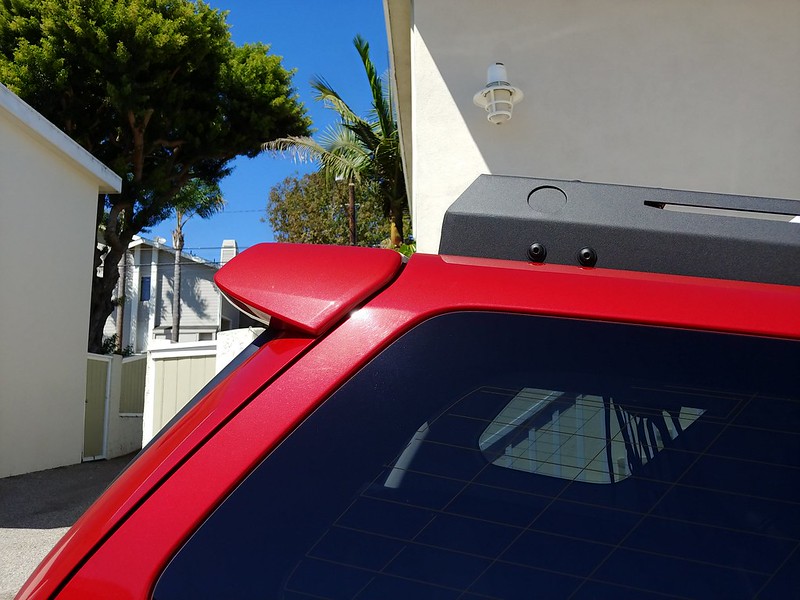
- No drilling. This was a big one for me. I have a background in welding and fabrication, but I didn't want to risk drilling crooked or leaky holes in my roof. The side rails (besides being very beefy) actually rest on the roof seam weatherstripping, so it’s well supported without resorting to extra drilling or bumpers.
- Lightbar integration seems like it will be very easy, if you want one. There are plenty of mounting options and they are already integrated into the front fairing. It looks like it can fit a 40” bar maximum (with the brackets turned inward). The fairing/front crossbar is structural and very stout, so there isn’t a separate fairing to worry about. It does look a little empty without lights though.
- Price- on the most recent group buy I paid $760 shipped for a bare metal rack with an extra crossbar. But, as you’ll see below, that ended up being a wash after factoring in replacing the hardware and powdercoating it myself.
Here are the cons:
- The rack is built in Venezuela. That means that communication is a little tougher, and lead times are stretched out due to shipping and customs. That’s a long way to journey, and the boxes that my parts arrived in were super beat up (one box was even mostly broken, thankfully no parts missing). However, after reading all of the posts in the GB thread I was pleasantly surprised that my rack arrived one month after paying Rorck. That’s a lot better than even some of the other group buys I’ve been in.
- The fit and finish is NOT top notch. Plasma cut parts are known for raggedy kerfs (edges) and jagged holes. There was one weld that missed its fillet for about a half inch, there was MIG spatter all over that needed grinding, and sharp edges abounded.
- I wouldn’t trust the powdercoat from the company itself. If they coated the parts just like I received them, I understand why rust is a huge problem for others. The parts are made of sheets of hot-rolled steel and were still covered in dark scale, which flakes off easily and allows rampant porosity to the base steel. I only saved $20 by forgoing their powdercoat, so I am inclined to think it’s not the best part of their work.
- Ease of attaching items: after all, that’s what the rack is for, right? It’s not great. It’s certainly not as easy as some other racks with T-slot bars or complementary accessories already made up. This rack is pretty bare bones. The V2 rack definitely made some improvements over the V1 version, with slotted side rails for more mounting options. The crossbars and tray also have a few slots cut into them, allowing things to be strapped or bolted in place, but you’re still largely on your own. If you’re not mechanically inclined, you might find creating or adapting your own mounting systems to be intimidating.
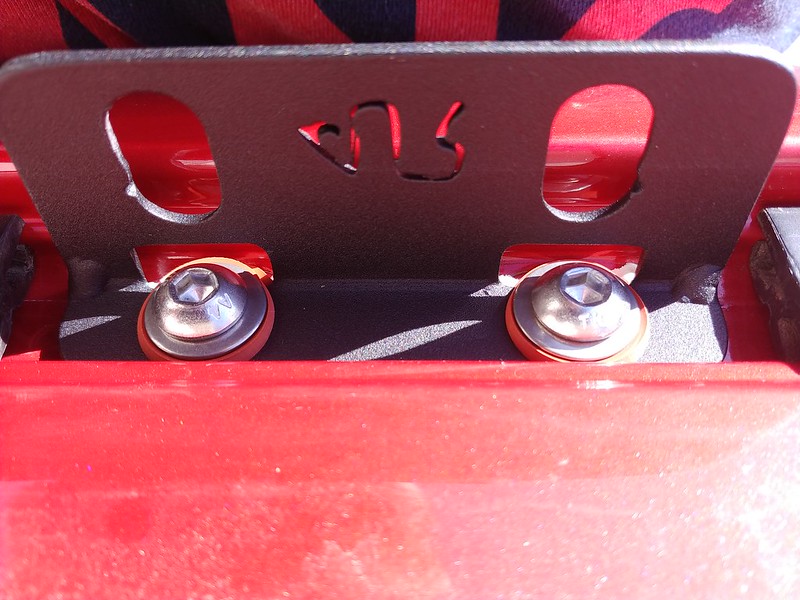
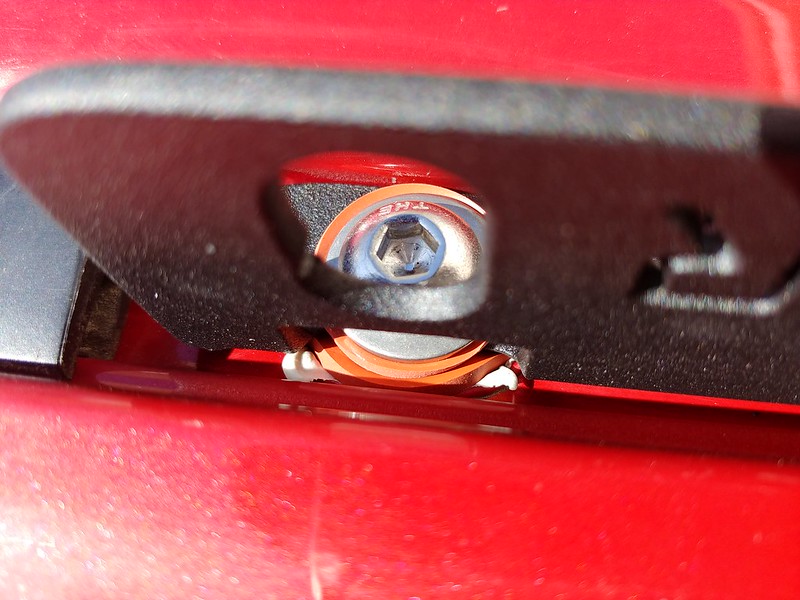
- I disagree with their choice of hardware. The holes in the roof are M8x1.25, but after that they start mixing 10mm and standard 3/8”x16 for no reason that I can figure out. All of the bolt threads are way too long as well, creating unnecessary clutter and weight. The instructions I found online were extremely vague about attaching the brackets to the roof, asking the end user to find and add their own rubber washers (what kind?) and smearing silicon everywhere to avoid leaks. This is a bad idea, as silicone sealants can kill paint and eventually will harden and retract, limiting water resistance. Also, I have no idea what grade or corrosion resistance this hardware is. I ended up not using any of it and ordered my own.
So, here are all the adjustments I made to the rack to kill its weaknesses. Starting off with the hardware list, all ordered from McMaster. I played around with a few options before settling on these:
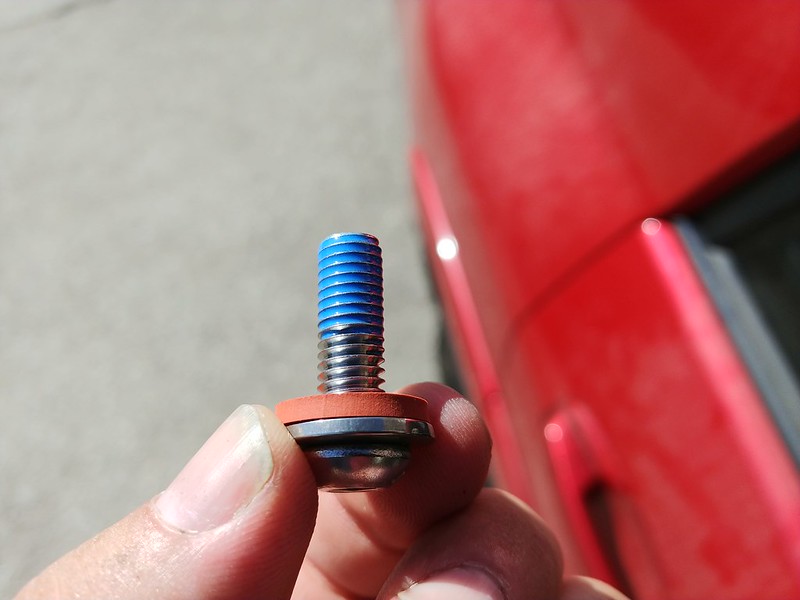
1. 94500A245 316SS button head cap crews. M8x1.25, 25mm long (about 1 inch). (QTY 1) pack of 10. This is for attaching the brackets to the roof.
2. 93237A106 316SS Belleville spring lock washer. These have an unusual “cupping” shape for gripping parts tightly. (QTY 2) packs of 5.
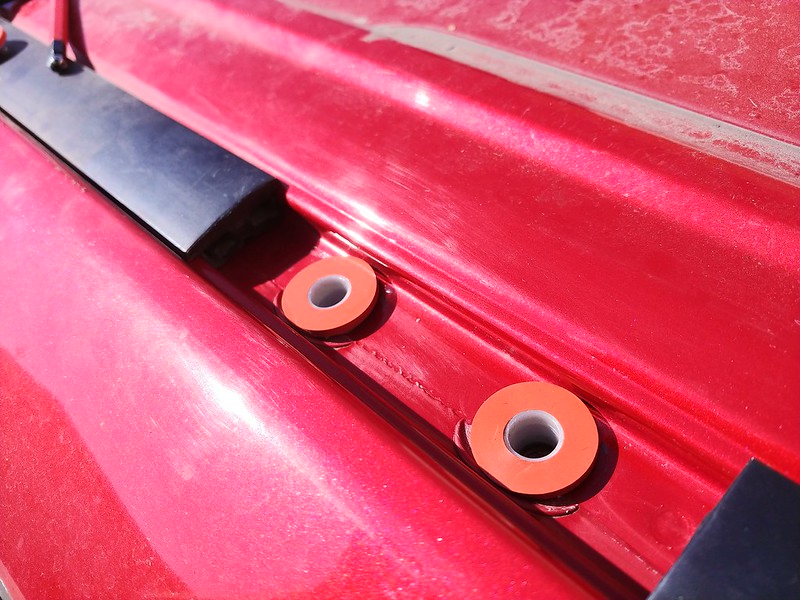
3. 99604A123 Silicone rubber sealing washer for 3/8” hardware. (QTY 1) pack of 25.
4. 99604A119 Silicone rubber sealing washer for 5/16” hardware. (QTY 1) pack of 50.
5. These silicone washers are rated for sunlight, ozone, and water resistance!
6. 90909A534 316SS flanged button head screws, 3/8”x16 and 3/4” thread length. You will need to order at least 16 for the rack, and you need 4 for every crossbar and tray you order. For example, I have three crossbars and one tray, so that’s 16 additional screws for a total of 32. I ordered (QTY 7) packs of 5, so I have 3 extra in case I lose some. Dang, these are expensive!
7. 94238A103 18-8SS flanged nylock nuts, 3/8”x16 threads. (QTY 2) packs of 25.
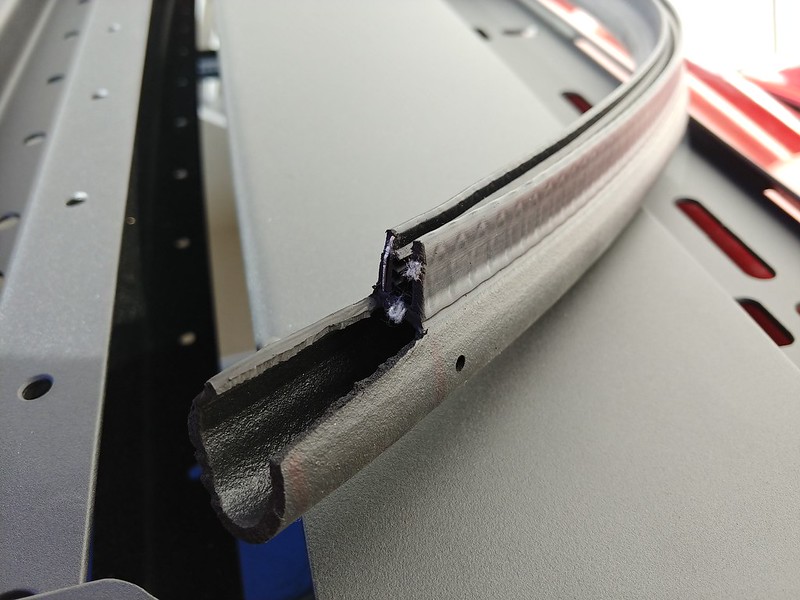
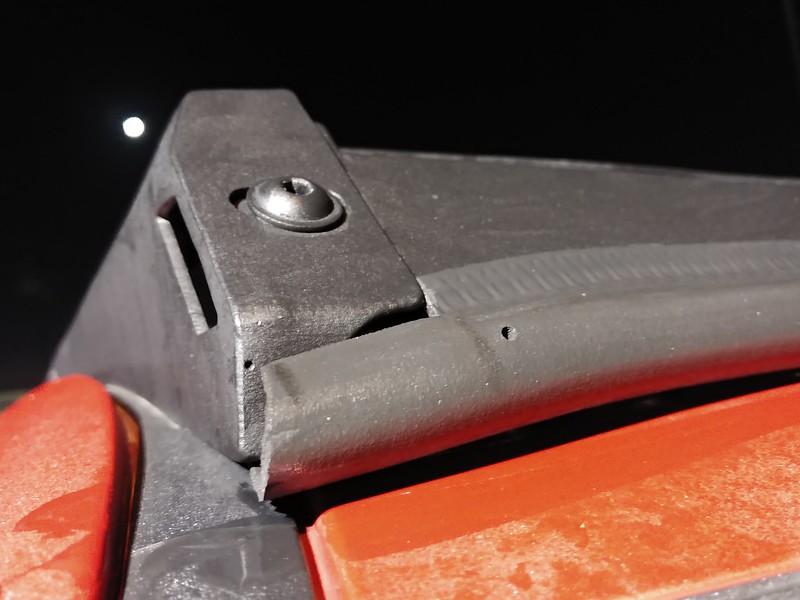
8. 12335A25 (OPTIONAL) rubber push-on seal for killing the front fairing to roof gap. I am experimenting with this to see if it reduces wind noise. This is also rated for exterior use and exposure.
Here are some of the quirks that I mentioned above. The MIG welds are boogery in some spots; this one missed the fillet entirely in the corner.
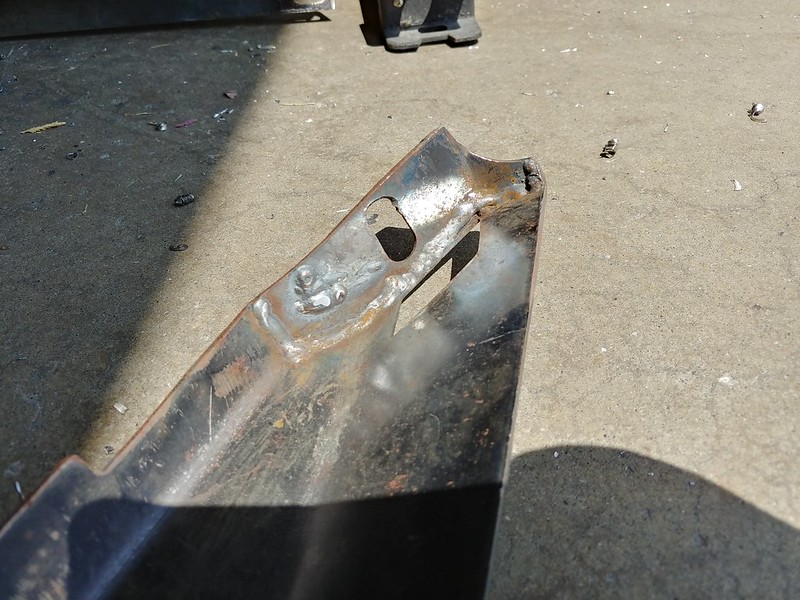
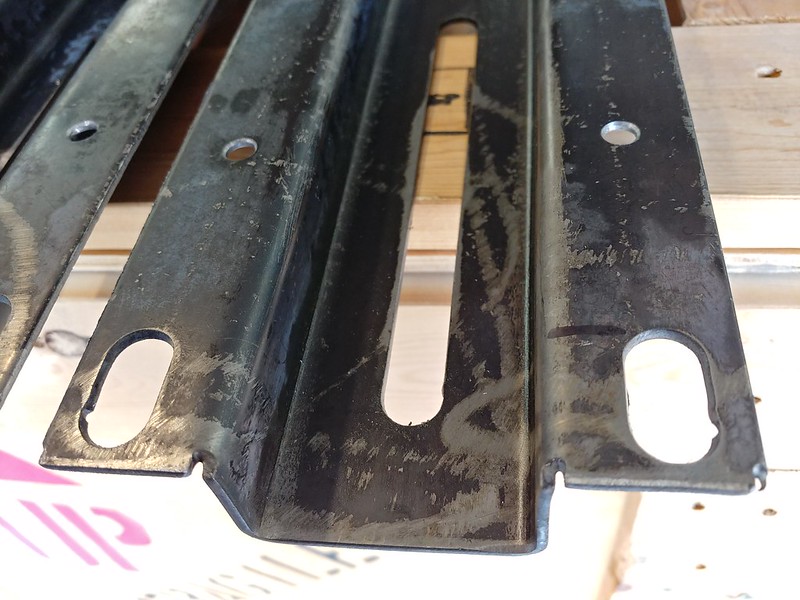
The edges and corners have cuts on them. The one furthest on the right is likely where the machine started cutting the part, and the other ones are added so that the metal won’t crimp or crack during brake-bending.
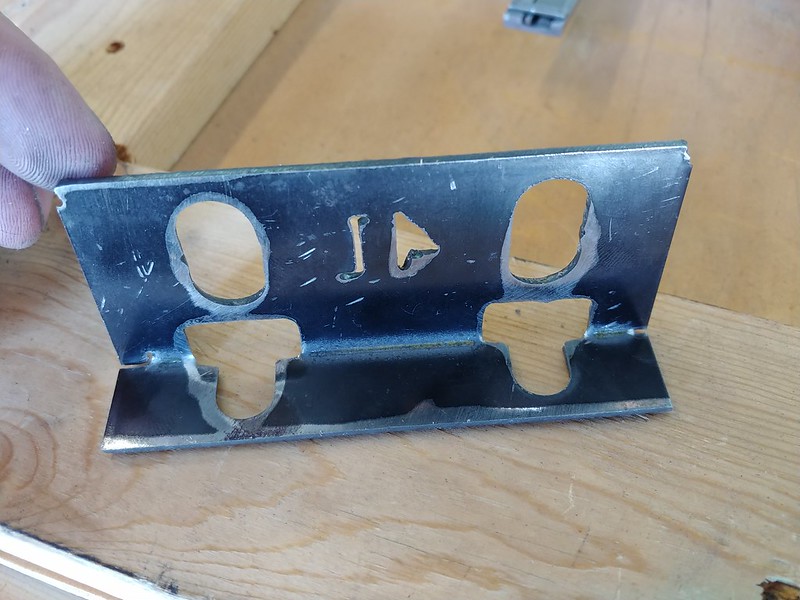
Here is an example of how I “fixed” one of the brackets. Again, the cuts in the bend corner are not cracks; they are intentionally cut as crimp reliefs during bending. But since I don’t want them becoming stress-risers and cracking later I rounded off the corners and TIG welded the reliefs. This may not be totally necessary, but I wanted all of these to be very robust.
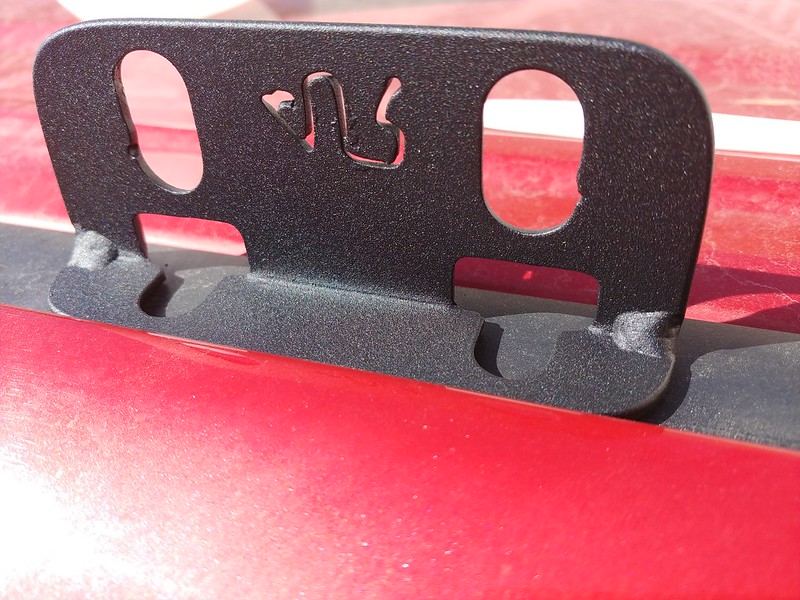
Also, you may want to check all of your brackets for equal bend angle. They are not perfectly 90 degrees; they’re a little more like 100°. One of mine was over-bent, so I tweaked it back to match the others.
I mentioned rough edges earlier, they are EVERYWHERE on these parts. I want to be able to grab my rack and pull myself up without cutting my hands. I set the parts up on sawhorses and attacked them with a dull flap wheel on a cheap harbor Freight grinder, smoothing down sharp edges and grinding off excess weld spatter. Now my parts look smooth and uniform.
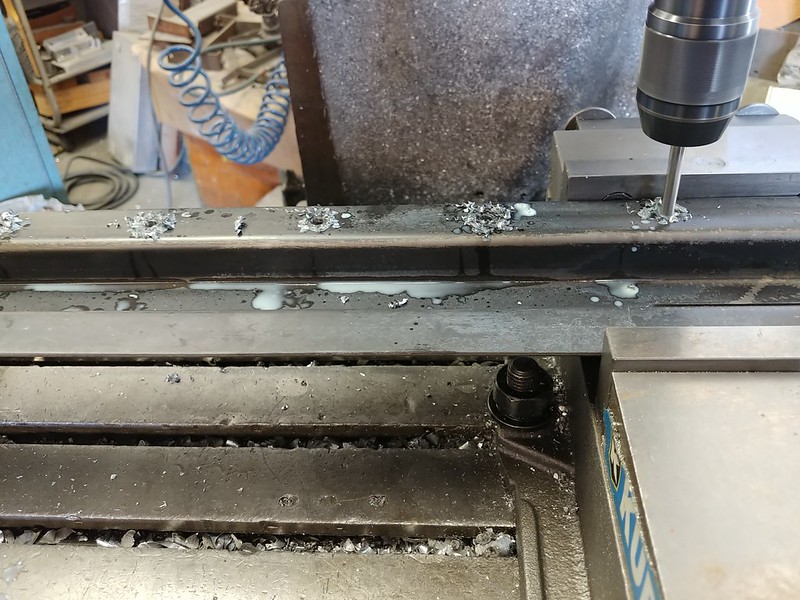
One of the other weaknesses is the difficulty of adding new parts. I wanted to be able to attach stuff in the future without drilling holes through the powdercoat, so I drilled them ahead of time. I set them up on a Bridgeport and drilled 9/32” holes on the top faces, arranged in 3.5” squares, and 13/32” holes every 3 inches along the bottom face. Each series of holes was started in the center of the part and then moved outward to the next. These parts have pretty terrible tolerances, but any capable machining shop should be able to do this if you’re so inclined. Basically, I can make mounting accessories in the future and attach them with ¼” or 3/8” hardware.
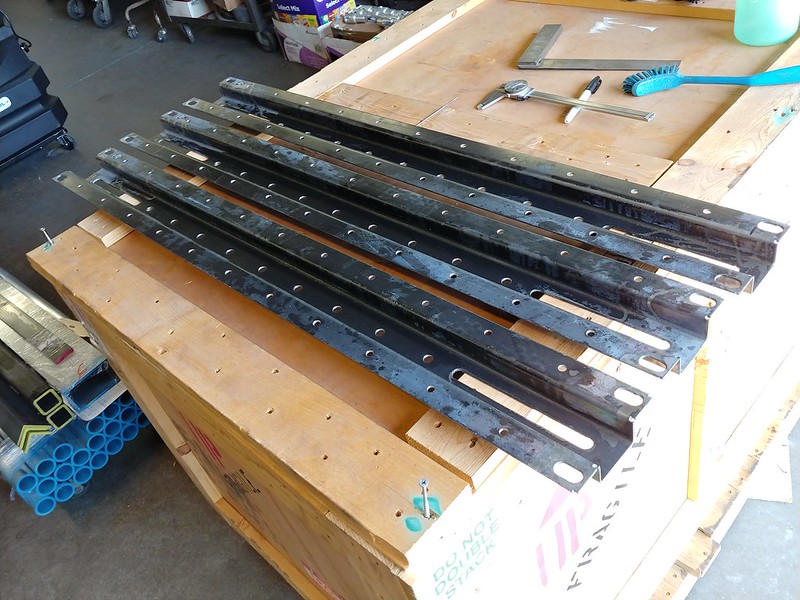
After the parts were massaged, I did some quick fit checks on the truck to make sure everything looked right. Actually, I should have done this FIRST. It would suck to do a bunch of work and then find out they’re the wrong parts, or that some are missing or don’t fit. Everything looked straight and fit together well.
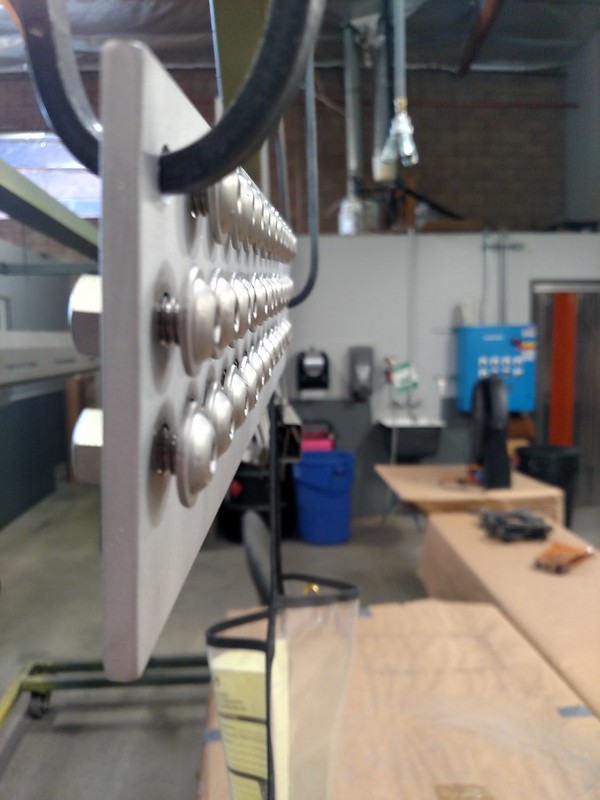
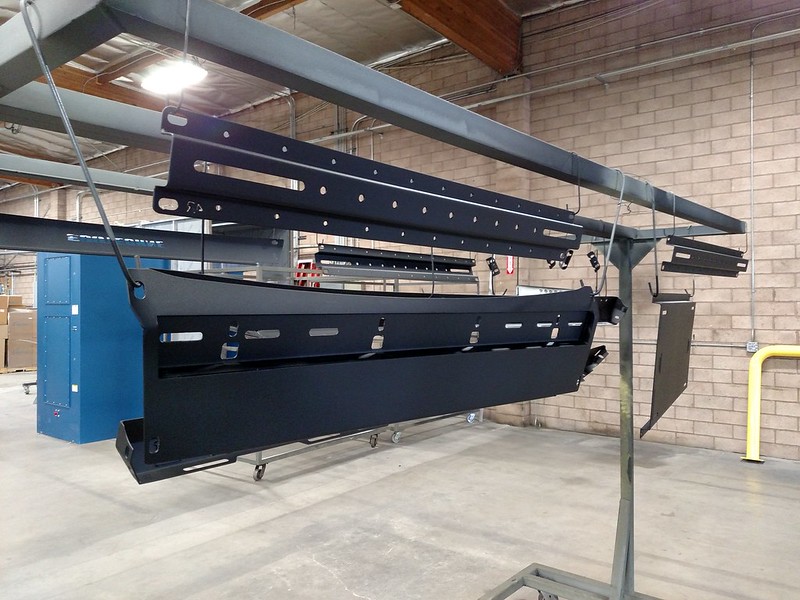
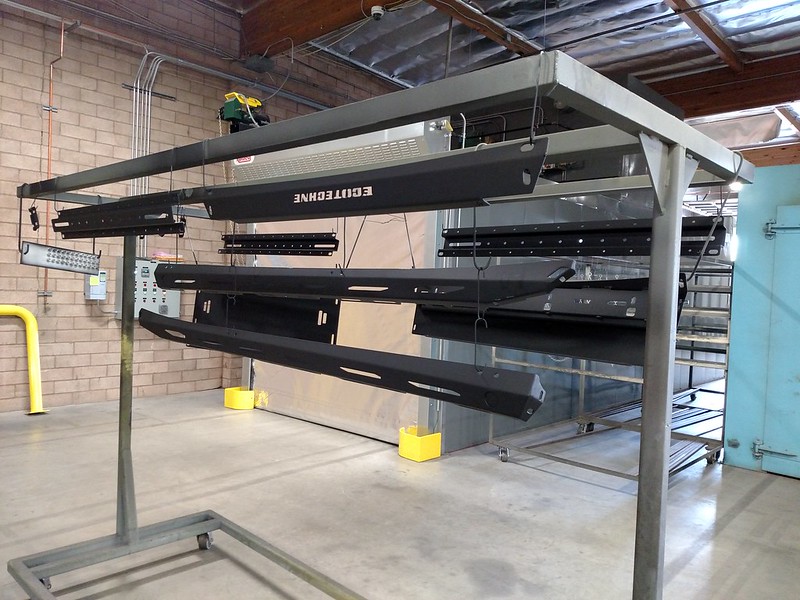
After this work, I was pretty satisfied with how the parts were coming out. Now they were ready for sandblast and powdercoat. This is where I believe EcoTechne should do the most improvement. I sent my parts to Andrews Powder Coating in Chatsworth, and they did a phenomenal job. Notice here why I chose bolts with integrated washers: I had them coated at the same time and they are a lot less complicated to coat and assemble later. Honestly, the bolts could just be spray-painted with a similar black, since they are stainless and won’t rust. But if you are sending all the parts for coating, you may as well do the bolt heads too. Andrews sandblasted the parts down to fresh clean metal. After that, they performed a two-stage process with a zinc-epoxy base coat and a micro-texture flat black top coat. This ensures that the coating is super durable and resistant to rust.
(Continued in next post).
First, the pros:
- In my opinion, this is one of the best looking full-length racks you can get for the 5th Gen. It has a sharp, chiseled look that complements the design language of the truck. Yet at the same time, it has a low profile and doesn't scream "mall safari" like some other, more popular tube basket racks.
- The side rails are probably the strongest part of the design. They are CNC plasma-cut and brake-formed steel, about 0.100” thick. Cutting them flat allows the bottom edge to follow the contour of the roofline, and brake-forming (cold working) with boxed ends creates a ton of strength without much weight. That’s why they’re inherently stronger and more supportive than simple flat side rails like the Prinsu or SSO designs.
- The crossbars attach using the hardware in the stronger “tensile” direction of force, rather than shear. Also, I have some reservations about threading bolts directly into extruded and tapped aluminum crossbars. They’re probably strong enough for most purposes, but I wouldn’t take it apart more than necessary. Once those threads are worn out or cross-threaded, you need new bars.
- No drilling. This was a big one for me. I have a background in welding and fabrication, but I didn't want to risk drilling crooked or leaky holes in my roof. The side rails (besides being very beefy) actually rest on the roof seam weatherstripping, so it’s well supported without resorting to extra drilling or bumpers.
- Lightbar integration seems like it will be very easy, if you want one. There are plenty of mounting options and they are already integrated into the front fairing. It looks like it can fit a 40” bar maximum (with the brackets turned inward). The fairing/front crossbar is structural and very stout, so there isn’t a separate fairing to worry about. It does look a little empty without lights though.
- Price- on the most recent group buy I paid $760 shipped for a bare metal rack with an extra crossbar. But, as you’ll see below, that ended up being a wash after factoring in replacing the hardware and powdercoating it myself.
Here are the cons:
- The rack is built in Venezuela. That means that communication is a little tougher, and lead times are stretched out due to shipping and customs. That’s a long way to journey, and the boxes that my parts arrived in were super beat up (one box was even mostly broken, thankfully no parts missing). However, after reading all of the posts in the GB thread I was pleasantly surprised that my rack arrived one month after paying Rorck. That’s a lot better than even some of the other group buys I’ve been in.
- The fit and finish is NOT top notch. Plasma cut parts are known for raggedy kerfs (edges) and jagged holes. There was one weld that missed its fillet for about a half inch, there was MIG spatter all over that needed grinding, and sharp edges abounded.
- I wouldn’t trust the powdercoat from the company itself. If they coated the parts just like I received them, I understand why rust is a huge problem for others. The parts are made of sheets of hot-rolled steel and were still covered in dark scale, which flakes off easily and allows rampant porosity to the base steel. I only saved $20 by forgoing their powdercoat, so I am inclined to think it’s not the best part of their work.
- Ease of attaching items: after all, that’s what the rack is for, right? It’s not great. It’s certainly not as easy as some other racks with T-slot bars or complementary accessories already made up. This rack is pretty bare bones. The V2 rack definitely made some improvements over the V1 version, with slotted side rails for more mounting options. The crossbars and tray also have a few slots cut into them, allowing things to be strapped or bolted in place, but you’re still largely on your own. If you’re not mechanically inclined, you might find creating or adapting your own mounting systems to be intimidating.
- I disagree with their choice of hardware. The holes in the roof are M8x1.25, but after that they start mixing 10mm and standard 3/8”x16 for no reason that I can figure out. All of the bolt threads are way too long as well, creating unnecessary clutter and weight. The instructions I found online were extremely vague about attaching the brackets to the roof, asking the end user to find and add their own rubber washers (what kind?) and smearing silicon everywhere to avoid leaks. This is a bad idea, as silicone sealants can kill paint and eventually will harden and retract, limiting water resistance. Also, I have no idea what grade or corrosion resistance this hardware is. I ended up not using any of it and ordered my own.
So, here are all the adjustments I made to the rack to kill its weaknesses. Starting off with the hardware list, all ordered from McMaster. I played around with a few options before settling on these:
1. 94500A245 316SS button head cap crews. M8x1.25, 25mm long (about 1 inch). (QTY 1) pack of 10. This is for attaching the brackets to the roof.
2. 93237A106 316SS Belleville spring lock washer. These have an unusual “cupping” shape for gripping parts tightly. (QTY 2) packs of 5.
3. 99604A123 Silicone rubber sealing washer for 3/8” hardware. (QTY 1) pack of 25.
4. 99604A119 Silicone rubber sealing washer for 5/16” hardware. (QTY 1) pack of 50.
5. These silicone washers are rated for sunlight, ozone, and water resistance!
6. 90909A534 316SS flanged button head screws, 3/8”x16 and 3/4” thread length. You will need to order at least 16 for the rack, and you need 4 for every crossbar and tray you order. For example, I have three crossbars and one tray, so that’s 16 additional screws for a total of 32. I ordered (QTY 7) packs of 5, so I have 3 extra in case I lose some. Dang, these are expensive!
7. 94238A103 18-8SS flanged nylock nuts, 3/8”x16 threads. (QTY 2) packs of 25.
8. 12335A25 (OPTIONAL) rubber push-on seal for killing the front fairing to roof gap. I am experimenting with this to see if it reduces wind noise. This is also rated for exterior use and exposure.
Here are some of the quirks that I mentioned above. The MIG welds are boogery in some spots; this one missed the fillet entirely in the corner.
The edges and corners have cuts on them. The one furthest on the right is likely where the machine started cutting the part, and the other ones are added so that the metal won’t crimp or crack during brake-bending.
Here is an example of how I “fixed” one of the brackets. Again, the cuts in the bend corner are not cracks; they are intentionally cut as crimp reliefs during bending. But since I don’t want them becoming stress-risers and cracking later I rounded off the corners and TIG welded the reliefs. This may not be totally necessary, but I wanted all of these to be very robust.
Also, you may want to check all of your brackets for equal bend angle. They are not perfectly 90 degrees; they’re a little more like 100°. One of mine was over-bent, so I tweaked it back to match the others.
I mentioned rough edges earlier, they are EVERYWHERE on these parts. I want to be able to grab my rack and pull myself up without cutting my hands. I set the parts up on sawhorses and attacked them with a dull flap wheel on a cheap harbor Freight grinder, smoothing down sharp edges and grinding off excess weld spatter. Now my parts look smooth and uniform.
One of the other weaknesses is the difficulty of adding new parts. I wanted to be able to attach stuff in the future without drilling holes through the powdercoat, so I drilled them ahead of time. I set them up on a Bridgeport and drilled 9/32” holes on the top faces, arranged in 3.5” squares, and 13/32” holes every 3 inches along the bottom face. Each series of holes was started in the center of the part and then moved outward to the next. These parts have pretty terrible tolerances, but any capable machining shop should be able to do this if you’re so inclined. Basically, I can make mounting accessories in the future and attach them with ¼” or 3/8” hardware.
After the parts were massaged, I did some quick fit checks on the truck to make sure everything looked right. Actually, I should have done this FIRST. It would suck to do a bunch of work and then find out they’re the wrong parts, or that some are missing or don’t fit. Everything looked straight and fit together well.
After this work, I was pretty satisfied with how the parts were coming out. Now they were ready for sandblast and powdercoat. This is where I believe EcoTechne should do the most improvement. I sent my parts to Andrews Powder Coating in Chatsworth, and they did a phenomenal job. Notice here why I chose bolts with integrated washers: I had them coated at the same time and they are a lot less complicated to coat and assemble later. Honestly, the bolts could just be spray-painted with a similar black, since they are stainless and won’t rust. But if you are sending all the parts for coating, you may as well do the bolt heads too. Andrews sandblasted the parts down to fresh clean metal. After that, they performed a two-stage process with a zinc-epoxy base coat and a micro-texture flat black top coat. This ensures that the coating is super durable and resistant to rust.
(Continued in next post).



 sad face.